How To Encrypt Mails With SSL Certificates (S/MIME) - Page 2
3 Get Your Certificate From a Trusted Certificate Authority
Apart from creating SSL certificates the above way, either signing it yourself or with a self created certificate authority, you can also get yourself a free SSL certificate from a trusted certificate authority on the net - the good thing about it is that it's valid and trusted from the beginning, without any security exceptions and manual configuration. The bad thing for some people however might be that you need to verify your identity to those businesses offering trusted certificates - this is necessary to validate a trusted certificate. If you choose this option however, there are providers that offer free SSL certificates on their homepages, e.g. https://www.startssl.com/.

4 Importing Certificates Into a Mail Client
4.1 Thunderbird
To import a certificate in Mozilla Thunderbird open the Preferences (I'm using Thunderbird 3 here):

Go to Advanced and open the Certificates tab. Click on View Certificates:

4.1.1 Import a Self Signed Certificate
Select the Your Certificates tab and click on Import:

Browse the .p12 file you created and hit Open:

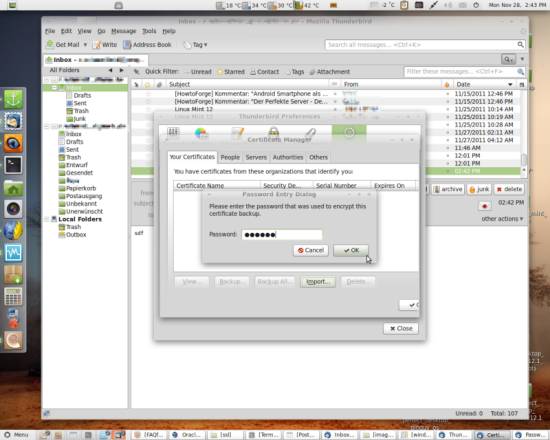
Every time you import a certificate, you will need to give the export passphrase you specified when you created the .p12 document:

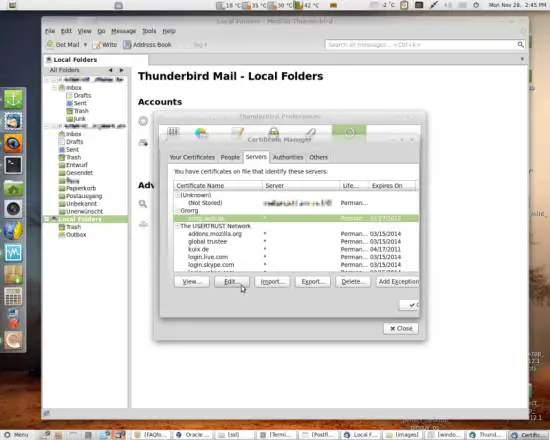
Next, go to the Servers tab and click Import again:

Here, browse the .crt file belonging to your certificate (there are two if you created a certificate authority).

Still on the same tab, select the newly imported entry and click Edit:

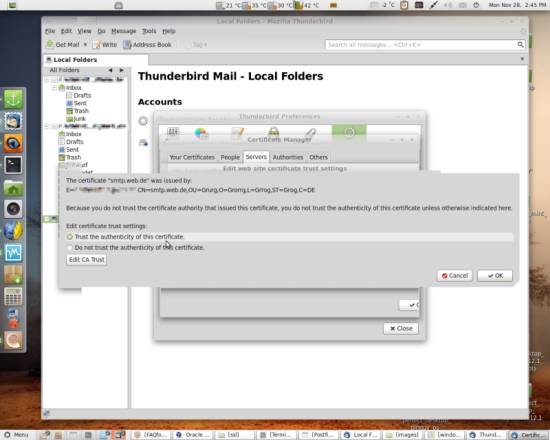
Select Trust the authenticity of this certificate and click Edit CA Trust:

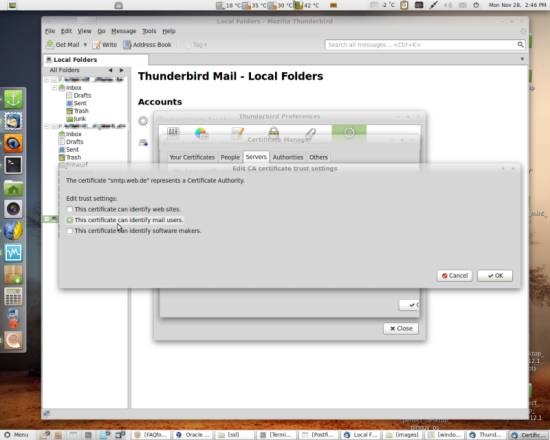
Since we are using the certificate in a mail client, select This certificate can identify mail users. and hit OK. The signer of the certificate (which is you) will then be listed on the certificate authorities list on the Authorities tab.

You only need to do the next step if you created a CA.
4.1.2 Import a CA Signed Certificate
Go to the Authorities tab and hit Import:

Now select the .crt file belonging to your certificate authority and hit Open:

You will then be asked how far you want to trust the certificate authority:

After pressing OK the created CA will be listed on the tab.
4.1.3 Assign the Certificate to an Account and Encrypt a Mail
Now you need to configure which certificate you want to use for which account. To assign a certificate to an account, go to the Account Settings:

On the account you want to configure, select Security out of the left panel. Use the Select... button to search for the certificate you want:

After you have found the certificate, which preferably looks different from mine, hit OK...

You will be asked if you want to use the same certificate you just selected for signing for decryption of encrypted mails sent to you - select Yes here if you want to have an encrypted mail exchange both ways:

You can select the menu items Encrypt This Message and Digitally Sign This Message:

The indicator symbols for a signed and encrypted mail look as follows. The sealed letter shows that the mail is signed whereas the lock shows that it's encrypted:


