How to Create Remote Desktop Gateway via Apache Guacamole on AlmaLinux 9
Apache Guacamole is a free and open-source remote desktop gateway that allows you to connect to your computer/server remotely using different protocols such as SSH, RDP, and VNC. Apache Guacamole is maintained by Apache Software Foundation, and licensed with Apache License 2.0.
Apache Guacamole is a clientless remote desktop gateway. You can access Apache Guacamole using only a web browser from anywhere at any time. Using Apache Guacamole is recommended if you have multiple remote operating systems with different protocols, such as Windows with RDP, Linux system with VNC and SSH.
In this guide, we'll walk you through the installation of Apache Guacamole as a Remote Desktop Gateway on AlmaLinux 9 machine. You will install Apache Guacamole with the MariaDB database server, Nginx as a reverse proxy, then secure the installation with SSL from Letsencrypt.
Prerequisites
Before you start, ensure you have the following:
- An AlmaLinux 9 server - This demo uses an AlmaLinux machine with the hostname guacamole-alma9.
- A non-root user that has privileges to execute sudo.
- A domain name pointed to the server IP address.
Setting Up Repositories
The first step you must do is to set up additional repositories on your AlmaLinux server. You must add the EPEL repository, and enable the CRB (Code Ready Builder) repository, which is the replacement of PowerTools on RHEL 8, then you must add the RPMFusion repository.
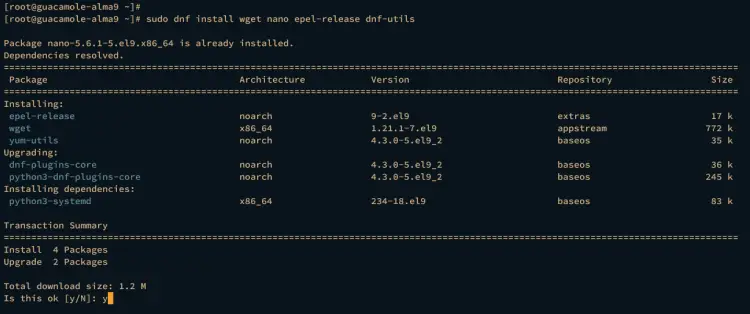
Run the dnf command below to install some basic dependencies and the EPEL repository to your system. Input y to confirm the installation, then press ENTER.
sudo dnf install wget nano epel-release dnf-utils
Now run the following command to enable the AlmaLinux CRB (Code Ready Builder) repository. In RHEL 8, this repository is called as PowerTools, and since RHEL 9, the name has been changed to CRB.
sudo dnf config-manager --set-enabled crb
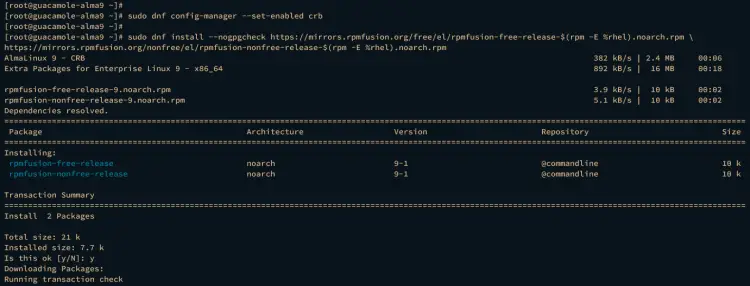
Next, run the following command to add the RPMFusion repository to your AlmaLinux system. This repository provided ffmpeg-devel package, which is needed by Apache Guacamole.
sudo dnf install --nogpgcheck https://mirrors.rpmfusion.org/free/el/rpmfusion-free-release-$(rpm -E %rhel).noarch.rpm \
https://mirrors.rpmfusion.org/nonfree/el/rpmfusion-nonfree-release-$(rpm -E %rhel).noarch.rpm
Input y to confirm the installation and press ENTER to proceed.
Installing Dependencies
With repositories added to your system, you can now proceed to install package dependencies for Apache Guacamole. You will be installing the following packages:
- Basic dependencies for compiling and installing guacd.
- Java and Apache Tomcat for running the Apache Guacamole web application, which is based in Java.
- MariaDB database server that will be used as user authentication for Apache Guacamole.
- Nginx web server as a reverse for Apache Guacamole web application.
- Certbot for securing access to Apache Guacamole.
Installing Dependencies for Compiling guacd
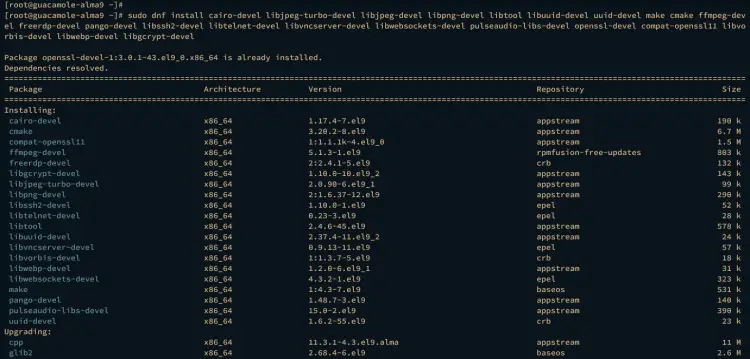
Run the dnf command below to install package dependencies that will be used for compiling guacd. Input y to confirm the installation and press ENTER.
sudo dnf install cairo-devel libjpeg-turbo-devel libjpeg-devel libpng-devel libtool libuuid-devel uuid-devel make cmake ffmpeg-devel freerdp-devel pango-devel libssh2-devel libtelnet-devel libvncserver-devel libwebsockets-devel pulseaudio-libs-devel openssl-devel compat-openssl11 libvorbis-devel libwebp-devel libgcrypt-devel
Also, input y to add the GPG key of RPMFusion and EPEL repository.
Installing Java and Apache Tomcat
Now, run the command below to install Java 11 and Apache Tomcat 9 to your AlmaLinux server. Both package versions are supported by Apache Guacamole, so you can install both packages from the AlmaLinux appstream repository.
sudo dnf install java-11-openjdk-devel tomcat
Input y when prompted, then press ENTER.
After Java and Apache Tomcat are installed, execute the java command below to verify the Java version. You should see that Java OpenJDK 11 is installed on your system.
java --version
Now run the following systemctl command to start and enable the tomcat service.
sudo systemctl start tomcat
sudo systemctl enable tomcat
Then verify the tomcat service to ensure that the service is running.
sudo systemctl status tomcat
If the tomcat server is running, the output should be active (running).
Installing MariaDB Server
Apache Guacamole supports multiple authentication methods, including database authentication, LDAP authentication, Radius, SAML, and OpenID. In this demo, you will be using database authentication via the MariaDB server for the Apache Guacamole.
Enter the dnf command below to install the MariaDB server. When prompted, input y to confirm and press ENTER.
sudo dnf install mariadb-server
Next, run the following command to start and enable the mariadb service.
sudo systemctl start mariadb
sudo systemctl enable mariadb
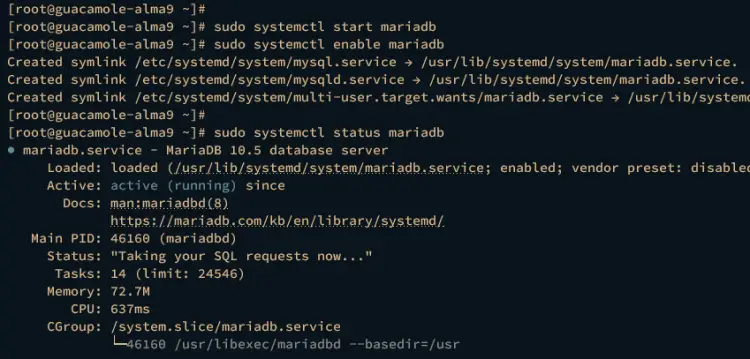
Then verify the mariadb service to ensure that the service is running.
sudo systemctl status mariadb
The output should be active (running) when the mariadb status is running.
Installing Nginx and Certbot
Now you will be installing Nginx which will be used as a reverse proxy for the Apache Guacamole client application and Certbot for generating SSL certificates and securing Apache Guacamole.
Run the dnf command below to install Nginx and Certbot to your system.
sudo dnf install nginx certbot python3-certbot-nginx
Input y to confirm the installation and press ENTER.
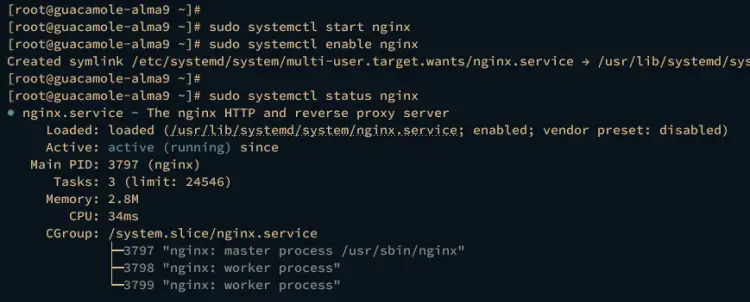
Once installation is finished, run the systemctl command below to start and enable the Nginx service.
sudo systemctl start nginx
sudo systemctl enable nginx
Then verify the Nginx service to ensure that the service is running.
sudo systemctl status nginx
The output active (running) indiicate that Nginx is running.
Configuring Firewalld
With package dependencies installed, the next step you will set up the firewalld and open HTTP and HTTPS protocols.
Run the following command to open HTTP and HTTPS protocols on your AlmaLinux server. Then reload firewalld to apply the changes.
sudo firewall-cmd --add-service={http,https} --permanent
sudo firewall-cmd --reload
Now, run the firewall-cmd command below to verify the list of enabled rules on firewalld.
sudo firewall-cmd --list-all
Within the protocols section, you should see both HTTP and HTTPS protocols enabled.
Setting Up MariaDB Database
In the following section, you will secure your MariaDB server installation via the mariadb-secure-installation utility, then create a new MariaDB database and user for Apache Guacamole.
First, you will secure the MariaDB server via the mariadb-secure-installation utility. Run it to secure your MariaDB server installation.
sudo mariadb-secure-installation
During the process, input y to apply the configuration or n for no. Below are some MariaDB configurations that you will be setting up:
- Switch the MariaDB root authentication to unix_socket? Input n.
- Set up MariaDB root password? Input y, then type a new password and repeat.
- Disable remote login for the root user? Inpu y.
- Remove default database test? Input y again.
- Remove default anonymous user? Input y to confirm.
- Reload table privileges to apply the changes? Input y.
Next, log in to the MariaDB server using the mariadb client command below as user root. When prompted for the password, input the MariaDB root password or press ENTER.
sudo mariadb -u root -p
Once logged in, run the following queries to create a new database and user for Apache Guacamole. In this demo, you will create a new database guacamoledb, user guacamole, with the password GuacamolePassword.
CREATE DATABASE guacamoledb;
CREATE USER 'guacamole'@'localhost' IDENTIFIED BY 'GuacamolePassword';
GRANT SELECT,INSERT,UPDATE,DELETE ON guacamoledb.* TO 'guacamole'@'localhost';
FLUSH PRIVILEGES;
Next, run the following query to verify the privileges for user guacamole.
SHOW GRANTS FOR 'guacamole'@'localhost';
quit
Ensure that user guacamole can SELECT, INSERT, UPDATE, and DELETE to the database guacamoledb.
Installing Apache Guacamole Server
The Apache Guacamole consists of two components:
- guacd: An arbitrary remote desktop protocol that can connect to RDP, SSH, VNC, and others.
- Guacamole Web Application: Java servlet container which is the front-end of the Apache Guacamole that can be run within Apache Tomcat.
Complete the following steps to install both the guacd and Guacamole Java servlet application.
Compiling and Installing guacd
Move the working directory to /usr/src and download the Apache Guacamole server source code using wget.
cd /usr/src
wget https://dlcdn.apache.org/guacamole/1.5.2/source/guacamole-server-1.5.2.tar.gz
Once downloaded, extract the file guacamole-server-1.5.2.tar.gz and you should get the new directory guacamole-server-1.5.2. Go into it via cd.
tar -xf guacamole-server-1.5.2.tar.gz
cd guacamole-server-*/
Now, run the following command to configure the installation. In this demo, you will be using an additional parameter --with-systemd-dir=, which will create a new service file guacd automatically.
./configure --with-systemd-dir=/etc/systemd/system/
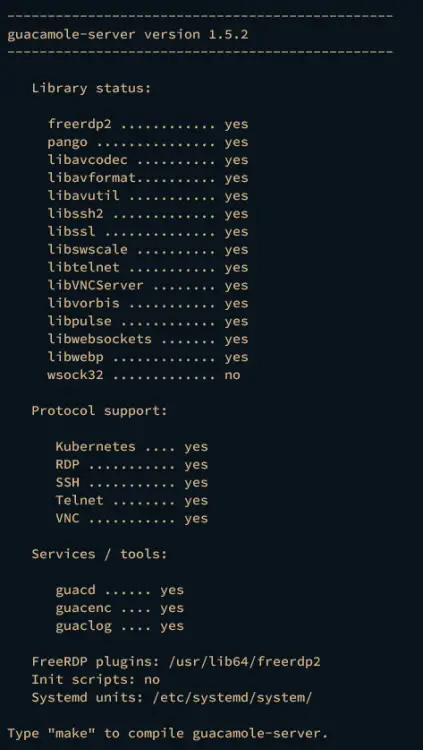
Once the configuration process is finished, ensure that everything has the status yes for the library status, protocols support, and the services/tools.
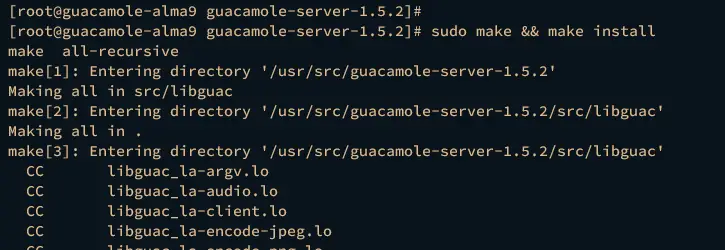
Next, run the following command to compile and install the Apache Guacamole server guacd.
sudo make && sudo make install
Once installation is finished, run the following command to reload the database cache for system libraries.
sudo ldconfig
Then, create a new configuration directory /etc/guacamole and create the guacd configuration /etc/guacamole/guacd.conf using nano editor.
sudo mkdir -p /etc/guacamole/
sudo nano /etc/guacamole/guacd.conf
Insert the following configuration to run the guacd service in localhost with port 4822.
[server]
bind_host = 127.0.0.1
bind_port = 4822
Save and exit the file when finished.
Next, run the systemctl command below to reload the systemd manager.
sudo systemctl daemon-reload
Then start and enable the Apache Guacamole guacd service using the command below.
sudo systemctl start guacd
sudo systemctl enable guacd
Lastly, run the following command to check the guacd service and ensure that the service is running.
sudo systemctl status guacd
Upon successful installation, you should get an output of the guacd service with the status active (running).
Moreover, you can also verify the guacd service by ensuring the port 4822 on your system.
ss -tulpn | grep 4822
The output should display the guacd service running on localhost with port 4822.
Installing Apache Guacamole Web Application
With the guacd installed, now you will install the Apache Guacamole web application, which is a Java servlet application.
The Apache Guacamole web application can be installed manually by compiling it from the source or installing it via the .war package. In this demo, you will install the Apache Guacamole web application via the .war file.
Move to the /usr/src directory and download the Apache Guacamole web application via the wget command.
cd /usr/src
wget https://dlcdn.apache.org/guacamole/1.5.2/binary/guacamole-1.5.2.war
Once downloaded, run the following command to copy the downloaded file guacamole-1.5.2.war to the Apache Tomcat webapps directory /var/lib/tomcat/webapps. With this, you can access the Apache Guacamole web application via the path URL /guacamole.
sudo cp guacamole-1.5.2.war /var/lib/tomcat/webapps/guacamole.war
Now restart the tomcat service using the command below to apply the changes.
sudo systemctl restart tomcat
Configuring Apache Guacamole with MariaDB Authentication
First, run the following command to create new additional directories extensions and lib within the /etc/guacamole/ directory. Then, create a new environment variable GUACAMOLE_HOME to the Apache Tomcat configuration /etc/sysconfig/tomcat.
sudo mkdir -p /etc/guacamole/{extensions,lib}
echo "GUACAMOLE_HOME=/etc/guacamole" | sudo tee -a /etc/sysconfig/tomcat
Now move to the /usr/src directory and download the Guacamole database extension via the wget command below.
cd /usr/src
wget https://downloads.apache.org/guacamole/1.5.2/binary/guacamole-auth-jdbc-1.5.2.tar.gz
Once downloaded, extract the file guacamole-auth-jdbc-1.5.2.tar.gz via the tar command. Then, move the Guacamole database extension to the /etc/guacamole/extensions/ directory.
tar -xf guacamole-auth-jdbc-1.5.2.tar.gz
sudo mv guacamole-auth-jdbc-1.5.2/mysql/guacamole-auth-jdbc-mysql-1.5.2.jar /etc/guacamole/extensions/
Next, move to the guacamole-auth-jdbc-1.5.2/mysql/schema directory and import the Apache Guacamole database schema to the database guacamoledb.
cd guacamole-auth-jdbc-1.5.2/mysql/schema
cat *.sql | mariadb -u root -p guacamoledb
Input the password of your MariaDB root user when prompted, then press ENTER.
Now, move to the /usr/src directory again and download the MySQL connector for the Java application via wget.
cd /usr/src
wget https://dev.mysql.com/get/Downloads/Connector-J/mysql-connector-j-8.0.33.tar.gz
Once downloaded, extract the file mysql-connector-j-8.0.33.tar.gz and move the MySQL Java connector to the /etc/guacamole/lib/ directory.
tar -xf mysql-connector-j-8.0.33.tar.gz
sudo mv mysql-connector-j-8.0.33/mysql-connector-j-8.0.33.jar /etc/guacamole/lib/
Now create a new Apache Guacamole configuration /etc/guacamole/guacamole.properties using nano editor.
sudo nano /etc/guacamole/guacamole.properties
Insert the details of the MariaDB database user and password for your Apache Guacamole installation.
# MySQL properties
mysql-hostname: localhost
mysql-database: guacamoledb
mysql-username: guacamole
mysql-password: GuacamolePassword
Save and close the file when you're done.
Lastly, run the systemctl command below to restart the tomcat service and apply the changes to the Apache Guacamole web application.
sudo systemctl restart tomcat
You've successfully reached the stage where the Apache Guacamole is up and running with the MariaDB authentication. The guacd service is running at localhost with port 4822, and the Apache Guacamole web application is running within the Apache Tomcat and accessible via URL path /guacamole.
Configuring Nginx as a Reverse Proxy
In the following section, you will be setting up Nginx as a reverse proxy for Apache Guacamole. You will also secure your installation by implementing HTTPS with Letsencrypt.
Open the Apache Tomcat configuration /etc/tomcat/server.xml using the following nano editor command.
sudo nano /etc/tomcat/server.xml
Within the `<Host name="localhost" appBase="webapps"` section, add a new configuration to enable reverse proxy on Apache Tomcat.
<Host name="localhost"  appBase="webapps"
    unpackWARs="true" autoDeploy="true">

    <Valve className="org.apache.catalina.valves.RemoteIpValve"
        internalProxies="127.0.0.1"
        remoteIpHeader="x-forwarded-for"
        remoteIpProxiesHeader="x-forwarded-by"
        protocolHeader="x-forwarded-proto" />
Save the file and exit the editor.
Now run the following command to restart the tomcat service and apply the changes.
sudo systemctl restart tomcat
Next, create a new Nginx server block configuration /etc/nginx/conf.d/guacamole.conf using the nano editor.
sudo nano /etc/nginx/conf.d/guacamole.conf
Insert the following server block configuration and be sure to change the domain name.
server {
    listen 80;
    server_name guacamole.howtoforge.local;

    access_log /var/log/nginx/guacamole-access.log;
    error_log /var/log/nginx/guacamole-error.log;

    location / {

        proxy_pass http://127.0.0.1:8080/guacamole/;
        proxy_buffering off;
        proxy_http_version 1.1;
        proxy_set_header X-Forwarded-For $proxy_add_x_forwarded_for;
        proxy_set_header Upgrade $http_upgrade;
        proxy_set_header Connection $http_connection;
        access_log off;
    }
}
Save the file and exit the editor.
Now run the following command to ensure that you have proper Nginx configuration and restart the Nginx to apply the changes.
sudo nginx -t
sudo systemctl restart nginx
If you have proper Nginx configuration, you should get an output syntax is ok - test is successful.
Lastly, run the certbot command below to secure your Apache Guacamole installation via Letsencrypt. Be sure to change the domain name and email address in this command.
sudo certbot --nginx --agree-tos --no-eff-email --redirect --hsts --staple-ocsp --email [email protected] -d guacamole.howtoforge.local
When the process is finished, you can access Apache Guacamole via an HTTPS connection. Also, the automatic redirect from HTTP to HTTPS is enabled by default via Letsencrypt.
Accessing Apache Guacamole
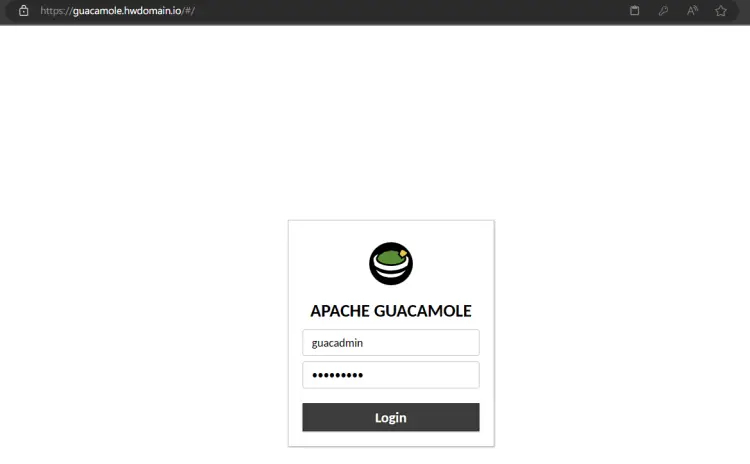
Launch your web browser and visit the domain name of your Apache Guacamole installation (i.e: https://guacamole.howtoforge.local). Log in via the default user guacadmin and password guacadmin.
When everything goes smoothly, you should see the Apache Guacamole user dashboard.
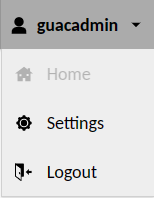
Now click on the Admin menu and click Settings. You will create a new connection on Apache Guacamole.
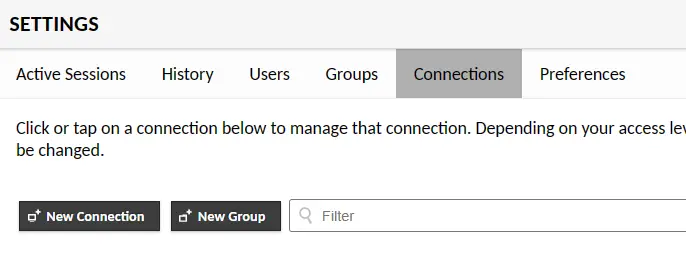
Select the Connections tab and click the button Create a new connection.
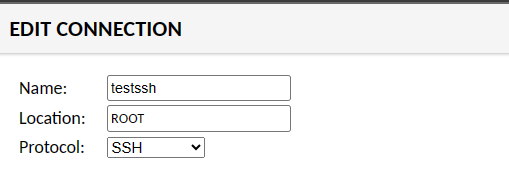
In the EDIT CONNECTION section, input the connection name and select the protocol that you want to connect. In this demo, you will create a new connection testssh with the protocol SSH.
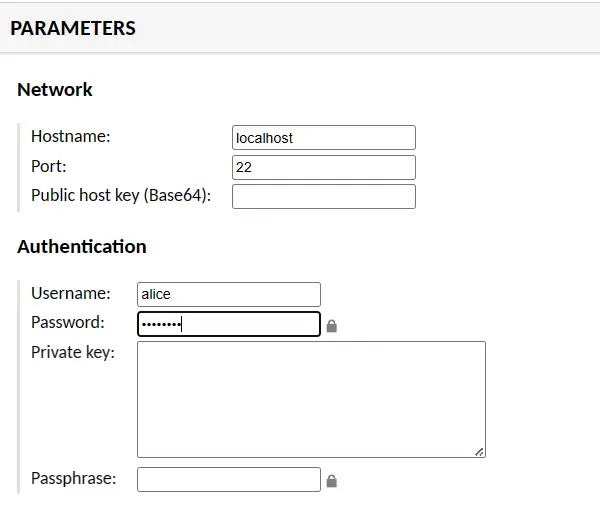
On the PARAMTERS section, input the target host IP address and port, then input the target host user name and password.
Scroll down and click Save to confirm.
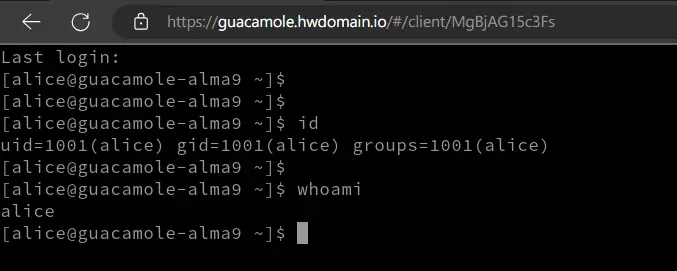
Next, back to the user home dashboard and you should see the connection testssh is created. Click on the connection testssh to connect to the target host.
If successful, you should be connected to the target host like the following:
Conclusion
Great job! You've successfully installed Apache Guacamole as Remote Desktop Gateway on an AlmaLinux 9 machine. You have installed Apache Guacamole with database MariaDB authentication and Nginx reverse proxy. Furthermore, you have also secured the deployment via SSL from letsencrypt. You can now start accessing your servers or desktops easily via the Apache Guacamole web application.

