Zimbra Integration With Samba - Ubuntu Based (Similar To AD And Exchange) - Page 2
7 - Configure Zimbra
Now we will need to install zimbra_posixaccount and zimbra_samba extensions for zimbra admin.
We will need to connect to the zimbra server to copy 2 files from it, if you have a windows box you can use WinSCP , if you have Ubuntu desktop you can connect via ssh by clicking on Places ? Connect to Server and then use SSH.
After copying the files over, the best way to modify the xml files without extracting them, if you extract them just make sure to zip them back as flat files without any folder structure.
So what do you need to copy from the zimbra server to your desktop PC are the following:
1 - /opt/zimbra/zimlets-admin-extra/zimbra_posixaccount.zip
2 - /opt/zimbra/zimlets-admin-extra/zimbra_samba.zip
In zimbra_posixaccount.zip you need to edit config_template.xml which we need to modify:
Edit ldapSuffix property in config_template.xml. This property is the path in your LDAP tree where all Linux and Samba user information will be stored. This can be the name of your primary email domain written in the ldap syntax. E.g. if your domain is tm.local, then ldapSuffix will be
dc=tm,dc=local
Edit also uidBase property in config_template.xml. uidBase is the base for creating Linux user IDs for user accounts that will be stored in LDAP. The first account that you will create through Zimbra Admin UI will have user ID = uidBase+1. If you already have user accounts in your current password database (most likely /etc/passwd) it is recommended that you set this value higher than the maximum existing user account.
Edit also gidBase property in config_template.xml. gidBase is the base for creating Linux group IDs for groups that will be stored in LDAP. The first group that you will create through Zimbra Admin UI will have group ID = gidBase+1.
Finally my xml file looks like that:
<zimletConfig name="zimbra_posixaccount" version="4">
    <global>
        <property name="loginShells">/bin/bash,/bin/sh,/bin/false</property>
        <property name="homePath">/home/%u</property>
        <property name="gidBase">10000</property>
        <property name="uidBase">10000</property>
        <property name="ldapSuffix">dc=tm,dc=local</property>
        <property name="ldapGroupSuffix">ou=groups</property>
    </global>
</zimletConfig> |
Zip all the files that are in zimbra_posixaccount folder into zimbra_posixaccount.zip together with modified config_template.xml (make a flat zip file without folders if you are not sure compare the structure of the original zip file with your newly created or just modify the files without extracting them).
Also In zimbra_samba.zip you will need to edit config_template.xml same thing as we have done before:
- Edit ldapSuffix, uidBase and gidBase properties using the same values as you used in for zimbra_posixaccount.zip
- Zip all the files zimbra_samba folder into zimbra_samba.zip together with modified config_template.xml into a flat ZIP file
Log in to Zimbra Admin (https://yourserver.com:7071/zimbraAdmin) as admin, navigate and click on Admin Extensions on the left, then press Deploy, after that press browse to open zimbra_posixaccount.zip deploy it and press finish, after that do the same for zimbra_samba.zip.
(For more information about installing Admin Extensions refer to ZCS Admin Guide.)
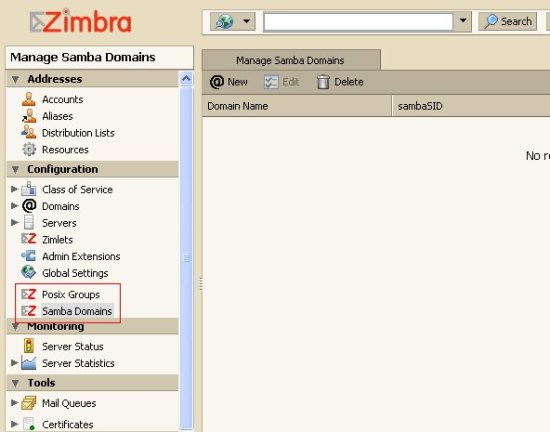
Refresh your Zimbra Admin to initialize the extensions. When the extensions are loaded for the first time, they will check if OUs defined by ldapMachineSuffix and ldapGroupSuffix propertiesin config_template.xml files exist and create these OUs, if they do not exist.
If all good it should then look like that:
Step 8 needs to be done on Samba server!
8 - Install Samba
Now let's go to our Samba Server, and install Samba:
apt-get install samba
If you got some policy failures you can ignore them you can then modify samba later on if you want.
Now we need to install pam_ldap and nss_ldap on the Samba server, however if you have a linux clients which will use Zimbra ldap for authentication then you will need to install pam_ldap and nss_ldap on them too.
Again please make sure your /etc/apt/sources.list is correctly configured as we mention above then run:
apt-get install libnss-ldap
You will then get a GUI for the configuration LDAP server host address here we will enter the zimbra server IP address:
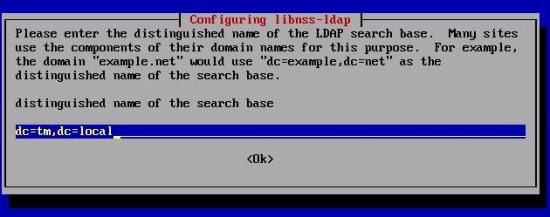
Then the distinguished name which is your domain name in the below format, If your domain name is abc.xyz.local then it should be dc=abc,dc=xyz,dc=local the same like the xml config files, in our case it will look like this:

The rest you can pick the defaults.
Then we will need to install pam_ldap:
apt-get install libpam-ldap
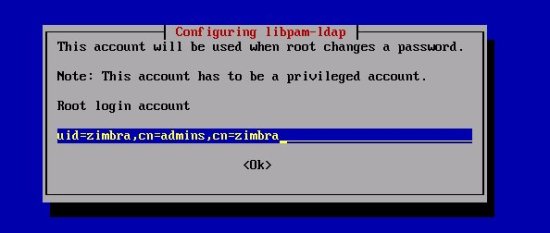
You can take the defaults until you are asked for Root login account enter the following:
Then you will be asked for the LDAP root account password – enter the LDAP root password that you selected during Zimbra installation (you remember the one we noted down ;) ) If you do not know the password, you can get it with this command as user zimbra:
su zimbra
zmlocalconfig -s ldap_root_password
At this stage I would say lets reboot the Samba server and after its up and running go ahead and reboot the Zimbra server, this is not really important but nice to do.
Step 9 needs to be done on Zimbra server!
9 - More Zimbra Configuration
Back to Zimbra server as we need to modify few things, however please read the below note before proceeding:Please note: upgrading Zimbra will overwrite any changes made to /opt/zimbra/conf/slapd.conf.in
I would recommend you to back up slapd.conf.in before any upgrade, and restore immediately after.
Also please keep in mind that if you have multi server Zimbra setup we work on the zimbra with the LDAP setup running.
Now we need to get a files called samba.schema from the samba source and copy it over to Zimbra server after that we will change the owner to be the Zimbra user.
Download Samba source package for the latest stable version and take samba.schema from examples/LDAP folder in the source package.
On the Zimbra server copy samba.schema to /opt/zimbra/openldap/etc/openldap/schema/.
Again you can use WinSCP if you have windows client or ssh if you have a Linux client, as we have described above.
Make sure you have samba.schema and nis.schema under /opt/zimbra/openldap/etc/openldap/schema/ on the zimbra server.
You need then to run these 2 commands to make zimbra user the owner of the file:
chown zimbra /opt/zimbra/openldap/etc/openldap/schema/samba.schema
chgrp zimbra /opt/zimbra/openldap/etc/openldap/schema/samba.schema
Next, edit /opt/zimbra/conf/slapd.conf.in file. Mind the .in suffix, the non-.in file is regenerated during restart. You need to add these the following two lines after the last “include” statement at the top of the file:
include "/opt/zimbra/openldap/etc/openldap/schema/nis.schema" include "/opt/zimbra/openldap/etc/openldap/schema/samba.schema" |
Add also these ldap indexes after the other index statements:
#indexes for PAM index uidNumber eq index gidNumber eq index memberUID eq #indexes for Samba index sambaSID eq index sambaPrimaryGroupSID eq index sambaDomainName eq |
Also add the following after the access section. Note that below you have to change the DNS to your domain name:
# only allow access to these attrs basically GAL/Postfix related attrs access to dn.subtree="ou=people,dc=tm,dc=local" by dn.children="cn=admins,cn=zimbra" write by * read access to dn.subtree="ou=groups,dc=tm,dc=local" by dn.children="cn=admins,cn=zimbra" write by * read |
Now you need to reboot the Zimbra server and then review /var/log/syslog for any errors.
Log in to the Zimbra server as root and then change to zimbra user and check if all is good.
su zimbra
zmcontrol
You should get the following:
Host zimbra.tm.local
antispam Running
antivirus Running
ldap Running
logger Running
mailbox Running
mta Running
snmp Running
spell Running
stats Running
Also you can try to access https://192.168.0.107:7071/zimbraAdmin to see if all looks good.
Now run the following zmprov commands as user zimbra:
su zimbra
zmprov mcf +zimbraAccountExtraObjectClass posixAccount
zmprov mcf +zimbraAccountExtraObjectClass sambaSamAccount


