Virtual Hosting With PureFTPd And MySQL (Incl. Quota And Bandwidth Management) On Ubuntu 14.04LTS - Page 2
This tutorial exists for these OS versions
- Ubuntu 12.10 (Quantal Quetzal)
- Ubuntu 14.04 LTS (Trusty Tahr)
- Ubuntu 12.04 LTS (Precise Pangolin)
- Ubuntu 10.10 (Maverick Meerkat)
- Ubuntu 9.10 (Karmic Koala)
- Ubuntu 9.04 (Jaunty Jackalope)
On this page
6 Populate The Database And Test
To populate the database you can use the MySQL shell:
mysql -u root -p
USE pureftpd;
Now we create the user exampleuser with the status 1 (which means his ftp account is active), the password secret (which will be stored encrypted using MySQL's MD5 function), the UID and GID 2001 (use the userid and groupid of the user/group you created at the end of step two!), the home directory /home/www.example.com, an upload and download bandwidth of 100 KB/sec. (kilobytes per second), and a quota of 50 MB:
INSERT INTO `ftpd` (`User`, `status`, `Password`, `Uid`, `Gid`, `Dir`, `ULBandwidth`, `DLBandwidth`, `comment`, `ipaccess`, `QuotaSize`, `QuotaFiles`) VALUES ('exampleuser', '1', MD5('secret'), '2001', '2001', '/home/www.example.com', '100', '100', '', '*', '50', '0');
quit;
Now open your FTP client program on your work station (something like FileZilla, WS_FTP, SmartFTP or gFTP) and try to connect. As hostname you use server1.example.com (or the IP address of the system), the username is exampleuser, and the password is secret.
If you are able to connect - congratulations! If not, something went wrong.
Now, if you run
ls -l /home
you should see that the directory /home/www.example.com (exampleuser's home directory) has been automatically created, and it is owned by ftpuser and ftpgroup (the user/group we created at the end of step two):
root@server1:~# ls -l /home/
total 4
drwxr-xr-x 2 ftpuser ftpgroup 4096 Apr 29 08:10 www.example.com
root@server1:~#
7 Database Administration
For most people it is easier if they have a graphical front-end to MySQL; therefore you can also use phpMyAdmin (in this example under http://server1.example.com/phpmyadmin/) to administrate the pureftpd database.
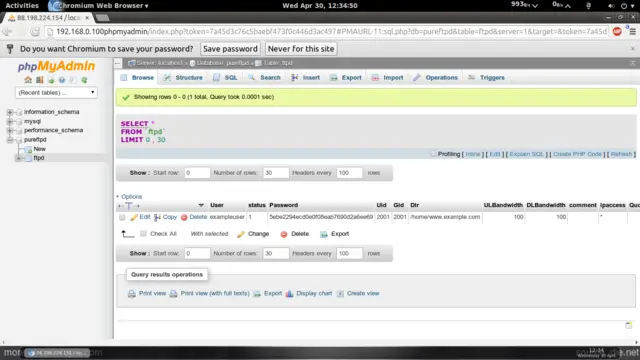
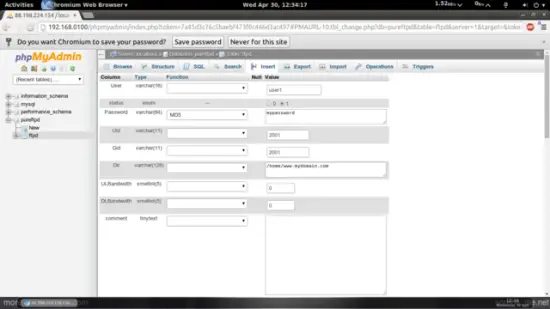
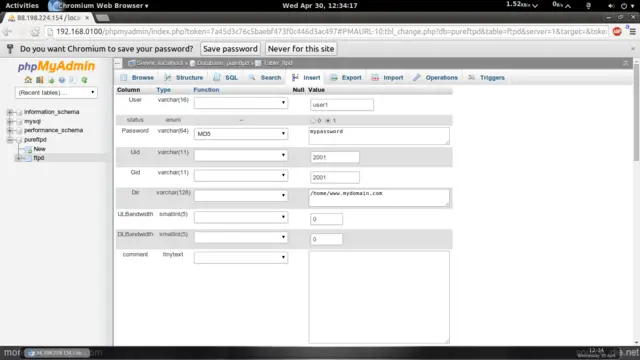
Whenever you want to create a new user, you have to create an entry in the table ftpd so I will explain the columns of this table here:
ftpd Table:
- User: The name of the virtual PureFTPd user (e.g. exampleuser).
- status: 0 or 1. 0 means the account is disabled, the user cannot login.
- Password: The password of the virtual user. Make sure you use MySQL's MD5 function to save the password encrypted as an MD5 string:
- UID: The userid of the ftp user you created at the end of step two (e.g. 2001).
- GID: The groupid of the ftp group you created at the end of step two (e.g. 2001).
- Dir: The home directory of the virtual PureFTPd user (e.g. /home/www.example.com). If it does not exist, it will be created when the new user logs in the first time via FTP. The virtual user will be jailed into this home directory, i.e., he cannot access other directories outside his home directory.
- ULBandwidth: Upload bandwidth of the virtual user in KB/sec. (kilobytes per second). 0 means unlimited.
- DLBandwidth: Download bandwidth of the virtual user in KB/sec. (kilobytes per second). 0 means unlimited.
- comment: You can enter any comment here (e.g. for your internal administration) here. Normally you leave this field empty.
- ipaccess: Enter IP addresses here that are allowed to connect to this FTP account. * means any IP address is allowed to connect.
- QuotaSize: Storage space in MB (not KB, as in ULBandwidth and DLBandwidth!) the virtual user is allowed to use on the FTP server. 0 means unlimited.
- QuotaFiles: amount of files the virtual user is allowed to save on the FTP server. 0 means unlimited.
8 Anonymous FTP
If you want to create an anonymous ftp account (an ftp account that everybody can login to without a password), you can do it like this:
First create a user ftp (with the homedir /home/ftp) and group ftp:
groupadd ftp
useradd -s /bin/false -d /home/ftp -m -c "anonymous ftp" -g ftp ftp
Then create the file /etc/pure-ftpd/conf/NoAnonymous which contains the string no:
echo "no" > /etc/pure-ftpd/conf/NoAnonymous
With this configuration, PureFTPd will allow anonymous logins.
Restart PureFTPd:
service pure-ftpd-mysql restart
Then we create the directory /home/ftp/incoming which will allow anonymous users to upload files. We will give the /home/ftp/incoming directory permissions of 311 so that users can upload, but not see or download any files in that directory. The /home/ftp directory will have permissions of 555 which allows seeing and downloading of files:
cd /home/ftp
mkdir incoming
chown ftp:nogroup incoming/
chmod 311 incoming/
cd ../
chmod 555 ftp/
Now anonymous users can login, and they can download files from /home/ftp, but uploads are limited to /home/ftp/incoming (and once a file is uploaded into /home/ftp/incoming, it cannot be read nor downloaded from there; the server admin has to move it into /home/ftp first to make it available to others).
9 Links
- PureFTPd: http://www.pureftpd.org/
- MySQL: http://www.mysql.com/
- phpMyAdmin: http://www.phpmyadmin.net/
- Ubuntu: http://www.ubuntu.com/

