Ceph is an open source storage platform, it provides high performance, reliability, and scalability. It's a free distributed storage system that can be setup without a single point of failure. Ceph provides an interface for object, block, and file-level storage.
This is the second part of our Ceph tutorial series - click here for the Ceph I tutorial (setup a Ceph Cluster on CentOS). In the second part, I will guide you step-by-step to install and configure a Ceph Block Device client to use Ceph as a filesystem on CentOS 7.
Prerequisite
- Ceph cluster - Ceph I Tutorial
- Client server - CentOS 7 - hostname and IP
- 10.0.15.15 client
- Root privileges
Step 1 - Configure Ceph Client Node
In this section, we will configure our CentOS 7 server as a Ceph client. We will configure the Ceph client as other Ceph node (mon-osd).
Login to the eCph client node.
ssh root@10.0.15.15
Add a new 'cephuser' and set a new password for the user.
useradd -d /home/cephuser -m cephuser
passwd cephuser
Enable password-less sudo for 'cephuser' by adding a new config to the 'sudoers.d' directory.
echo "cephuser ALL = (root) NOPASSWD:ALL" | sudo tee /etc/sudoers.d/cephuser
sed -i s'/Defaults requiretty/#Defaults requiretty'/g /etc/sudoers
chmod 0440 /etc/sudoers.d/cephuser
After enabling sudo password-less for the cephuser, we need to disable SELinux on the client node.
sed -i 's/SELINUX=enforcing/SELINUX=disabled/g' /etc/selinux/config
Next, install NTP and sync the system time with the ntpdate command. Then start the NTP service.
yum install -y open-vm-tools
yum install -y ntp ntpdate ntp-doc
ntpdate 0.us.pool.ntp.org
hwclock --systohc
systemctl enable ntpd.service
systemctl start ntpd.service
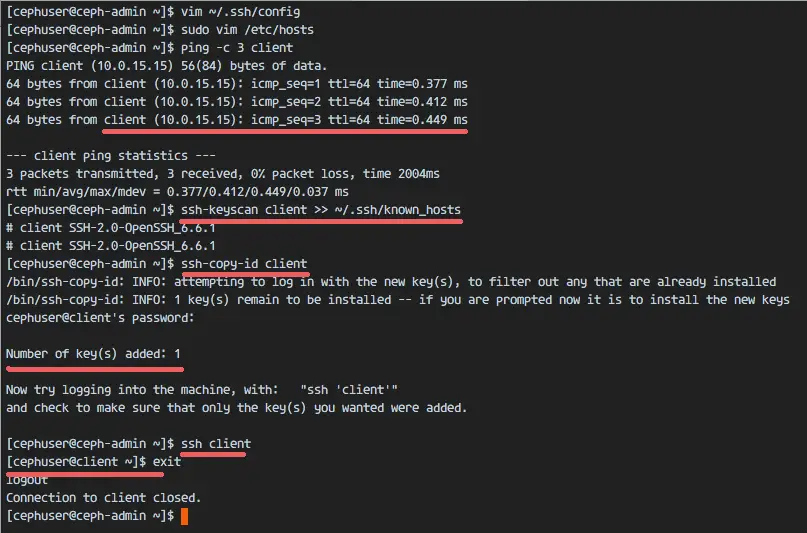
Add the host configuration for all ceph-cluster nodes to the '/etc/hosts' file.
vim /etc/hosts
This is my configuration from Ceph I tutorial.
10.0.15.10        ceph-admin
10.0.15.11        mon1
10.0.15.21        osd1
10.0.15.22        osd2
10.0.15.23        osd3
10.0.15.15        client
Save the hosts file and exit the editor.
Step 2 - Configure the Ceph Admin-node
In the first step, we've prepared the Ceph client node for the ceph installation. But we still need to configure the ceph-admin node to be able to manage the Ceph installation on the client node. We will install Ceph on the client node from the 'ceph-admin' node now.
Login to the ceph-admin node.
ssh root@ceph-admin
su - cephuser
Edit the ssh configuration file with vim.
vim ~/.ssh/config
Add the new client node configuration at the end of the file.
Host client
        Hostname client
        User cephuser
Save the config file and exit vim.
Next, edit the /etc/hosts file on the ceph-admin node.
sudo vim /etc/hosts
And add the client hostname and IP address.
10.0.15.15 client
Save /etc/hosts and exit the editor.
Now we can add the ceph-admin SSH key to the client node.
ssh-keyscan client >> ~/.ssh/known_hosts
ssh-copy-id client
Type in your "cephuser" password when requested.
Try to connect to the client node server with the command below to test the connection.
ssh client
Step 3 - Install Ceph on Client Node
In this step, we will install Ceph on the client node (the node that acts as client node) from the ceph-admin node.
Login to the ceph-admin node as root by ssh and become "cephuser" with su.
ssh root@ceph-admin
su - cephuser
Go to the Ceph cluster directory, in our first Ceph tutorial, we used the 'cluster' directory.
cd cluster/
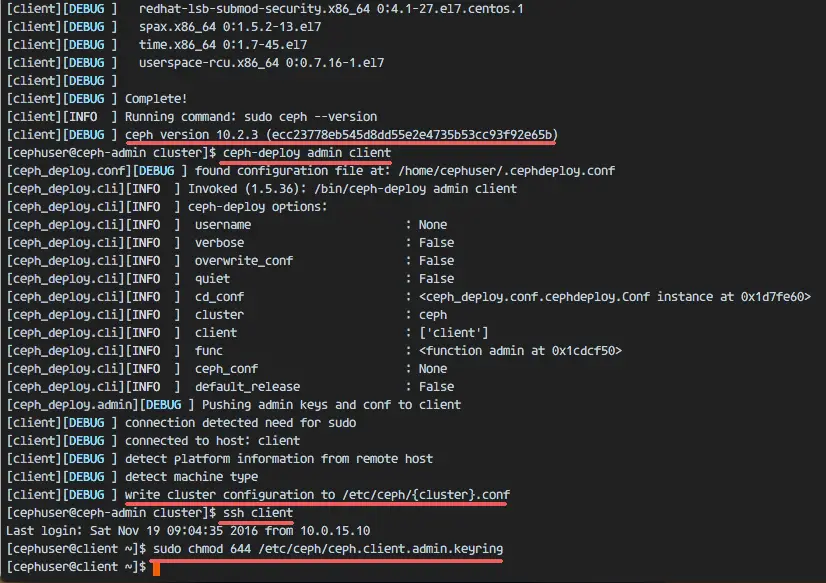
Install Ceph on the client node with ceph-deploy and then push the configuration and the admin key to the client node.
ceph-deploy install client
ceph-deploy admin client
The Ceph installation will take some time (depends on the server and network speed). When the task finished, connect to the client node and change the permission of the admin key.
ssh client
sudo chmod 644 /etc/ceph/ceph.client.admin.keyring
Ceph has been installed on the client node.
Step 4 - Configure and Mount Ceph as Block Device
Ceph allows users to use the Ceph cluster as a thin-provisioned block device. We can mount the Ceph storage like a normal hard drive on our system. Ceph Block Storage or Ceph RADOS Block Storage (RBD) stores block device images as an object, it automatically stripes and replicates our data across the Ceph cluster. Ceph RBD has been integrated with KVM, so we can also use it as block storage on various virtualization platforms such as OpenStack, Apache CLoudstack, Proxmox VE etc.
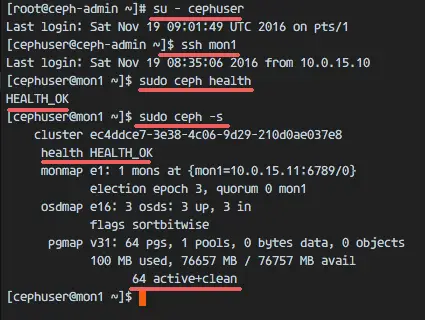
Before creating a new block device on the client node, we must check the cluster status. Login to the Ceph monitor node and check the cluster state.
ssh mon1
sudo ceph -s
Make sure cluster health is 'HEALTH_OK' and pgmap is 'active & clean'.
In this step, we will use Ceph as a block device or block storage on a client server with CentOS 7 as the client node operating system. From the ceph-admin node, connect to the client node with ssh. There is no password required as we configured passwordless logins for that node in the furst chapters.
ssh client
Ceph provides the rbd command for managing rados block device images. We can create a new image, resize, create a snapshot, and export our block devices with the rbd command.
Create a new rbd image with size 40GB, and then check 'disk01' is available on the rbd list.
rbd create disk01 --size 40960
rbd ls -l
Next, activate the rbd kernel module.
sudo modprobe rbd
sudo rbd feature disable disk01 exclusive-lock object-map fast-diff deep-flatten
Now, map the disk01 image to a block device via rbd kernel module, and make sure the disk01 in the list of mapped devices then.
sudo rbd map disk01
rbd showmapped

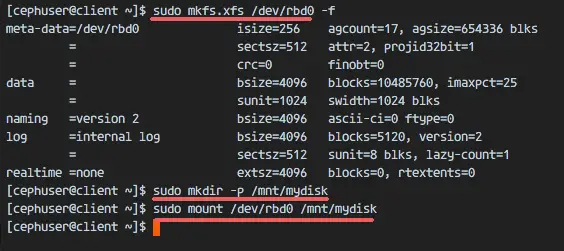
We can see that the disk01 image has been mapped as '/dev/rbd0' device. Before using it to store data, we have to format that disk01 image with the mkfs command. I will use the XFS file system.
sudo mkfs.xfs /dev/rbd0
Mount '/dev/rbd0' to the mnt directory. I will use the 'mydisk' subdirectory for this purpose.
sudo mkdir -p /mnt/mydisk
sudo mount /dev/rbd0 /mnt/mydisk
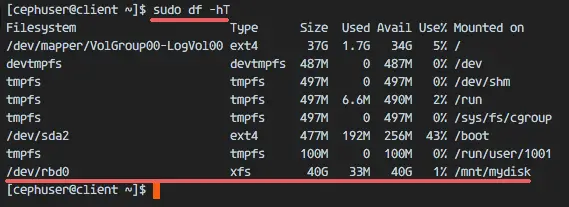
The Ceph RBD or RADOS Block Device has been configured and mounted on the system. Check that the device has been mounted correctly with the df command.
df -hT
Using Ceph as Block Device on CentOS 7 has been successful.
Step 5 - Setup RBD at Boot time
Using Ceph as a Block Device on the CentOS 7 Client node has been successful. Now we will configure to automount the Ceph Block Device to the system. at boot time We need to create a services file for 'RBD Auto Mount'.
Create a new file in the /usr/local/bin directory for mounting and unmounting of the RBD disk01.
cd /usr/local/bin/
vim rbd-mount
Paste the script below:
#!/bin/bash
# Script Author: http://bryanapperson.com/
# Change with your pools name
export poolname=rbd

# CHange with your disk image name
export rbdimage=disk01

# Mount Directory
export mountpoint=/mnt/mydisk

# Image mount/unmount and pool are passed from the systems service as arguments
# Determine if we are mounting or unmounting
if [ "$1" == "m" ]; then
   modprobe rbd
   rbd feature disable $rbdimage exclusive-lock object-map fast-diff deep-flatten
   rbd map $rbdimage --id admin --keyring /etc/ceph/ceph.client.admin.keyring
   mkdir -p $mountpoint
   mount /dev/rbd/$poolname/$rbdimage $mountpoint
fi
if [ "$1" == "u" ]; then
   umount $mountpoint
   rbd unmap /dev/rbd/$poolname/$rbdimage
fi
Save the file and exit vim, then make it executable with chmod.
chmod +x rbd-mount
Next, go to the systemd directory and create the service file.
cd /etc/systemd/system/
vim rbd-mount.service
Paste service configuration below:
[Unit]
Description=RADOS block device mapping for $rbdimage in pool $poolname"
Conflicts=shutdown.target
Wants=network-online.target
After=NetworkManager-wait-online.service
[Service]
Type=oneshot
RemainAfterExit=yes
ExecStart=/usr/local/bin/rbd-mount m
ExecStop=/usr/local/bin/rbd-mount u
[Install]
WantedBy=multi-user.target
Save the file and exit vim.
Reload the systemd files and enable the rbd-mount service to start at boot time.
systemctl daemon-reload
systemctl enable rbd-mount.service
If you reboot the client node now, rbd 'disk01' will automatically be mounted to the '/mnt/mydisk' directory.

