Installing Seafile 6.3.2 inside ISPConfig 3.1
Seafile is an open-source cloud-based file storage system similar to Dropbox & Box. The difference is that Seafile can be deployed on a client's own system. This provides a greater safety and security factor as the passwords are only interchanged between the client who setup the system, and his / her own users rather than a corporate cloud hosting company.
There are a few Seafile server setup tutorials for ISPConfig, but none that didn't require a good majority of editing the files that should really be left alone as per ISPConfig developer recommendations. While this setup is written for Ubuntu 18.04 LTS and ISPConfig 3, it can be followed for other distributions. This solution works for me, but no guarantee or warranty is expressed or implied.
It is assumed that the reader is wanting to deploy Seafile using MySQL and Apache (also https). It is also assumed that you can functionally use ISPConfig, as this is not an ISPConfig tutorial.
1 Setup Website
Open your ISPConfig hosting control panel, click on the Sites tab, and create a new website. You will want to make sure that you select None for Auto-Subdomain, SSL, Let's Encrypt SSL, and Fast-CGI for PHP. While you can technically use an existing website, creating a new one works better as it allows us to keep all the cloud files separated from other sites. This also is necessary to use the ISPConfig panel for configuration changes.
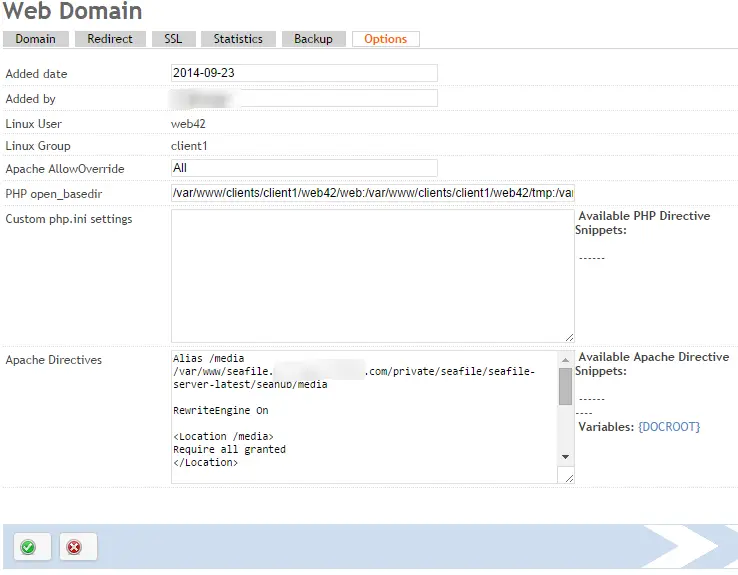
In the website configuration panel, click the Options tab and insert the following in Apache Directives section:
Alias /media /var/www/seafile.myseafile.com/private/seafile/seafile-server-latest/seahub/media

RewriteEngine On

<Location /media>
Require all granted
</Location>

# seafile httpserver
#
ProxyPass /seafhttp http://127.0.0.1:8082
ProxyPassReverse /seafhttp http://127.0.0.1:8082
RewriteRule ^/seafhttp - [QSA,L]
#
# seahub
#
SetEnvIf Authorization "(.*)" HTTP_AUTHORIZATION=$1
ProxyPass / http://127.0.0.1:8000/
ProxyPassReverse / http://127.0.0.1:8000/
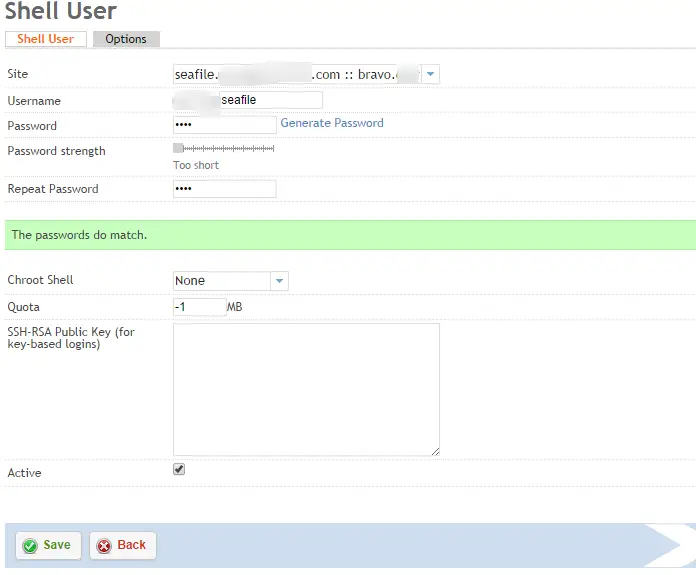
You should also create a shell user for this site as it will be necessary shortly.
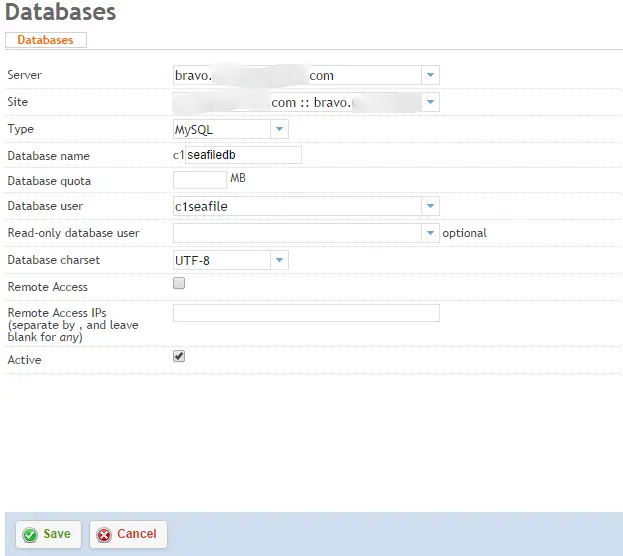
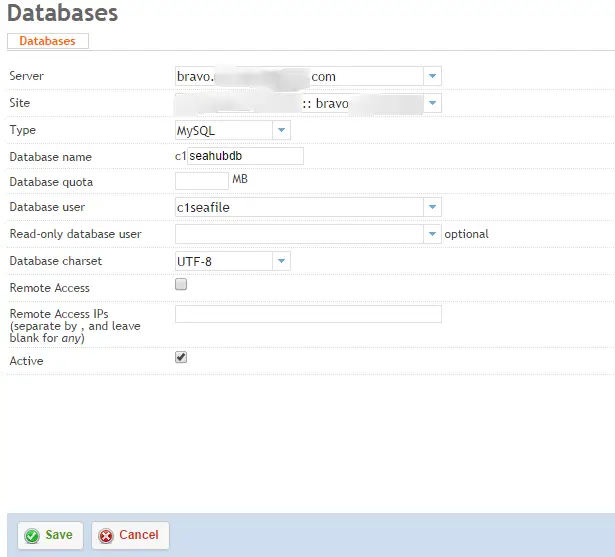
2 Create Databases
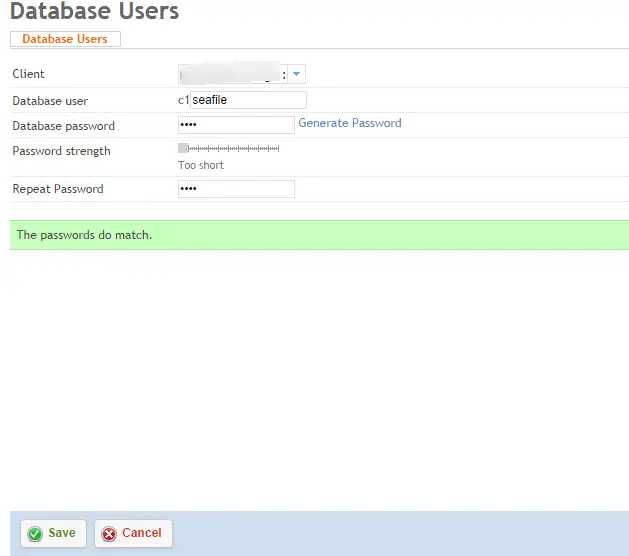
From the Sites panel in ISPConfig, select Database User and Add new User. Create a single user per client that will manage that client's seafile databases.
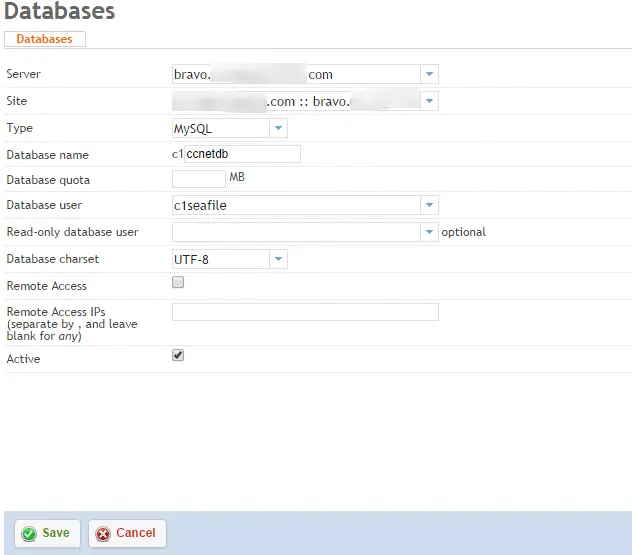
After the database user is created, click Databases, and Add new Database. You will need to add three seperate databases: ccnetdb, seafiledb, seahubdb
3 Download and Install Seafile software
There are some required packages that we need to install. SSH into your server with a user that has sufficient permissions to install software.
apt-get install python2.7 python-setuptools python-simplejson python-pil python-mysqldb python-flup
I prefer to have all my servers running inside the private directory rather than the web directory, so we'll setup as such. SSH into the server with the username we created above.
cd private
mkdir seafile
cd seafile

wget https://download.seadrive.org/seafile-server_6.3.2_x86-64.tar.gz
    or for 32bit
wget https://download.seadrive.org/seafile-server_6.2.5_i386.tar.gz

tar zxvf seafile-server_6.3.2_x86-64.tar.gz
mkdir installed
mv seafile-server_* installed

cd seafile-server-*
./setup-seafile-mysql.sh
At this point, you'll need to answer the prompted questions as they relate to your system and installation. When you get to the section titled Please Choose a way to initialize seafile databases you'll need to select 2 and input the database information from your ISPConfig setup.
4 Initial Run
It's time to start seafile and make sure the initial setup is working.
./seafile.sh start
./seahub.sh start
After starting the services, open your web browser and navigate to the website address you created above with port 8000.
http://192.168.1.111:8000/
5 Apache Setup
Now modify the SERVICE_URL in /path/to/seafile-server/ccnet/ccnet.conf
SERVICE_URL = https://www.myseafile.com
We'll also need to modify the FILE_SERVER_ROOT in /path/to/seafile-server/seahub_settings.py
FILE_SERVER_ROOT = 'https://www.myseafile.com/seafhttp'
Restart Apache.
sudo service apache2 restart
Restart Seafile services.
./seafile.sh start
./seahub.sh start
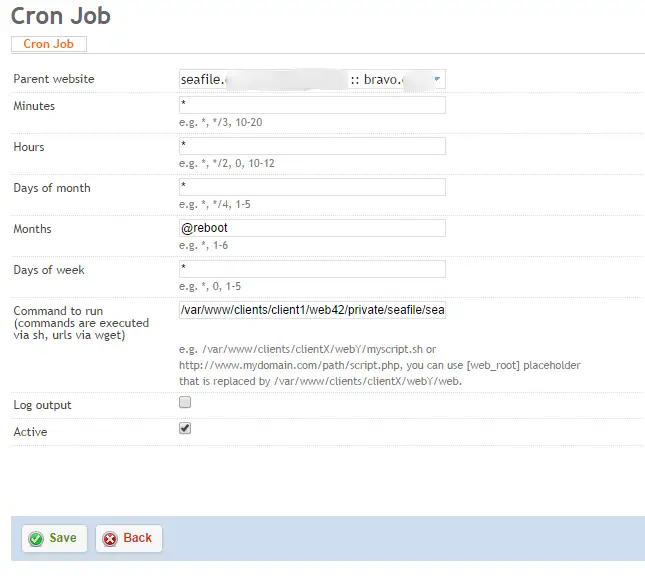
6 Start services automatically
Since the goal here is to keep everything contained with ISPConfig, rather than creating a startup service, we're going to add the seafile script to the users cron jobs. Naturally, you'll need to make sure that the client has the ability to add full cron jobs.
Create a startup file:
cd ~/private/seafile
touch startSeafile.sh
chmod +x startSeafile.sh
Paste the following code into the startSeafile.sh script:
#!/bin/bash

# Change the value of "seafile_dir" to your path of seafile installation
seafile_dir=/var/www/clients/client1/web2/private/seafile
script_path=${seafile_dir}/seafile-server-latest
seafile_init_log=${seafile_dir}/logs/seafile.init.log
seahub_init_log=${seafile_dir}/logs/seahub.init.log

## Sleep command is necessary to prevent MYSQL errors if
## this script runs before MYSQL is fully operational
sleep 60 &
wait %1

case "$1" in
start)
${script_path}/seafile.sh start >> ${seafile_init_log} &
wait %1
${script_path}/seahub.sh start >> ${seahub_init_log} &
wait %1
;;
restart)
${script_path}/seafile.sh restart >> ${seafile_init_log} &
wait %1
${script_path}/seahub.sh restart >> ${seahub_init_log} &
wait %1
;;
stop)
${script_path}/seafile.sh $1 >> ${seafile_init_log} &
${script_path}/seahub.sh $1 >> ${seahub_init_log}
;;
*)
echo "Usage: /etc/init.d/seafile {start|stop|restart}"
exit 1
;;
esac
In order to make sure that cron files get written properly, there are a few things that should be checked. Click Client -> [your client] -> Limits. Make sure that the Cron Job Limits are set to Full Cron with 0 delay between executions. After that you will only need to add the single startServer.sh cron job into the Commands to Run section of ISPConfig.
/var/www/clients/client1/web42/private/seafile/startSeafile.sh start
That's it!

