How to Install PyroCMS on Ubuntu Linux
This tutorial exists for these OS versions
- Ubuntu 24.04 (Noble Numbat)
- Ubuntu 16.04 (Xenial Xerus)
On this page
PyroCMS is a free, open source, powerful, easy to use and modular CMS and development platform built with Laravel 5. PyroCMS is a lightweight CMS that allow us to create custom modules and for any end user to understand how PyroCMS works. PyroCMS comes with a responsive control panel that makes it easy to manage your content from a central location.
In this tutorial, I will explain how to install PyroCMS on Ubuntu 16.04 LTS server.
Prerequisites
- A server running Ubuntu 16.04.
- A non-root user with sudo privileges setup on your server.
Getting Started
Before starting, it is necessary to update your system to the latest version and install required packages to your server. You can do this with the following command:
sudo apt-get update -y
sudo apt-get upgrade -y
Once your system is updated, restart your system and install required packages with the following command:
sudo apt-get install curl wget unzip git -y
Install Nginx, MariaDB, and PHP
Next, you will need to install Nginx, MariaDB, PHP and other PHP libraries to your system. You can install all of them by running the following command:
sudo apt-get install nginx mariadb-server php7.0 php7.0-fpm php7.0-mysql php7.0-curl php7.0-sqlite3 php7.0-mbstring php7.0-cli php7.0-gd php7.0-dom -y
Once all the packages are installed, start Nginx, MariaDB and Php7.0-fpm service and enable them to start on boot time with the following command:
sudo systemctl start nginx
sudo systemctl start mysql
sudo systemctl start php7.0-fpm
sudo systemctl enable nginx
sudo systemctl enable mysql
sudo systemctl enable php7.0-fpm
Configure Database
Before configuring the database, you will need to secure MariaDB first. You can do this by running the following command:
sudo mysql_secure_installation
Answer all the questions as shown below:
Change the password for root ? N
Remove anonymous users? Y
Disallow root login remotely? Y
Remove test database and access to it? Y
Reload privilege tables now? Y
Once the MariaDB is secured, log in to MariaDB console:
mysql -u root -p
Enter your root password, then create a database for PyroCMS:
MariaDB [(none)]>CREATE DATABASE pyrodb;
Next, create a user for PyroCMS, assign a password and grant all privileges on Pyrodb database with the following command:
MariaDB [(none)]> CREATE user pyro identified by 'password';
MariaDB [(none)]> GRANT ALL PRIVILEGES on pyrodb.* to pyro@localhost identified by 'password';
Next, flush the privileges with the following command:
MariaDB [(none)]> FLUSH PRIVILEGES;
Finally, exit from the MySQL shell with the following command:
MariaDB [(none)]> exit;
Install PyroCMS
Before starting, you will need to install the Composer. Composer is a dependency manager that can be used to install dependencies required by PHP. You can install Composer with the following command:
curl -s https://getcomposer.org/installer | php
sudo mv composer.phar /usr/local/bin/composer
sudo chmod 755 /usr/local/bin/composer
Next, create a directory for PyroCMS where you need to install it:
sudo mkdir /var/www/html/pyrocms
Next, change the directory to the pyrocms folder and download the latest version of the PyroCMS using the following command:
cd /var/www/html/pyrocms/
sudo composer create-project pyrocms/pyrocms .
Next, give proper permission to the pyrocms directory:
sudo chown -R www-data:www-data /var/www/html/pyrocms
Configure Nginx for PyroCMS
Next, you will need to create a Nginx virtual host directive for PyroCMS. You can do this with the following command:
sudo nano /etc/nginx/sites-available/pyro.conf
Add the following lines:
server {
  listen 80;

  server_name 192.168.0.102; # Check this
  root /var/www/html/pyrocms/public; # Check this

  index index.php index.html;
  charset utf-8;

  location / {
    try_files $uri $uri/ /index.php?$args;
  }

  location ~ \.php$ {
    fastcgi_pass unix:/var/run/php/php7.0-fpm.sock; # Check this
    fastcgi_index index.php;
    fastcgi_param SCRIPT_FILENAME $document_root$fastcgi_script_name;
    include fastcgi_params;
  }

}
Save and close the file, then enable virtual host and restart Nginx service with the following command:
sudo ln -s /etc/nginx/sites-available/pyro.conf /etc/nginx/sites-enabled/
sudo systemctl restart nginx
Access PyroCMS
Now, open your web browser and type the URL http://192.168.0.102, you will be redirected to the following page:
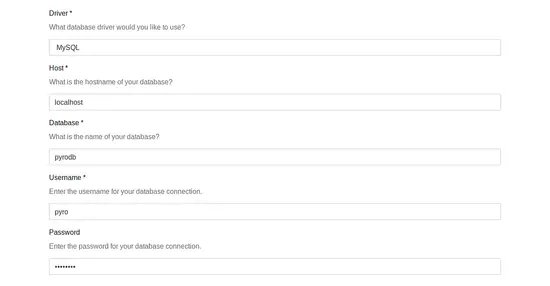
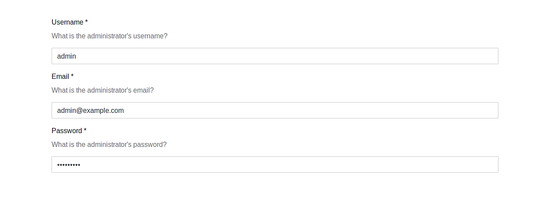
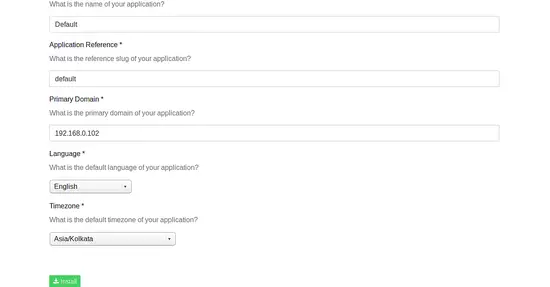
Here, agree to the license agreement and provide all the information like, database username, database name, admin username and password, then click on the Install button, you should see the following page:
Now, click on Login button, you should see the following page:
Now, provide your admin credential and click on the Login button, you should see the PyroCMS dashboard in the following page:


