Install and Configure Kolab Groupware on Ubuntu 16.04 LTS
Kolab is an Open source web-based groupware software application that provides solutions for an email server, directory service, web service, Calendar, Task, address books and more. Kolab supports several clients including, outlook, KDE Contact, Thunderbird, and Roundcube. Kolab provides user-friendly and easy to use web interface that can be used to add, modify and delete users, domains, shared folders and much more.
Kolab comes with lots of features, some of them are listed below:
- Provide support for mixed-client environments like outlook, web, and KDE.
- Uses IMAP and POP3 for email and LDAP for storing configuration data.
- Provide support for shared contacts and calendars.
- Full server-side support for CardDAV and WebDAV, ActiveSync and CalDAV.
Requirements
- A server running Ubuntu 16.04.
- A non-root user with sudo privileges setup on your server.
- A static IP 192.168.0.190 setup on your server.
Getting Started
Before starting, you will need to set up Fully Qualified Domain Name or hostname to your system. You can do this by editing /etc/hosts and /etc/hostname file:
sudo nano /etc/hosts
Add the IP address and hostname at the end of the file:
192.168.0.190 mail.kolab.com mail
Save and close the file, then edit /etc/hostname file:
sudo nano /etc/hostname
Add the following line:
mail.kolab.com
Save the file when you are finished, then restart your system to apply all the changes.
Install MariaDB
Before installing Kolab, you will need to install the latest version of the MariaDB in your server. By default, MariaDB is not available in Ubuntu 16.04 default repository. So, first download the APT key for MariaDB with the following command:
sudo apt-key adv --recv-keys --keyserver hkp://keyserver.ubuntu.com:80 0xF1656F24C74CD1D8
Next, add the Maria-DB repository with the following command:
sudo add-apt-repository 'deb [arch=amd64,i386,ppc64el] http://mirror.jmu.edu/pub/mariadb/repo/10.1/ubuntu xenial main'
Next, update the repository and install MariaDB with the following command:
sudo apt-get update -y
sudo apt-get install mariadb-server -y
Once MariaDB is installed, start MariaDB service and enable it to start on boot time with the following command:
sudo systemctl start mysql
sudo systemctl enable mysql
Next, secure the MariaDB installation by running the following script:
sudo mysql_secure_installation
Answer all the questions as shown below:
Enter current password for root (enter for none):
Change the root password? [Y/n] n
Remove anonymous users? [Y/n] Y
Disallow root login remotely? [Y/n] Y
Remove test database and access to it? [Y/n] Y
Reload privilege tables now? [Y/n] Y
Once MariaDB is secured, you can proceed to the next step.
Install Kolab
By default, Kolab is not available in Ubuntu 16.04 default repository. So you will need to add the Kolab repository to the APT. You can do this by editing /etc/apt/sources.list file:
sudo nano /etc/apt/sources.list
Add the following lines at the end of the file:
deb http://obs.kolabsys.com/repositories/Kolab:/16/Ubuntu_16.04/ ./
deb-src http://obs.kolabsys.com/repositories/Kolab:/16/Ubuntu_16.04/ ./
Save and close the file, then Import the GPG key used to sign the packages:
wget -q -O- https://ssl.kolabsys.com/community.asc | sudo apt-key add -
Next, you will need to ensure the Kolab packages have priority over the Ubuntu packages. You can do this by creating /etc/apt/preferences.d/kolab file:
sudo nano /etc/apt/preferences.d/kolab
Add the following lines:
Package: *
Pin: origin obs.kolabsys.com
Pin-Priority: 501
Save the file and update the repository metadata with the following command:
sudo apt-get update -y
Finally, install Kolab by just running the following command:
sudo apt-get install kolab -y
Configure Kolab
After installing Kolab, you will need to setup Kolab Groupware. You can do this by running the following command:
sudo setup-kolab
During the Kolab setup, you will be asked the following questions, please follow the instructions provided along with them.
#Please supply a password for the LDAP administrator user 'admin', used to login to the graphical console of 389 Directory server.

Administrator password [JAOw_2oIhlezXlK]:
Confirm Administrator password:

#Please supply a password for the LDAP Directory Manager user, which is the administrator user you will be using to at least initially log in to the Web
#Admin, and that Kolab uses to perform administrative tasks.

Directory Manager password [QXML8Suxv-YTUFr]:
Confirm Directory Manager password:

#Please choose the system user and group the service should use to run under. These should be existing, unprivileged, local system POSIX accounts with no shell.

User [dirsrv]:
Group [dirsrv]:

#This setup procedure plans to set up Kolab Groupware for the following domain name space. This domain name is obtained from the reverse DNS entry on your
#network interface. Please confirm this is the appropriate domain name space.

kolab.com [Y/n]: Y

#The standard root dn we composed for you follows. Please confirm this is the root dn you wish to use.

dc=kolab,dc=com [Y/n]: Y

#Setup is now going to set up the 389 Directory Server. This may take a little while (during which period there is no output and no progress indication).

Created symlink from /etc/systemd/system/multi-user.target.wants/dirsrv.target to /lib/systemd/system/dirsrv.target.

#Please supply a Cyrus Administrator password. This password is used by Kolab to execute administrative tasks in Cyrus IMAP. You may also need the password
#yourself to troubleshoot Cyrus IMAP and/or perform other administrative tasks against Cyrus IMAP directly.

Cyrus Administrator password [h3IbKvhbKGUwhy5]:
Confirm Cyrus Administrator password:

#Please supply a Kolab Service account password. This account is used by various services such as Postfix, and Roundcube, as anonymous binds to the LDAP server
#will not be allowed.

Kolab Service password [KhHTzhSYh4w11Vw]:
Confirm Kolab Service password:

What MySQL server are we setting up?
 - 1: Existing MySQL server (with root password already set).
 - 2: New MySQL server (needs to be initialized).
Choice:  - 1: Existing MySQL server (with root password already set).
 - 2: New MySQL server (needs to be initialized).
Choice:  - 1: Existing MySQL server (with root password already set).
 - 2: New MySQL server (needs to be initialized).
Choice: 2

#Please supply the root password for MySQL, so we can set up user accounts for other components that use MySQL.

MySQL root password:

#Please supply a password for the MySQL user 'kolab'. This password will be used by Kolab services, such as the Web Administration Panel.

MySQL kolab password [2-Zz7j_AjGI8QF0]:
Confirm MySQL kolab password:

#Please supply the timezone PHP should be using. You have to use a Continent or Country / City locality name like 'Europe/Berlin', but not just 'CEST'.

Timezone ID [UTC]: Asia/Kolkata

#Please supply a password for the MySQL user 'roundcube'. This password will be used by the Roundcube webmail interface.

MySQL roundcube password [OVwJoKktzbOMAys]:
Confirm MySQL roundcube password:
Once the Kolab setup is complete, you can proceed to access Kolab web interface.
Access Kolab Web Interface
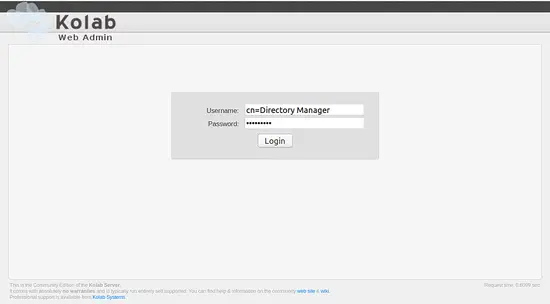
Open your web browser and type the URL http://mail.kolab.com/kolab-webadmin or http://192.168.0.190/kolab-webadmin. You will be redirected to the Kolab login page as shown below:
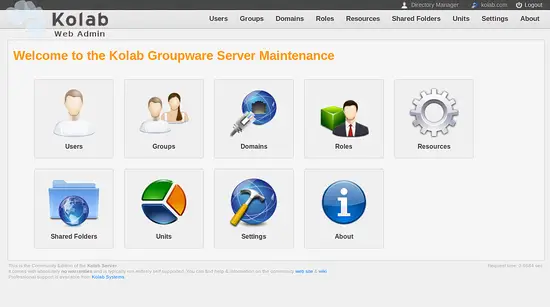
Provide username as cn=Directory Manager and password that you set in above step. Then click on the Login button. You should see the following screen:
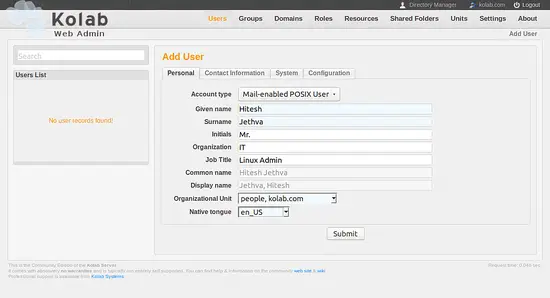
Next, Click on Users Icon in Web Interface and create a mail user as shown below:
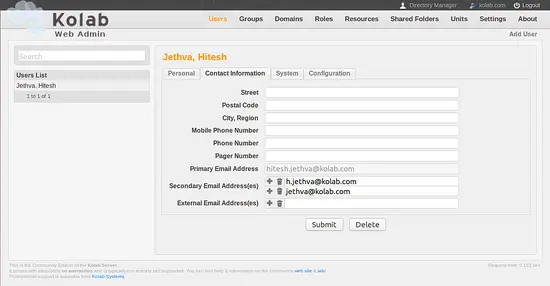
Next, click on the Contact Tab to verify the user id:
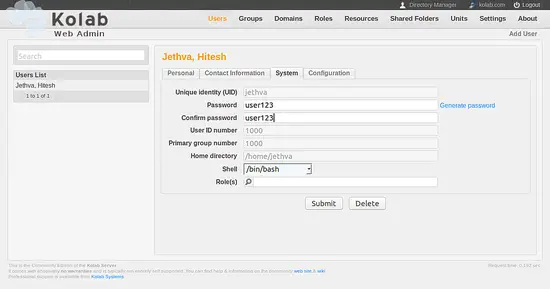
Next, click on the System tab to set email user password:
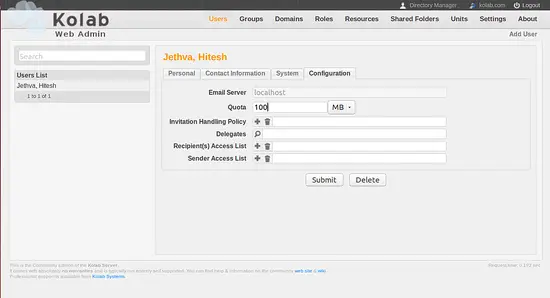
Next, click on the Configuration tab to set the email Quota for user:
Once you are done, click on Submit button to save all the configuration.
Access Roundcube Webmail
Now, your mail user is created, it's time to access your mail through Rouncube webmail.
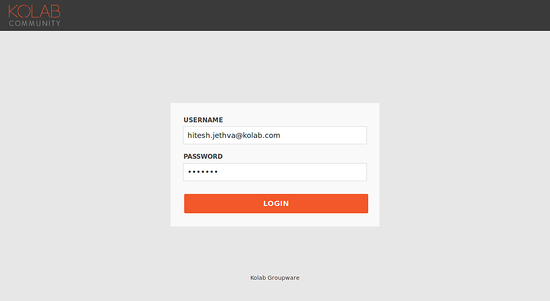
Open your web browser and type the URL http://mail.kolab.com/roundcubemail. You should see the following screen:
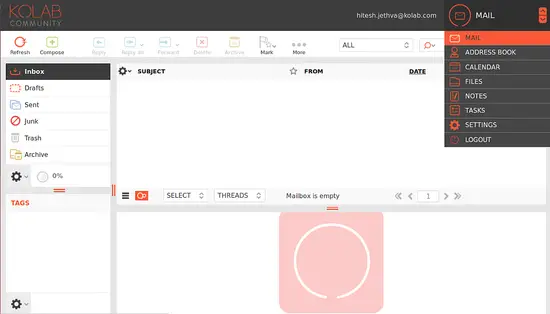
Provide username as your primary email id and password that you set in above step. Then click on the Login button. You should see the Roundcube web interface in the following screen:
Using this interface, you can easily access and send the email, manage address book, calendar, and tasks.
Congratulations! You have successfully installed Kolab Groupware on Ubuntu 16.04 server. You can now easily send and receive emails, manage contacts, task and address book.

