How to Install and Configure Zabbix on CentOS 7
This tutorial exists for these OS versions
- CentOS 8
- CentOS 7
On this page
- Prerequisites
- What we will do?
- Step 1 - Install Apache2/httpd
- Step 2 - Install and Configure PHP 7.2 on CentOS 7
- Step 3 - Install and Configure MariaDB
- Step 4 - Install and Configure Zabbix 3.4
- Step 5 - Configure Firewalld
- Step 6 - Zabbix Initial Setup
- Step 7 - Change Default Admin Password
- Reference
Zabbix is an open source monitoring tool for network services, network hardware, servers, and application. Designed to track and monitor the status of your system and servers. Zabbix offers support for many database systems - including MySQL, PostgreSQL, SQLite, and IBM DB2 - to store data. Zabbix backend is written in C, and the frontend is written in PHP.
In this tutorial, we will show you step-by-step how to install and configure an open source monitoring system Zabbix 3.4 on the CentOS 7 system. This guide will cover some topics, including installation and configuration of the LAMP Stack for our Zabbix installation, and how to change the default password for Zabbix admin web UI.
Prerequisites
- CentOS 7 Server
- Root privileges
What we will do?
- Install Apache2/httpd on CentOS 7
- Install and Configure PHP 7.2 on CentOS 7
- Install and Configure MySQL
- Install and Configure Zabbix 3.4 on CentOS 7
- Configure FirewallD
- Zabbix Initial-Setup
- Change Default Admin
Step 1 - Install Apache2/httpd
In this guide, we will run Zabbix under the Apache web server. The web server packages can be installed from the default CentOS 7 repository.
Install Apache/httpd using the yum command below.
sudo yum -y install httpd
After the installation is complete, start the service and enable it to launch every time at system boot.
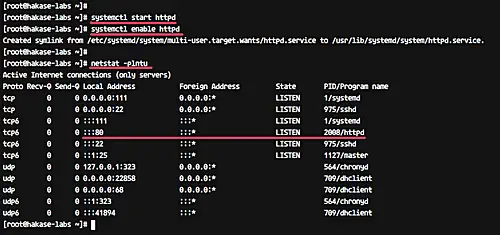
systemctl start httpd
systemctl enable httpd
The Apache/httpd web server has been installed on the system - check it using the netstat command.
netstat -plntu
And you will get the default HTTP port 80 in the LISTEN state.
Step 2 - Install and Configure PHP 7.2 on CentOS 7
In this step, we will install PHP 7 from a third-party repository - we will install PHP 7.2 from the 'webtatic' repository.
Before installing PHP 7 with all extensions needed, add the webtatic and the EPEL repository to the system.
Run commands below.
yum -y install epel-release
sudo rpm -Uvh https://mirror.webtatic.com/yum/el7/webtatic-release.rpm
Now install PHP 7.2 packages from the webtatic repository using yum.
yum -y install mod_php72w php72w-cli php72w-common php72w-devel php72w-pear php72w-gd php72w-mbstring php72w-mysql php72w-xml php72w-bcmath
And after the installation is complete, we need to edit the default 'php.ini' file using the vim editor.
vim /etc/php.ini
Change the values of the configuration as shown below.
 max_execution_time = 600
 max_input_time = 600
 memory_limit = 256M
 post_max_size = 32M
 upload_max_filesize = 16M
 date.timezone = Asia/Jakarta
Save and exit.
Now restart the httpd service.
systemctl restart httpd
The PHP 7 installation and configuration for Zabbix has been completed.
Step 3 - Install and Configure MariaDB
Zabbix offers support for many databases for the installation, including MySQL, PostgreSQL, SQLite, and Oracle database. For this guide, we will be using MariaDB as the database for our Zabbix installation.
Install mariadb-server using yum command below.
sudo yum -y install mariadb-server
After the installation is complete, start the service and enable it to launch everytime at system boot.
systemctl start mariadb
systemctl enable mariadb
Now run the command below to configure MariaDB root password.
mysql_secure_installation
Type your root password and press Enter.
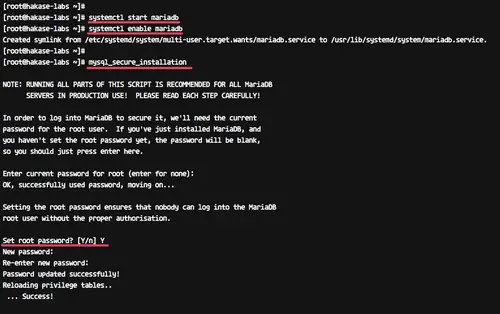
MariaDB database has been installed, and the root password has been configured.
Next, we need to create a new database for our Zabbix installation. We will create a new database and user named 'zabbix' with password 'hakase-labs@'.
Login to the MySQL shell.
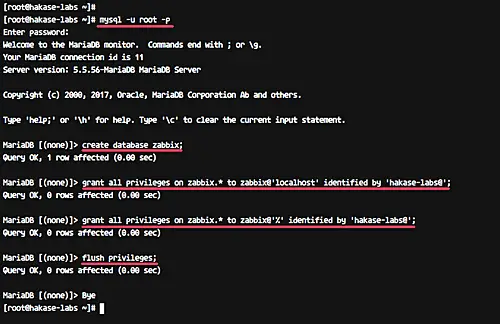
mysql -u root -p
And run the following MySQL queries on the shell.
create database zabbix;
grant all privileges on zabbix.* to zabbix@'localhost' identified by 'hakase-labs@';
grant all privileges on zabbix.* to zabbix@'%' identified by 'hakase-labs@';
flush privileges;
New database for Zabbix installation has been created.
Step 4 - Install and Configure Zabbix 3.4
In this step, we will install and configure Zabbix. We will install Zabbix from the official repository, then configure Zabbix-server and Zabbix-agent.
- Install Zabbix Packages
Add the Zabbix repository to the CentOS 7 system.
yum -y install http://repo.zabbix.com/zabbix/3.4/rhel/7/x86_64/zabbix-release-3.4-1.el7.centos.noarch.rpm
Now install Zabbix using the yum command below.
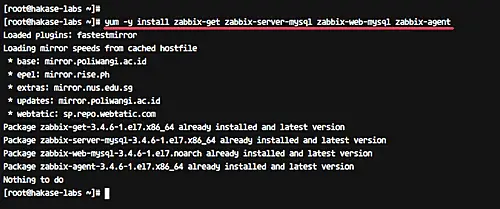
yum -y install zabbix-get zabbix-server-mysql zabbix-web-mysql zabbix-agent
Wait for the Zabbix packages installation.
- Import Database Sample
Import the Zabbix database sample to our 'zabbix' database. Go to the Zabbix documentation directory and extract the Zabbix sql file.
cd /usr/share/doc/zabbix-server-mysql-3.4.6/
gunzip create.sql.gz
Now import the database sample to our 'zabbix' database.
mysql -u root -p zabbix < create.sql
Type your root password and make sure there is no error.
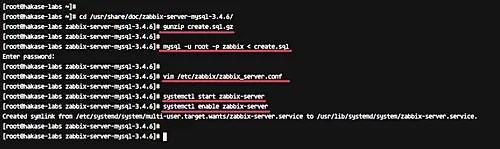
- Configure Zabbix Server
Zabbix-server is the central process of the Zabbix software system. We will configure the Zabbix-server by editing the configuration file using the vim editor.
Run the following command.
vim /etc/zabbix/zabbix_server.conf
On the database line configuration, type the configuration as below and change the 'DBPassword' value with your own database password.
DBHost=localhost
DBPassword=hakase-labs@
Save and exit.
Now start the Zabbix-server service and enable it to launch everytime at system boot.
systemctl start zabbix-server
systemctl enable zabbix-server
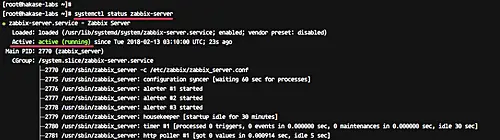
Zabbix-server is running on the CentOS 7 system - check it using the command below.
systemctl status zabbix-server
And you will get the result as shown below.
- Configure Zabbix Agent
Zabbix-agent must be installed on the target monitoring system. The agent will gather all information of the server and reports data to the Zabbix-server.
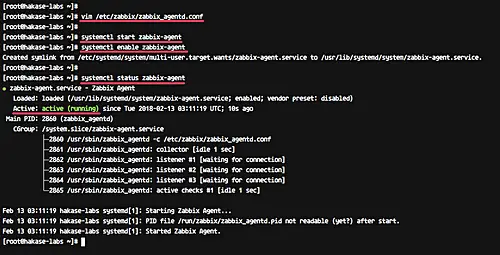
Edit the Zabbix-agent configuration file using vim.
vim /etc/zabbix/zabbix_agentd.conf
Change following lines with your own info:
 Server=127.0.0.1
 ServerActive=127.0.0.1
 Hostname=hakase-labs
Save and exit.
Now start the zabbix-agent and enable it to launch everytime at system boot.
systemctl start zabbix-agent
systemctl enable zabbix-agent
Zabbix-agent is running on the system - check it using the following command.
systemctl status zabbix-agent
And you will get the result as shown below.
Step 5 - Configure Firewalld
In this step, we will open the HTTP and https port for Zabbix admin web UI, and will also add an additional port for Zabbix-server and Zabbix-agent.
If you do not have firewalld on your system, install it using the following command.
yum -y install firewalld
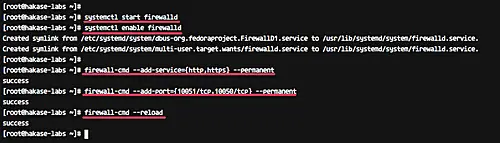
Start the firewalld service and enable it to launch everytime at system boot.
systemctl start firewalld
systemctl enable firewalld
Now we will open the HTTP and https port, and the port that will be used by the Zabbix-server and Zabbix agent (port 10051 and 10050).
Run the following firewall-cmd commands.
firewall-cmd --add-service={http,https} --permanent
firewall-cmd --add-port={10051/tcp,10050/tcp} --permanent
Now reload the firewalld configuration and check the port.
firewall-cmd --reload
firewall-cmd --list-all
Firewalld configuration for Zabbix installation has been completed.
Step 6 - Zabbix Initial Setup
Before going any further, we will restart all of our services using the systemctl commands below.
systemctl restart zabbix-server
systemctl restart zabbix-agent
systemctl restart httpd
Now open your web browser, and type your server IP address.
And you will be redirected to the Zabbix welcome message.
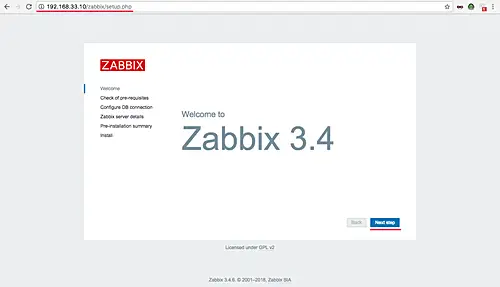
Click the 'Next Step' button.
Now, Zabbix will check all system requirements for its installation. Make sure there is no error.
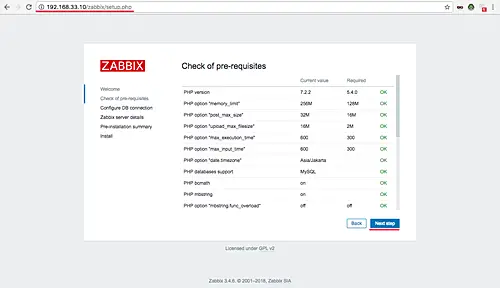
Then click the 'Next step' button again.
For the database info, type all your database setup.
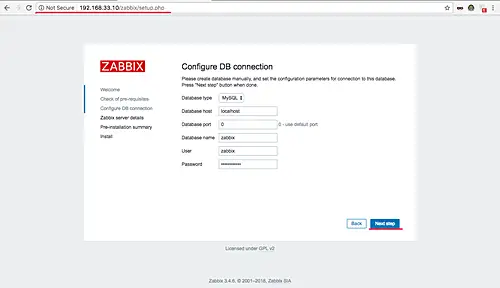
And click the 'Next step' button.
Now comes the Zabbix server details configuration. On the 'Host' field, type your own server IP address, and change the name with your own domain name or hostname.
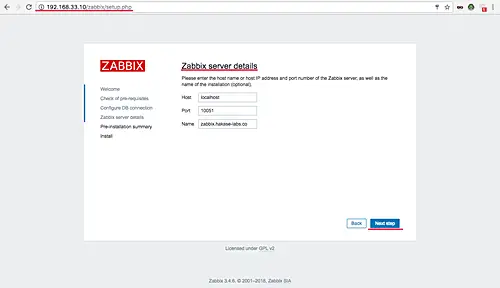
Click the 'Next step' button again.
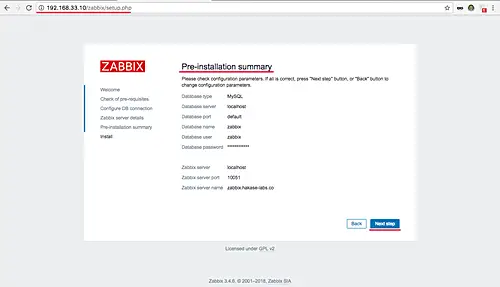
Make sure all of those configurations are correct, then click the next button to install Zabbix.
And when the installation is complete, you will get the page as shown below.
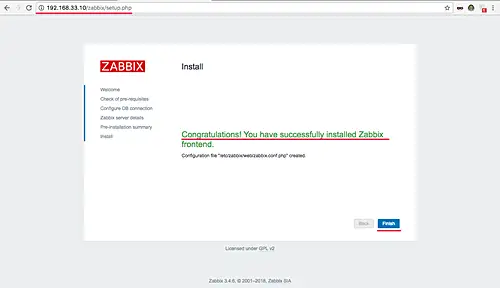
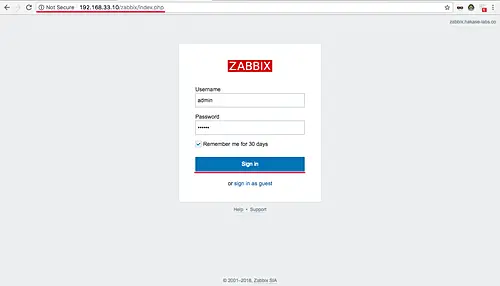
Click the 'Finish' button and you will be redirected to the Zabbix login page.
Login with default user 'admin' and password 'zabbix'.
Now you get the Zabbix admin Dashboard.
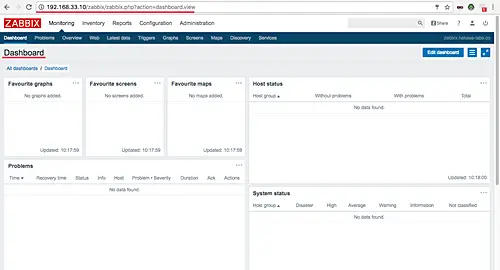
Zabbix server installation has been completed.
Step 7 - Change Default Admin Password
In this step, we want to change the default Zabbix admin password for security.
On the Zabbix admin dashboard, click the user icon on the top right.
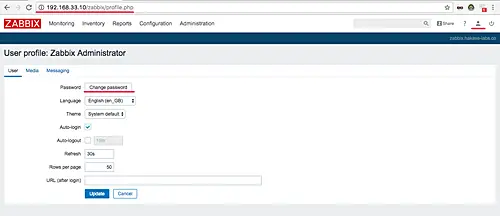
Click the 'Change Password' button and type your new password.
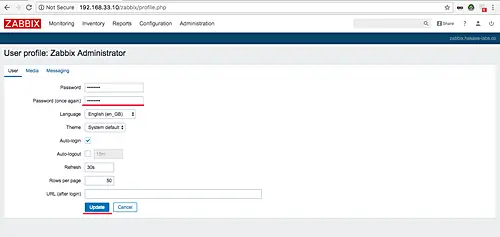
Now click the 'update' button, and the default admin password has been changed.
Zabbix monitoring system is now installed on the CentOS 7 server.

