How to donate CPU/GPU resources to science with Boinc
Altruism is one thing that I'd like to believe characterizes all Linux users out there. This trait can be manifested in a lot of different ways, but when we're talking about computers, the most characteristic and practical way is donating computational resources for a good cause. Here's is a quick guide on how to do exactly that.
First, we will need the client that will connect our PCs to the servers that need our power. This client is named BOINC, and you can download it from this webpage: http://boinc.berkeley.edu/download.php
BOINC stands for Berkeley Open Infrastructure for Network computing, and it is basically an open source middleware system that enables researchers from various institutions and scientific organizations around the globe to take advantage of the processing resources of thousands of personal computers that would otherwise sit idle.
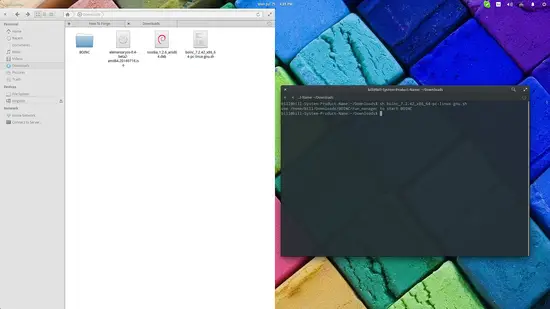
To install BOINC, open a terminal in the download location and run the file using the “sh” command. In our case, the complete command would be:
sh boinc_7.2.42_x86_64-pc-linux-gnu.sh
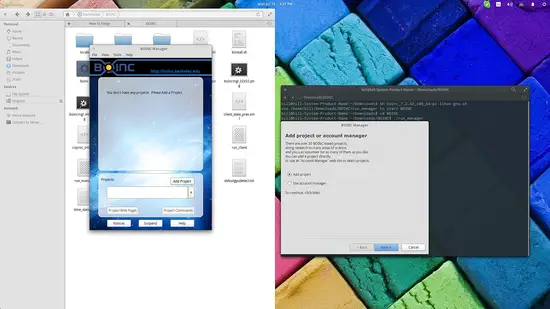
Running this will create a new folder containing the BOINC files. Enter the newly created folder by typing “cd BOINC”, and then type “./run_manager” to run the software.
It is normal to get an error about BOINC manager failing to connect to the main server upon its first start. This is actually a security feature that you can override by following the instructions provided in the last section of this wiki page: http://boinc.berkeley.edu/wiki/Installing_BOINC_on_Debian#Optional_setup_hints
If you install BOINC through your package manager, this process won't be required, but you may not get the latest version of the client.
Once you will get connected to the BOINC server, you will be asked to select a project that will be the receiver of your computational resources. Don't worry too much about the first choice, as you will be able to add more projects later. However, do worry about the compatibility of your operation system with a selection, and also take note of the hardware requirements that vary depending on your choice. You can learn more about those by visiting this webpage: http://boincfaq.mundayweb.com/index.php?view=67
After you have selected a project, you will be asked to login or create a new account through BOINC. This account will be corresponding to the particular project, and not to BOINC. Alternatively, you may set up a BOINC account and let one of the two available project managers do the job of logging you in and out of the selected projects.
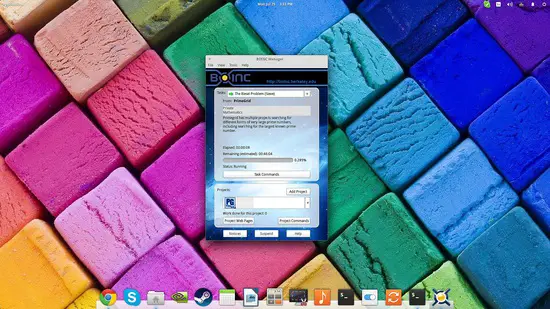
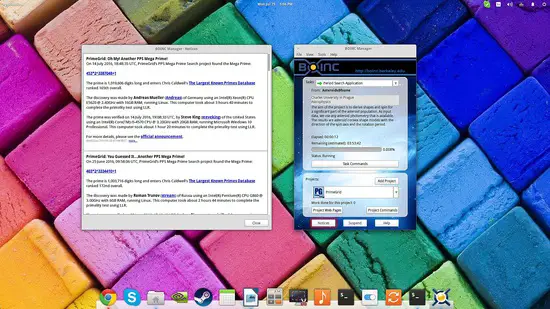
The software will then connect to the server of the selected project, and it will get updated on the work that is left to be done. Your computer will start working as per the default settings of the application, and you may also get updated on the latest developments of the community of donators by hitting that “Notices” button on the bottom left.
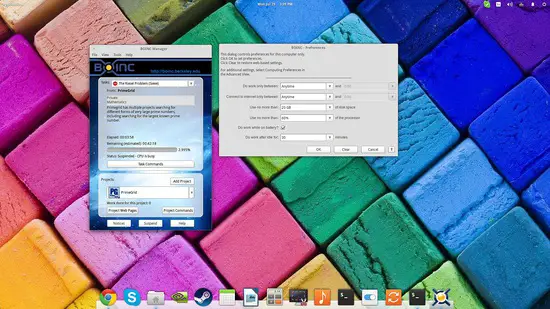
If you want to stop BOINC from eating up your resources, you may press the “Suspend” button. Let's do this and then go to the utility's preferences in order to set up its operational parameters. Simply click on the “Tools” menu located on the top panel and select the “Computing Preferences” option. This will open up a window with options concerning the time of activation of BOINC, the idle time threshold, the disk space and CPU percentage load limits, and whether you will allow BOINC to run when your system is on battery mode or not. Set these as you like, and hit “OK”. Then press “Resume” and BOINC will work according to these new settings.
Note that these options will only apply to the particular machine, so if you login to BOINC from another computer, you will have to reset them again.
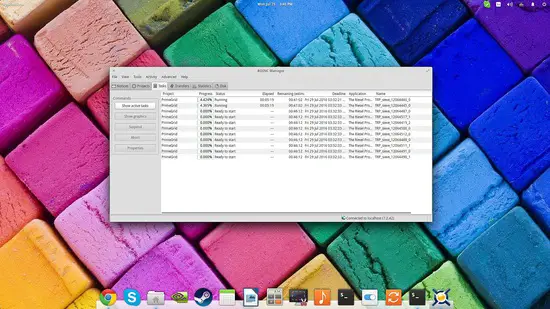
If you want to see more details about what your system is doing for the selected projects, click on the “View” menu and select the “Advanced View” option. This view is basically less fancy, but it allows the user to get real-time stats of what's going on, as well as what has been done with BOINC on this account.
This mode will let you control the running tasks with greater ease (Tasks tab), will allow you to quickly change the network and computational activity settings (Activity menu), and finally, let you connect to another computer for joint operation (Advanced menu).
BOINC has been around for almost fifteen years now, and it has really made a difference in the progress rates of various important scientific studies and researches. From astronomy to biology, and from mathematics to chemistry, BOINC has been the means by which volunteers from around the globe helped us realize new things and overcome the struggles of our previously incomplete understanding. All this has happened in the days when our CPUs weren't powerful enough to even cover our own daily user needs. Nowadays, our computing power is much greater, so you may even use BOINC while you work, or while you use your system for entertainment. Even if you don't want to dedicate your CPU sources, you can donate your GPU instead. You can do this if you own a CUDA-enabled Nvidia, Intel Ivy Bridge or Haswell, or any of the latest AMD APUs. Have fun doing the right thing for the benefit of us all.

