Secure ISPConfig 3 And Services With GoDaddy Signed Certificate On CentOS
Let's set up a signed certificate from GoDaddy for the ISPConfig control panel, Pure-FTPD, Postfix, Dovecot, phpMyAdmin, and Squirrelmail. Don't forget to replace pluto.example.com with your own FQDN throughout this entire section! ISPConfig automatically created an SSL key, CSR, and a self-signed certificate in the /usr/local/ispconfig/interface/ssl/ directory when we answered y to Do you want a secure (SSL) connection to the ISPConfig web interface (y,n) [y]:. If we answered no to that question, we could still create them by performing the following steps:
- Change the directory to /usr/local/ispconfig/interface/ssl/
- Create a key and a certificate signing request
- Create a self signed certificate
- Change the read/write/execute persmissions on the certificate files
- Change the ownership on the certificate files
Type the following lines in your SSH terminal window:
cd /usr/local/ispconfig/interface/ssl/
openssl req -new -newkey rsa:4096 -days 3650 -nodes -keyout ispserver.key -out ispserver.csr
openssl x509 -req -days 3650 -in ispserver.csr -signkey ispserver.key -out ispserver.crt
chmod 750 ispserver.*
chown ispconfig:ispconfig ispserver.*
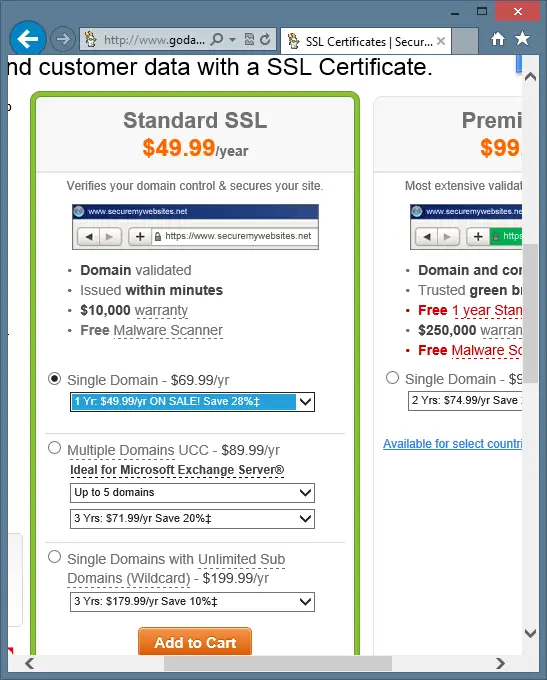
First, we must log into our GoDaddy account and purchase an SSL certificate. I bought the Standard SSL Single Domain certificate for two years. This certificate covers pluto.example.com and www.pluto.example.com. If you don't have a GoDaddy account, create one and then purchase a new Standard SSL Single Domain certificate as shown in the following:
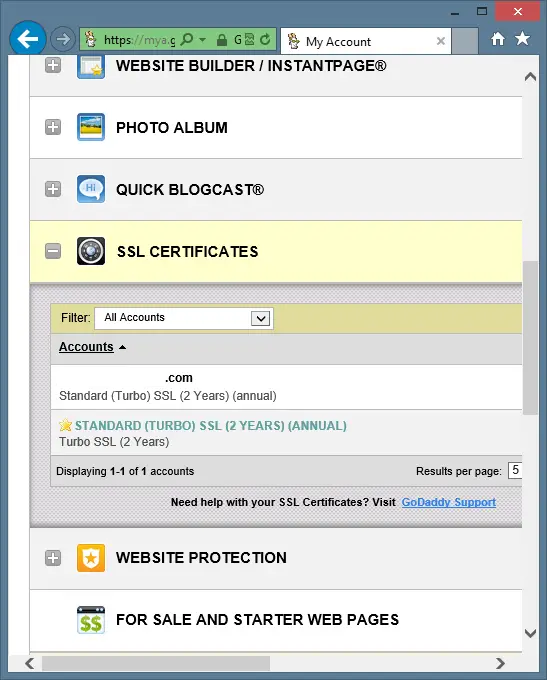
Your credit for your new SSL certificate usually doesn't show up in your GoDaddy account right away. After waiting about 5 minutes, the SSL certificate credit showed up in my account with another SSL certificate that I have previously purchased and setup. It says Standard (Turbo) SSL (2 Years) (Annual) and looks like the following:
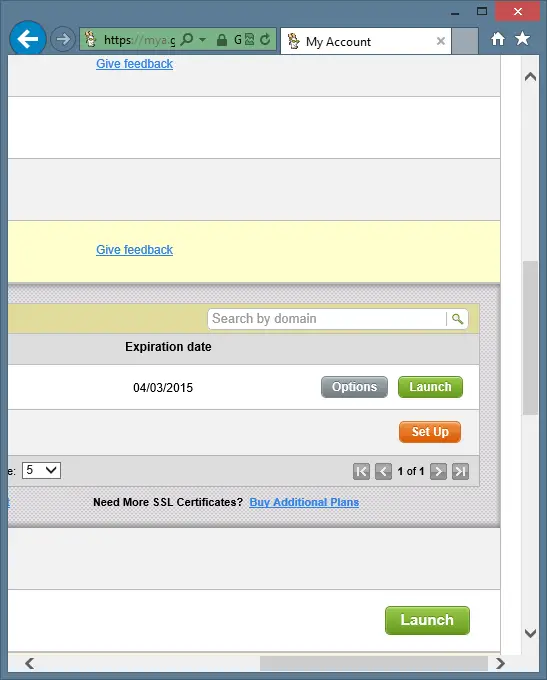
GoDaddy makes you first activate the credit for the new certificate before you can begin configuring it. To activate the certificate, click the Set Up button beside the SSL credit as shown in the following:
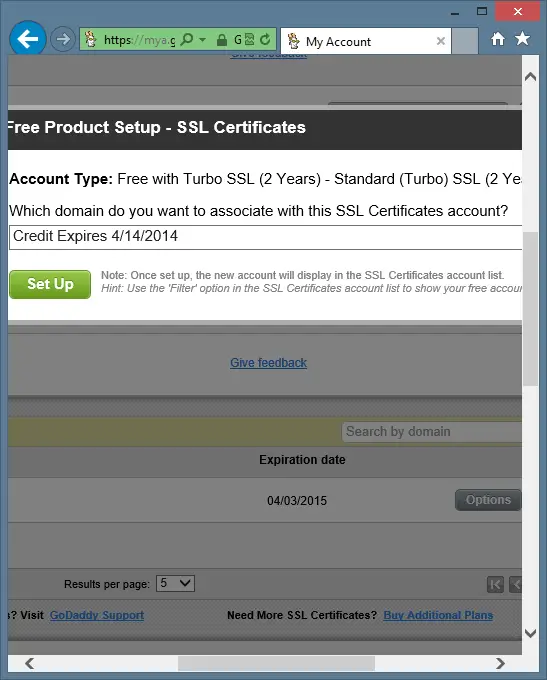
Then you will be prompted to select which SSL credit you are activating. It will look like the following:
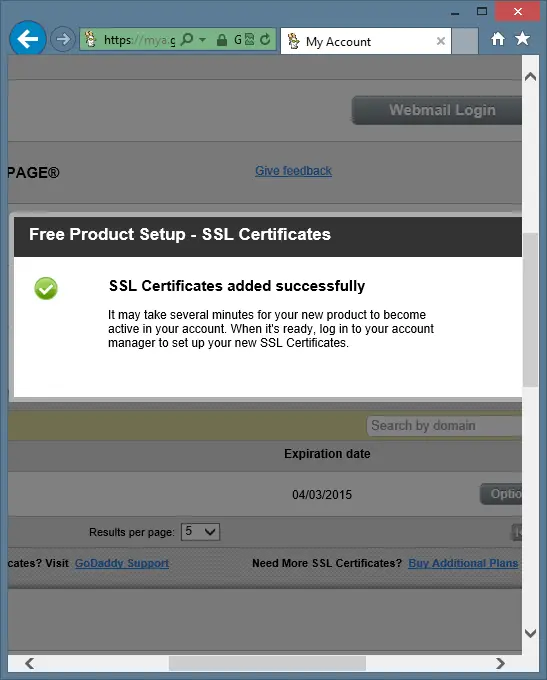
There are numerous bugs in the GoDaddy software on this page. Don't be alarmed though. Everything will work! It will say, "Free Product Setup" and "Account Type: Free with Turbo SSL." That may seem very odd to you, since we just paid for the SSL certificate. It will also ask you, "Which domain do you want to associate with this SSL Certificates account?" However, there are no domains listed in the selection box. The unactivated SSL credits are listed in the box by the date in which they expire. If you have numerous unactivated SSL certificates, make sure you select the correct one. The date listed on my unactivated credit is incorrect! Once, you've selected the correct credit, click the Set Up button. You should see a message telling you that the activation was successful like the following:
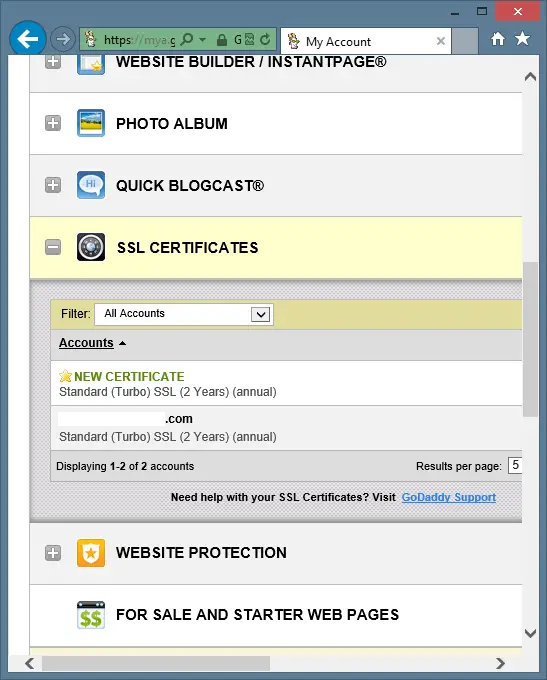
Your SSL credit is now activated and ready to begin being configured. It will be listed in your GoDaddy account as "NEW CERTIFICATE", like the following:
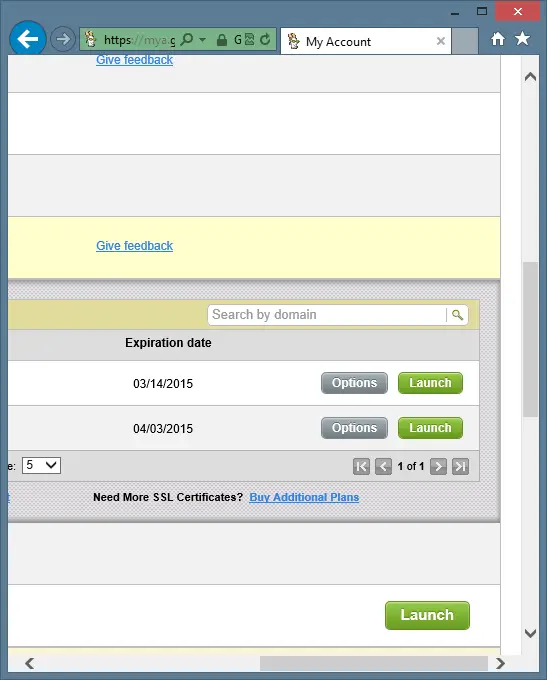
Note that the expiration date on the certificate has changed, but it is still incorrect. Don't worry. It will be fixed at the end. Click the Launch button beside the SSL certificate in your GoDaddy account as shown in the following:
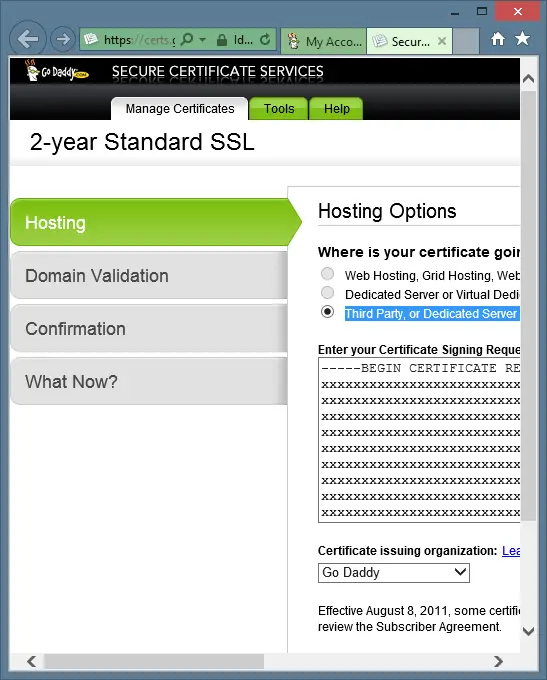
You will be asked for some information to setup your SSL certificate Hosting Options. Make sure that the option "Third Party, or Dedicated Server or Virtual Dedicated Server, without Simple Control Panel" is selected. Then, copy and paste your CSR into the window, including the -----BEGIN CERTIFICATE REQUEST----- and -----END CERTIFICATE REQUEST----- lines. To copy your CSR, type the following line in your SSH terminal window:
cat /usr/local/ispconfig/interface/ssl/ispserver.csr
Make sure to paste the entire contents of the CSR into the GoDaddy CSR box. I replaced my actual CSR text with x's in the screenshot. It should look similar to the following:
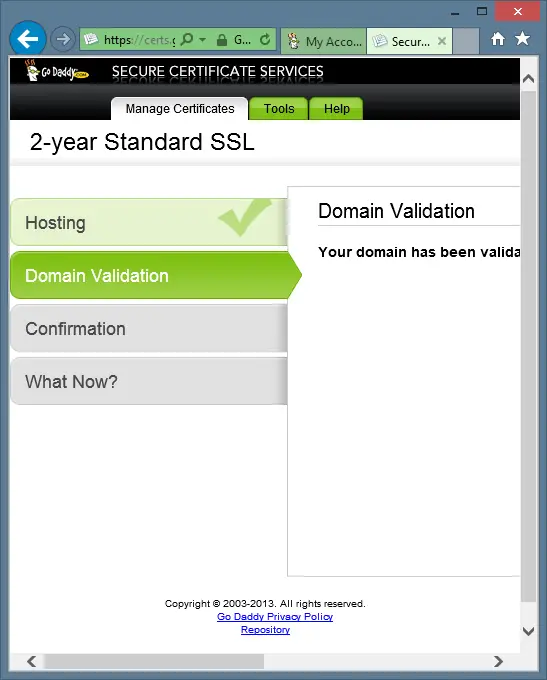
Click the Next button. You will see a message saying, "Your domain has been validated. Please continue to the confirmation step." It will look like the following:

