Running ownCloud 5.0 On Nginx (LEMP) On Debian Wheezy
This tutorial shows how you can install and run ownCloud 5.0 on a Debian Wheezy system that has nginx installed instead of Apache (LEMP = Linux + nginx (pronounced "engine x") + MySQL + PHP). nginx is a HTTP server that uses much less resources than Apache and delivers pages a lot of faster, especially static files.
I do not issue any guarantee that this will work for you!
1 Preliminary Note
I want to install ownCloud in a vhost called www.example.com/example.com here with the document root /var/www/www.example.com/web.
You should have a working LEMP installation, as shown in this tutorial:
2 Installing APC And A Few Other Requirements
APC is a free and open PHP opcode cacher for caching and optimizing PHP intermediate code. It's similar to other PHP opcode cachers, such as eAccelerator and XCache. It is strongly recommended to have one of these installed to speed up your PHP page.
APC can be installed as follows:
apt-get install php-apc
Install a few other requirements:
apt-get install php-xml-parser php5-intl php5-sqlite php5-mysql smbclient curl libcurl3 php5-curl
Reload PHP-FPM as follows:
/etc/init.d/php5-fpm reload
3 Installing ownCloud
The document root of my www.example.com web site is /var/www/www.example.com/web - if it doesn't exist, create it as follows:
mkdir -p /var/www/www.example.com/web
Next download ownCloud from the ownCloud web site to your server, uncompress it and place it in your document root:
cd /tmp
wget http://download.owncloud.org/community/owncloud-5.0.13.tar.bz2
tar xvfj owncloud-5.0.13.tar.bz2
rm -f owncloud-5.0.13.tar.bz2
cd owncloud
mv * .htaccess /var/www/www.example.com/web/
It is recommended to make the document root and the ownCloud files in it writable by the nginx daemon which is running as user www-data and group www-data:
chown -R www-data:www-data /var/www/www.example.com/web
If you haven't already created a MySQL database for ownCloud (including a MySQL ownCloud user), you can do that as follows (I name the database owncloud in this example, and the user is called owncloud_admin, and his password is owncloud_admin_password):
mysqladmin -u root -p create owncloud
mysql -u root -p
GRANT ALL PRIVILEGES ON owncloud.* TO 'owncloud_admin'@'localhost' IDENTIFIED BY 'owncloud_admin_password';
GRANT ALL PRIVILEGES ON owncloud.* TO 'owncloud_admin'@'localhost.localdomain' IDENTIFIED BY 'owncloud_admin_password';
FLUSH PRIVILEGES;
quit;
Next we create an nginx vhost configuration for our www.example.com vhost in the /etc/nginx/sites-available/ directory as follows:
vi /etc/nginx/sites-available/www.example.com.vhost
server {
       listen 80;
       server_name www.example.com example.com;
       root /var/www/www.example.com/web;

       if ($http_host != "www.example.com") {
                 rewrite ^ http://www.example.com$request_uri permanent;
       }

       index index.php index.html;

       location = /favicon.ico {
                log_not_found off;
                access_log off;
       }

       location = /robots.txt {
                allow all;
                log_not_found off;
                access_log off;
       }

       # Deny all attempts to access hidden files such as .htaccess, .htpasswd, .DS_Store (Mac).
       location ~ /\. {
                deny all;
                access_log off;
                log_not_found off;
       }

        client_max_body_size 10G; # set max upload size

        rewrite ^/caldav(.*)$ /remote.php/caldav$1 redirect;
        rewrite ^/carddav(.*)$ /remote.php/carddav$1 redirect;
        rewrite ^/webdav(.*)$ /remote.php/webdav$1 redirect;
        rewrite ^/apps/calendar/caldav.php /remote.php/caldav/ last;
        rewrite ^/apps/contacts/carddav.php /remote.php/carddav/ last;
        rewrite ^/apps/([^/]*)/(.*\.(css|php))$ /index.php?app=$1&getfile=$2 last;
        rewrite ^/remote/(.*) /remote.php last;

        error_page 403 = /core/templates/403.php;
        error_page 404 = /core/templates/404.php;

        location ~ ^/(data|config|\.ht|db_structure\.xml|README) {
                        deny all;
        }

        location / {
                        rewrite ^/.well-known/host-meta /public.php?service=host-meta last;
                        rewrite ^/.well-known/host-meta.json /public.php?service=host-meta-json last;

                        rewrite ^/.well-known/carddav /remote.php/carddav/ redirect;
                        rewrite ^/.well-known/caldav /remote.php/caldav/ redirect;

                        rewrite ^(/core/doc/[^\/]+/)$ $1/index.html;

                        try_files $uri $uri/ /index.php$is_args$args;
        }

        location ~ ^(.+?\.php)(/.*)?$ {
                        try_files $1 =404;
                        include fastcgi_params;
                        fastcgi_param SCRIPT_FILENAME $document_root$1;
                        fastcgi_param PATH_INFO $2;
                        fastcgi_param HTTPS $https;
                        fastcgi_pass unix:/var/run/php5-fpm.sock;
                        fastcgi_intercept_errors on;
                        fastcgi_index index.php;
                        fastcgi_buffers 64 4K;
        }

        location ~* ^.+\.(jpg|jpeg|gif|bmp|ico|png|css|js|swf)$ {
                        expires 30d;
                        access_log off;
        }
}
|
To enable the vhost, we create a symlink to it from the /etc/nginx/sites-enabled/ directory:
cd /etc/nginx/sites-enabled/
ln -s /etc/nginx/sites-available/www.example.com.vhost www.example.com.vhost
Reload nginx for the changes to take effect:
/etc/init.d/nginx reload
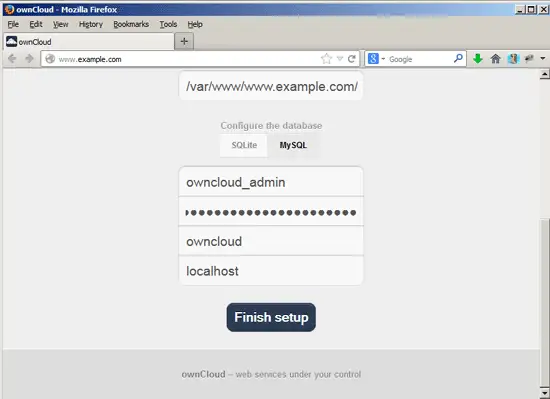
Now we can launch the web-based ownCloud installer by going to http://www.example.com - fill in a user name and password for the administrator account and click on Advanced. Then scroll down...

... and click on MySQL. This will make the input fields for the database details appear. Fill in your database details and click on Finish setup:
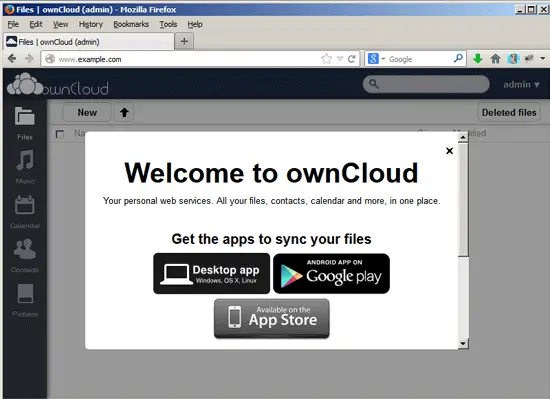
If everything goes well, you should see the Welcome to ownCloud message:
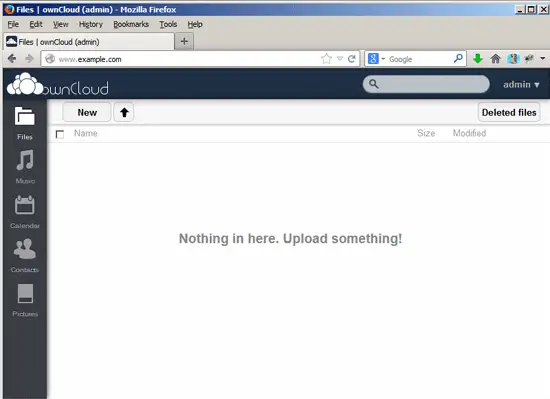
The installation is now finished, and you can start using ownCloud:
4 Links
- ownCloud: http://owncloud.org/
- nginx: http://nginx.org/
- nginx Wiki: http://wiki.nginx.org/
- Debian: http://www.debian.org/

