Role-based access control (RBAC) in Kubernetes
On this page
Role-based access control (RBAC) is used to assign access to a computer or network resources in the Kubernetes Cluster.
In this article, we will understand the basics of RBAC and create Role, ClusterRole, RoleBinding and ClusterRoleBinding Objects.
We will then create a kubeconfig file to give limited access to a particular user on a selected namespace.
But before we proceed let's understand the basics first.
- A Role or ClusterRole contains a set of permissions.
- A Role sets permissions within a particular namespace and ClusterRole is a non-namespaced resource.
- A role binding grants the permissions defined in a role to a user or set of users whereas ClusterRoleBinding grants that access cluster-wide
- A RoleBinding may reference any Role in the same namespace. Alternatively, a RoleBinding can reference a ClusterRole and bind that ClusterRole to the namespace of the RoleBindin
- A kubeconfig file is a file used to configure access to Kubernetes from the kubectl command-line tool.
To understand RBAC in detail, visit the official documentation of Kubernetes here.
Note: Refer screenshots to avoid any confusion before executing the commands. ( ubuntu@master = master node and ubuntu@ip-172-31-25-70 = user machine)
Pre-requisites
- Kubernetes Cluster with at least 1 worker node.
If you want to learn to create a Kubernetes Cluster, click here. This guide will help you create a Kubernetes cluster with 1 Master and 2 Nodes on AWS Ubuntu EC2 Instances.
What will we do?
- Create Role, Role Binding, Cluster Role, Cluster Role Binding object files.
- Create Role, Role Binding, Cluster Role, Cluster Role Binding objects in the cluster.
- Provide access to users using the kubeconfig file.
- Summary of kubeconfig file creation.
Create a Role, Role Binding, Cluster Role, Cluster Role Binding object files.
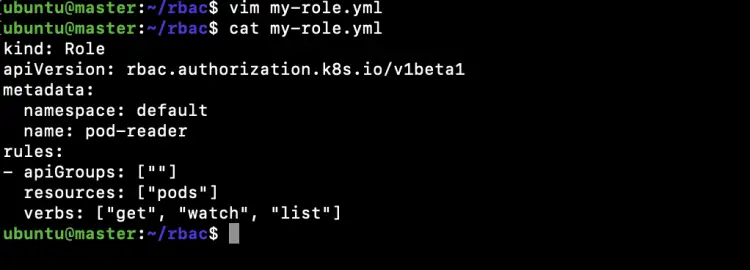
Create a file to create a Role in the "default" namespace that can be used to grant the get, watch and list access to pods.
vim my-role.yml
kind: Role
apiVersion: rbac.authorization.k8s.io/v1beta1
metadata:
  namespace: default
  name: pod-reader
rules:
- apiGroups: [""]
  resources: ["pods"]
  verbs: ["get", "watch", "list"]
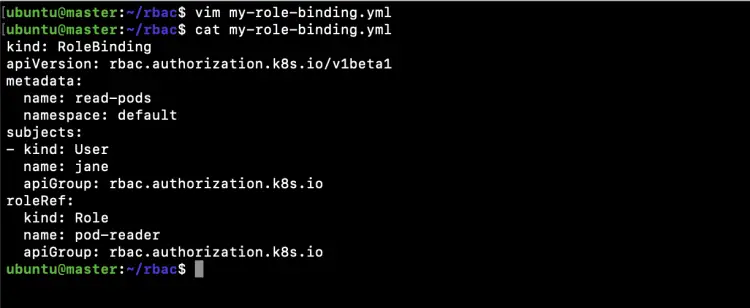
Create a new file to create a RoleBinding that allows the "pod-reader" Role to the user "jane" within the "default" namespace.
vim my-role-binding.yml
kind: RoleBinding
apiVersion: rbac.authorization.k8s.io/v1beta1
metadata:
  name: read-pods
  namespace: default
subjects:
- kind: User
  name: jane
  apiGroup: rbac.authorization.k8s.io
roleRef:
  kind: Role
  name: pod-reader
  apiGroup: rbac.authorization.k8s.io
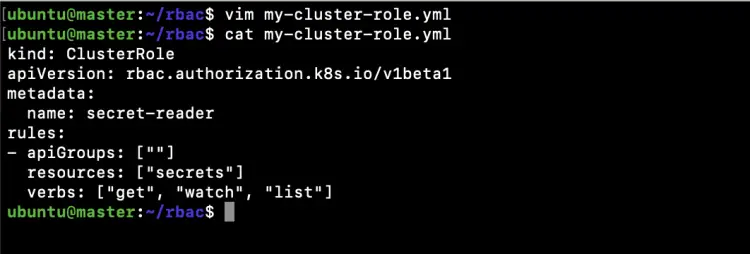
Create a file to create a ClusterRole that can be used to grant the get, watch and list access to secrets in any particular namespace, or across all namespaces depending on how it is bound.
vim my-cluster-role.yml
kind: ClusterRole
apiVersion: rbac.authorization.k8s.io/v1beta1
metadata:
  name: secret-reader
rules:
- apiGroups: [""]
  resources: ["secrets"]
  verbs: ["get", "watch", "list"]
Create a new file to create a ClusterRoleBinding that will allow any user in the group "manager" to read secrets in any namespace.
vim my-cluster-role-binding.yml
kind: ClusterRoleBinding
apiVersion: rbac.authorization.k8s.io/v1beta1
metadata:
  name: read-secrets-global
subjects:
- kind: Group
  name: manager
  apiGroup: rbac.authorization.k8s.io
roleRef:
  kind: ClusterRole
  name: secret-reader
  apiGroup: rbac.authorization.k8s.io
Create a Role, Role Binding, Cluster Role, Cluster Role Binding objects.
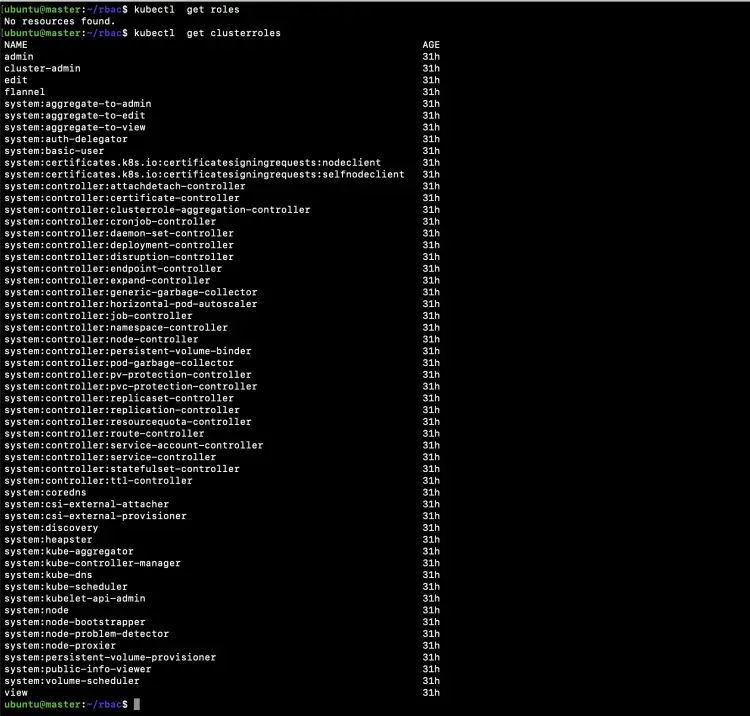
Get a list of existing Roles and ClusterRoles from the cluster.
kubectl get roles
kubectl get clusterroles
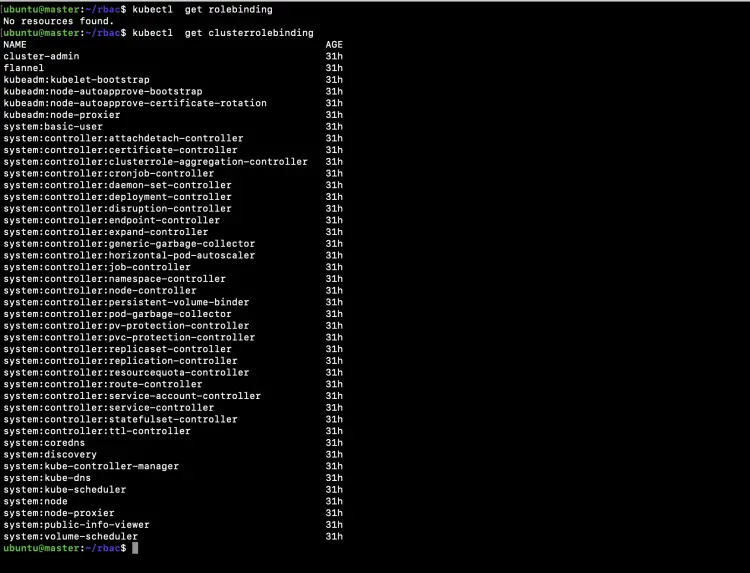
Get a list of existing RoleBindings and ClusterRoleBindings from the cluster.
kubectl get rolebinding
kubectl get clusterrolebinding
Now create a Role, RoleBinding and ClusterRole ClusterRoleBinding using the files we created in the above steps.
kubectl create -f my-role.yml
kubectl create -f my-role-binding.yml
kubectl create -f my-cluster-role.yml
kubectl create -f my-cluster-role-binding.yml
Using the following commands verify if the objects have been created.
kubectl get roles | grep pod-reader
kubectl get rolebinding | grep read-pods
kubectl get clusterroles | grep secret-reader
kubectl get clusterrolebinding | grep read-secrets-global
In the above screenshot, you can see that the Role, RoleBinding and ClusterRole, ClusterRoleBinding has been created.
Provide access to users using the kubeconfig(config) file.
Now, in this section, we will create a config file that can be shared with a user. Here, to test this scenario we will create a user "bob" on the Linux server and share this config file with the "bob" user. We will then try to perform operations that are allowed and disallowed to that user. We will bind an admin ClusterRole to the "bob" user which will give access on all objects within "bob" namespace.
On the master-nodes create a key and certificate signing request (CSR) using openssl.
pwd
mkdir user-bob
cd user-bob/
openssl req -new -newkey rsa:4096 -nodes -keyout bob-k8s.key -out bob-k8s.csr -subj "/CN=bob/O=devops"
cat bob-k8s.csr | base64 | tr -d '\n'
Create a CertificateSigningRequest object definition file containing the CSR we generated in the above step. In the below file add the output of "cat bob-k8s.csr | base64 | tr -d '\n'" command to "request" property.
vim k8s-csr.yaml
apiVersion: certificates.k8s.io/v1beta1
kind: CertificateSigningRequest
metadata:
  name: bob-k8s-access
spec:
  groups:
  - system:authenticated
  request: # replace output of: cat bob-k8s.csr | base64 | tr -d '\n'
  usages:
  - client auth
cat k8s-csr.yaml
Create a CertificateSigningRequest object within Kubernetes containing the CSR we generated in the above step.
kubectl get csr
kubectl create -f k8s-csr.yaml
kubectl get csr
Now we want to approve the CSR (CertificateSigningRequest) object we created in the above step.
kubectl get csr
kubectl certificate approve bob-k8s-access
kubectl get csr
In the above screenshot, you can see that the CSR has been Approved, Issued.
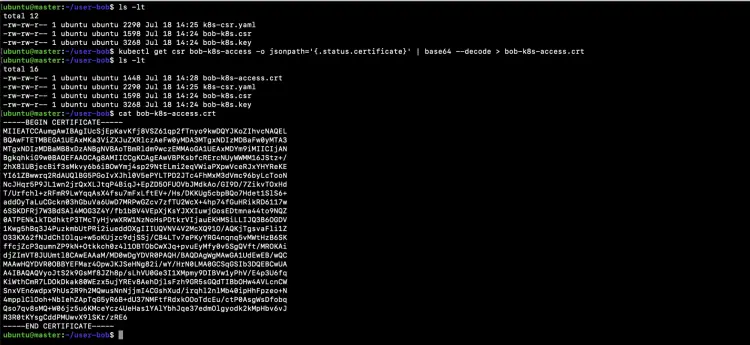
Retrieve the certificate available in the ‘status.certificate’ field of the CSR object.
ls -lt
kubectl get csr bob-k8s-access -o jsonpath='{.status.certificate}' | base64 --decode > bob-k8s-access.crt
ls -lt
cat bob-k8s-access.crt
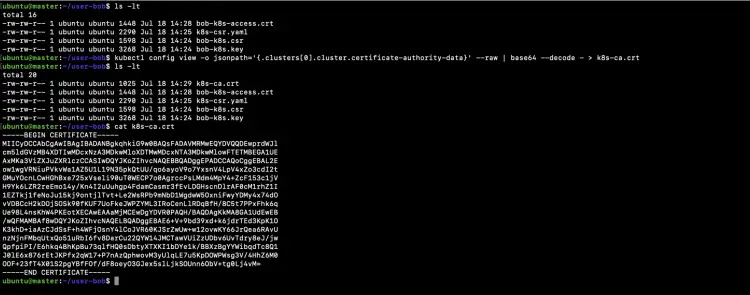
Retrieve cluster CA certificate which is the next requirement for Bob’s kubeconfig file and save it to "k8s-ca.crt" file.
ls -lt
kubectl config view -o jsonpath='{.clusters[0].cluster.certificate-authority-data}' --raw | base64 --decode - > k8s-ca.crt
ls -lt
cat k8s-ca.crt
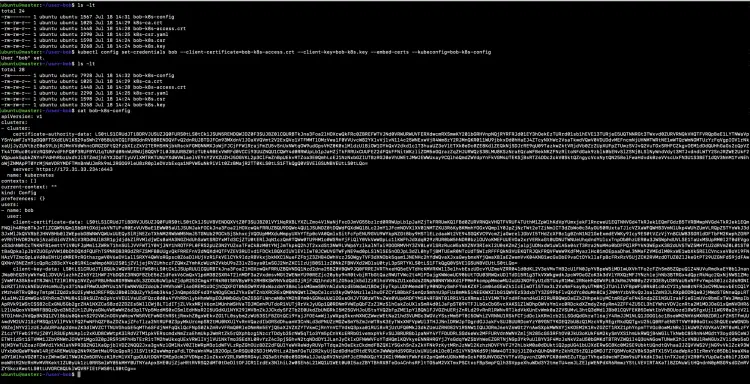
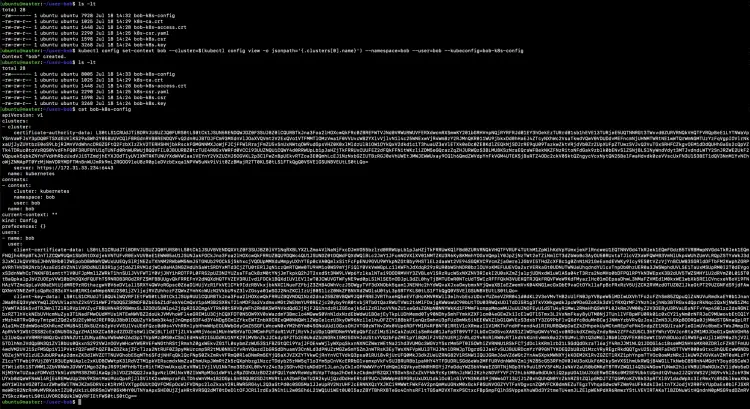
Set up the cluster configuration in Bob’s kubeconfig file. All these details will be put from our existing kubeconfig using the command below.
ls -lt
kubectl config set-cluster $(kubectl config view -o jsonpath='{.clusters[0].name}') --server=$(kubectl config view -o jsonpath='{.clusters[0].cluster.server}') --certificate-authority=k8s-ca.crt --kubeconfig=bob-k8s-config --embed-certs
ls -lt
cat bob-k8s-config
Setup the user which will import Bob’s key and cert into the config file.
ls -lt
kubectl config set-credentials bob --client-certificate=bob-k8s-access.crt --client-key=bob-k8s.key --embed-certs --kubeconfig=bob-k8s-config
ls -lt
cat bob-k8s-config
Create a context for "Bob's" config file using the following command.
ls -lt
kubectl config set-context bob --cluster=$(kubectl config view -o jsonpath='{.clusters[0].name}') --namespace=bob --user=bob --kubeconfig=bob-k8s-config
ls -lt
cat bob-k8s-config
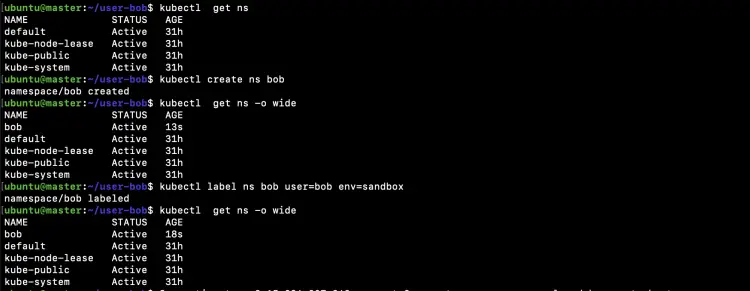
Create a namespace for Bob
kubectl get ns
kubectl create ns bob
kubectl get ns -o wide
kubectl label ns bob user=bob env=sandbox
kubectl get ns -o wide
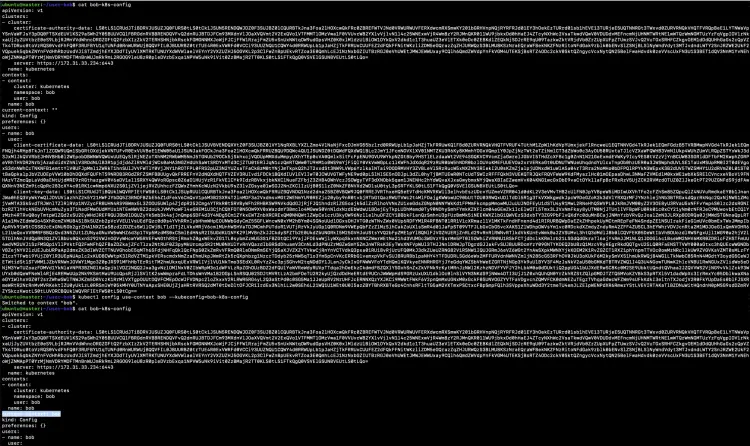
Specify the context that Bob will use for his kubectl commands.
cat bob-k8s-config
kubectl config use-context bob --kubeconfig=bob-k8s-config
cat bob-k8s-config
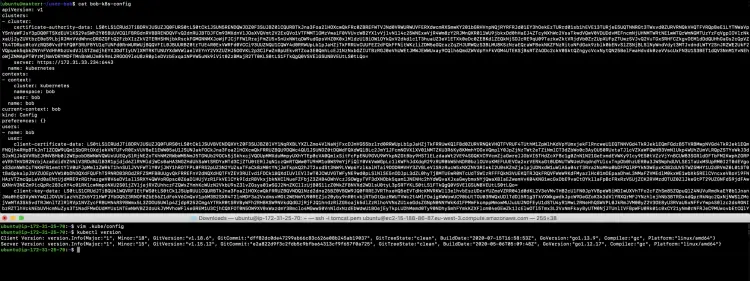
Copy "bob-k8s-config" from the master node to ".kube/config" file in Bob's home directory and test Bob’s kubeconfig by running the ‘kubectl version’.
vim .kube/config #All the output of "cat bob-k8s-config" command ran on the master node and save it to /home/bob/.kube/config on the user machine.
kubectl version #Execute this on the user machine
Test permissions by executing the following commands from the user machine.
kubectl get nodes
kubectl get pods
kubectl get ns
kubectl get deployments
kubectl get all
In the above screenshot you can see that "Bob" user is unable to perform any operation as no access has been given to it.
Assign the default ‘admin’ cluster role to Bob to create most types of Kubernetes objects within his namespace. This role "bob-admin" will give admin access to "Bob" user on "bob" namespace using "admin" ClusterRole.
Eecute the following command on the master node.
kubectl create rolebinding bob-admin --namespace=bob --clusterrole=admin --user=bob
kubectl get rolebinding
kubectl get clusterrole | grep admin
Get namespaces created to Bob.
Now, execute all the following commands from the user machine.
kubectl get ns
kubectl get ns bob
In the above screenshot you can see the "Bob" user is unable to list "namespace" resources.
Create a Pod in "bob" namespace set as the default namespace in Bob's kubeconfig file.
kubectl run nginx --image=nginx
kubectl get pods
kubectl get pods -o wide
Check the current namespace set as the default namespace
kubectl config get-contexts
In the above screenshot, you can see that "Bob" is able to create a Pod in "bob" namespace as we have bound "admin" role to "Bob" user for "bob" namespace.
Try to create a pod in a "default" namespace on which Bob does not have any permissions. Since we have allowed "Bob" user to be able to create objects only in "bob" namespace, Bob user will not be able to create any of the resources in any namespace other than "bob".
kubectl run nginx-2 --image=nginx --namespace=default
Check the namespace set as the default namespace in the kubeconfig file. This shows that "bob" namespace is set as the default namespace in the config file.
kubectl config view --minify | grep namespace:
Summary of Kubeconfig file creation
- Create a key and certificate signing request (CSR) using openssl.
- Create a CertificateSigningRequest object definition file.
- Create a CertificateSigningRequest object.
- Approve the CSR (CertificateSigningRequest).
- Retrieve the certificate of the CSR object.
- Retrieve cluster CA certificate.
- Set up the cluster configuration in kubeconfig file.
- Setup the user.
- Create a context.
- Create a namespace for the user.
- Specify the context in the kubeconfig file.
- Pass on the kubeconfig to the user.
- Test the permissions using the user's config file
- Assign the role to the user
- Test the permissions again using the user's config file.
Conclusion
In this article, we saw the basics of Role, RoleBinding and ClusterRole, ClusterRoleBinding, we also created these objects in our cluster. We then created a config file that allows a particular user to perform operations in a particular namespace. We saw how RBAC can help us restrict access to the Kubernetes cluster.

