Booting On PXE And On A Customized Debian System
This document describes how to boot on a Debian system with a PXE boot. It is not recommended to use this tutorial for many PXE clients, but you can use it for network deployement, for example.
The PXE server and client will be running both on Debian Etch 4.0.
You can use a crossover cable or boot over a switch.
1. Installing Debian (on the server)
1.1 Installing the base system
Follow the excellent tutorial "The Perfect Setup - Debian Etch (Debian 4.0)", the first 2 pages.
1.2 Configuring the network
Edit the file /etc/network/interfaces.
vi /etc/network/interfacesAnd change the file to have something like this:
# This file describes the network interfaces available on your system
# and how to activate them. For more information, see interfaces(5).
# The loopback network interface
auto lo
iface lo inet loopback
# The primary network interface
auto eth0
iface eth0 inet static
    address 192.168.100.1
    netmask 255.255.255.0
    gateway 192.168.100.254
Change the gateway or adapt the IP configuration to work on your environment. Please change allow-hotplug eth1 to auto eth0 to avoid to lose your network if you reboot your server without network cable (in case of you need to unplug your computer to plug in a crossover cable).
2. Installing the packages
You must install :
- a DHCP server to
enable PXE
- a TFTP server to transfer somes files
- the debootstrap package to create a virtual system
apt-get install tftpd-hpa dhcp3-server debootstrap nfs-kernel-server
3. Creating the virtual system
3.1 Creating a minimal Debian Etch system
In this section, we will create a folder containing the future system. You will be able to customize this system without changing you PXE server configuration. First, create the base system:
mkdir /pxeroot
cd /pxeroot
debootstrap etch /pxeroot
The last command may take a long time depending on your internet connection. It will download a basic Debian system. Then you must configure your network.
cp /etc/network/interfaces /pxeroot/etc/network/interfaces
vi /pxeroot/etc/network/interfaces
And paste this content into the file. This will allow the PXE client to have a dynamic IP address.
# Used by ifup(8) and ifdown(8). See the interfaces(5) manpage or
# /usr/share/doc/ifupdown/examples for more information.
# The loopback network interface
auto lo
iface lo inet loopback
# The primary network interface
auto eth0
iface eth0 inet dhcp
Set the network name:
echo pxeboot > /pxeroot/etc/hostname
cp /etc/hosts /pxeroot/etc/hosts
vi /pxeroot/etc/hosts
And change the file to have something like this:
127.0.0.1 localhost pxeboot
# The following lines are desirable for IPv6 capable hosts
::1 ip6-localhost ip6-loopback
fe00::0 ip6-localnet
ff00::0 ip6-mcastprefix
ff02::1 ip6-allnodes
ff02::2 ip6-allrouters
ff02::3 ip6-allhosts
Create the fstab file:
cp /etc/fstab /pxeroot/etc/fstab
vi /pxeroot/etc/fstab
And change the file to look like this:
# /etc/fstab: static file system information.
# <file system>   <mount point>   <type>   <options>   <dump>    <pass>
/dev/ram0  /       ext2   defaults    0   0
proc       /proc      proc   defaults    0   1
tmpfs      /tmp       tmpfs  defaults    0   1
3.2 Customize your virtual system
You can use the chroot command to customize your system. Simply run:
chroot /pxeroot
First, you must install a Linux kernel:
apt-get install linux-image-386
Some warnings will appear because your system might not be bootable because there is no boot loader on the system (grub, lilo,...). Don't stop the script by answering "no" when it aks if you want to stop the installation.
Then simply install the wanted package. In our case, we will run partimage for dumping partition.
apt-get install partimage
When your configuration is finished, exit the chroot:
exit
4 Configuring the DHCP server
Now we need to have a dhcp server to give the address to the PXE client.
vi /etc/dhcp3/dhcpd.conf
And change the file to have something like this:
subnet 192.168.100.0 netmask 255.255.255.0 {
    range 192.168.100.100 192.168.100.200;
    option subnet-mask 255.255.255.0;
    filename "pxelinux.0";
    next-server 192.168.100.1;
    option root-path "192.168.100.1:/pxeroot";
    option broadcast-address 192.168.100.255;
}
You can set other options as gateway, dns,... but in our example, we don't need it.
Restart the DHCP server when the configuration is finished:
/etc/init.d/dhcp-server restart
5 Configuring the TFTP server
Setting up the startup:
vi /etc/default/tftpd-hpa
And change the file to look like this:
RUN_DAEMON="yes"
OPTIONS="-l -s /var/lib/tftpboot"
Then restart the service:
/etc/init.d/tftpd-hpa restart
6 Configuring PXE boot
These commands will create the PXE boot system:
cd /var/lib/tftpboot
wget
http://ftp.debian.org/debian/dists/etch/main/installer-i386/current/images/netboot/pxelinux.0
cp /pxeroot/vmlinux ./
cp /pxeroot/initrc.img ./
mkdir pxelinux.cfg
vi pxelinux.cfg/default
Then paste this into the file:
DISPLAY boot.txt2
F1 f1.txt
...

DEFAULT linux

LABEL linux
    kernel vmlinuz
    append vga=normal initrd=initrd.img ramdisk_size=14332 root=/dev/nfs nfsroot=192.168.100.1:/pxeroot rw --

PROMPT 0
TIIMEOUT 0
You can optionally write a comment visible on boot into /var/lib/tftpboot/boot.txt.
7 Configuring NFS
You must simply export the folder /pxeroot.
vi /etc/exports
And add this line:
/pxeroot 192.168.100.0/255.255.255.0(rw,sync,no_root_squash,no_subtree_check)
Restart the nfs sever for the changes to take effect:
/etc/init.d/nfs-kernel-server restart
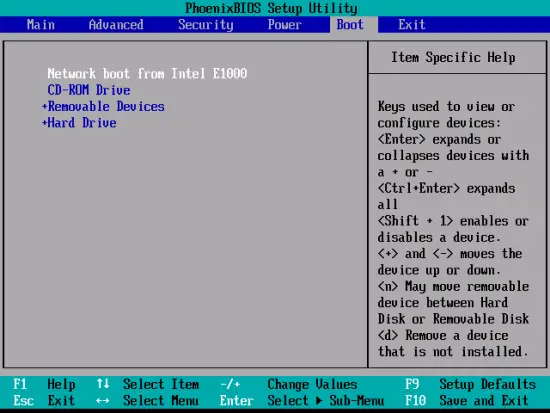
8 Starting the computer (on the client)
You must check that the network boot is before the other bootable device. When you computer startup, press on "F2", "DELETE" or "F10" depending on your configuration. Find the boot order section then set up the Network boot at the first place. For example here: