Labels and Selectors in Kubernetes
Labels are nothing but key-value pairs assigned to Kubernetes Objects like Pods, Service, etc. Labels can be used to organize and to select Kubernetes objects. Labels can be attached to objects at creation time and can be modified at any time. We can add multiple Labels to Kubernetes objects.
Selectors are used by the users to select a set of objects. The label selector is the core grouping primitive in Kubernetes. Kubernetes API supports two types of selectors
- Equality-based selectors:
This allows filtering by key and value, where matching objects should satisfy all the specified labels. - Set-based selectors:
This allows filtering keys according to a set of values.
To know more about Labels and Selectors, click here.
In this article, we will create a Pod with Labels to it and redirect the requests to it from the service using Selector. We will also perform get, delete operations on Pod and Service using Label/Selectors on the command line.
Pre-requisites
- Kubernetes Cluster with at least 1 worker node.
If you want to learn to create a Kubernetes Cluster, click here. This guide will help you create a Kubernetes cluster with 1 Master and 2 Nodes on AWS Ubuntu 18l04 EC2 Instances.
What we will do
- Create a Pod and Service with Labels and Selector
- Understand Labels
Create a Pod and Service with Labels and Selectors
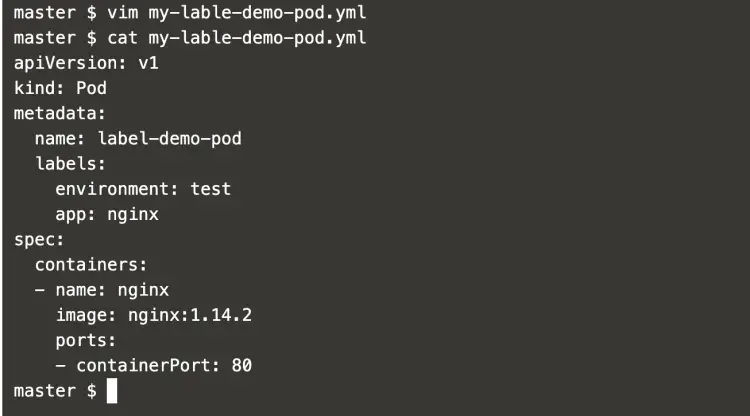
To create a Pod with labels, create a new file and add the following content in it.
vim my-lable-demo-pod.yml
apiVersion: v1
kind: Pod
metadata:
  name: label-demo-pod
  labels:
    environment: test
    app: nginx
spec:
  containers:
  - name: nginx
    image: nginx:1.14.2
    ports:
    - containerPort: 80
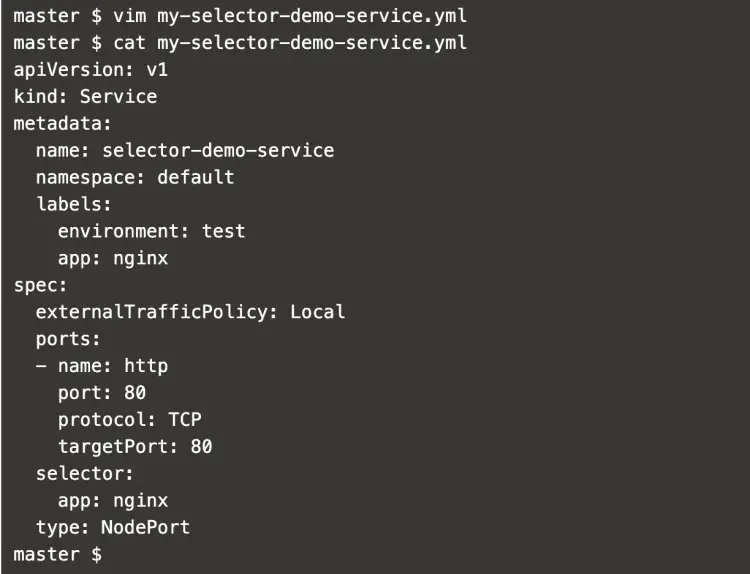
To create a service with a selector, create a file with the following service definition which uses the default namespace.
vim my-selector-demo-service.yml
apiVersion: v1
kind: Service
metadata:
  name: selector-demo-service
  namespace: default
  labels:
    environment: test
    app: nginx
spec:
  externalTrafficPolicy: Local
  ports:
  - name: http
    port: 80
    protocol: TCP
    targetPort: 80
  selector:
    app: nginx
  type: NodePort
To create a Pod, execute the following command.
kubectl create -f my-lable-demo-pod.yml
kubectl get pods
To create a Service, execute the following command.
kubectl create -f my-selector-demo-service.yml
kubectl get service
Now, to check if the Label Selector is working, try to access the service on NodeIP:NodePort.
Here, Ip of my Node is 106.210.138.189 and the service is exposed on Port=30385.
Since we are able to access the Nginx Pod using the Service we created, it means, the Label and Selector worked.
Understand Labels
Now, we can perform various operations on the Pod and Service we created using the Label.
To get Pods matching a label of our choice, we can "--selector" in the command as follows.
kubectl get pods --selector environment=test
kubectl get pods --selector app=nginx
We can also use "-l" instead of "--selector" to get the Pods matching the label of our choice.
kubectl get pods -l environment=test
kubectl get pods -l environment=prod
We can even perform the delete pod operation by specifying the label. Pods matching the label can be deleted using the following commands.
kubectl get pods
kubectl delete pods -l environment=test
kubectl get pods
The way we could delete Pods matching the labels, we can also delete the service.
To delete the serving matching a label, use the following command. Also, if there is no service matching the specified label in the command, no delete operation will be performed.
kubectl get service
kubectl delete service -l environemt=test
kubectl delete service -l environment=test
kubectl get service
Conclusion
In this article, we created a Pod with labels in it and created and pointed a service to those Pods matching the label. We also saw how Pods and Services matching the labels can be deleted.


