Installing Wordpress On A Server Running ISPconfig 2.x

Version: 1.0
Author: Paul Voth - #mail#@#beentold<dot>#org#
This tutorial describes how I install Wordpress which I have done this way on numerous different servers, including Windows and Linux setups. I absolutely agree that there are other ways to do this, but this is a tutorial on my way of doing it. If you have improvements or suggestions, please let me know.
Lastly - this is my first self-written HowToForge contribution, so please go easy on me.
1. Foolish Assumptions
1.1 I assume that you have (done) the following:
- You have set up your server according to one of the "The Perfect Setup..." tutorials here on HowToForge.com
- You have installed ISPconfig
- You have created a website in ISPconfig (if not, check out this tutorial: ISPConfig 2.x - First Steps)
- You have downloaded Wordpress 2.5 or newer (if not, download it here)
- You have an FTP client program and a text editor and you know how to use them
1.2 Logins and other data used in this tutorial:
- In this tutorial domain.tld is used as the website's domain. Replace it with the actual domain of your website
- The MySQL database name we will be creating will be web1_db1
- The MySQL user we will be creating will be web1_u1
- The MySQL password we will be using is MySQLPassword - please do NOT use that as the actual password and change it to something more secure
- The ISPconfig site name is web1 - that may differ for you. Please check.
- The IP address used here for connecting to your server via SSH is 192.168.0.100
2. First steps
2.1 Uploading the files
Unzip your wordpress archive. Yes, I know, many other tutorials tell you to upload the archive and unpack it on your server. I do not do it this way. The reason is that on many occasions this caused problems. The files, once unpacked, could only be moved or changed by the root user. And since I don't like using the root user when I don't have to (security reasons), I do it this way.
So we've unpacked the wordpress zip (or .tar.gz) archive. I assume you have already created a website for your Wordpress blog. Open your FTP client and connect to your server. If you use the FTP account that you created in ISPconfig when you created the domain.tld site, navigate to the /web folder. If you are connecting as root, navigate to /var/www/web1/web. On Debian at least. May vary if you use another Linux - so really for simplicity's and security's sake: create an FTP user account in ISPconfig, if you haven't already and use that.
Upload the wordpress folder to the /web folder on your server keeping the directory structure intact (virtually all current ftp clients do this automatically).
While the upload is going on, let's create a database for our Wordpress blog.
2.2 Setting up a MySQL database
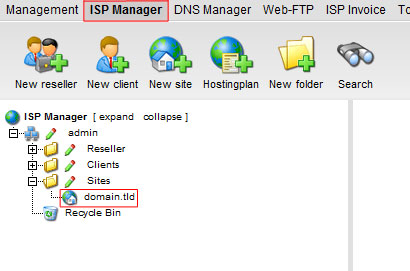
Log in to your ISPconfig as admin and open the ISPManager. Open the site you have created for the Wordpress blog. In our example the site is called domain.tld.
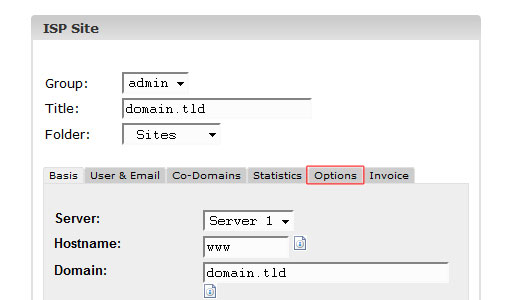
Then we click on Options.
Now we click the New button next to the word Databases. As you can see, the database name and database user have been created automatically. In my exmple these are web1db1 and web1u1. In your setup that may differ. Now all we need to do is enter a new password for the user. I will use MySQLPassword as the password. Please use something else. A complicated password increases security, so please take this seriously! Use something that includes small and capitol letters as well as numbers. Minimum length of the password should be 6 characters, but I usually choose a 10 character password.
You can leave the Remote Access setting on No for now. If you ever need remote access to your MySQL database, you can switch it on at any time. If you don't need it, it's just another potential security issue.
Please write down your new MySQL password down and/or store it somewhere safe! This will be the last time you see it in ISPconfig or anywhere else on the server.
Now all you need to do is click Save and we're all done here. You can close the browser window with IPSconfig now.
Let's wait for the upload to completely finish, before moving on to the next step.
3. Installing Wordpress
3.1 Chmodding
Before we can start the automatic installation script, we need to chmod the folder that contains the wordpress blog to make it writable for the installation script. Connect to your server via SSH. If you're using a Linux terminal, type:
ssh 192.168.0.100
(please remember, 192.168.0.100 is a fictitious IP address, use your server's IP address.)
If you are using Windows, download an SSH client (For example Putty - free) and connect to your server.
Once connected, you will be asked for your login details. Enter these and proceed.
Once you are connected and logged in, use the following command to make the wordpress folder writable (if your blog will be at www.domain.tld):
chmod 777 /var/www/web1/web/
If your blog will be in its own directory (i.e. www.domain.tld/wordpress) you will need to chmod that folder. So if you're using a folder called wordpress, you need to type:
chmod 777 /var/www/web1/web/wordpress/
After the installation is done you can chmod the folder back to its original setting, usually 775 using this command:
chmod 775 /var/www/web1/web/
3.2 Using the Wordpress installer
Now point your browser to http://www.domain.tld/wp-admin/install.php or if you uploaded the files to a seperate folder (for example wordpress) point the browser to: http://www.domain.tld/wordpress/wp-admin/install.php
You will see a welcome message like this:
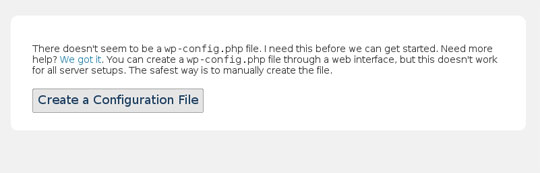
Click the Create a Configuration File button.
You should now see a page explaining what we're gonna do next. Click Let's go! If you see an error message about the directory not being writable, something went wrong while chmodding. Go back to step 3.1 and chmod the directory that contains the wordpress files and folders.
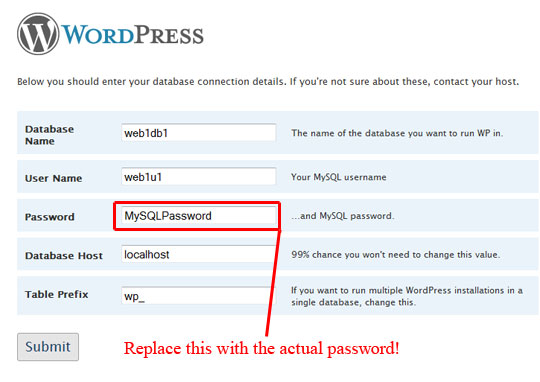
Now we will enter the MySQL details. Fill the form with the data you wrote down. Make sure to insert your MySQL password, not the one I entered in the following example:
Once you've clicked Submit, the script will proceed and you can enter the name of your blog and your e-mail address. Make sure it is your actual e-mail address, because an e-mail will be sent to that address including your username and password for your new Wordpress blog!
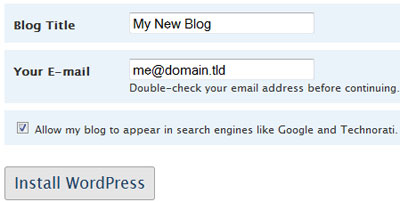
Checking Allow my blog to appear in search engines like Google and Technorati will allow your new blog to be indexed by search engines which will help bring new visitors to your blog. Done? Click Install WordPress.
You should now see a success message. It lists the username and password for your new Wordpress blog. Write these down! You will also receive an e-mail with the username and password.
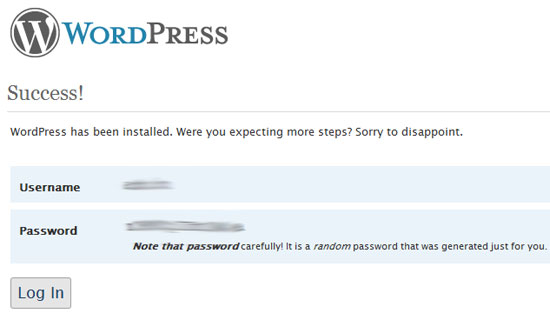
Now all you need to do is click Log In and log in with the details you just wrote down. The next thing you should see is the Wordpress admin control panel Dashboard:
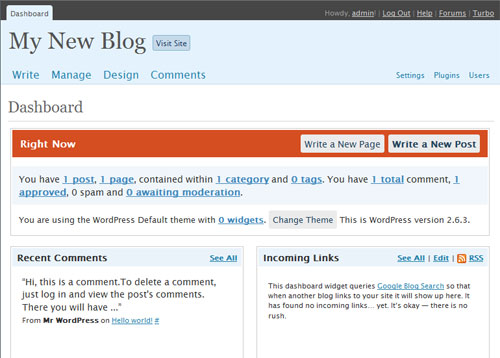
Congratulations - you have just successfully installed a Wordpress blog on your server. Enjoy!
4. First steps
Wait, what do you mean first steps?
Don't worry, all I'm gonna say here is that you should probably change your automatically generated Wordpress password (and write that one down too). Also, make a couple posts!
And lastly, if you liked this and/or any other tutorials on HowToForge.com please consider supporting this great free resource by becoming a subscriber.

