Installing Joomla 1.5.6 On A Lighttpd Web Server (Debian Etch) - Page 2
On this page
Now we enable Joomla's FTP layer and fill in our FTP user (web1_admin) and its password. Leave the FTP Root Path field empty and click on the Autofind FTP Path button:
The installer will then fill in that field for you:
Click on Verify FTP Settings to make sure that the settings are correct; click on Next afterwards:
Fill in a name for your site and the email address of the admin user plus a password for that user. The admin user will later be able to log in to Joomla's backend.
Scroll down and click on Install Sample Data to install a default Joomla site with which you can start developing your own Joomla site:
Click on Next after the sample data has been successfuly installed; you should see the final page of the installation wizard. It tells us to delete the installation directory...
... which we do as follows:
cd /var/www/web1/web
rm -fr installation/
In addition to that we change the ownership of the Joomla configuration file configuration.php to web1_admin and web1 and make the cache directory world-writable:
chown web1_admin:web1 configuration.php
chmod 777 cache
Now you can log in to the administration interface (http://www.example.com/administrator/) with the user name admin and its password:
Go to Global Configuration and fill in your FTP login (remember, configuration.php is now owned by web1_admin, not www-data)...
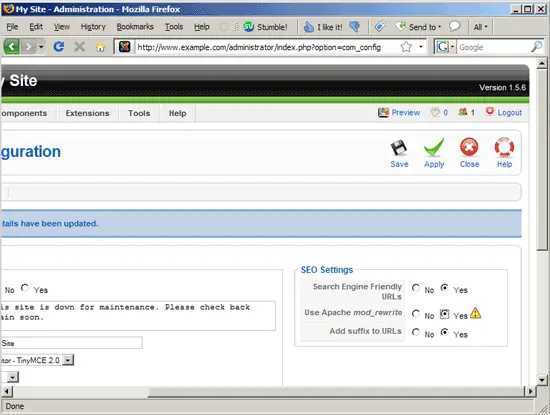
... then scroll to the right where it says SEO Settings and set all three settings (even the one for Apache mod_rewrite!) to yes. Click on Save or Apply afterwards:
Joomla should then display the message that the settings have been updated:
You can now go to the main site (http://www.example.com) and browse it. The links should have search-engine friendly URLs. Click on some internal links - if all goes well, the pages should display without errors.
6 Links
- Joomla: http://www.joomla.org
- lighttpd: http://www.lighttpd.net
- Debian: http://www.debian.org


