How to setup Elastic Container Service (ECS) on AWS
Elastic Container Service is a fully managed container orchestration service provided by AWS. It is a choice to run containers on AWS. It supports Fargate to provide serverless compute for containers. Fargate removes the need to provision and manage servers. ECS helps to focus on building and managing applications instead of infrastructure. It is a highly scalable, fast container management service that makes it easy to run, stop, and manage containers on a cluster.
ECS comes with different pricing models. To know about its pricing visit the AWS official page here.
Basic terminologies in ECS.
- ECS Cluster: It is a logical grouping of tasks or services.
- The Task Definition: It describes one or more containers (up to a maximum of ten) that form your application.
- The Task: It is a runnable unit of a task definition.
- Service: It is used to run and maintain a specified number of instances of a task definition.
In this article, we will create an ECS cluster and deploy a sample Nginx application onto it. We will create a test cluster to understand the cluster setup. You are advised to set up a production cluster with a customized configuration as per the requirement.
Pre-requisites
- AWS Account(Create if you don’t have one).
- Basic understanding of IAM Role(Click here to learn about IAM).
- Basic understanding of VPC(Click here to learn about VPC)
What will we do?
- Login to AWS(Create if you don’t have one).
- Create a Cluster
- Create a Task Execution IAM Role
- Create a Task Definition
- Create a Service
- Access the Task we created
- Delete the Cluster
Login to AWS
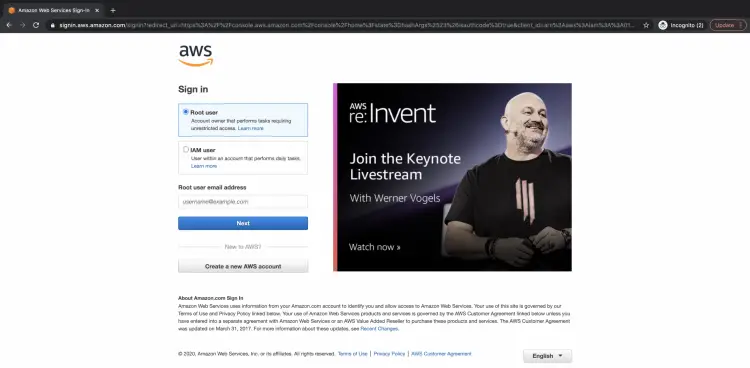
Click here to go to the AWS Login page and enter your credentials.
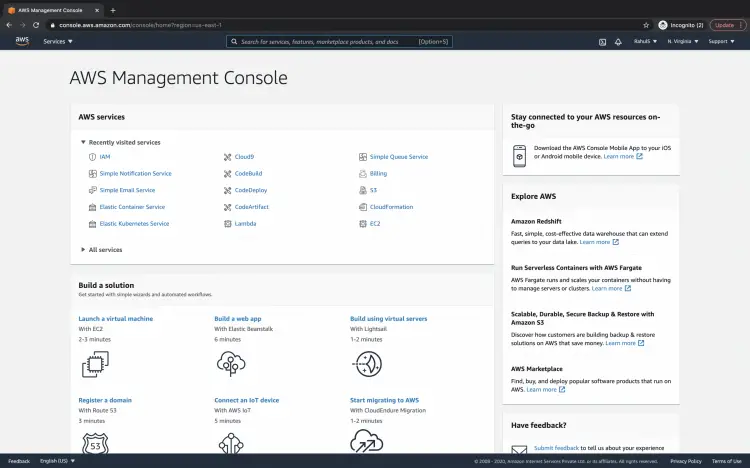
Once you login into the account, you will see the main AWS Management Console as follows.
Create a Cluster
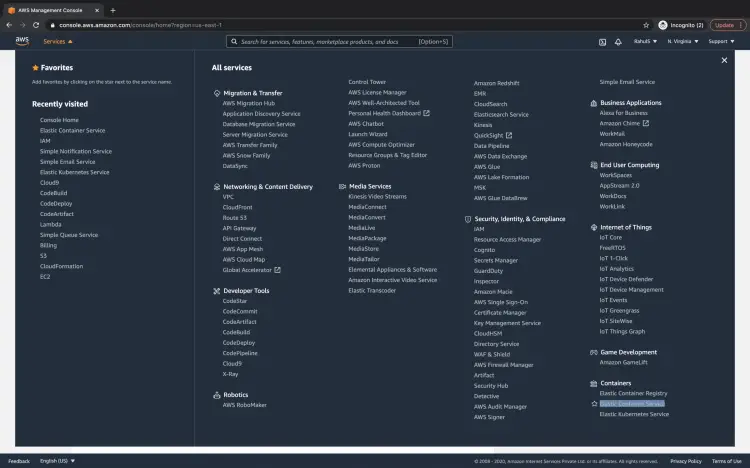
To go to ECS, click on services in the top left of the screen and under Containers, click on Elastic Container Service.
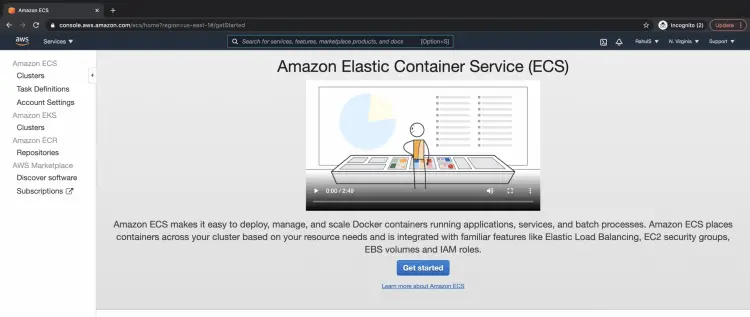
You will see the main dashboard of ECS as below. Click on "Clusters" in the left panel.
Since I have not created any cluster we see nothing in the list. Create your first cluster click on the "Create Cluster" button.
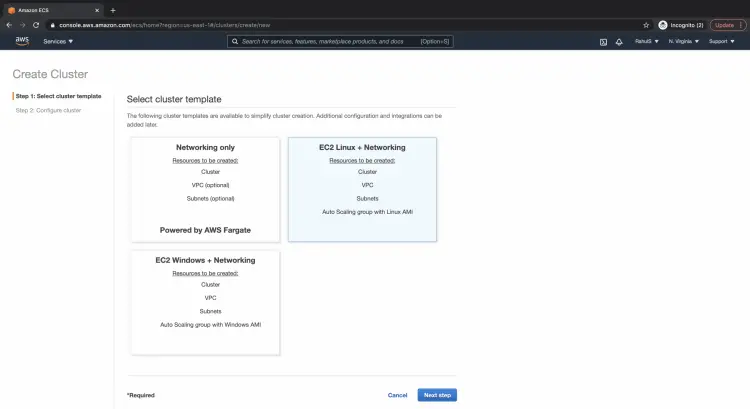
Here, select the "EC2 Linux + Networking" option and click on the "Next step" button.
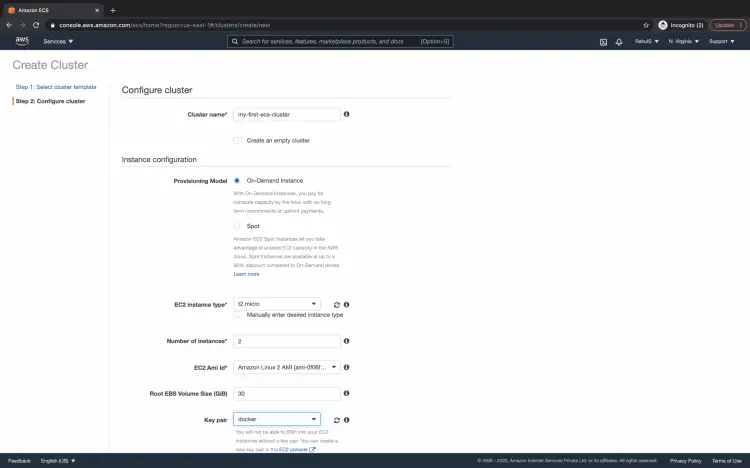
Give a name to the cluster, select EC2 instance type. EC2 instances in the cluster will get created of the type we select. Select the provisioning model of EC2 instances to be created. Specify other configurations as per your requirement.
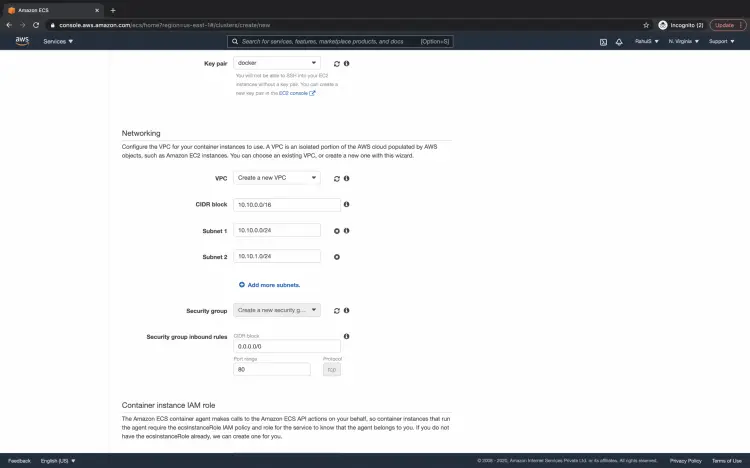
You can either create a new PC or choose an existing one. If you are not aware of VPC and networking and would like to know more about it I would recommend you go through the article here.
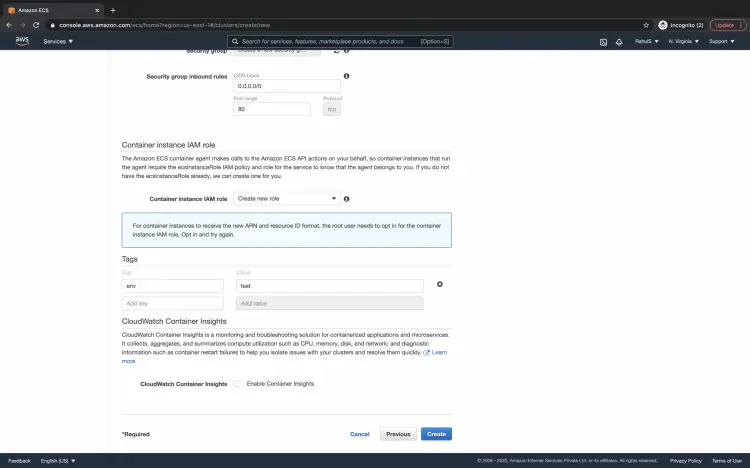
You can specify tags if you want or you can keep it empty as it is an optional configuration. Click on the "Create" button which will create a cluster for you.
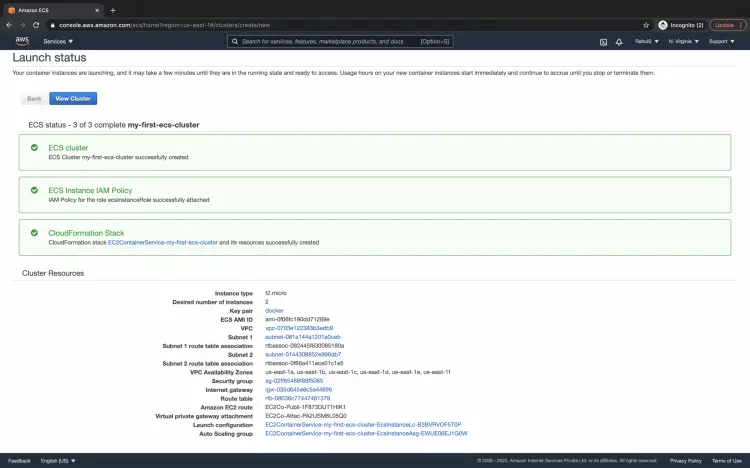
This will take a few minutes and once the cluster has been created you can see the status as "ECS Status -3 of 3.. "on the same page. Click on the "View Cluster" button to go to the cluster.
Create a Task Execution IAM Role
Before you proceed with the further configuration you will need a role that will be used for task execution. So go to IAM and create a new role with the following policy. Click here if you are not aware of IAM and would like to learn more about it.
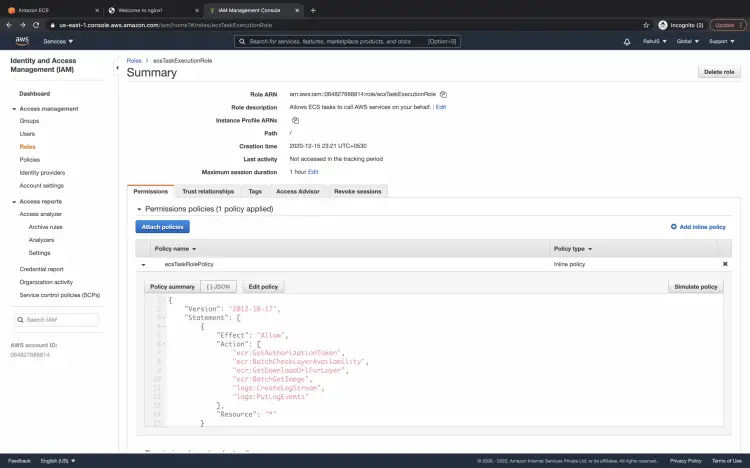
Create a Role: ecsTaskExecutionRole with the following policy.
{
    "Version": "2012-10-17",
    "Statement": [
        {
            "Effect": "Allow",
            "Action": [
                "ecr:GetAuthorizationToken",
                "ecr:BatchCheckLayerAvailability",
                "ecr:GetDownloadUrlForLayer",
                "ecr:BatchGetImage",
                "logs:CreateLogStream",
                "logs:PutLogEvents"
            ],
            "Resource": "*"
        }
    ]
}
Once you create a Role you will see it as follows in the IAM console.
Create a Task Definition
If you are ready with the IAM Role, you can now proceed with creating a task definition.
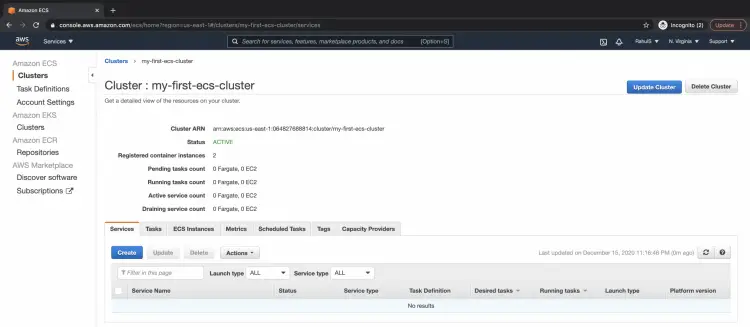
Till this point, you just have an empty cluster that does not have your containerized application running into it.
The next step is to create a task definition. To create your first task definition click on "Task Definitions" in the left panel under "Clusters".
Here click on the "Create new Task Definitions" button.
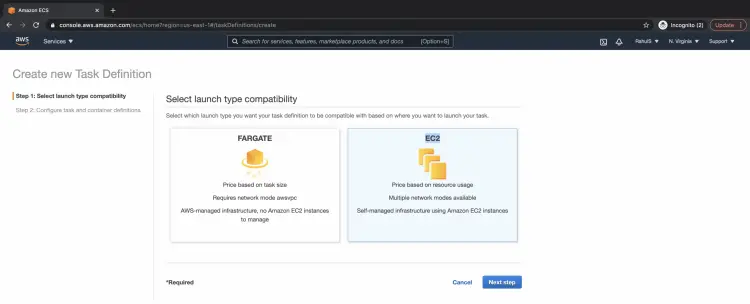
On this page select, the launch type as "EC2 And then click on the "Next" step button".
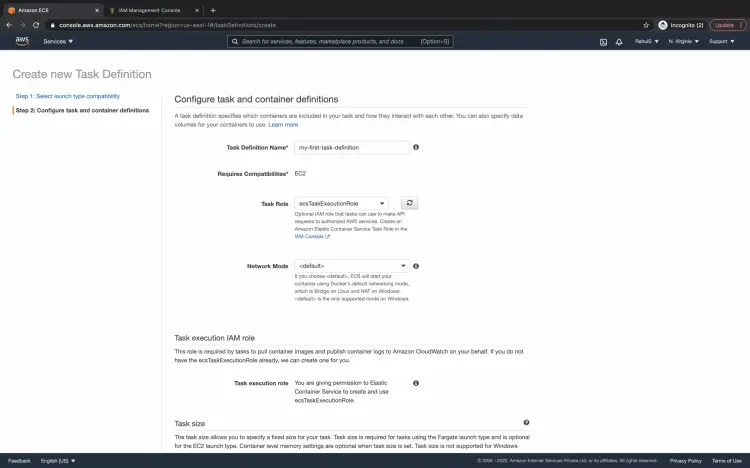
Remember we created an IAM role in the previous step? Now, we need to specify the Role we created under the Task role. Give a name to the task definition.
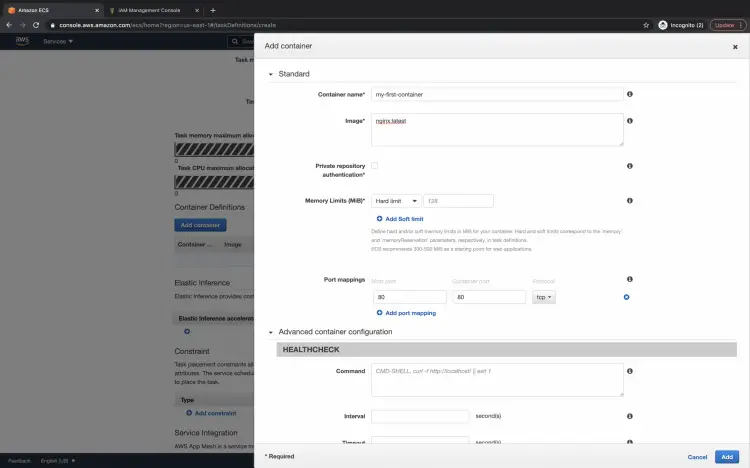
When you scroll down a bit you will see the "Add container" button, click on it and you will see a new screen popping up as follows.
On this screen given a name to the container, specify the image to be used for the container. You can also specify memory limits, port mappings, health checks. If you're done with the configuration click on the "Add" button.
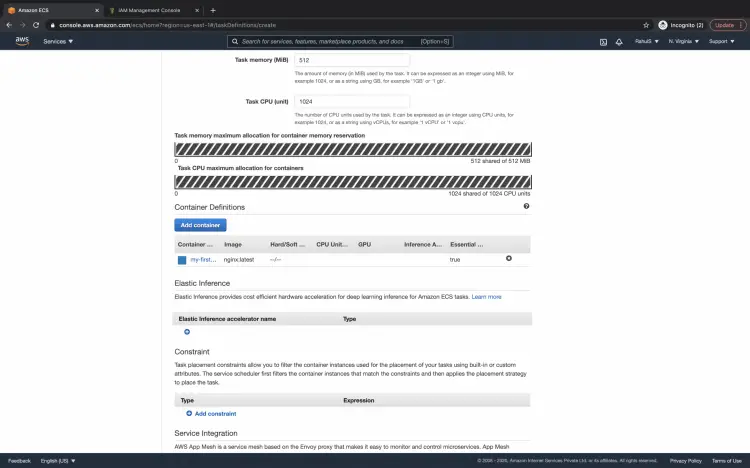
Specify "Task memory" and "Task CPU" that will be used by the task.
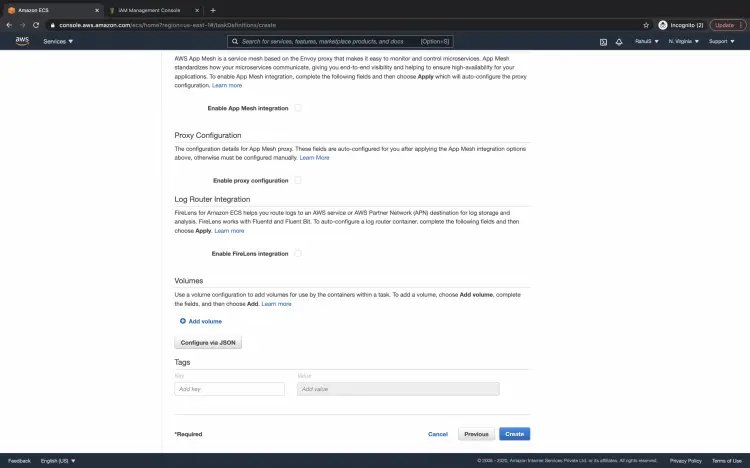
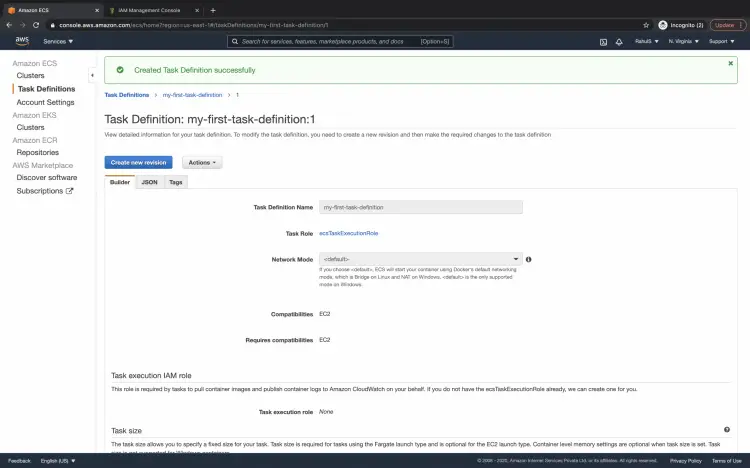
Now you are ready with the basic and mandatory configuration for the task, click on the "Create" button which will create a task definition.
You will see the message as "Created Task Definition successfully".
Create a Service
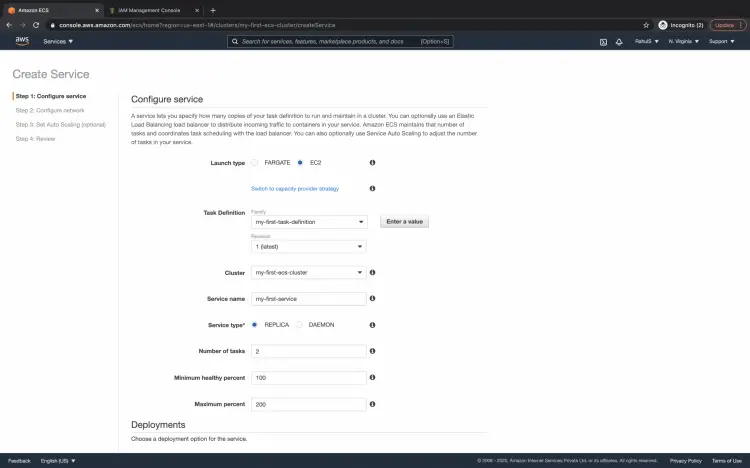
Till this point, we have a cluster and task definition. The next step is to create a service. Go back to the cluster we created and under the Service tab click on the Create button to create a Service.
Choose the launch type as EC2, select the task definition we created, you can choose the Cluster name from the drop-down option, Even name to the service we are creating, specify the number of tasks as 2 which will create 2 copies of your application.
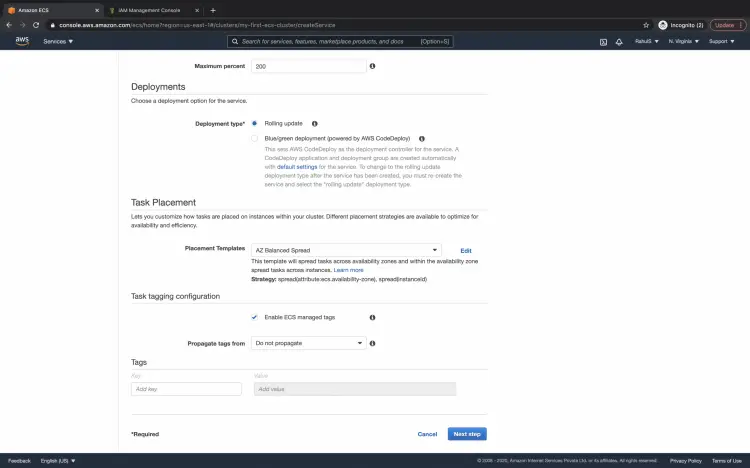
Keep the rest of the configuration as is under deployments and task placement. Tags are optional so it is not mandatory to specify tags. Click on the "Next step" button to proceed further.
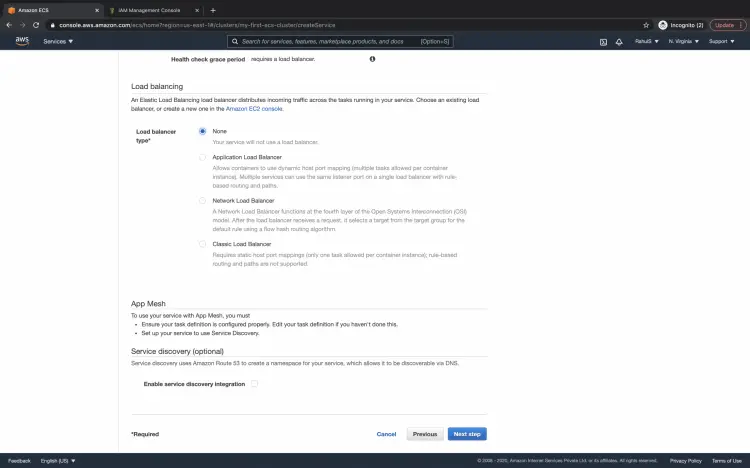
If you have any load balancer then you can select it to route the external traffic to your application through it. Click on the "Next step" button.
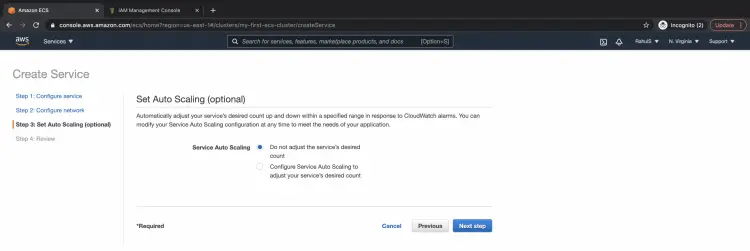
If you do not want your service to be scaled then proceed with the default configuration as "Do not adjust the service's desired count".
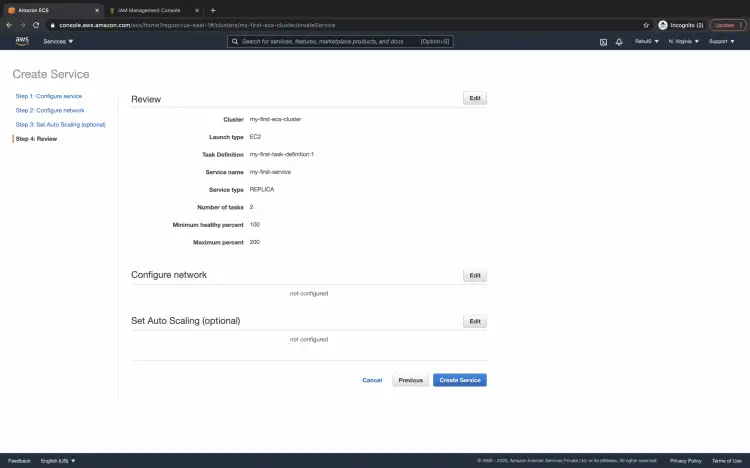
Review the configuration that we have just made for the service to be created click on the "Create Service" button.
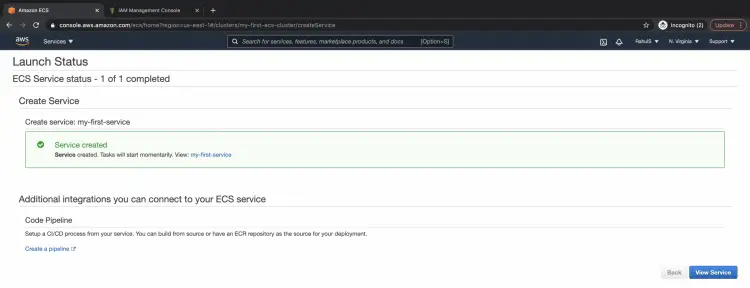
You see the status as "ECS Service status- 1 of 1 completed" if the service has been created successfully.
Access the Task we created
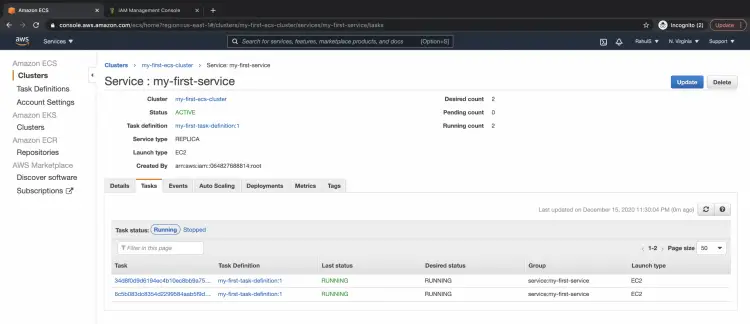
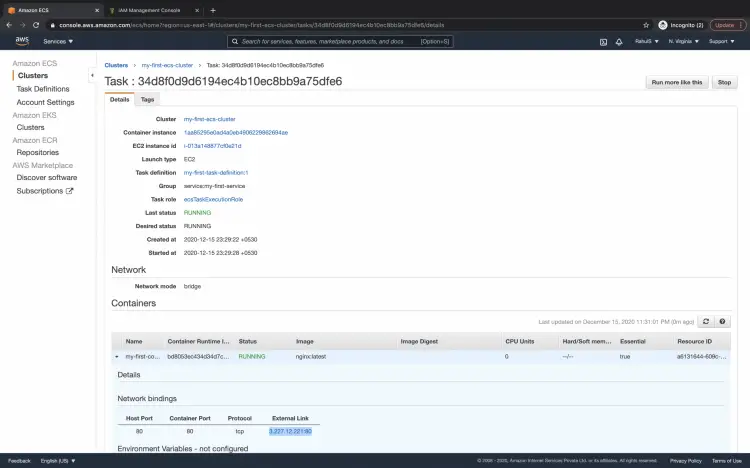
Go back to the cluster and under the "Tasks" tab now you can see 2 tasks are running. These tasks contain your application.
Click on one of the tasks to know more about it.
Since we have not specified any load balancer we cannot access the application from the external world on a specific link. Because of this, we would need to access our tasks on their individual external links.
Under Network bindings, you can find the external link of the task. This particular task will only be accessible from the link available here. Copy the link to test if the application, Nginx, that we had specified in the task definition is up and running.
Go to the browser and hit the link we copied in the previous step. You can see the default page of Nginx. This means our application, Nginx, has been successfully deployed.
Delete the Cluster
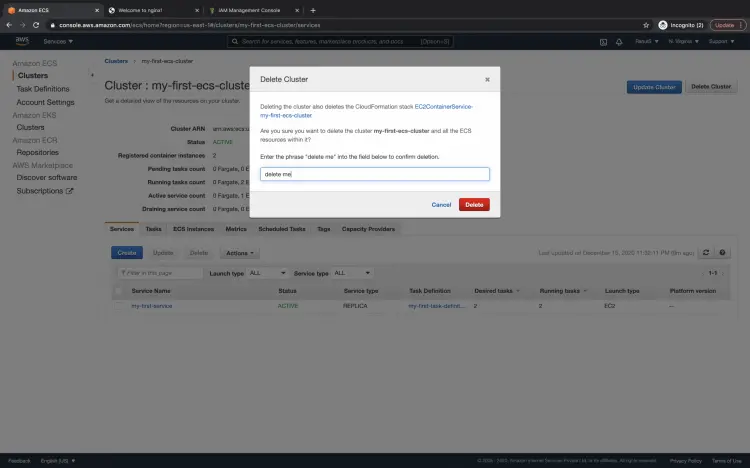
If you no longer need your cluster you can delete it with a single click. Go back to the cluster and click on the Delete Cluster" button.
Confirm the deletion action by entering "delete me" in the text field and click on the "Delete" button. This will permanently delete the cluster and once deleted you can not recover it. So be careful while deleting the cluster if you are working on real-time applications.
Conclusion
In this article, we saw the steps to create a cluster, task definition and a service. The steps we saw can be used to create a test cluster. If you want to create a Cluster with the real-time application, you need to be more specific about the configurations we saw.

