How to protect documents with a digital signature in ONLYOFFICE Desktop Editors v.6.2
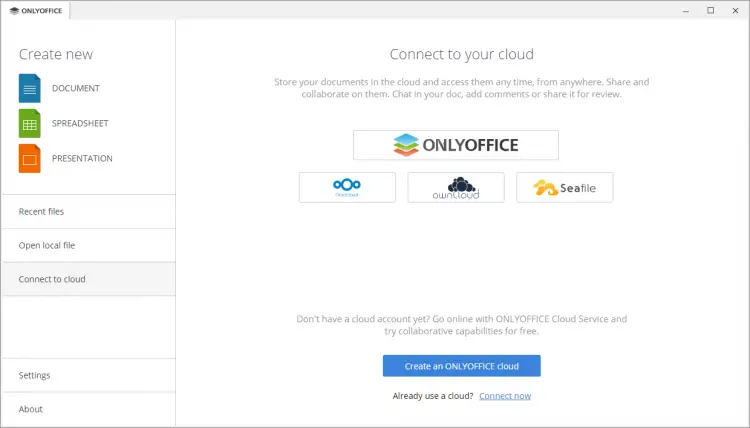
ONLYOFFICE Desktop Editors is a free open-source office suite that contains viewers and editors for text documents, spreadsheets, and presentations. Along with offline work, it’s possible to connect the app to the cloud (ONLYOFFICE, Nextcloud, ownCloud, Seafile) and collaborate on docs online. The code repository is available on GitHub under AGPL v.3.0 license.
The recently released version 6.2 of ONLYOFFICE Desktop Editors brought lots of updates:
- Digital signature to verify that document content originates from you and there are no alterations.
- Ability to connect the app to Seafile for online document collaboration.
- API documentation that allows developers to connect the app to 3rd party DMS.
- Data validation to control the parameters of the information entered in cells by other users.
- Table of Figures in docs to easily organize illustrations and navigate between them.
- Slicers for Pivot Tables to indicate the filtering state to understand what data is currently displayed.
- Ability to set a custom number format for cells.
- New functions: GROWTH, TREND, LOGEST, UNIQUE, MUNIT, and RANDARRAY.
- New proofing options in presentations to choose whether you want to use autocorrect as you type.
In this tutorial, we’ll learn how to use a digital signature in ONLYOFFICE Desktop Editors to protect your documents.
If you’re new to the ONLYOFFICE desktop app, learn how to install it on your Ubuntu machine from this HowtoForge tutorial (step 2). In case you have Manjaro, refer to these instructions.
Note: To be able to digitally sign documents, you need a signing certificate issued by Certificate Authority. Certificates provide keys used to validate the authenticity of digital signatures.
Part 1: Adding an invisible digital signature
- Create a new file or open the existing one with ONLYOFFICE Desktop Editors.
- Switch to the Protection tab.
- Click the arrow next to the Signature button.
- Select the Add digital signature option.
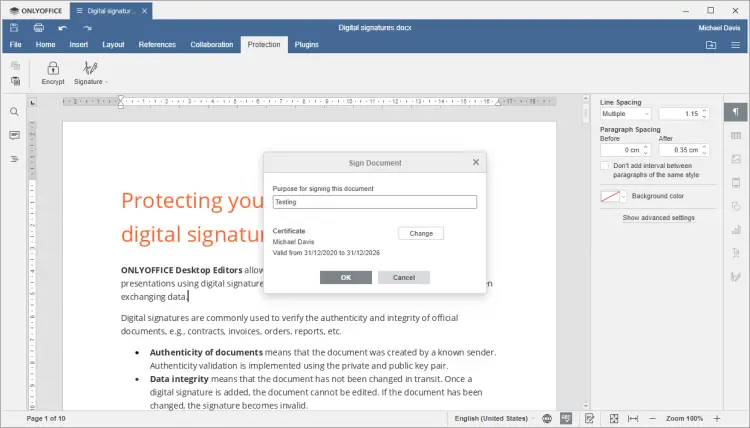
- In the opened window, fill in the purpose for signing the document.
- Select a digital certificate (.crt and .key files) and click OK.
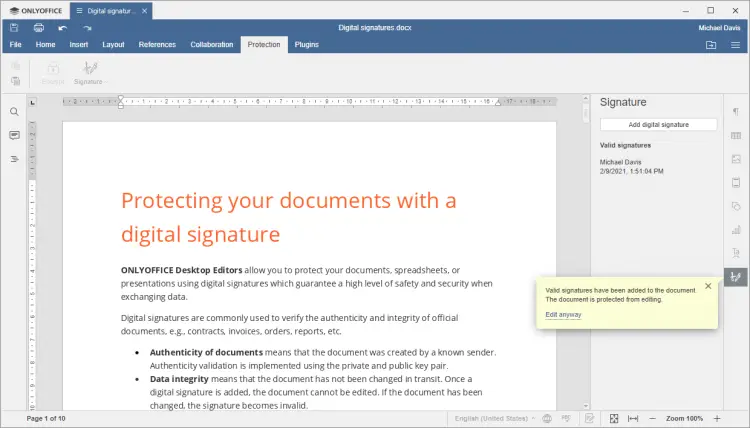
Once done, your document is signed and protected from editing.
This signature type is not visible in the text, but you can find its details and settings on the right-side toolbar, including the certificate owner’s name, date and time of adding the signature, as well as options to remove it or apply another one.
If someone decides to make alterations in the signed document, a warning message appears saying that the file is protected. By clicking Edit anyway, they make the signature invalid, so you’ll know the content has been modified intentionally.
Part 2: Adding a signature line
A signature line is visible in the document text and allows requesting signatures from other users.
- Create a new file or open the existing one with ONLYOFFICE Desktop Editors.
- Put the mouse cursor where you want a signature to appear.
- Switch to the Protection tab.
- Click the arrow next to the Signature button.
- Select the Add signature line option.
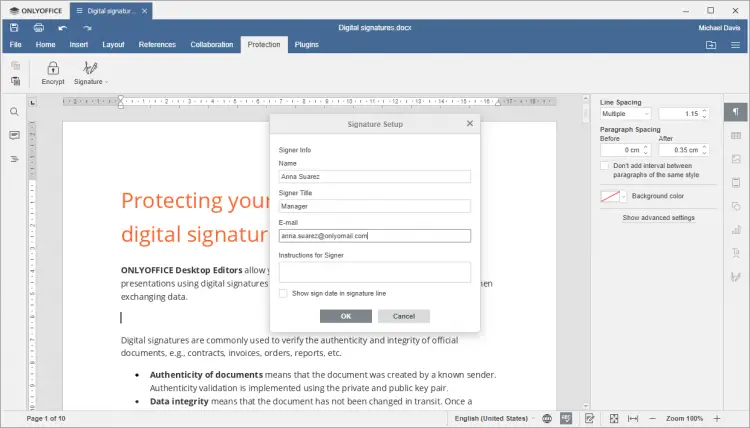
- In the opened window, fill in the required fields: Name, Signer Title, E-mail, and Instructions for Signer.
- If necessary, check the Show sign date in signature line box.
- Click OK and save the document.
Once done, the signature line appears in the document. You can sign the doc yourself as well as request other users to do so.
It’s also possible to add multiple signature lines according to the number of signers. If you want both to request signatures and sign the document yourself, first you need to add all signature lines and then sign the document.
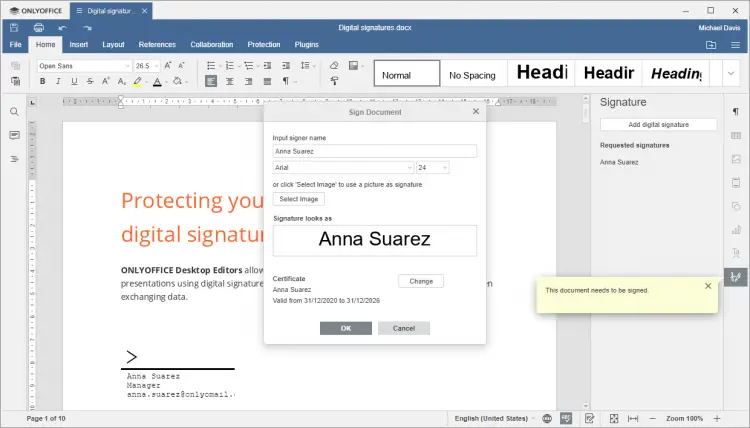
If your team members receive a document which requires their signature, they’ll see a pop-up window on the right sidebar informing them that the document needs to be signed.
To sign the document via this signature type, double-click the signature line and choose Sign in the opened menu.
You can enter your name in the Input signer name field and format the text choosing the necessary font type and size, or click the Select image button and upload an image you want to use as a signature.
Then, preview your signature, select a digital certificate (.crt and .key files), and click OK. Once ready, the document is protected from editing and everyone can see added digital signatures.
Part 3: Removing digital signatures
To edit a protected document, click the Edit anyway option in the pop-up window on the right-side panel. In this case, all the added digital signatures will be removed.
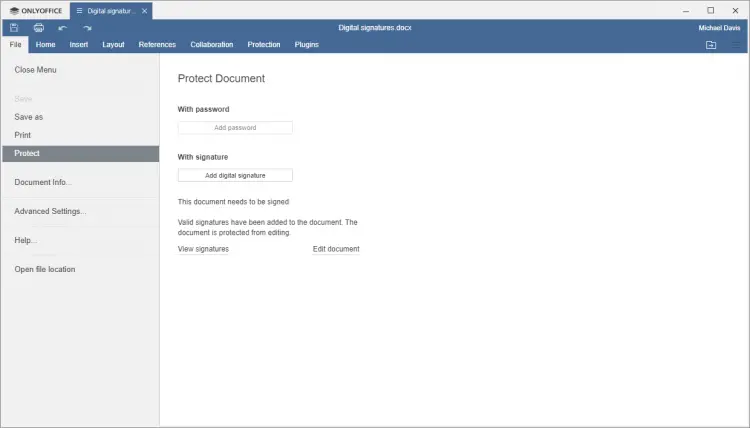
Alternatively, you can remove all signatures via the File tab. Go to the Protect section on the left sidebar and choose the Edit document option.
To remove one of the several signatures contained in the doc:
- Click the Signature Settings icon on the right sidebar.
- Click the arrow next to the certain signature.
- Choose the Remove Signature option from the menu.
That’s all! Now you can ensure a higher level of security for your documents using digital signatures.

