How to Install Wine on Debian 11
Have you ever wanted to run Windows programs on your Linux system, without having to dual boot? If so, then you'll be happy to know that it's possible, thanks to Wine. In this tutorial, we'll show you how to install and use Wine on Debian 11.
What is Wine?
Wine is a compatibility layer for running Windows applications on Linux. In other words, it's software that allows you to run Windows programs on Linux. Wine is an open-source project, which means that it's free to use.
Why Use Wine?
There are several reasons why you might want to use Wine.
Maybe you're a software developer who needs to test your app on Windows. Or maybe you just prefer using Linux, but there's that one Windows program that you can't live without. Whatever the reason, Wine makes it possible to run Windows programs on Linux.
How Does Wine Work?
Wine consists of two parts:
- A program that allows Windows applications to run on Linux, called "Wine"
- A library that implements the Windows API, called "Winelib"
When you install Wine, what you're really doing is installing the Wine program and the Winelib library. The Wine program provides a translation layer between Windows applications and Linux. In other words, it translates the Windows API calls into Linux system calls.
The Winelib library contains the implementation of the Windows API. So when a Windows application makes a Windows API call, the Wine program will call the corresponding function in the Winelib library.
This translation layer is what allows Windows applications to run on Linux.
Prerequisites
Before you begin this tutorial, you should have a non-root user account with sudo privileges on your Debian 11 machine.
Installing Wine Using APT
Before you can use Wine, you need to install it. The easiest way to install Wine is through the Debian package manager, apt. However, this method might not always install the latest version of Wine. If you want to install the latest version of Wine, then you can use the WineHQ repository, which will be covered later in this tutorial.
Enabling 32-bit Architecture
Before you can install Wine, we need to enable 32-bit architecture on your system. Many Wine packages are only available for 32-bit, so we need to enable it.
First, check to see if your system is already running in 32-bit mode by running the following command.
lscpu
If the output of the above command includes "x86-64" as shown then your system is already running in 32-bit mode and you can skip this step.
If not, then you'll need to enable 32-bit architecture. You can do this by running the following command. i386 refers to the 32-bit architecture.
sudo dpkg --add-architecture i386
Finally, check that the i386 architecture has been added by running the following command. You should see "i386" listed as an output.
dpkg --print-foreign-architectures
Installing Wine
Now that you have 32-bit architecture enabled, you can install Wine.
First, update your apt repository cache by running the following command
sudo apt update -y
Run the below command to check that apt can see the Wine packages. You should see something similar to the following output. The version number might be different depending on which version of Debian you're using.
apt-cache policy wine
Finally, install Wine by running the following command. This will install the Wine program and all of the necessary libraries.
sudo apt install -y wine64
Check the version of Wine that was installed. This command prints out the version number and then exits.
wine --version
You should see an output similar to the following.
Installing Wine Using the Oficial WineHQ Reþository
If you want to install the latest version of Wine, then you can use the official WineHQ repository. However, this method requires a bit more work than using apt.
Adding the WineHQ Repository
First, you need to add the GPG key for the WineHQ repository.
Run the below command to install the required dependencies.
sudo apt -y install gnupg2 software-properties-common
Run the following command to download the key. A key is a piece of information that allows you to access something. In this case, the key allows you to access the WineHQ repository.
wget -nc https://dl.winehq.org/wine-builds/winehq.key
Now that you have the key, you can add it to your system. By adding the key, you're telling apt that you trust the packages coming from the WineHQ repository.
sudo apt-key add winehq.key
Run the following command to add the WineHQ repository. This command adds the repository to the source list file located at /etc/apt/sources.list
sudo apt-add-repository https://dl.winehq.org/wine-builds/debian/
If you want to check the contents of this file, you can use the cat command.
cat /etc/apt/sources.list
You should see an output similar to the following.
Installing Wine
Now that the WineHQ repository has been added, you can install Wine.
First, update your apt repository cache by running the following command. This command ensures that apt is aware of the new packages in the WineHQ repository.
sudo apt update -y
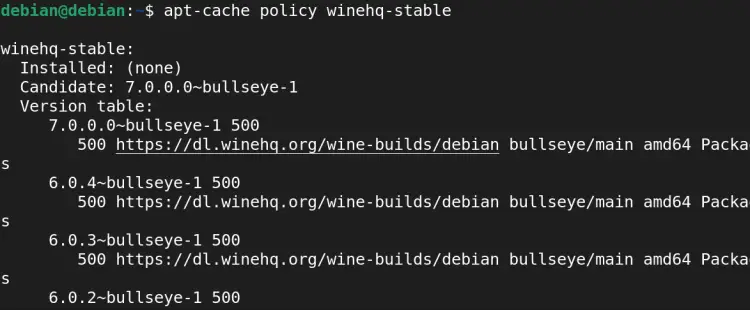
Next, check the apt cache to see which versions of Wine are available.
apt-cache policy winehq-stable
You should see an output similar to the following.
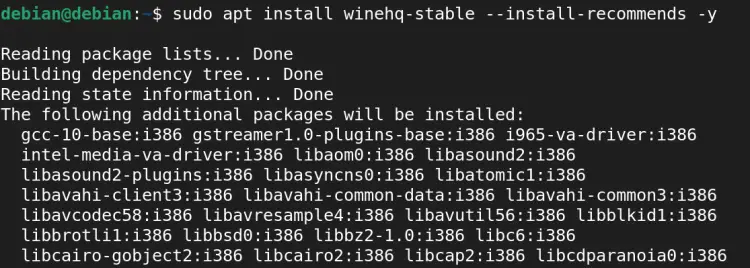
Finally, install Wine by running the following command. This command installs the stable branch of Wine, which is the recommended version to use.
sudo apt install winehq-stable --install-recommends -y
You can install the staging branch of Wine if you want to try the latest features. However, the staging branch is less stable than the stable branch and may cause problems. Run the following command to install the staging branch.
sudo apt install --install-recommends winehq-staging -y
You can also install the developer version, which is the bleeding edge development version. This version is updated very frequently and may contain bugs. This version is for developers and people who want to help test the latest features.
sudo apt install --install-recommends winehq-devel -y
Now that Wine has been installed, you can check the version to make sure that everything was installed correctly.
wine --version
As you can see below, the version of Wine that was installed is 7.0, which is very recent.
Configuring Wine with Winecfg
What is Winecfg? Winecfg is a configuration tool for Wine that allows you to change settings related to how Windows applications will run on your system. Many Windows applications work out of the box with Wine. However, some applications may require you to change settings in order for them to work properly. Winecfg helps you to make these changes.
Winecfg is a graphical tool(GUI), which means that you can use your mouse to click on options and change settings.
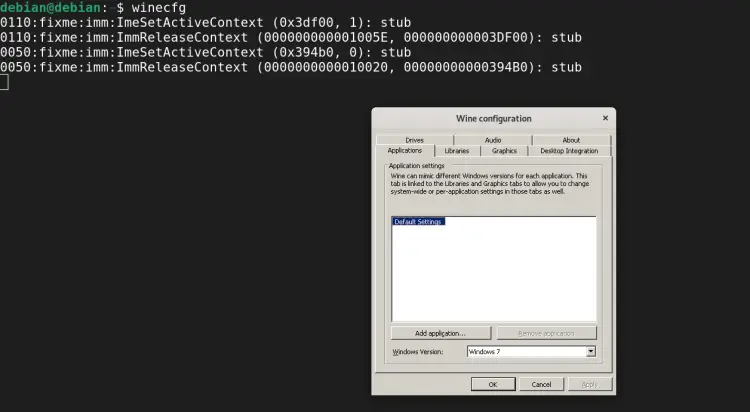
To launch the Winecfg GUI, open the terminal and type in winecfg.
winecfg
If you get an error that says "CreateWindow Make sure that your X server is running and that $DISPLAY is set correctly." as shown below. This error indicates that the $DISPLAY variable is not set.
To fix this error, run the following command to set the display variable. This command assumes that your X server is on screen 0(:0). Replace :0 with :1, :2, etc if your X server is on a different screen.
export DISPLAY=:0
After you have set the display variable, try to launch Winecfg again. You should now be able to see the Winecfg window as shown below.
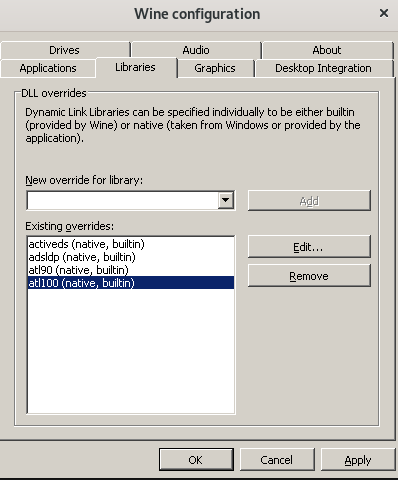
The Libraries tab is the most important tab in Winecfg. The libraries tab allows you to select which Windows DLLs(dynamic link libraries) are used by a particular program. Some programs may not work properly if the wrong DLL is selected. You can use the Libraries tab to override which DLLs are used by a program. For example, if a program is trying to use the wrong DLL for Microsoft DirectX, you can override it using the Libraries tab.
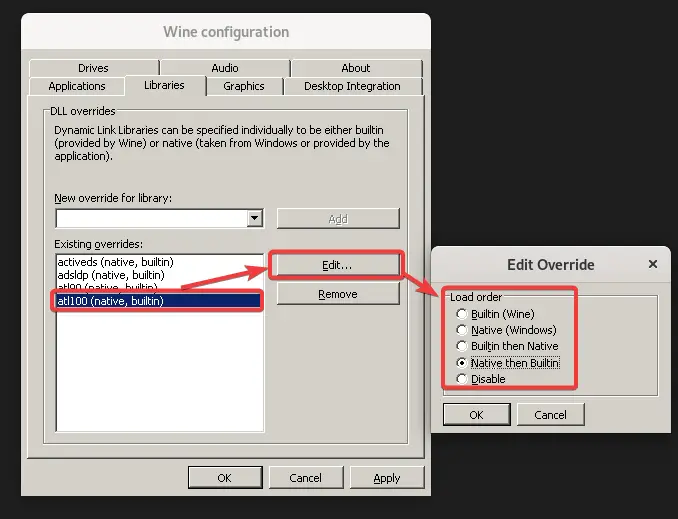
To override a DLL, select the desired DLL from the New override for library dropdown menu, click on the "Add" button and click Apply. This will add the selected DLL to the Exisiting overrides list as shown below. Now, when the program tries to load the wrong DLL, it will use the DLL that you have selected instead.
You can see the native and builtin label next to each DLL in the list.
The native label means that the DLL is provided by your system and is not part of Wine. The builtin label means that the DLL is built into Wine. As a general rule of thumb, you should try to use the native version of a DLL if it is available. The builtin version of a DLL should only be used if the program doesn't work with the native version.
You can edit an Existing Override by selecting it from the list and clicking on the "Edit" button. This will open a new window where you can change the load order of the DLLs as shown below.
- The "Native(Windows)" radio button should be selected by default. This setting will cause Wine to use the native version of the DLL if it is available.
- The "Builtin(Wine)" radio button should only be used if the program doesn't work with the native version of the DLL.
- The "Disabled" radio button can be used to disable an override. This is useful if you want to temporarily disable an override to see if it is causing any problems.
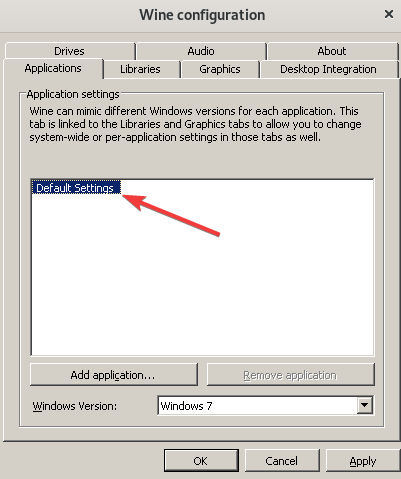
The second important tab in Winecfg is the Applications tab. The Applications tab allows you to change settings that are specific to individual programs. By default, the default settings are used for all programs. This means the general settings will be used for all programs.
You can use the Applications tab to change the settings for a specific program without changing the settings for all programs. You change which version of Windows the program uses, whether or not to use a virtual desktop, and other settings.
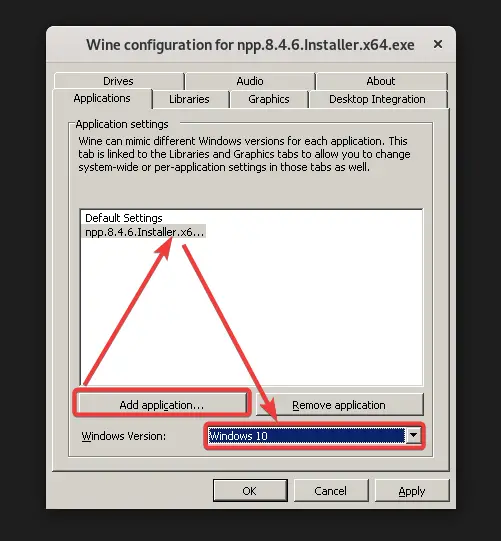
This is because of compatibility problems with certain programs. For example, if a program doesn't work properly in Windows 10, you can try changing the setting to Windows 7. As a rule of thumb, you should try to use the latest version of Windows that the program is designed for. Windows 7 is too old and many programs will not work properly with it. The Windows 11 preview is too new and many programs will not work properly with it either. So Windows 10 is usually the best choice.
To create a set of settings for a specific program, click "Add Application" and browse for the program's EXE file. Then select the desired version of Windows from the drop-down menu as shown below. This example selects Notepad ++ and Windows 10. From now on, the settings that you change will only apply to Notepad ++. When you open Notepad ++, Winecfg will use the Windows 10 environment.
The other tabs in Winecfg are self-explanatory and you can experiment with them to see what they do. It's impossible to cover all the settings in this article. You can refer to the official documentation for more information.
Using Wine to Install a Windows Application
Now that you have Wine installed and configured, you can use it to install Windows programs. In this tutorial, you will learn how to use Wine to install a Windows program.
For this tutorial, we will be using the Notepad ++ program. You can download the installer from the official website.
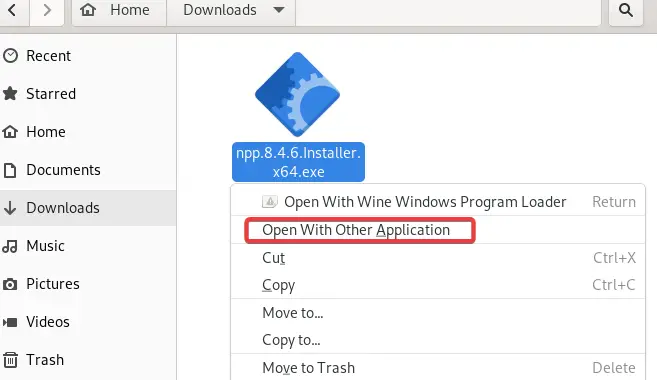
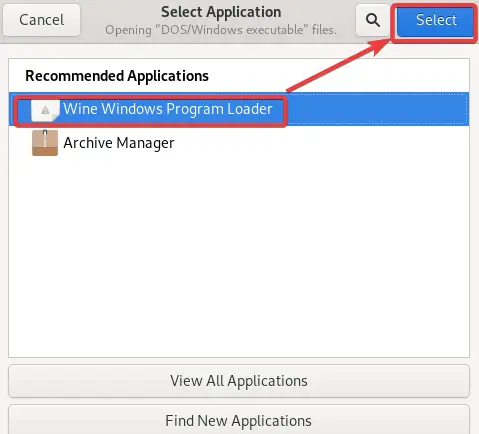
Once you have downloaded the installer, left-click on it and select "Open with Other Application."
In the window that appears, select "Wine Windows Program Loader" and click "Select."
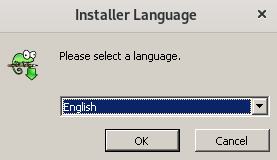
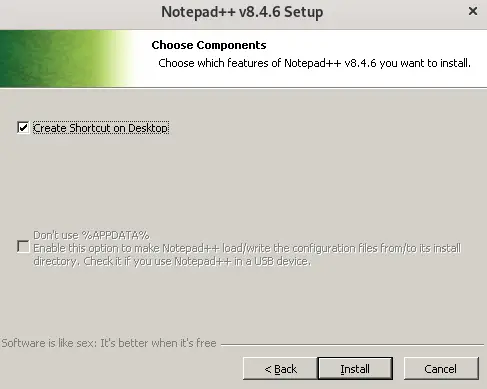
The installer should now launch in a Wine environment. Proceed through the installer like you would any other Windows program.
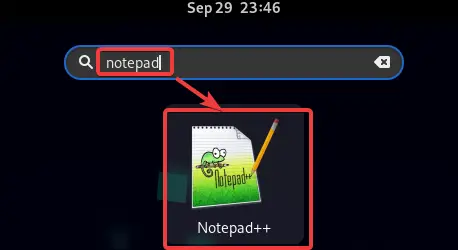
To launch the program, type notepad in the search bar and click on the "Notepad ++" icon that appears.
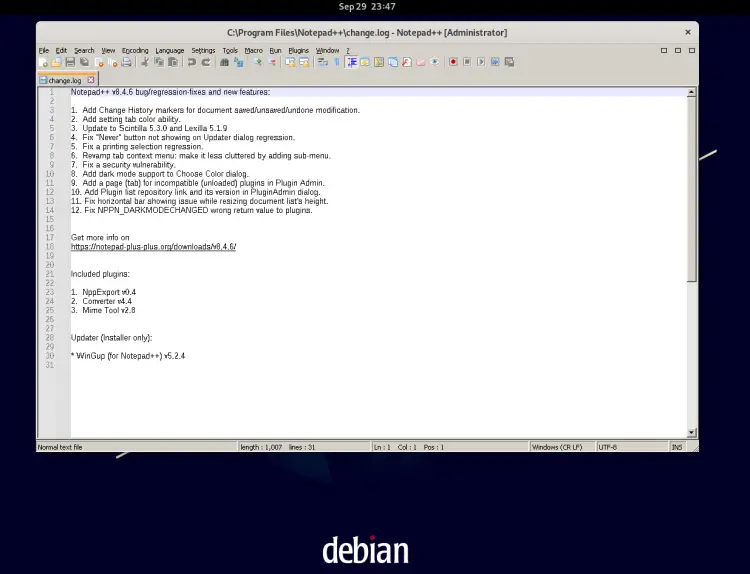
You should now see the Notepad ++ window. Congratulations, you have successfully installed a Windows program using Wine!
Updating Wine
Since Wine is constantly being developed, it's important to keep it up-to-date. New versions of Wine are released frequently and they usually bring bug fixes and new features.
To update Wine, run the below comamnd.
sudo apt-get upgrade winehq-stable
As mentioned earlier, there are also development versions of Wine which are released less frequently. These versions can be unstable and they may contain bugs. If you want to use the development version, you can install it by running the following command:
sudo apt-get upgrade winehq-devel
Conclusion
A dual-boot system is not always the best option. If you only need to use Windows programs occasionally, it's best to use Wine. In this tutorial, you learned how to install and configure Wine on Debian 11. You also learned how to use Wine to install a Windows program. If you have any questions, feel free to leave a comment below.


