How to Install Seafile Server with Nginx and Letsencrypt on FreeBSD 12.0
On this page
- Step 1 - Update and Upgrade Packages
- Step 2 - Install Nginx Webserver
- Step 3 - Install and Configure MySQL Server
- Step 4 - Install Seafile and Seahub Server
- Step 5 - Configure Seafile and Seahub Server
- Step 6 - Generate SSL Letsencrypt on FreeBSD
- Step 7 - Set up Nginx Virtual Host for Seafile
- Step 8 - Testing
- Reference
Seafile is an open-source file-hosting and cloud storage system with advanced functions like syncing from multiple platforms (cross-platform system), privacy protection with built-in file encryption, and support for Two-Factor Authentication (TFA), version control, file locking, online editing, and many more. Seafile is written in Python programming language and provides similar features like Dropbox, mega.co.nz, and others.
In this tutorial, we will show you step-by-step how to install and configure the Seafile server with Nginx web server, MySQL database, and SSL Letsencrypt. We will install the seafile server under the Nginx web server with HTTPS SSL Letsencrypt enabled, using the MySQL 5.7 on the FreeBSD 12.0 system.
For this guide, we will install the Seafile Server on the FreeBSD 12.0 system with 2GB of RAM and 2 CPUs.
What we will do:
- Update and Upgrade Packages
- Install Nginx webserver
- Install and Configure MySQL
- Install Seafile and Seahub Server
- Configure Seafile and Seahub Server
- Install Certbot and Generate SSL Letsencrypt
- Setup Nginx Virtual Host for Seafile Server
- Testing
Step 1 - Update and Upgrade Packages
First of all, we will update the FreeBSD packages repository and upgrade all packages installed to the latest version.
Update the FreeBSD repository and upgrade all packages using the pkg command below.
pkg update
pkg upgrade
Once all the installation is complete, go to the next step.
Step 2 - Install Nginx Webserver
After upgrading all packages to the latest version, we will install the Nginx web server.
Install Nginx to the FreeBSD system using the pkg command below.
pkg install nginx
Once the installation is complete, add nginx service to the system boot.
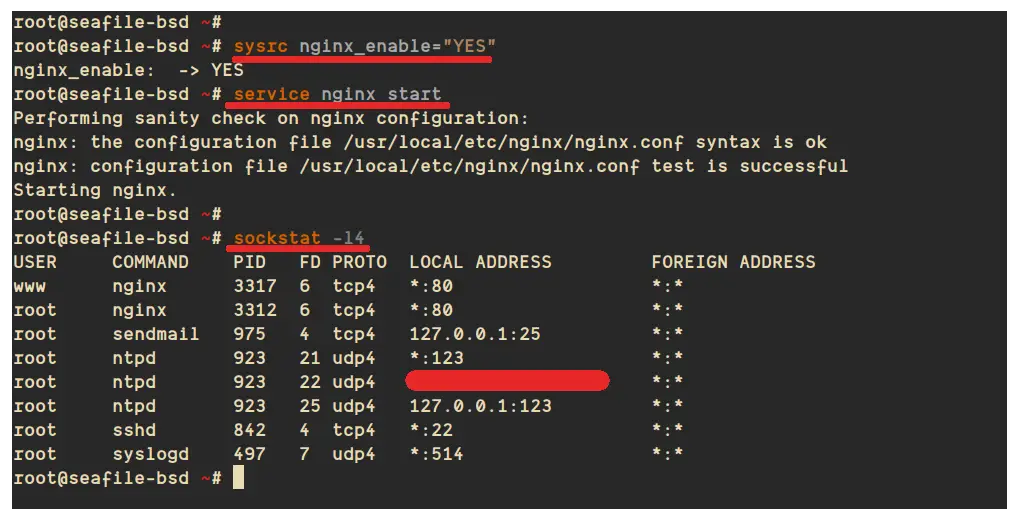
sysrc nginx_enable="YES"
Then start the nginx service.
service nginx start
As a result, the Nginx web server is up and running on the FreeBSD system. Check it using the following commands.
service nginx status
sockstat -l4
The Nginx service is running with default HTTP port 80.
Step 3 - Install and Configure MySQL Server
Now we will install the MySQL database to the FreeBSD system. We will install the MySQL 5.7 server, reset the default root password, and create a new database and user for the Seafile installation.
Install MySQL 5.7 using the pkg command below.
pkg install mysql57-server mysql57-client
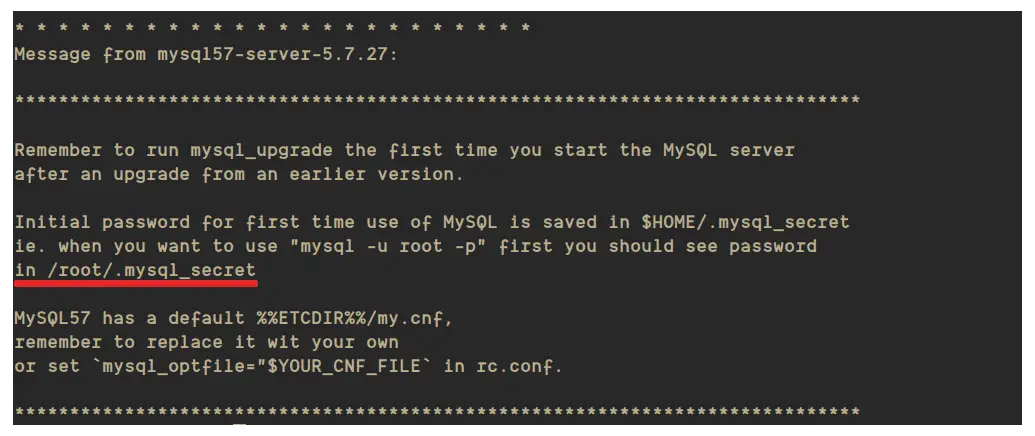
Once the installation is complete, you will get the default generated MySQL root password on the '~/.mysql-secret' file.
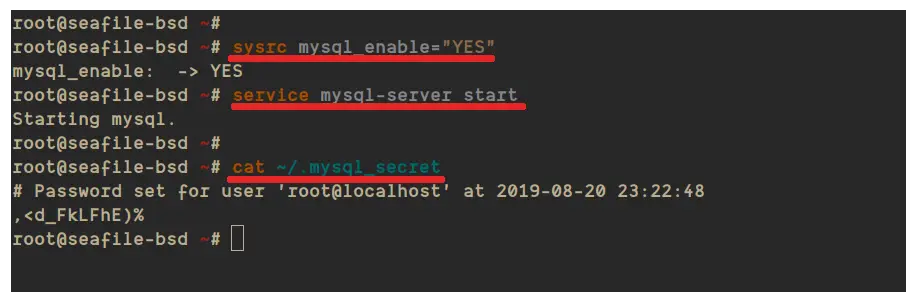
Now add the MySQL service to the system boot and start the service.
sysrc mysql_enable="YES"
service mysql-server start
The MySQL service is up and running.
Next, we must change the default MySQL root password before creating a new database. Show the default generated MySQL root password using cat command as below.
cat ~/.mysql-secret
Copy the generated root password, log in to the MySQL shell as the root user.
mysql -u root -p
Paste the PASSWORD:
Change the MySQL root password using the following query.
ALTER USER 'root'@'localhost' IDENTIFIED BY 'newrootpassmysql';

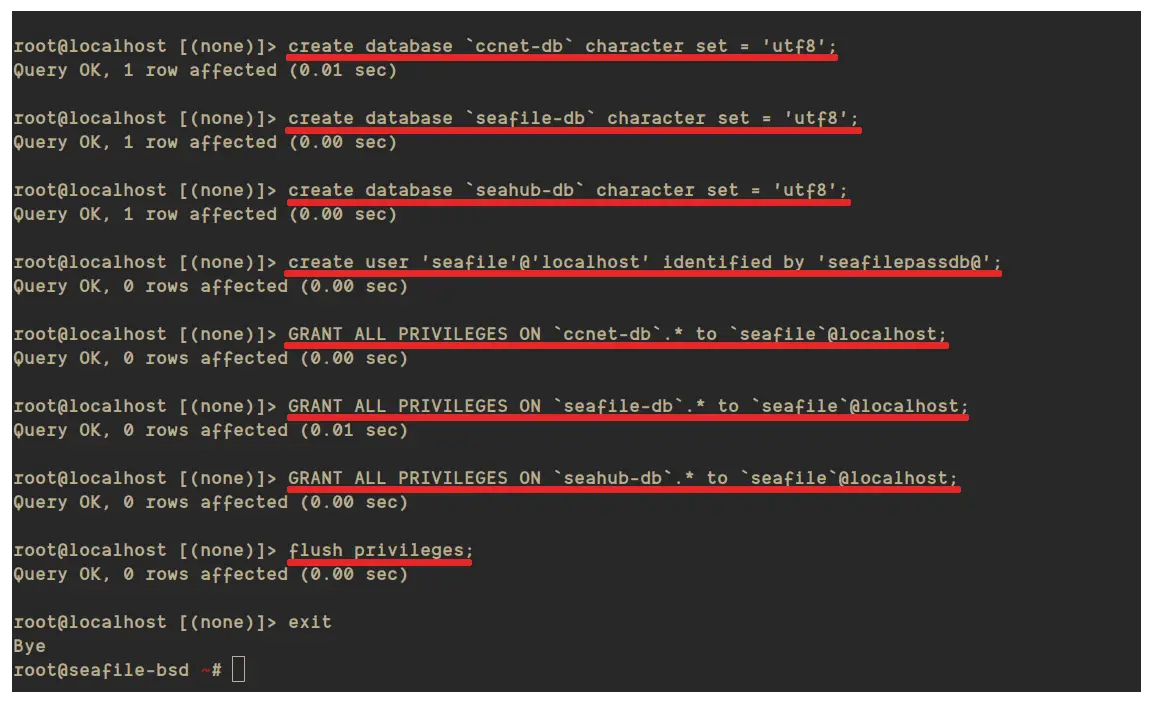
After that, create new MySQL user and databases for our Seafile installation using MySQL queries below.
create database `ccnet-db` character set = 'utf8';
create database `seafile-db` character set = 'utf8';
create database `seahub-db` character set = 'utf8';

create user 'seafile'@'localhost' identified by 'seafilepassdb@';

GRANT ALL PRIVILEGES ON `ccnet-db`.* to `seafile`@localhost;
GRANT ALL PRIVILEGES ON `seafile-db`.* to `seafile`@localhost;
GRANT ALL PRIVILEGES ON `seahub-db`.* to `seafile`@localhost;

flush privileges;
exit
Now the MySQL databases and user for the Seafile installation has been created, and we're ready to install the Seafile Server.
Step 4 - Install Seafile and Seahub Server
In this step, we're going to install the Seafile and Seahub from the FreeBSD repository and then configure it to use the MySQL as the database.
Now install the seafile and seahub using the pkg command below.
pkg install seafile-server
pkg install seahub
Once the installation is complete, add the seafile and seahub services to the startup boot time.
sysrc seafile_enable="YES"
sysrc seahub_enable="YES"
Next, go to the seafile installation directory '/usr/local/www/haiwen/seafile-server' and run the setup file for MySQL database system.
cd /usr/local/www/haiwen/seafile-server
./setup-seafile-mysql.sh
Now you will be asked for some questions about the seafile installation.
Type your server name, server domain name or IP address, seafile data directory, seafile server port, and choose number '2' to use the existing MySQL database.

Now type the details about your database details and user as below.

Once all database configuration is complete, you will get the result as below.

As a result, the seafile server installation is successful.
Now start the seafile and seahub services using the command below.
service seafile start
service seahub start
The seafile service is up and running on default port '8082', and the seahub service is running on default port '8000'.
Step 5 - Configure Seafile and Seahub Server
In this tutorial, we will set up the seafile behind the nginx reverse proxy and using the domain name 'files.mydomain.comf'. So, we need an additional configuration for both Seafile and seahub.
Now go to the seafile installation directory '/usr/local/www/haiwen/conf'.
cd /usr/local/www/haiwen/conf
Edit the 'ccnet.conf' configuration file.
vim ccnet.conf
Change the 'SERVICE_URL' with your domain name and change the 'http' to 'https'.
SERVICE_URL = https://files.mydomain.com/
Save and close.
Now edit the 'seafile.conf' file using vim editor.
vim seafile.conf
Add the 'host' option to '127.0.0.1' for the 'fileserver' configuration.
[fileserver]
host = 127.0.0.1
port = 8082
Save and close.
Next, we need to define the 'FILE_SERVER_ROOT' configuration with our domain name by editing the 'seahub_settings.py' configuration.
vim seahub_settings.py
Change the domain name with your own and paste into it.
FILE_SERVER_ROOT = 'https://files.mydomain.com/seafhttp'
Save and close.
Now edit the 'gunicorn.conf' using vim editor.
vim gunicorn.conf
Change the bind option with the local IP '127.0.0.1' as below.
bind = "127.0.0.1:8000"
Save and close.
Next, we need to change the owner of the seafile installation directory and the seahub cache directory to user 'seafile' with the group 'www'.
chown -R seafile:www /usr/local/www/haiwen
chown -R seafile:www /tmp/seahub_cache
Then restart both seafile and seahub services.
service seafile restart
service seahub restart
As a result, the seafile and seahub service are running with the custom configuration.

Now we need to create the admin user for our seafile installation. Go to the '/usr/local/www/haiwen/seafile-server' directory and run the 'reset-admin.sh' script.
cd /usr/local/www/haiwen/seafile-server
./reset-admin.sh
Type your email address and the password. And as a result, the admin user for Seafile server has been created.
And the Seafile and Seahub configuration has been completed.

Step 6 - Generate SSL Letsencrypt on FreeBSD
In this step, we're going to generate the SSL Letsencrypt for our Seafile installation.
Install certbot and the nginx plugin using the pkg command below.
pkg install py36-certbot py36-certbot-nginx
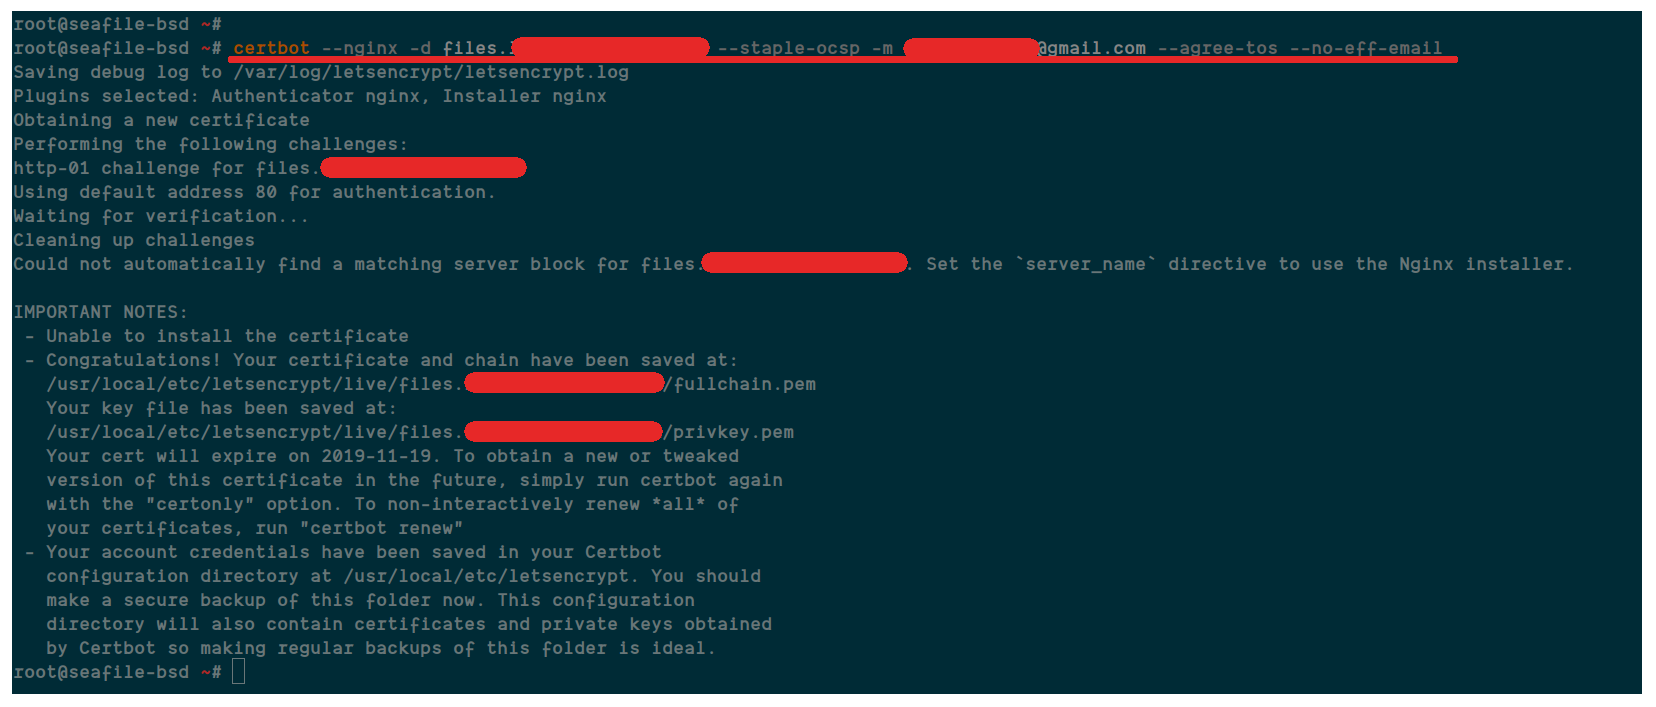
Once the installation is complete, generate the SSL using the certbot command below. And make sure to change the domain name and the email with your own.
certbot --nginx -d files.mydomain.com --staple-ocsp -m [email protected] --agree-tos --no-eff-email
Now the SSL letsencrypt has been generated, located at the '/usr/local/etc/letsencrypt' directory.
Step 7 - Set up Nginx Virtual Host for Seafile
In this step, we're going to configure the Nginx virtual host for Seafile. Before going any further, you need to configure the Nginx virtual host using the following guide.
Setup Nginx Virtual Host on FreeBSD 12.0
Next, go to the '/usr/local/etc/nginx' directory and create a new virtual host configuration file 'vhost/seafile.conf' using vim editor.
cd /usr/local/etc/nginx
vim vhost/seafile.conf
Now change the domain name and the SSL certificates path with your own and paste into it.
server {
        listen       80;
        server_name  files.mydomain.com;
        rewrite ^ https://$http_host$request_uri? permanent;
        server_tokens off;
    }

server {
        listen 443 ssl http2;
        server_name files.mydomain.com;

        ssl_certificate /usr/local/etc/letsencrypt/live/files.mydomain.com/fullchain.pem;
        ssl_certificate_key /usr/local/etc/letsencrypt/live/files.mydomain.com/privkey.pem;
        ssl_session_timeout 5m;
        ssl_session_cache shared:SSL:5m;

        #SSL Security
        ssl_protocols TLSv1 TLSv1.1 TLSv1.2;
        ssl_ciphers 'ECDHE-ECDSA-AES256-GCM-SHA384:ECDHE-RSA-AES256-GCM-SHA384:ECDHE-ECDSA-CHACHA20-POLY1305:ECDHE-RSA-CHACHA20-POLY1305:ECDHE-ECDSA-AES128-GCM-SHA256:ECDHE-RSA-AES128-GCM-SHA256:ECDHE-ECDSA-AES256-SHA384:ECDHE-RSA-AES256-SHA384:ECDHE-ECDSA-AES128-SHA256:ECDHE-RSA-AES128-SHA256';
        ssl_ecdh_curve secp384r1;
        ssl_prefer_server_ciphers on;
        server_tokens off;
        ssl_session_tickets off;

        proxy_set_header X-Forwarded-For $remote_addr;

        location / {
            proxy_pass         http://127.0.0.1:8000;
            proxy_set_header   Host $host;
            proxy_redirect off;
            proxy_set_header X-Forwarded-Proto $scheme;
            proxy_set_header   X-Real-IP $remote_addr;
            proxy_set_header   X-Forwarded-For $proxy_add_x_forwarded_for;
            proxy_set_header   X-Forwarded-Host $server_name;
            proxy_read_timeout  1200s;

            # used for view/edit office file via Office Online Server
            client_max_body_size 0;

            access_log      /var/log/nginx/seahub.access.log;
            error_log       /var/log/nginx/seahub.error.log;
        }

        location /seafhttp {
            rewrite ^/seafhttp(.*)$ $1 break;
            proxy_pass http://127.0.0.1:8082;
            client_max_body_size 0;
            proxy_set_header   X-Forwarded-For $proxy_add_x_forwarded_for;
            proxy_connect_timeout  36000s;
            proxy_read_timeout  36000s;
            proxy_send_timeout  36000s;
            send_timeout  36000s;
        }
        location /media {
            root /usr/local/www/haiwen/seafile-server/seahub;
        }
    }
Save and close.
After that, test the nginx configuration and make sure there is no error. Then restart the nginx service.
nginx -t
service nginx restart
Now you will get the result as below.

The Nginx virtual host configuration for Seafile has been added, check using the 'sockstat' command below and you will get the 'HTTPS' port is used by Nginx service.
sockstat -l4

Step 8 - Testing
Open your web browser and type your Seafile URL installation on the address bar.
Now you will be redirected to the secure HTTPS connection will be shown the Seafile login page as below.

Type your admin email and password, then click the 'Login' button.
And you will get the Seafile Dashboard as below.

Now you can create a new library and upload your files into it. Below is the successful result after creating a new library and upload files into it.

As a result, the Seafile Server installation with Nginx and SSL Letsencrypt on FreeBSD 12.0 has been completed successfully.

