How to Install Rocket.Chat Server on Rocky Linux 8
On this page
- Prerequisites
- Step 1 - Configure Firewall
- Step 2 - Install Docker and Docker Compose
- Step 3 - Install Docker Compose
- Step 4 - Install RocketChat
- Step 5 - Install SSL
- Step 6 - Install and Configure Nginx
- Step 7 - Access and Configure RocketChat
- Step 8 - Backup and Restore Rocket Chat
- Step 9 - Upgrade Rocket Chat
- Conclusion
Rocket.Chat is an open-source chat server developed in JavaScript using the Meteor.js framework. It allows you to communicate securely in real time across multiple devices. It allows companies and organizations to build their chat server for internal communications with their employees. It integrates with social channels, chatbots, social media, and productivity apps. It allows monitoring DevOps workflows with integrations via Bitbucket, Jira, GitLab, Confluence, Bamboo, etc. It is available on multiple desktop and mobile platforms. There are two editions of Rocket.Chat available, one is a free community edition and the other one is an enterprise edition.
In this tutorial, we will install the free Community edition of Rocket.Chat server on a Rocky Linux machine.
Prerequisites
-
A Server running Rocky Linux with a minimum of 1GB of RAM for a server for up to 200 users, and up to 50 concurrently active users. If you want to accommodate more than 200 users, you should opt for a server with a minimum of 2GB of RAM.
-
A domain name pointing to the server. For our tutorial, we will use the
rocketchat.example.comdomain. -
A non-sudo user with root privileges.
-
SELinux is disabled.
-
Everything is updated.
$ sudo dnf update
-
Install basic utility packages. Some of them may already be installed.
$ sudo dnf install wget curl nano unzip yum-utils -y
Step 1 - Configure Firewall
The first step is to configure the firewall. Rocky Linux uses Firewalld Firewall. Check the firewall's status.
$ sudo firewall-cmd --state
running
The firewall works with different zones, and the public zone is the default one that we will use. List all the services and ports active on the firewall.
$ sudo firewall-cmd --permanent --list-services
It should show the following output.
cockpit dhcpv6-client ssh
Moodle needs HTTP and HTTPS ports to function. Open them.
$ sudo firewall-cmd --add-service=http --permanent
$ sudo firewall-cmd --add-service=https --permanent
Reload the firewall to apply the changes.
$ sudo firewall-cmd --reload
Step 2 - Install Docker and Docker Compose
Rocky Linux ships with an older version of Docker. To install the latest version, first, install the official Docker repository.
$ sudo yum-config-manager \
    --add-repo \
    https://download.docker.com/linux/centos/docker-ce.repo
Install the latest version of Docker.
$ sudo dnf install docker-ce docker-ce-cli containerd.io
Enable and run the Docker daemon.
$ sudo systemctl enable docker --now
Verify that it is running.
 docker.service - Docker Application Container Engine
   Loaded: loaded (/usr/lib/systemd/system/docker.service; enabled; vendor preset: disabled)
   Active: active (running) since Sat 2022-08-20 22:35:19 UTC; 1s ago
     Docs: https://docs.docker.com
 Main PID: 82575 (dockerd)
    Tasks: 7
   Memory: 31.1M
   CGroup: /system.slice/docker.service
           ??82575 /usr/bin/dockerd -H fd:// --containerd=/run/containerd/containerd.sock
...
By default, Docker requires root privileges. If you want to avoid using sudo every time you run the docker command, add your username to the docker group.
$ sudo usermod -aG docker $(whoami)
You will need to log out of the server and back in as the same user to enable this change or use the following command.
$ su - ${USER}
Confirm that your user is added to the Docker group.
$ groups
navjot wheel docker
Step 3 - Install Docker Compose
Docker Compose is available as a plugin. Check the latest version of Docker compose available from its Github releases page. At the time of writing this tutorial, the latest available version is 2.10.0.
Create the directory for Docker plugins.
$ mkdir ~/.docker/cli-plugins -p
Download the Docker compose plugin to the directory.
$ curl -SL https://github.com/docker/compose/releases/download/v2.10.0/docker-compose-linux-x86_64 -o ~/.docker/cli-plugins/docker-compose
Set the permissions to make the plugin executable.
$ chmod +x ~/.docker/cli-plugins/docker-compose
Verify the installation.
$ docker compose version
You will receive the following output.
Docker Compose version v2.10.0
Step 4 - Install RocketChat
Create a directory to store Docker files.
$ mkdir ~/rocketchat
Switch to the directory.
$ cd ~/rocketchat
Create and open the Rocketchat Docker compose file for editing.
$ nano docker-compose.yml
Paste the following code in it.
volumes:
  mongodb_data:
  rocketchat-uploads:

services:
  rocketchat:
    image: registry.rocket.chat/rocketchat/rocket.chat:5.0.4
    restart: on-failure
    volumes:
      - rocketchat-uploads:/app/uploads
    environment:
      MONGO_URL: mongodb://mongodb:27017/rocketchat?replicaSet=rs0
      MONGO_OPLOG_URL: mongodb://mongodb:27017/local?replicaSet=rs0
      ROOT_URL: https://rocketchat.example.com
      PORT: 3000
      DEPLOY_METHOD: docker
      Accounts_UseDNSDomainCheck: 'false'
      MAIL_URL: 'smtps://AmazonSESuser:[email protected]:587'
    depends_on:
      - mongodb
    expose:
      - 3000
    ports:
      - 3000:3000
    healthcheck:
      test: >
         /usr/local/bin/node -e '
         const http = require("http");
         const options = {
           host: "localhost",
           port: 3000,
           path: "/api/info",
           timeout: 2000
         };
         const healthCheck = http.request(options, (res) => {
           console.log(`HEALTHCHECK STATUS: $${res.statusCode}`);
           if (res.statusCode == 200) {
             process.exit(0);
           } else {
             process.exit(1);
           }
         });
         healthCheck.on("error", function (err) {
           console.error("ERROR");
           process.exit(1);
         });
         healthCheck.end();'
      interval: 10s
      timeout: 5s
      retries: 3
      start_period: 60s

  mongodb:
    image: bitnami/mongodb:4.4
    restart: on-failure
    volumes:
      - mongodb_data:/bitnami/mongodb
    environment:
      MONGODB_REPLICA_SET_MODE: primary
      MONGODB_REPLICA_SET_NAME: rs0
      MONGODB_PORT_NUMBER: 27017
      MONGODB_INITIAL_PRIMARY_HOST: mongodb
      MONGODB_INITIAL_PRIMARY_PORT_NUMBER: 27017
      MONGODB_ADVERTISED_HOSTNAME: mongodb
      MONGODB_ENABLE_JOURNAL: 'true'
      ALLOW_EMPTY_PASSWORD: 'yes'
    healthcheck:
      test: echo 'db.runCommand("ping").ok' | mongo mongodb:27017/test --quiet
      interval: 10s
      timeout: 5s
      retries: 3
      start_period: 60s
Save the file by pressing Ctrl + X and entering Y when prompted.
Launch the Docker container.
$ docker compose up -d
Check the status of the containers to ensure they are running properly.
CONTAINER ID   IMAGE                                               COMMAND                  CREATED         STATUS                   PORTS                                       NAMES
59cd748e684f   registry.rocket.chat/rocketchat/rocket.chat:5.0.4   "docker-entrypoint.s…"   2 minutes ago   Up 2 minutes (healthy)   0.0.0.0:3000->3000/tcp, :::3000->3000/tcp   rocketchat-rocketchat-1
1fdabedf8681   bitnami/mongodb:4.4                                 "/opt/bitnami/script…"   2 minutes ago   Up 2 minutes (healthy)   27017/tcp                                   rocketchat-mongodb-1
You can also use the following command to check the status.
$ docker compose ps
NAME                      COMMAND                  SERVICE             STATUS              PORTS
rocketchat-mongodb-1      "/opt/bitnami/script…"   mongodb             running (healthy)   27017/tcp
rocketchat-rocketchat-1   "docker-entrypoint.s…"   rocketchat          running (healthy)   0.0.0.0:3000->3000/tcp, :::3000->3000/tcp
At this point, you can check your installation by launching the URL http://rocketchat.example.com:3000 or http://<serverIPaddress>:3000 in the browser. The next step is to configure SSL and put the installation behind a proxy server.
Step 5 - Install SSL
To install an SSL certificate using Let's Encrypt, we need to install the Certbot tool.
Firstly, you need to download and install the EPEL repository.
$ sudo dnf install epel-release
Run the following commands to install Certbot.
$ sudo dnf install certbot
Generate the SSL certificate.
$ sudo certbot certonly --standalone --agree-tos --no-eff-email --staple-ocsp --preferred-challenges http -m [email protected] -d rocketchat.example.com
The above command will download a certificate to the /etc/letsencrypt/live/rocketchat.example.com directory on your server.
Generate a Diffie-Hellman group certificate.
$ sudo openssl dhparam -dsaparam -out /etc/ssl/certs/dhparam.pem 4096
Create a challenge web root directory for Let's Encrypt auto-renewal.
$ sudo mkdir -p /var/lib/letsencrypt
Create a Cron Job to renew the SSL. It will run every day to check the certificate and renew it if needed. For that, first, create the file /etc/cron.daily/certbot-renew and open it for editing.
$ sudo nano /etc/cron.daily/certbot-renew
Paste the following code.
#!/bin/sh
certbot renew --cert-name rocketchat.example.com --webroot -w /var/lib/letsencrypt/ --post-hook "systemctl reload nginx"
Save the file by pressing Ctrl + X and entering Y when prompted.
Change the permissions on the task file to make it executable.
$ sudo chmod +x /etc/cron.daily/certbot-renew
Step 6 - Install and Configure Nginx
We will be installing the latest version of Nginx. Create and open the file /etc/yum.repos.d/nginx.repo for editing.
$ sudo nano /etc/yum.repos.d/nginx.repo
Paste the following lines in it.
[nginx-stable]
name=nginx stable repo
baseurl=http://nginx.org/packages/centos/$releasever/$basearch/
gpgcheck=1
enabled=1
gpgkey=https://nginx.org/keys/nginx_signing.key
module_hotfixes=true

[nginx-mainline]
name=nginx mainline repo
baseurl=http://nginx.org/packages/mainline/centos/$releasever/$basearch/
gpgcheck=1
enabled=0
gpgkey=https://nginx.org/keys/nginx_signing.key
module_hotfixes=true
Save the file by pressing Ctrl + X and entering Y when prompted.
Install Nginx.
$ sudo dnf install nginx
Verify the installation.
$ nginx -v
nginx version: nginx/1.22.0
Enable and start the Nginx service.
$ sudo systemctl enable nginx --now
Create and open the file /etc/nginx/conf.d/rocket.conf for editing.
$ sudo nano /etc/nginx/conf.d/rocket.conf
Paste the following code in it.
# Redirect all non-encrypted to encrypted
    server {
        listen 80;
        listen [::]:80;
        server_name rocketchat.example.com;
        return 301 https://$host$request_uri;
    }

# HTTPS Server
    server {
        listen 443 ssl http2;
        listen [::]:443 ssl http2;
        server_name rocketchat.example.com;

        access_log /var/log/nginx/rocketchat_access.log main;
        error_log /var/log/nginx/rocketchat_error.log;

        ssl_certificate /etc/letsencrypt/live/rocketchat.example.com/fullchain.pem;
        ssl_certificate_key /etc/letsencrypt/live/rocketchat.example.com/privkey.pem;
        ssl_trusted_certificate /etc/letsencrypt/live/rocketchat.example.com/chain.pem;
        ssl_dhparam /etc/ssl/certs/dhparam.pem;
        ssl_protocols TLSv1.2 TLSv1.3;
        ssl_ciphers 'ECDHE-ECDSA-AES128-GCM-SHA256:ECDHE-RSA-AES128-GCM-SHA256:ECDHE-ECDSA-AES256-GCM-SHA384:ECDHE-RSA-AES256-GCM-SHA384:ECDHE-ECDSA-CHACHA20-POLY1305:ECDHE-RSA-CHACHA20-POLY1305:DHE-RSA-AES128-GCM-SHA256:DHE-RSA-AES256-GCM-SHA384';
        ssl_prefer_server_ciphers on;
        ssl_session_cache shared:SSL:20m;
        ssl_session_tickets off;
        ssl_session_timeout 180m;
        ssl_stapling on;
        ssl_stapling_verify on;

        location / {
            proxy_pass http://rocketchat.example.com:3000/;
            proxy_http_version 1.1;
            proxy_set_header Upgrade $http_upgrade;
            proxy_set_header Connection "upgrade";
            proxy_set_header Host $http_host;
            proxy_set_header X-Real-IP $remote_addr;
            proxy_set_header X-Forwarded-For $proxy_add_x_forwarded_for;
            proxy_set_header X-Forwarded-Proto https;
            proxy_set_header X-Nginx-Proxy true;
            proxy_redirect off;
        }
    }
Once finished, save the file by pressing Ctrl + X and entering Y when prompted. The above configuration allows Nginx to act as a proxy server and bind to the port 3000 on localhost.
Open the file /etc/nginx/nginx.conf for editing.
$ sudo nano /etc/nginx/nginx.conf
Add the following line before the line include /etc/nginx/conf.d/*.conf;.
server_names_hash_bucket_size 64;
Save the file by pressing Ctrl + X and entering Y when prompted.
Verify the Nginx configuration file syntax.
$ sudo nginx -t
nginx: the configuration file /etc/nginx/nginx.conf syntax is ok
nginx: configuration file /etc/nginx/nginx.conf test is successful
Restart the Nginx service to enable the new configuration.
$ sudo systemctl restart nginx
Step 7 - Access and Configure RocketChat
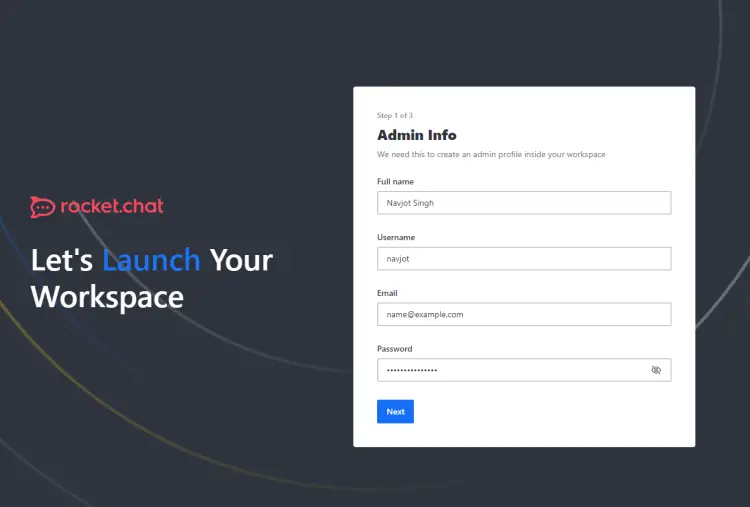
Launch the URL https://rocketchat.example.com in your browser and you will be greeted with the following setup screen.
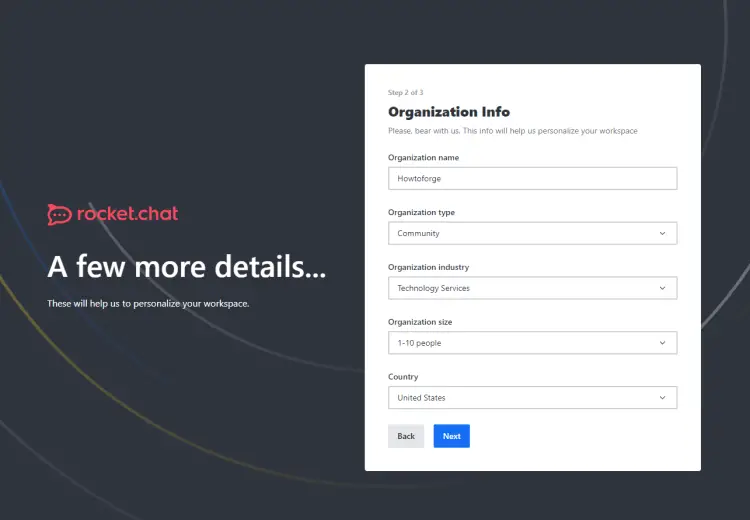
Fill in your administrator details and click the Next button to proceed. Next, you will be asked to fill in the organization details.
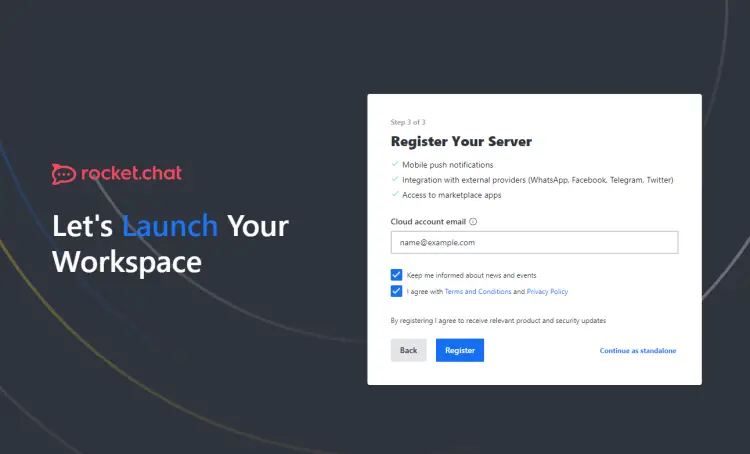
Fill in your organization details and click the Next button to proceed. You will be asked to register your chat server with Rocket Cloud if you want access to marketplace apps and more features.
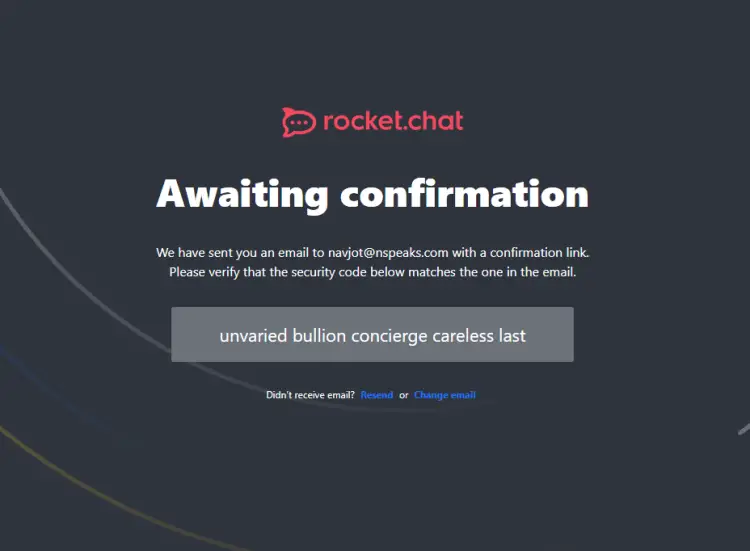
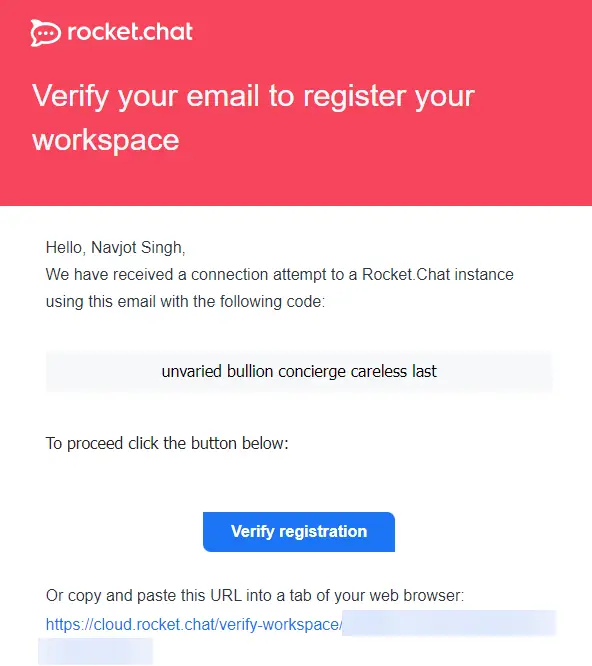
Fill in the details, and click register if you are interested. Else, click on the Continue as standalone link to proceed. If you registered with Cloud, a verification mail will be sent.
Click the link in the verification mail to verify your registration.
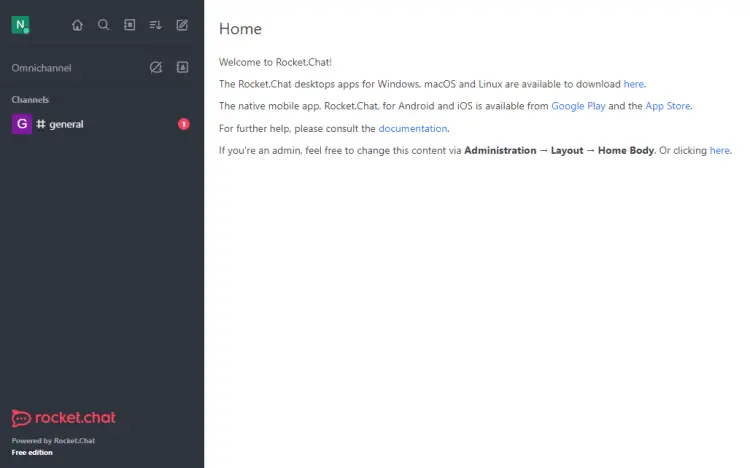
On verification, you will be taken to the Rocket Chat dashboard.
Configure SMTP Settings
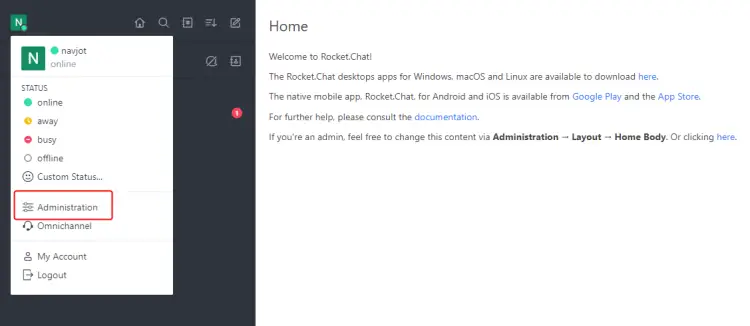
Visit the administration page by clicking on your profile image by clicking the top left of the page and clicking the Administration link.
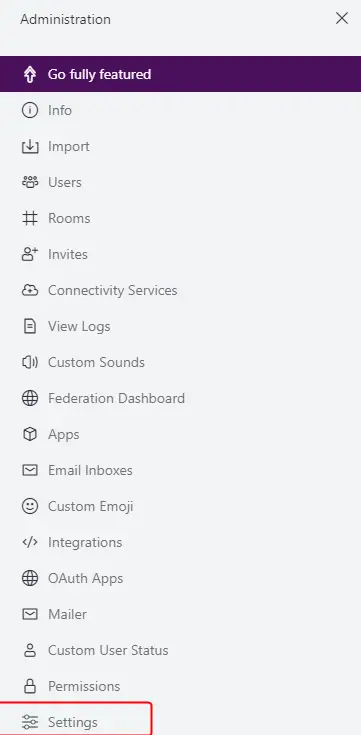
Click the Settings link from the left sidebar.
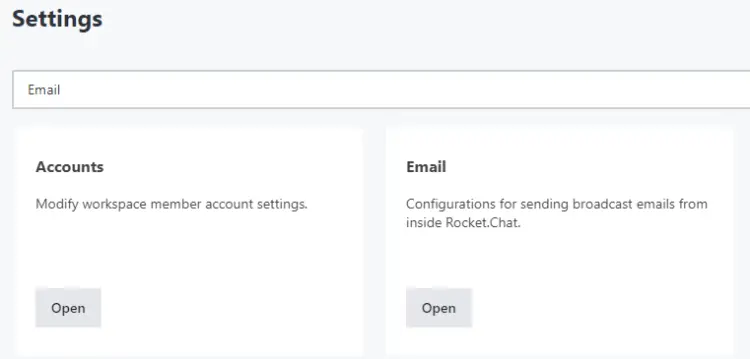
On the settings page, type Email in the search box to bring up the Email button.
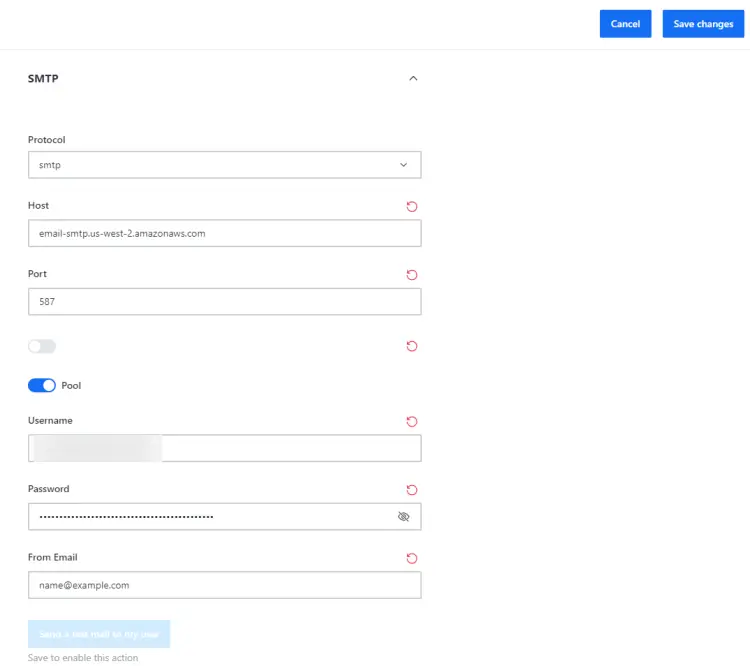
Click the Open button under the Email section to open the email settings page. On the next page, expand the SMTP section of the page.
Fill in the SMTP details and click the Save changes button on the top right to enable the Send a test mail to my user button. You will be prompted for your password to save the SMTP settings.
For our tutorial, we are using Amazon SES as our mailer with 587 as the port. Uncheck the button above the Pool button. The button's function is to ignore TLS but it is not labeled correctly.
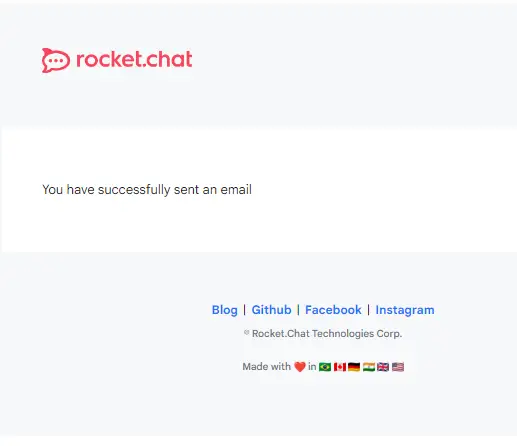
You should have received a similar test mail if everything was set up correctly.
Login to Rocket.Chat Cloud
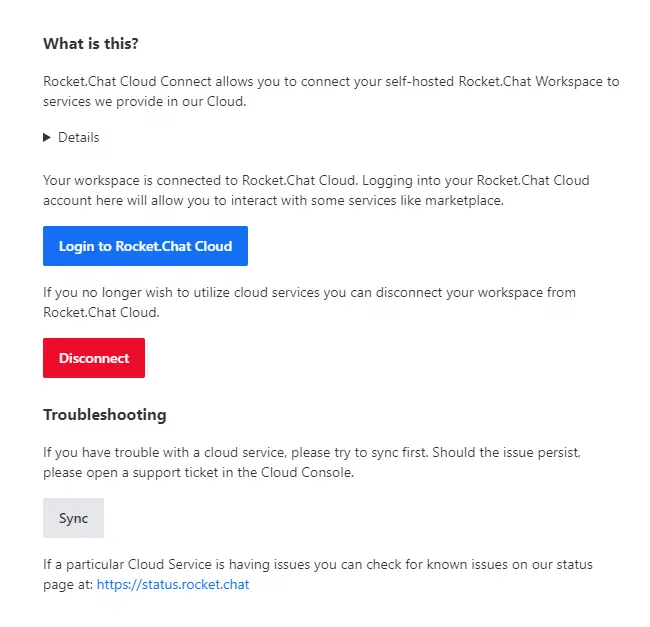
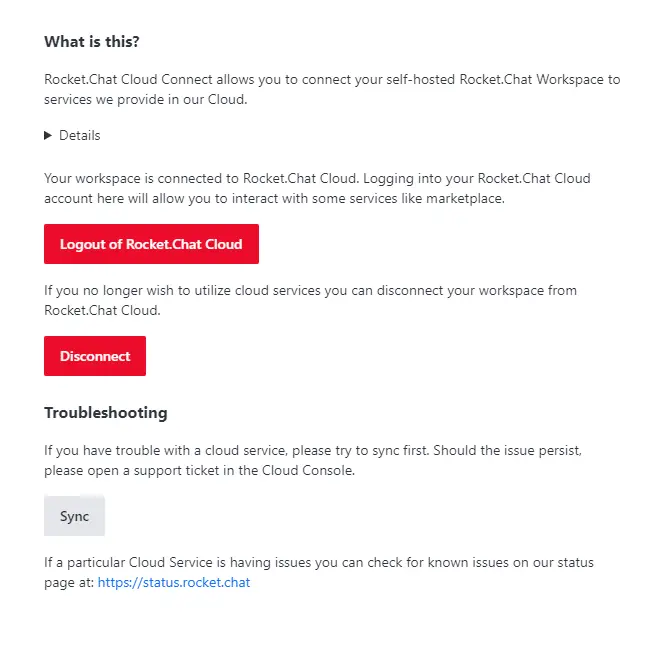
To use the Rocket.Chat Cloud features, you need to log in. Visit the Administration >> Connectivity Services menu and you will be greeted with the following page.
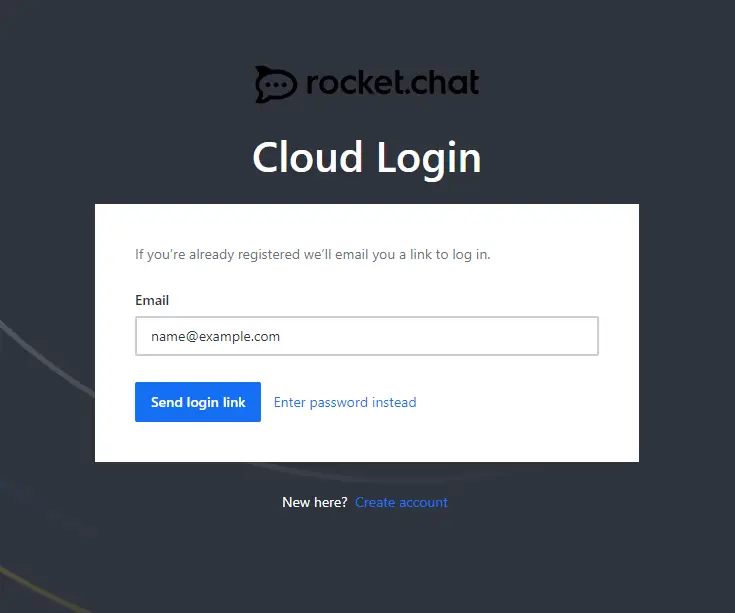
Click the Login to Rocket.Chat Cloud button to start the process. You will be taken to the login page where you will be asked to fill in the email id with which you registered during the setup process.
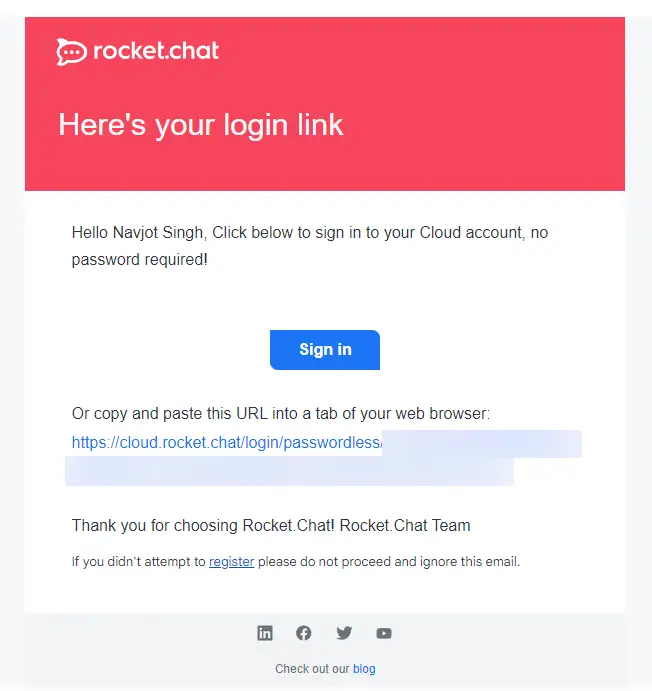
Click the Send login link to proceed. You will receive a mail with the login link.
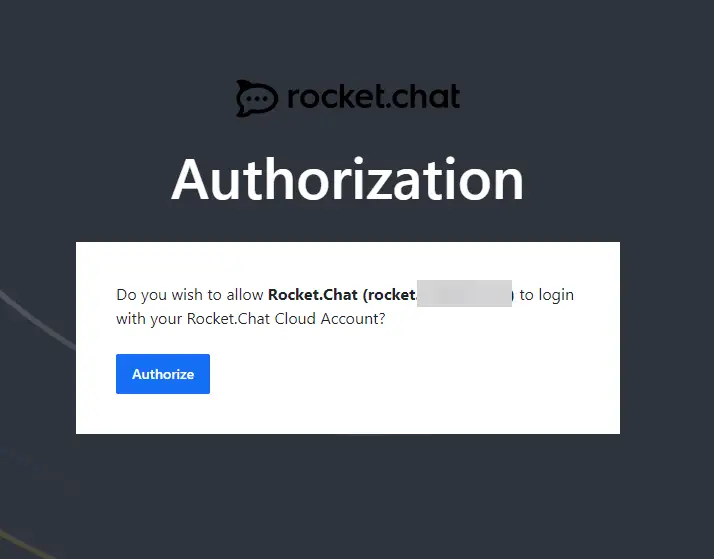
Click the login link to complete the process. You will be asked to authorize your server to log in with the Cloud account.
Click the Authorize button to proceed to take you back to the Connectivity Services page. You are logged in to the cloud now.
Install and Use Rocket.Chat Cloud Apps
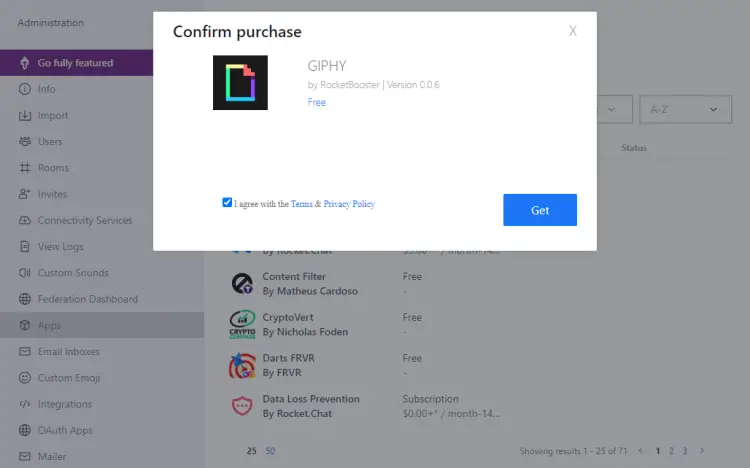
You can now install Cloud apps via the Administration >> Apps page. We are installing the GIPHY app on our server. Click the Get button to proceed with the installation.
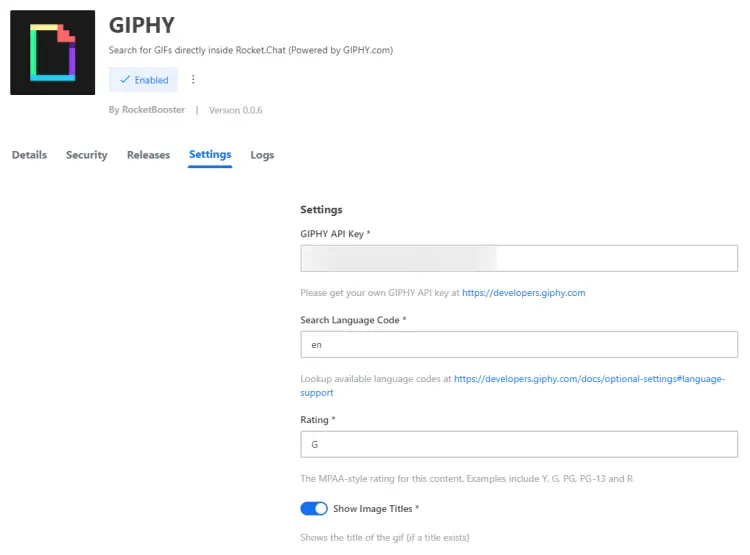
To configure the app, click the app name from the Apps page and you will get the details page for the application. From there, you can configure the settings and start using the app.
Fill in the settings and click the Save changes button to complete setting up the application.
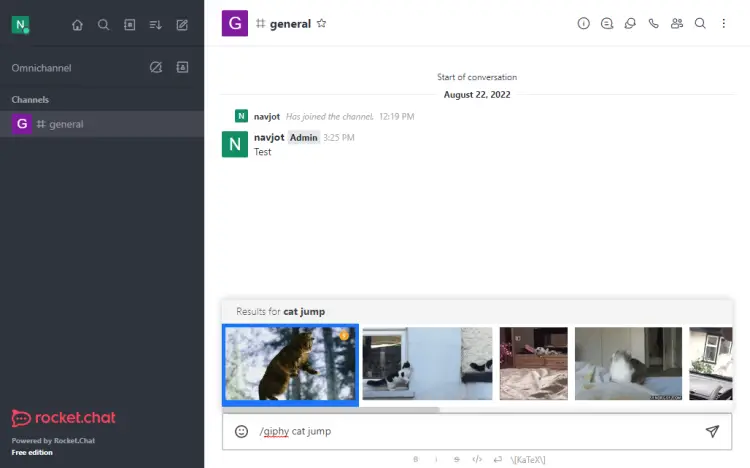
Go back to the Rocket Chat dashboard and visit the message board. To use the GIPHY app, type /giphy <search term> and you will see a lot of GIFs related to your query.
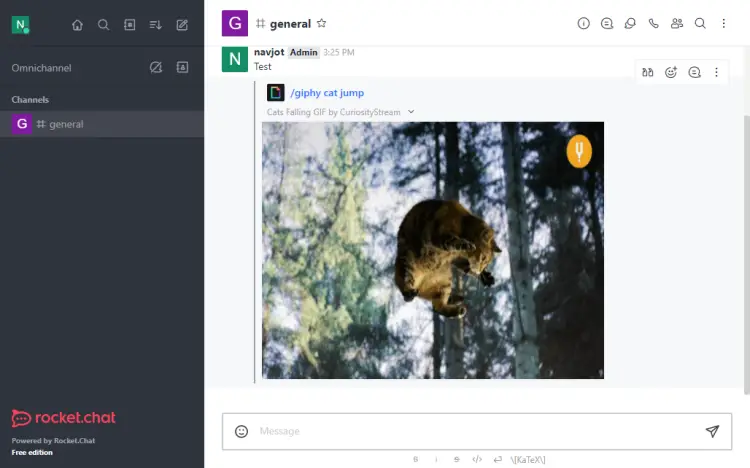
Press the Enter button to send the GIF to the message screen.
Step 8 - Backup and Restore Rocket Chat
Backing up Rocket Chat requires you to back up the MongoDB database.
Stop the Docker container.
$ docker compose down
Run the following command to list out the label of the MongoDB docker image.
$ docker ps -a
For our tutorial, the label of the MongoDB image is rocketchat_mongo_1. Run the following command to export the database into a file.
$ docker exec rocketchat_mongo_1 sh -c 'mongodump --archive' > db.dump
To restore the database, use the following command.
$ docker exec -i <database_name> sh -c 'mongorestore --archive' < db.dump
Step 9 - Upgrade Rocket Chat
Upgrading Rocket Chat requires you to follow some commands. The data doesn't get affected via the upgrade process. Pull the latest version of the Rocket Chat image.
$ docker pull registry.rocket.chat/rocketchat/rocket.chat:latest
Stop the existing bucket.
$ docker compose stop rocketchat
Remove the existing container.
$ docker compose rm rocketchat
Start Rocket Chat by creating a new container.
$ docker compose up -d rocketchat
Conclusion
This concludes our tutorial on installing the Rocket.Chat server on a Rocky Linux 8 machine. If you have any questions, post them in the comments below.

