How to Install Redmine Project Management Software on Rocky Linux 8
On this page
- Prerequisites
- Step 1 - Configure Firewall
- Step 2 - Install Apache Server
- Step 3 - Install and Configure MySQL Server
- Step 4 - Install EPEL Repository
- Step 5 - Install Ruby and other requisites
- Step 6 - Install Redmine
- Step 7 - Install Phusion Passenger
- Step 8 - Install SSL
- Step 9 - Install and Configure Nginx as Reverse-proxy
- Conclusion
Redmine is a free and open-source project management software and issue tracking tool. It is written using the Ruby on Rails framework and can be integrated with various version control systems. It includes a repository browser and diff viewer. It can be used to manage projects features per project wikis and forums, time tracking and role-based access control. It is cross-platform, cross-database and supports 49 languages.
In this tutorial, you will learn how to install Redmine on a Rocky Linux 8 based server.
Prerequisites
-
A Server running Rocky Linux.
-
A non-sudo user with root privileges.
-
Disable SELinux.
-
Everything is updated.
$ sudo dnf update
Step 1 - Configure Firewall
The first step is to configure the firewall. Rocky Linux uses Firewalld Firewall. Check the firewall's status.
$ sudo firewall-cmd --state
running
Open port 3000, which we can use to check Redmine.
$ sudo firewall-cmd --permanent --add-port=3000
Allow HTTP and HTTPS ports.
$ sudo firewall-cmd --permanent --add-service=http
$ sudo firewall-cmd --permanent --add-service=https
Reload the firewall to enable the changes.
$ sudo firewall-cmd --reload
Step 2 - Install Apache Server
We will use the Apache webserver to deploy Redmine. Install Apache using the following command.
$ sudo dnf install httpd
Enable and start Apache service.
$ sudo systemctl enable --now httpd.service
Grant your current logged in user to the apache user so that it has the necessary access to the /var/www/redmine directory.
$ sudo usermod -aG $USER apache
Step 3 - Install and Configure MySQL Server
We will use MySQL database to store the data. Rocky Linux's Appstream repository ships with the latest version of MySQL.
Install MySQL.
$ sudo dnf install mysql-server
Enable and start the MySQL service.
$ sudo systemctl enable mysqld --now
Secure MySQL installation.
$ sudo mysql_secure_installation
For the first step, you will be asked if you want to set up the Validate Password Plugin, which you can use to test the strength of your MySQL password. Choose Y to proceed. You will be asked to choose the password validation level in the next step. Choose 2 which is the strongest level and will require your password to be at least eight characters long and include a mix of uppercase, lowercase, numeric and special characters.
Securing the MySQL server deployment.

Connecting to MySQL using a blank password.

VALIDATE PASSWORD COMPONENT can be used to test passwords
and improve security. It checks the strength of password
and allows the users to set only those passwords which are
secure enough. Would you like to setup VALIDATE PASSWORD component?

Press y|Y for Yes, any other key for No: Y

There are three levels of password validation policy:

LOW    Length >= 8
MEDIUM Length >= 8, numeric, mixed case, and special characters
STRONG Length >= 8, numeric, mixed case, special characters and dictionary                  file

Please enter 0 = LOW, 1 = MEDIUM and 2 = STRONG: 2
You will be asked to choose a root password in the next step. Choose a strong password that fulfills the requirements of the password validation plugin. In the next step, you will be asked whether to continue with the chosen password. Press y to continue.
Please set the password for root here.

New password:

Re-enter new password:

Estimated strength of the password: 100
Do you wish to continue with the password provided?(Press y|Y for Yes, any other key for No) : Y
Press Y and then ENTER key for all the following prompts to remove anonymous users and the test database, disable root logins and load the newly set rules.
...
Remove anonymous users? (Press y|Y for Yes, any other key for No) : Y
Success.
...
Disallow root login remotely? (Press y|Y for Yes, any other key for No) : Y
Success.
...
Remove test database and access to it? (Press y|Y for Yes, any other key for No) : Y
 - Dropping test database...
Success.
 - Removing privileges on test database...
Success.
Reloading the privilege tables will ensure that all changes
made so far will take effect immediately.
...
Reload privilege tables now? (Press y|Y for Yes, any other key for No) : Y
Success.
All done!
Enter the MySQL shell. Enter your root password to continue.
$ mysql -u root -p
Create redmine user. Make sure the password meets the requirements set before.
mysql> CREATE USER 'redmine'@'localhost' IDENTIFIED BY 'Your_password2';
Create redmine database.
mysql> CREATE DATABASE redmine CHARACTER SET utf8mb4;
Grant the user privileges on the redmine database.
mysql> GRANT ALL PRIVILEGES ON redmine.* TO 'redmine'@'localhost';
Exit the Shell.
mysql> exit
Step 4 - Install EPEL Repository
Some of the packages required for Redmine are available in the EPEL repository. Run the following command to install the EPEL repository.
$ sudo dnf install epel-release
Enable the PowerTools repository.
$ sudo dnf config-manager --set-enabled powertools
Step 5 - Install Ruby and other requisites
Rocky Linux 8 ships with four different versions of Ruby - 2.5, 2.6, 2.7 and 3.0.
List all the available Ruby modules.
$ dnf module list ruby
Last metadata expiration check: 0:18:58 ago on Mon 03 Jan 2022 11:50:10 AM UTC.
Rocky Linux 8 - AppStream
Name            Stream             Profiles              Summary
ruby            2.5 [d]            common [d]            An interpreter of object-oriented scripting language
ruby            2.6                common [d]            An interpreter of object-oriented scripting language
ruby            2.7                common [d]            An interpreter of object-oriented scripting language
ruby            3.0                common [d]            An interpreter of object-oriented scripting language

Hint: [d]efault, [e]nabled, [x]disabled, [i]nstalled
Redmine's latest version is compatible with every version except 3.0. We will install Ruby 2.7 for our tutorial.
Reset other versions and enable the 2.7 version of Ruby.
$ sudo dnf module reset ruby
$ sudo dnf module enable ruby:2.7
Install Ruby.
$ sudo dnf install ruby ruby-devel
Verify the installation.
$ ruby -v
ruby 2.7.4p191 (2021-07-07 revision a21a3b7d23) [x86_64-linux]
Install all the remaining packages required by Redmine.
$ sudo dnf install rpm-build wget libxml2-devel make automake libtool ImageMagick ImageMagick-devel mariadb-devel httpd-devel openssl-devel libcurl-devel gcc gcc-c++
Step 6 - Install Redmine
Visit the Redmine downloads page and check the latest stable version available. At the time of writing this tutorial, the latest available version is 4.2.3.
Use wget to download Redmine.
$ wget https://redmine.org/releases/redmine-4.2.3.tar.gz
Extract and move the files to the /var/www/redmine directory.
$ tar xfz redmine-4.2.3.tar.gz
$ sudo mv redmine-4.2.3 /var/www/redmine
Shift to the /var/www/redmine directory.
$ cd /var/www/redmine
Create Redmine configuration files by using the supplied example files.
$ cp config/configuration.yml.example config/configuration.yml
$ cp config/database.yml.example config/database.yml
$ cp public/dispatch.fcgi.example public/dispatch.fcgi
Open the database.yml file for editing.
$ nano config/database.yml
Find and configure your database settings under the following section.
production:
  adapter: mysql2
  database: redmine
  host: localhost
  username: redmine
  password: "Your_password2"
  # Use "utf8" instead of "utfmb4" for MySQL prior to 5.7.7
  encoding: utf8mb4
Save the file by pressing Ctrl + X and entering Y when prompted.
Install bundler for managing ruby gem dependencies.
$ gem install bundler
Set the environment for installing gem dependencies.
$ bundle config set --local without 'development test'
Install the gem dependencies.
$ bundle install
If you face any issue with gem versions, use the following command to restore.
$ sudo gem pristine --all
Generate a random secret key to prevent tampering with the cookies for storing session data.
$ bundle exec rake generate_secret_token
Create the database structure.
$ RAILS_ENV=production bundle exec rake db:migrate
Insert the data into the MySQL database.
$ RAILS_ENV=production REDMINE_LANG=en bundle exec rake redmine:load_default_data
Create necessary directories and set file permissions.
$ mkdir -p tmp/pdf
$ mkdir -p public/plugin_assets
$ chown -R $USER:$USER files log tmp public/plugin_assets
$ chmod -R 755 /var/www/remine/
Run the following command to start a Rails server instance.
$ bundle exec rails server webrick -e production
=> Booting WEBrick
=> Rails 5.2.6 application starting in production on http://0.0.0.0:3000
=> Run `rails server -h` for more startup options
[2022-01-03 12:58:19] INFO  WEBrick 1.6.1
[2022-01-03 12:58:19] INFO  ruby 2.7.4 (2021-07-07) [x86_64-linux]
[2022-01-03 12:58:19] INFO  WEBrick::HTTPServer#start: pid=117224 port=3000
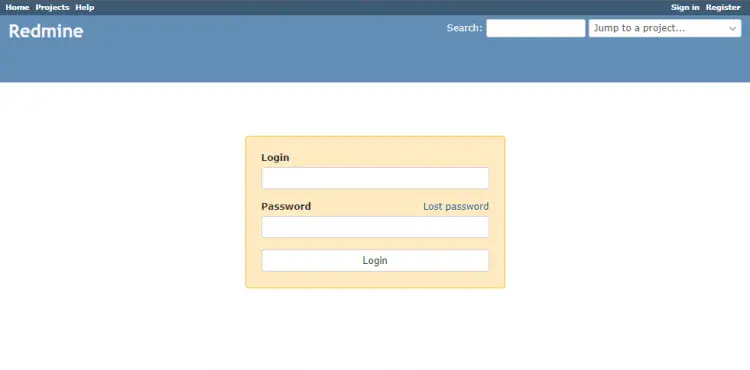
Open the URL http://<yourserverIP>:3000/login to obtain the Redmine Login screen.
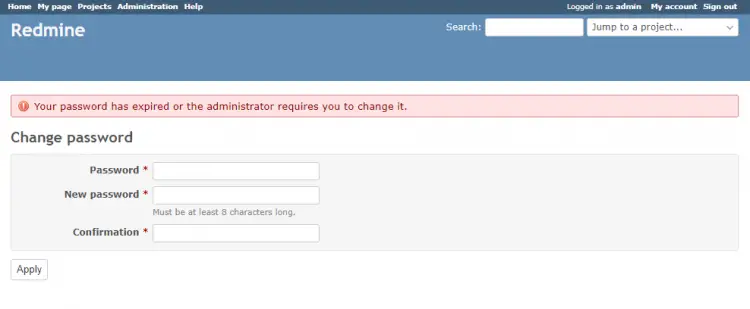
Enter the default credentials (admin/admin) to log in. You will be asked to change the password.
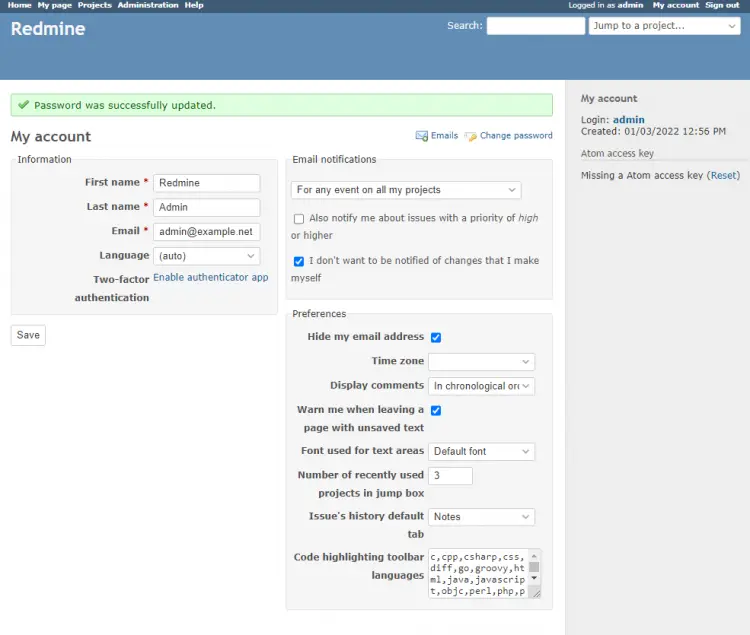
Next, you will be redirected to the My Account page.
Redmine has been installed successfully.
Next, press CTRL+C on the terminal to stop the server.
Step 7 - Install Phusion Passenger
Phusion Passenger is a ruby application server that allows us to serve Redmine via a 3rd party server. In our case, we will use Apache.
Install Passenger.
$ gem install passenger
Install Passenger module for Apache server.
$ passenger-install-apache2-module
You will be greeted with a welcome message. Press Enter to continue.
Welcome to the Phusion Passenger Apache 2 module installer, v6.0.12.

This installer will guide you through the entire installation process. It
shouldn't take more than 3 minutes in total.

Here's what you can expect from the installation process:

 1. The Apache 2 module will be installed for you.
 2. You'll learn how to configure Apache.
 3. You'll learn how to deploy a Ruby on Rails application.

Don't worry if anything goes wrong. This installer will advise you on how to
solve any problems.

Press Enter to continue, or Ctrl-C to abort.


--------------------------------------------
Next, you will be asked for the language. Ruby is selected by default, so just press Enter to continue.
Which languages are you interested in?

Use <space> to select.
If the menu doesn't display correctly, press '!'

 ? ?  Ruby
   ?  Python
   ?  Node.js
   ?  Meteor

--------------------------------------------
You may get a warning about file permissions. If you have been following our tutorial, just press Enter to continue.
Warning: some directories may be inaccessible by the web server!

The web server typically runs under a separate user account for security
reasons. That user must be able to access the Phusion Passenger(R) files.
However, it appears that some directories have too strict permissions. This
may prevent the web server user from accessing Phusion Passenger(R) files.

It is recommended that you relax permissions as follows:

  sudo chmod o+x "/home/navjot"

Press Ctrl-C to return to the shell. (Recommended)
After relaxing permissions, re-run this installer.
  -OR-
Press Enter to continue anyway.
The whole process will take around 10-15 minutes to finish. If you get an error like the following, it is most likely due to low RAM. You should either increase RAM on your server or install swap space.
c++: fatal error: Killed signal terminated program cc1plus
compilation terminated.
rake aborted!
Once the process is complete, you will get the following message.
--------------------------------------------
Almost there!

Please edit your Apache configuration file, and add these lines:

   LoadModule passenger_module /home/navjot/.gem/ruby/gems/passenger-6.0.12/buildout/apache2/mod_passenger.so
   <IfModule mod_passenger.c>
     PassengerRoot /home/navjot/.gem/ruby/gems/passenger-6.0.12
     PassengerDefaultRuby /usr/bin/ruby
   </IfModule>

After you restart Apache, you are ready to deploy any number of web
applications on Apache, with a minimum amount of configuration!

Press ENTER when you are done editing.
Don't press Enter yet. Open a new session on your server as the current user and perform the following configurations.
Configure Apache Server
Create an Apache module configuration file for Phusion Passenger.
$ sudo nano /etc/httpd/conf.modules.d/00-passenger.conf
Paste the code which you got at the end of the passenger install.
 LoadModule passenger_module /home/navjot/.gem/ruby/gems/passenger-6.0.12/buildout/apache2/mod_passenger.so
   <IfModule mod_passenger.c>
     PassengerRoot /home/username/.gem/ruby/gems/passenger-6.0.12
     PassengerDefaultRuby /usr/bin/ruby
   </IfModule>
Save the file by pressing Ctrl + X and entering Y when prompted.
Create another Apache configuration file for the Redmine site.
$ sudo nano /etc/httpd/conf.d/redmine.conf
Paste the following code in it.
Listen 3000
<IfModule mod_passenger.c>
  PassengerRoot /home/username/.gem/ruby/gems/passenger-6.0.12
  PassengerDefaultRuby /usr/bin/ruby
</IfModule>
<VirtualHost *:3000>
    ServerName redmine.example.com
    DocumentRoot "/var/www/redmine/public"

    CustomLog logs/redmine_access.log combined
    ErrorLog logs/redmine_error_log
    LogLevel warn

    <Directory "/var/www/redmine/public">
        Options Indexes ExecCGI FollowSymLinks
        Require all granted
        AllowOverride all
    </Directory>
</VirtualHost>
Save the file by pressing Ctrl + X and entering Y when prompted.
Open the main Apache configuration file /etc/httpd/conf/httpd.conf for editing.
$ sudo nano /etc/httpd/conf/httpd.conf
Find the variable ServerName and uncomment by removing the hash (#) in front of it and setting its value as the following.
ServerName localhost
Save the file by pressing Ctrl + X and entering Y when prompted.
Verify your Apache configuration.
$ httpd -t
Syntax OK
Go back and press Enter to continue your Passenger installation. It will perform some checks, and you should see the following message on its successful completion.
Deploying a web application

To learn how to deploy a web app on Passenger, please follow the deployment
guide:

  https://www.phusionpassenger.com/library/deploy/apache/deploy/

Enjoy Phusion Passenger, a product of Phusion® (www.phusion.nl) :-)
https://www.phusionpassenger.com

Passenger® is a registered trademark of Phusion Holding B.V.
Restart your Apache server.
$ sudo systemctl restart httpd
Your website should be available at http://redmine.example.com:3000.
This is not the perfect way to access Redmine. It is still being served via the insecure HTTP protocol and uses a port number. We will install Nginx to act as a reverse proxy and serve Redmine using HTTPS protocol to improve this. Before moving to the Nginx installation and configuration, we need to set up the SSL certificate.
Step 8 - Install SSL
To install an SSL certificate using Let's Encrypt, we need to install the Certbot tool. Run the following commands to install Certbot.
$ sudo dnf install certbot
Stop Apache server.
$ sudo systemctl stop httpd
Generate the SSL certificate.
$ sudo certbot certonly --standalone --agree-tos --no-eff-email --staple-ocsp --preferred-challenges http -m [email protected] -d redmine.example.com
The above command will download a certificate to the /etc/letsencrypt/live/redmine.example.com directory on your server.
Start Apache server.
$ sudo systemctl start httpd
Generate a Diffie-Hellman group certificate.
$ sudo openssl dhparam -out /etc/ssl/certs/dhparam.pem 2048
Create a challenge webroot directory for Let's Encrypt auto-renewal.
$ sudo mkdir -p /var/lib/letsencrypt
Create a Cron Job to renew the SSL. It will run every day to check the certificate and renew if needed. For that, first, create the file /etc/cron.daily/certbot-renew and open it for editing.
$ sudo nano /etc/cron.daily/certbot-renew
Paste the following code.
#!/bin/sh
certbot renew --cert-name redmine.example.com --webroot -w /var/lib/letsencrypt/ --post-hook "systemctl restart nginx"
Save the file by pressing Ctrl + X and entering Y when prompted.
Change the permissions on the task file to make it executable.
$ sudo chmod +x /etc/cron.daily/certbot-renew
Step 9 - Install and Configure Nginx as Reverse-proxy
Rocky Linux 8 ships with four different versions of Nginx - 1.14, 1.16, 1.18 and 1.20.
List all the available Nginx modules.
$ dnf module list nginx
Last metadata expiration check: 20:23:20 ago on Mon 03 Jan 2022 12:38:07 PM UTC.
Rocky Linux 8 - AppStream
Name                      Stream                       Profiles                      Summary
nginx                     1.14 [d]                     common [d]                    nginx webserver
nginx                     1.16                         common [d]                    nginx webserver
nginx                     1.18                         common [d]                    nginx webserver
nginx                     1.20                         common [d]                    nginx webserver

Extra Packages for Enterprise Linux Modular 8 - x86_64
Name                      Stream                       Profiles                      Summary
nginx                     mainline                     common                        nginx webserver
nginx                     1.20                         common [d]                    nginx webserver

Hint: [d]efault, [e]nabled, [x]disabled, [i]nstalled
Reset other versions and enable the 1.20 version of Nginx.
$ sudo dnf module reset nginx
$ sudo dnf module enable nginx:1.20
Install Nginx. We are temporarily disabling the Epel repository since we want to grab Nginx from the Appstream.
$ sudo dnf install nginx --disablerepo=epel-modular
Verify the installation.
$ nginx -v
nginx version: nginx/1.20.0
To avoid any conflict with Nginx, we need to change the default port Apache is listening to.
Change Apache Listening Port
Open the file /etc/httpd/conf/httpd.conf for editing.
$ sudo nano /etc/httpd/conf/httpd.conf
Change the port from 80 to 8080 as follows.
Listen 8080
Save the file by pressing Ctrl + X and entering Y when prompted.
Restart Apache.
$ sudo systemctl restart httpd
Configure Nginx
Create and open the file /etc/nginx/conf.d/redmine.conf for editing.
$ sudo nano /etc/nginx/conf.d/redmine.conf
Paste the following code in it.
# Redirect all non-encrypted to encrypted
server {
    listen 80;
    server_name redmine.example.com;
    return 301 https://$host$request_uri;
}

server {
    listen 443 ssl http2;

    server_name redmine.example.com;

    ssl_certificate     /etc/letsencrypt/live/redmine.example.com/fullchain.pem;
    ssl_certificate_key /etc/letsencrypt/live/redmine.example.com/privkey.pem;
	ssl_trusted_certificate /etc/letsencrypt/live/redmine.example.com/chain.pem;

	ssl_session_timeout  5m;
    ssl_session_cache shared:MozSSL:10m;
    ssl_session_tickets off;

    ssl_protocols TLSv1.2 TLSv1.3;
    ssl_prefer_server_ciphers on;
    ssl_ciphers ECDHE-ECDSA-AES128-GCM-SHA256:ECDHE-RSA-AES128-GCM-SHA256:ECDHE-ECDSA-AES256-GCM-SHA384:ECDHE-RSA-AES256-GCM-SHA384:ECDHE-ECDSA-CHACHA20-POLY1305:ECDHE-RSA-CHACHA20-POLY1305:DHE-RSA-AES128-GCM-SHA256:DHE-RSA-AES256-GCM-SHA384;
    ssl_ecdh_curve X25519:prime256v1:secp384r1:secp521r1;
    ssl_stapling on;
    ssl_stapling_verify on;
    ssl_dhparam /etc/ssl/certs/dhparam.pem;
    resolver 8.8.8.8;

    access_log /var/log/nginx/redmine.example.com.access.log main;
    error_log  /var/log/nginx/redmine.example.com.error.log;

	location / {
        proxy_pass          http://localhost:3000;
        proxy_redirect      off;
        proxy_buffering     off;
        proxy_set_header    Host $host;
        proxy_set_header    X-Real-IP $remote_addr;
        proxy_set_header    X-Forwarded-For $proxy_add_x_forwarded_for;
    }
}
Save the file by pressing Ctrl + X and entering Y when prompted once finished.
Open the file /etc/nginx/nginx.conf for editing.
$ sudo nano /etc/nginx/nginx.conf
Add the following line before the line include /etc/nginx/conf.d/*.conf;.
server_names_hash_bucket_size 64;
Save the file by pressing Ctrl + X and entering Y when prompted.
Verify the Nginx configuration file syntax.
$ sudo nginx -t
nginx: the configuration file /etc/nginx/nginx.conf syntax is ok
nginx: configuration file /etc/nginx/nginx.conf test is successful
Start the Nginx service to enable the new configuration.
$ sudo systemctl start nginx
Your Redmine application should be accessible at https://redmine.example.com.
Conclusion
This concludes our tutorial where you learned how to install Redmine Project Manager on a Rocky Linux 8 based server. You also learned to serve the Redmine application via Nginx using HTTPS protocol. If you have any questions, post them in the comments below.


