How to Install pgAdmin 4 PostgreSQL Admin Tool on Ubuntu 24.04
This tutorial exists for these OS versions
- Ubuntu 24.04 (Noble Numbat)
- Ubuntu 18.04 (Bionic Beaver)
On this page
pgAdmin4 is an easy-to-use free and open-source graphical administration tool for PostgreSQL. It supports PostgreSQL 9.6 and above and can run on multiple operating systems, including Windows, macOS, and Linux. The pgAdmin4 can be run in two modes, desktop mode for Desktop users and server mode that is accessible from anywhere via web browser.
In this tutorial, you'll learn how to install pgAdmin4 server mode on Ubuntu 24.04. You'll be running pgAdmin4 in the background as a systemd service and it will be accessible through a web browser. This tutorial also covers PostgreSQL installation on Ubuntu through the official PostgreSQL repository, and how to set up database and user in PostgreSQL.
Prerequisites
Before you start, make sure you have the following:
- An Ubuntu 24.04 Server
- A non-root user with administrator privileges
Installing PostgreSQL Server
Before installing pgAdmin4, let's install the PostgreSQL server through the official PostgreSQL repository.
First, run the command below to download the GPG key for the PostgreSQL repository and export it to the '/usr/share/keyrings/postgresql-key.gpg'.
curl https://www.postgresql.org/media/keys/ACCC4CF8.asc | gpg --dearmor | sudo tee /usr/share/keyrings/postgresql-key.gpg >/dev/null
Add the PostgreSQL repository to your Ubuntu system with the following command.
sudo sh -c 'echo "deb [signed-by=/usr/share/keyrings/postgresql-key.gpg arch=amd64] http://apt.postgresql.org/pub/repos/apt $(lsb_release -cs)-pgdg main" > /etc/apt/sources.list.d/pgdg.list'
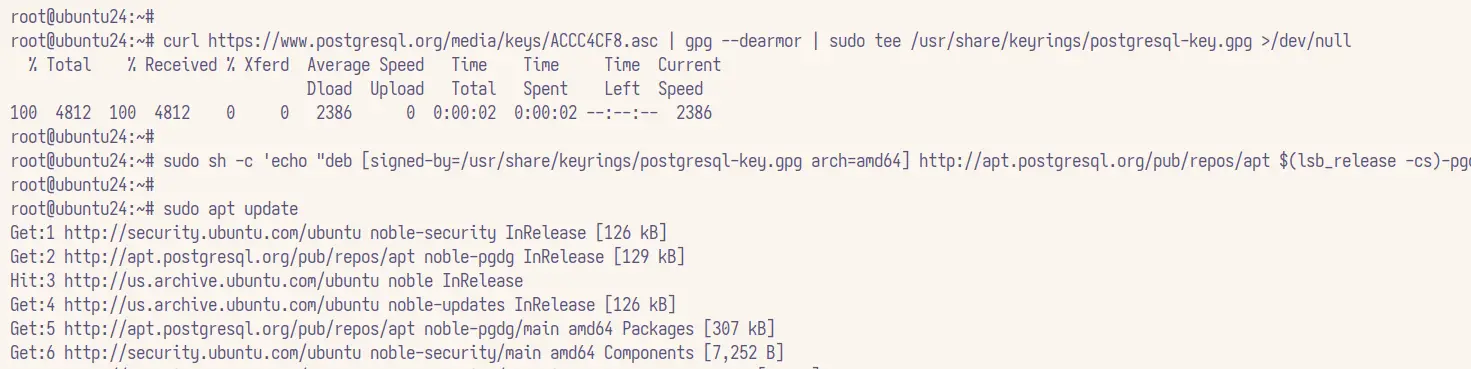
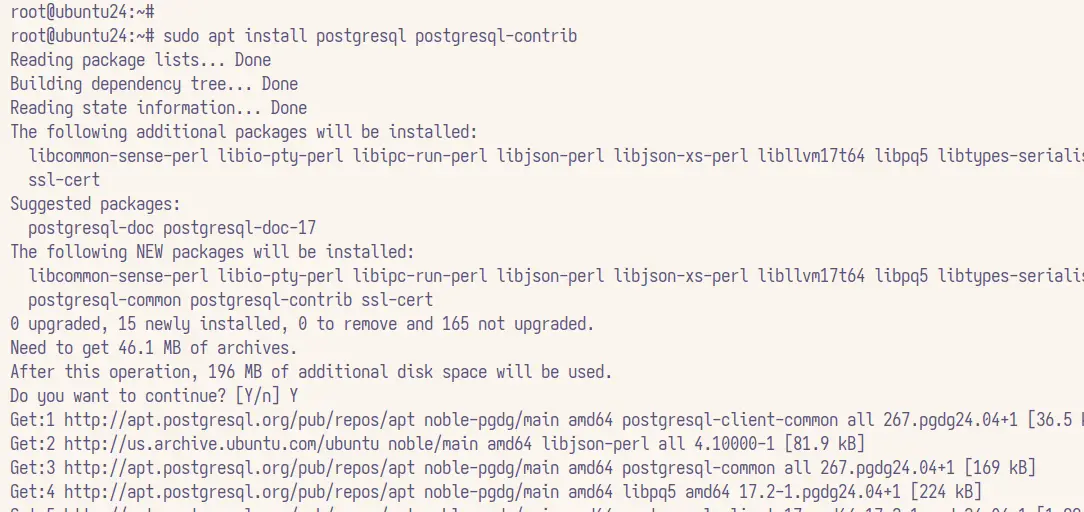
Now run the 'apt' command below to update your Ubuntu package index and install the PostgreSQL server. Enter 'Y' to confirm the installation.
sudo apt update && sudo apt install postgresql postgresql-contrib
After the installation is finished, check the 'postgresql' service status with the command below. You'll see that PostgreSQL is enabled and running with the status 'exited'.
sudo systemctl is-enabled postgresql
sudo systemctl status postgresql
Setting up PostgreSQL Database and User
After you've installed PostgreSQL, you need to create a new user and database within the PostgreSQL server. In this example, you'll be using 'psql' or PostgreSQL shell to create a new PostgreSQL database and user.
Log in to the PostgreSQL server using the 'psql' command below.
sudo -u postgres psql
Run the following query to create a new user 'alice' with the password 'alicepassword' and verify the list of users on your PostgreSQL server. You can change the username and password with your information.
CREATE ROLE alice WITH SUPERUSER CREATEDB CREATEROLE LOGIN ENCRYPTED PASSWORD 'alicepassword';
\du
You can see below that user 'alice' is created in PostgreSQL.

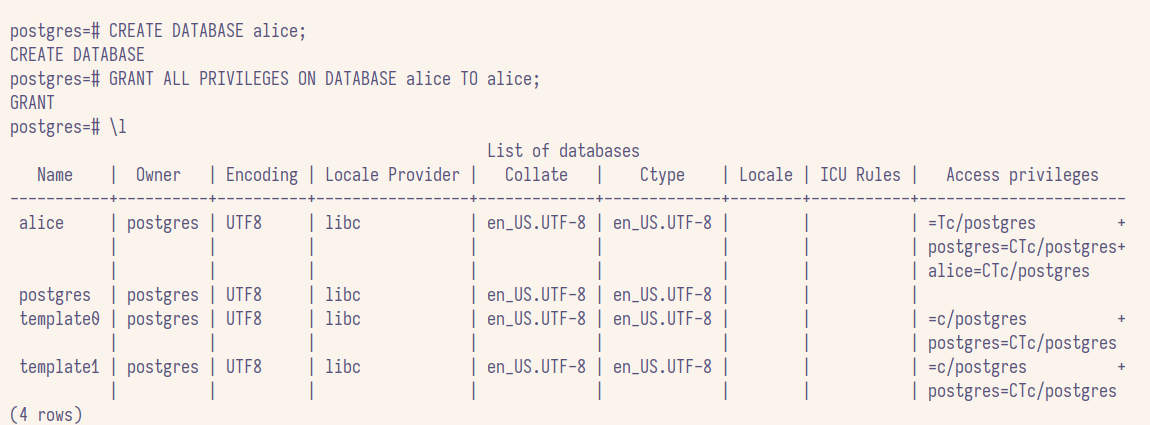
Now run the following queries to create a new database 'alice' and grant the database privileges to the user 'alice'.
CREATE DATABASE alice;
GRANT ALL PRIVILEGES ON DATABASE alice TO alice;
Check the list of databases on PostgreSQL with the query below.
\l
You'll see the new database 'alice' is created.
Installing pgAdmin4
Now that you've installed and configured your PostgreSQL server, you're ready to install 'pgAdmin4-web' server mode, which can be installed through the official pgAdmin4 repository.
Download the GPG key for the pgAdmin4 repository with the following command.
curl -fsSL https://www.pgadmin.org/static/packages_pgadmin_org.pub | sudo gpg --dearmor -o /usr/share/keyrings/pgadmin4.gpg
Now add the pgAdmin4 repository for the Ubuntu system using the command below.
sudo echo "deb [arch=amd64 signed-by=/usr/share/keyrings/pgadmin4.gpg] https://ftp.postgresql.org/pub/pgadmin/pgadmin4/apt/$(lsb_release -cs) pgadmin4 main"\
| sudo tee /etc/apt/sources.list.d/pgadmin4.list

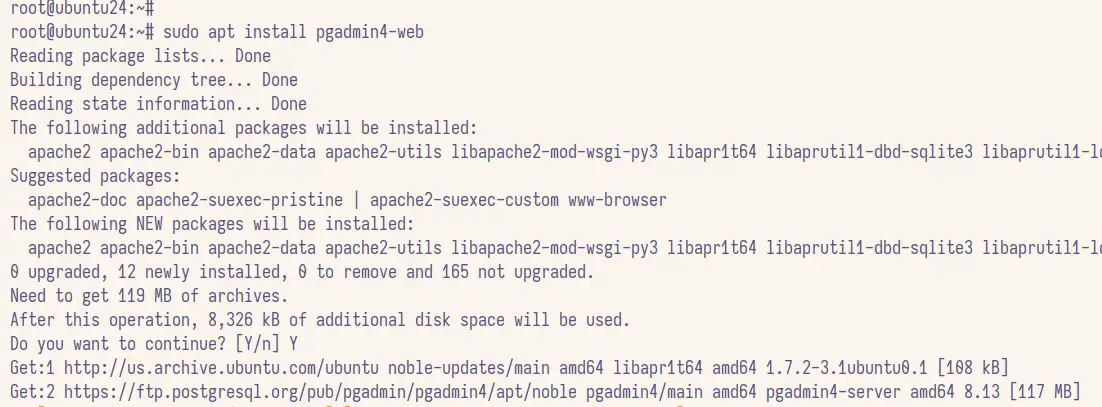
Next, run the 'apt' command below to update your Ubuntu package index and install the 'pgadmin4-web' package. Input 'Y' to confirm with the installation.
sudo apt update && sudo apt install pgadmin4-web
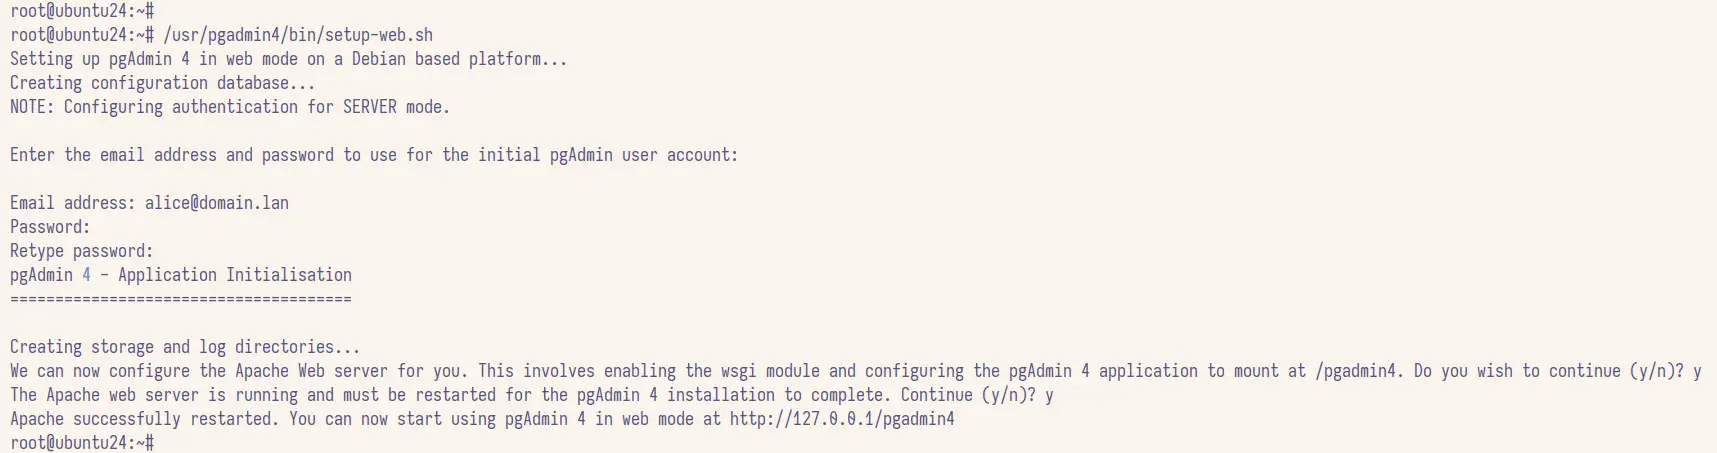
After the installation is finished, execute the 'setup-web.sh' script to configure your pgAdmin4 installation.
/usr/pgadmin4/bin/setup-web.sh
Now you'll be asked with the pgAdmin4 configurations below:
- Enter your email address and password that will be used for pgAdmin4 authentication
- Enter 'y' to configure Apache as a reverse proxy
- Enter 'y' to restart the Apache web server and apply your changes
Accessing pgAdmin4
Open your web browser and visit http://192.168.10.60/pgadmin4. If your installation is successful, you'll see the pgAdmin4 login page.
Log in with your email address and password to the pgAdmin4 dashboard.
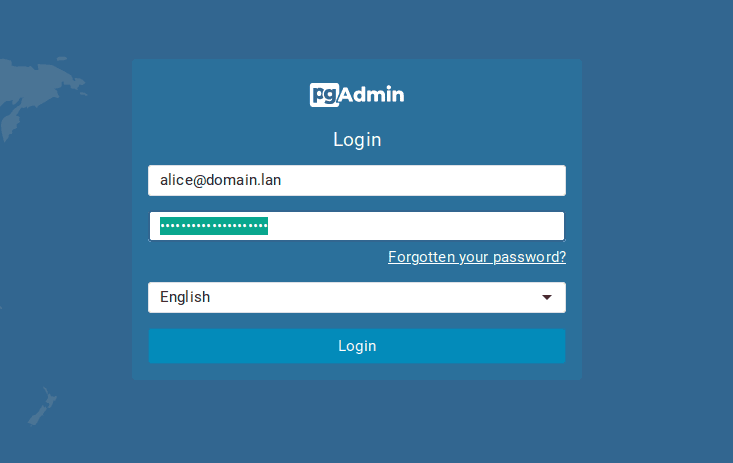
If you have the correct email address and password, you'll be presented with the pgAdmin4 dashboard like the following:

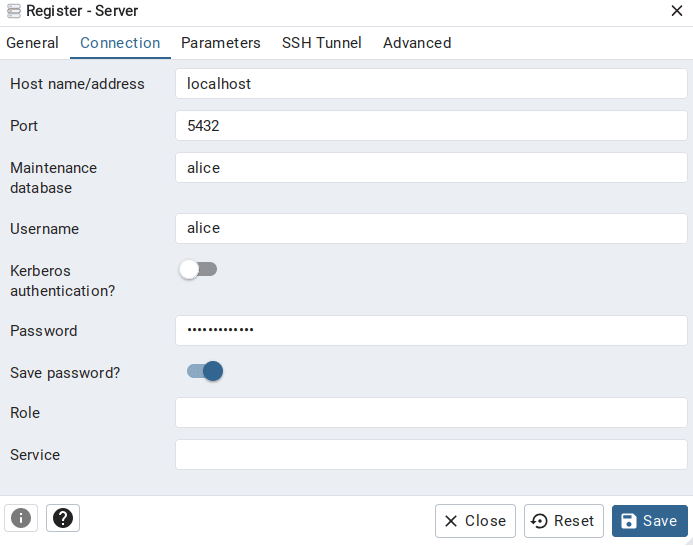
Once you've logged in to pgAdmin4, you need to connect to the PostgreSQL server. Click on the 'Add New Server' menu in the dashboard.
- Input your connection name in the 'General' tab
- Input your PostgreSQL server details within the 'Connection' tab
- Check the option 'Save password'
- Click 'Save'
Once connected to the PostgreSQL server, you'll see the page like the following:

Conclusion
Congratulations! You've finished the installation of pgAdmin4 server mode on the Ubuntu 24.04 server. You've installed and configured the PostgreSQL server through the official PostgreSQL repository and installed pgAdmin4 with the Apache as a reverse proxy. You've also learned how to connect to the PostgreSQL server from the pgAdmin4 dashboard.

