How to install ONLYOFFICE Docs 6.3 on Ubuntu from snap package
ONLYOFFICE Docs is an open-source office suite distributed under GNU AGPL v3.0. It comprises web-based viewers and collaborative editors for text documents, spreadsheets, and presentations highly compatible with OOXML formats.
ONLYOFFICE Docs can be integrated with various cloud services such as Nextcloud, ownCloud, Seafile, Alfresco, Plone, etc., as well as embedded into your own solution. The editors can also be used together with ONLYOFFICE Groups, a free open-source collaboration platform distributed under Apache 2.0 (the complete solution is available as ONLYOFFICE Workspace).
In this tutorial, we’ll learn how to install ONLYOFFICE Docs on your Ubuntu machine using snap.
What's new in ONLYOFFICE Docs 6.3
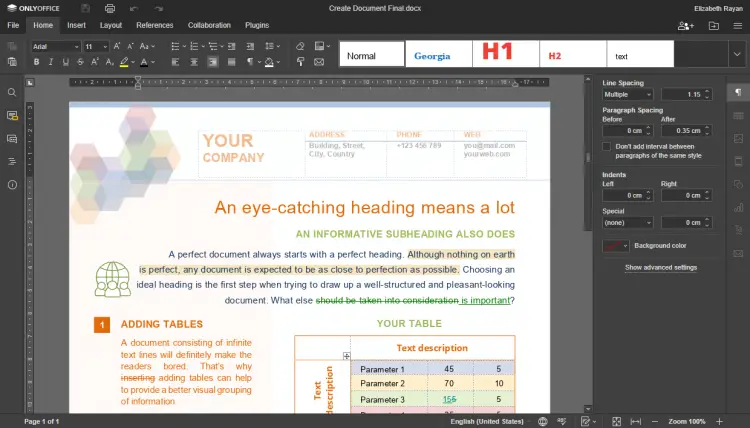
- Dark theme to facilitate work at night or in dark environments.
- 150% scaling for small HDPI monitors.
- Password protection.
- New chart types: line and scatter along with full support for combo charts.
- Quick change of the capitalization of selected text (Sentence case, lowercase, UPPERCASE, Capitalize Each Word, tOGGLE cASE).
- Enabling Track Changes for everyone who has full access to the file or just for yourself and saving the status to file.
- Opening XML files and saving documents to EPUB, FB2, and HTML.
- Quick change of list levels.
- XLOOKUP function in spreadsheets.
- Grouping/ungrouping data in pivot tables according to custom requirements.
- New cell formats: mm/dd, mm/dd/yyyy, mm/dd/yy for dates, Croatian kuna for currencies.
- Transparency setting to slide properties in the right panel in presentations.
- Column setting for text in a shape on the toolbar.
Step 1: Enable snapd
Starting from Ubuntu 16.04 LTS, snapd is already installed. For older versions and Ubuntu flavors that don’t include snapd by default, install it from the Ubuntu Software Centre or from the command line:
sudo apt update
sudo apt install snapd
Once done, log out and back in again or restart your system to ensure snap’s paths are updated correctly.
Step 2: Install ONLYOFFICE Docs
Run the following command:
sudo snap install onlyoffice-ds
Once ready, ONLYOFFICE Docs (Document Server) will be available at .
Step 3: Change HTTP port
By default, the snap will listen on port 80. To change the HTTP port (e.g. to port 8888), run:
snap set onlyoffice-ds onlyoffice.ds-port=8888
Step 4: Change MySQL port
By default, MySQL uses port 3306. To change the database port, run:
snap set onlyoffice-ds onlyoffice.db-port=3307
Step 5: Activate HTTPS
If you don’t have CA certified certificates, generate a self-signed SSL certificate:
openssl genrsa -out onlyoffice.key 2048
openssl req -new -key onlyoffice.key -out onlyoffice.csr
openssl x509 -req -days 365 -in onlyoffice.csr -signkey onlyoffice.key -out onlyoffice.crt
Generate stronger DHE parameters to strengthen the server security:
openssl dhparam -out dhparam.pem 2048
Then, install the onlyoffice.key, onlyoffice.crt and dhparam.pem files to the ONLYOFFICE server:
cp onlyoffice.key /var/snap/onlyoffice-ds/current/var/www/onlyoffice/Data/certs/
cp onlyoffice.crt /var/snap/onlyoffice-ds/current/var/www/onlyoffice/Data/certs/
cp dhparam.pem /var/snap/onlyoffice-ds/current/var/www/onlyoffice/Data/certs/
Once done, restart ONLYOFFICE Document Server:
snap restart onlyoffice-ds
That’s all! Now you can integrate ONLYOFFICE Docs with the platform you already use and start working with your documents.


