How to Install OCS Inventory Server on Ubuntu 22.04
This tutorial exists for these OS versions
- Ubuntu 22.04 (Jammy Jellyfish)
- Ubuntu 20.04 (Focal Fossa)
On this page
OCS Inventory Server is open-source software that allows you to scan and inventory all devices in your environment or IT departments. It's a free inventory and assets management solution that helps you keep track of all your devices and computers' information.
There are 4 main components of the OCS Inventory Server, the Database server, the Communication Server, the Administration Server, and the Deployment server. The OCS Inventory Server lets you get the latest and most relevant data about your devices. it can be installed in multiple operating systems and provides agent packages for multiple operating systems such as Microsoft Windows, Linux, BSD, Sun Solaris, IBM AIX, HP-UX, MacOS X, and Android.
As for Network devices, OCS Inventory Supports network discovery and SNMP Agents. You can add and insert information about your network hardware: printers, switches, computers (which do not have an OCS agent installed), etc via Network Discovery and SNMP agents.
In this guide, you will install OCS Inventory Server on an Ubuntu 22.04 server. You will install OCS Inventory Server with Apache2 web server, MariaDB database server, and PHP. This also includes the installation of ocsreports, which is a PHP-based application that provides a web administration dashboard for the OCS Inventory Server and it will be run with Apache2 and PHP.
Prerequisites
To complete this guide, you must have the following requirements:
- A Linux server running Ubuntu 22.04 - This example uses a fresh and generic Ubuntu server with the hostname 'ocs-server' and IP address '192.168.5.20'.
- A non-root user with sudo/root administrator privileges.
When those requirements are ready, go on and start the OCS Inventory Server installation.
Installing Dependencies
In this first section, you must install some dependencies that will be used for installing and running OCS Inventory Server. This installation will include the following packages:
- Basic dependencies - These packages will be used to compile some Perl modules.
- Perl and some additional Perl packages - OCS Inventory Server is written in Perl, so you must install Perl on your server. Some additional Perl packages here include the Perl database driver and the Perl soap package for the REST API.
- LAMP Stack - The OCS Inventory Server will be running with Apache2, MariaDB database. PHP packages will be used by the 'ocsreports', which is the web application dashboard of the OCS Inventory Server.
- Additional Perl Modules - You will install some Perl modules via CPAN (The Comprehensive Perl Archive Network).
Before starting, enter the following command to update and refresh your Ubuntu package index.
sudo apt update
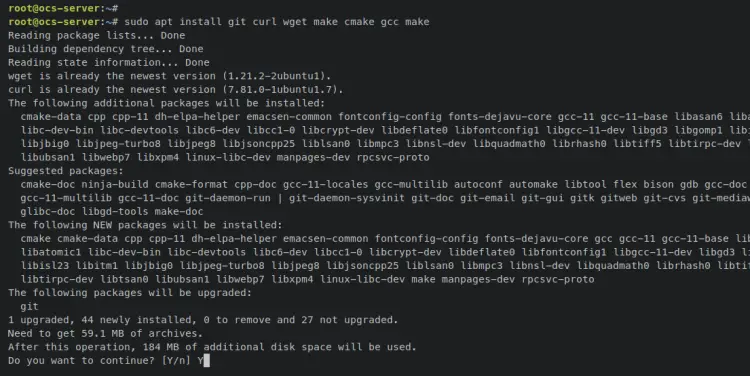
Enter the following 'apt install' command to install some basic development dependencies. These packages are mainly used for compiling some Perl modules.
sudo apt install git curl wget make cmake gcc make
When prompted, input y to confirm and press ENTER to proceed.
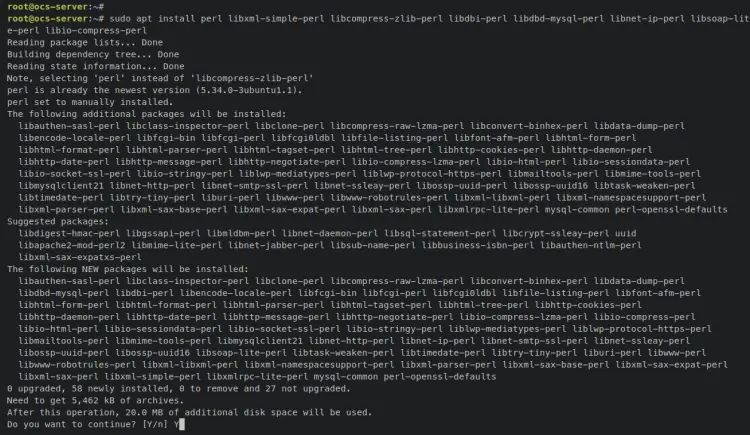
Now install Perl and some Perl packages via the 'apt install' command below. OCS Inventory Server is mainly written in Perl, so you must install Perl packages before installing the OCS Inventory Server.
sudo apt install perl libxml-simple-perl libcompress-zlib-perl libdbi-perl libdbd-mysql-perl libnet-ip-perl libsoap-lite-perl libio-compress-perl
Input y when prompted and press ENTER to proceed.
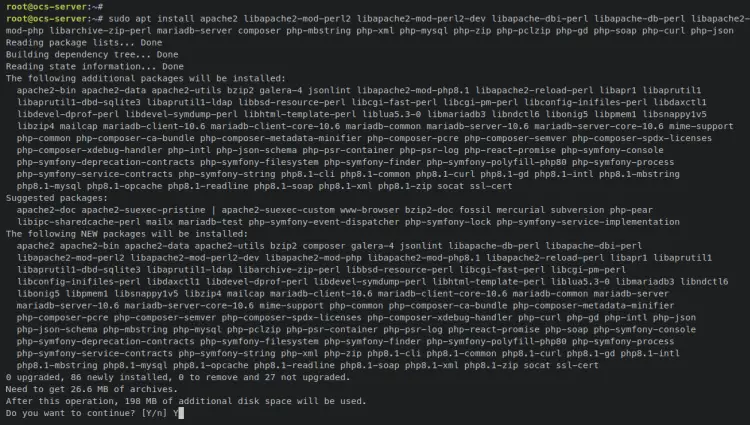
Next, install the LAMP Stack with some additional packages such as 'libapache2-mod-perl2' and 'composer' via the following 'apt install' command. The Apache web server and PHP packages will be used to run the web administration dashboard for OCS Inventory Server, and the MariaDB is used as the database backend.
sudo apt install apache2 libapache2-mod-perl2 libapache2-mod-perl2-dev libapache-dbi-perl libapache-db-perl libapache2-mod-php libarchive-zip-perl mariadb-server composer php-mbstring php-xml php-mysql php-zip php-pclzip php-gd php-soap php-curl php-json
Input y when prompted, then press ENTER.
With the LAMP Stack and Composer installed, enter the following commands to verify the Apache2 and MariaDB service status, then verify the version of PHP and Composer.
Verify the Apache2 service via the 'systemctl' command below. An output 'enabled' confirms that the Apache2 web server will start automatically upon the system startup, and the output 'active (running)' confirms that the Apache2 web server is running.
sudo systemctl is-enabled apache2
sudo systemctl status apache2
Verify the MariaDB service via the 'systemctl' command below. An output 'enabled' confirms that the MariaDB server will start automatically upon the system startup, and the output 'active (running)' confirms that the MariaDB service is running.
sudo systemctl is-enabled mariadb
sudo systemctl status mariadb
Verify the PHP version using the below command. At the time of this writing, PHP 8.1 is installed on the server, which is provided by the Ubuntu repository.
php -v
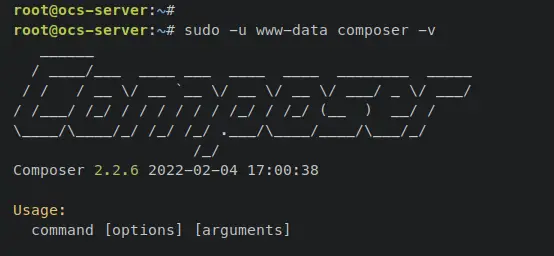
Verify the Composer version by entering the following command.
sudo -u www-data composer -v
With basic dependencies installed, enter the following command to install some Perl modules that are needed by OCS Inventory Server.
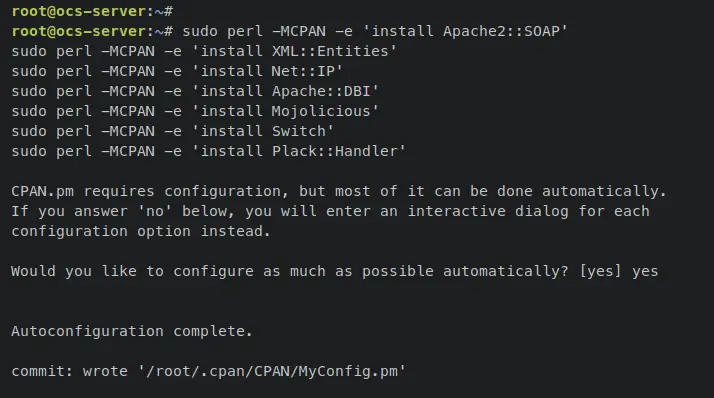
sudo perl -MCPAN -e 'install Apache2::SOAP'
sudo perl -MCPAN -e 'install XML::Entities'
sudo perl -MCPAN -e 'install Net::IP'
sudo perl -MCPAN -e 'install Apache::DBI'
sudo perl -MCPAN -e 'install Mojolicious'
sudo perl -MCPAN -e 'install Switch'
sudo perl -MCPAN -e 'install Plack::Handler'
You will be asked to set up CPAN for the first time. Input 'yes' to confirm and set up CPAN automatically. The installation of Perl modules should now begin.
When Perl modules installation is finished, this confirms that package dependencies for OCS Inventory Server are now installed. In the next step, you will set up the MariaDB server and PHP.
Configuring MariaDB Server
In this section, you will set up and secure the MariaDB server deployment via the 'mariadb-secure-installation' command. Then, you will create a new database and user that will be used by the OCS Inventory Server.
Enter the following command to start configuring and securing the MariaDB server deployment.
sudo mariadb-secure-installation
You will be asked about the following MariaDB configurations:
- Switch local authentication to unix_socket? Input n.
- Set up the new MariaDB root password? Input y to confirm, then type the new password for your MariaDB server deployment.
- Remove anonymous user? Input y to confirm.
- Remove the default database test from the deployment?. Input y to confirm.
- Disallow MariaDB root login from remote connections? Input y to confirm.
- Reload table privileges and apply the changes? Input y and press ENTER.
With this, you have now secured the MariaDB server deployment and configured the password for the MariaDB root user.
Now log in to the MariaDB shell using the below command. You will be creating a new MariaDB database and user for the OCS Inventory Server application.
sudo mariadb -u root -p
Enter the following queries to create a new database 'ocsdb' and the user 'ocs@localhost'. Also, be sure to change the following MariaDB user password.
CREATE DATABASE ocsdb;
GRANT ALL PRIVILEGES ON ocsdb.* TO ocs@localhost IDENTIFIED BY "ocsP4ssw0rd";
FLUSH PRIVILEGES;
Lastly, enter the following query to verify the list privileges of the new user 'ocs@localhost'. You should see the MariaDB user 'ocs@localhost' has access to the database 'ocsdb' that will be used by OCS Inventory Server.
SHOW GRANTS FOR ocs@localhost;
QUIT;
In this section, you have secured the MariaDB server deployment and configured the MariaDB root password via the 'mariadb-secure-installation' command. You have also created a new MariaDB database and user for the OCS Inventory Server installation. In the next step, you will set up a PHP configuration that will be used to run the 'ocsreports' or OCS administration dashboard.
Configuring PHP
After configuring the MariaDB server, you will now set up the PHP installation that will be used by the ocsreports or OCS Administration Server. You will need to change some parameters in the 'php.ini' file and restart the Apache2 service to apply the changes that you have made.
Open the PHP config file '/etc/php/8.1/apache2/php.ini' using the following nano editor command.
sudo nano /etc/php/8.1/apache2/php.ini
Change the default parameters with the following lines. Be sure to adjust the 'date.timezone' parameter with your timezone.
memory_limit = 512M
post_max_size = 100M
upload_max_filesize = 100M
max_execution_time = 360
date.timezone = Europe/Stockholm
Save and close the file when finished.
Now enter the following systemctl command utility to restart the Apache2 service and apply the changes.
sudo systemctl restart apache2
With this, the basic configuration of the LAMP Stack for the OCS Inventory Server is finished. In the next step, you will set up the UFW firewall and open some ports or services.
Configuring UFW Firewall
On the Ubuntu server, ufw is the default firewall that is installed. It's installed, but not yet running on the system. In this section, you will add the OpenSSH and 'Apache Full' services to the ufw. Then, you will start ufw on your server and enable it to run automatically upon the system bootup.
Enter the following 'ufw allow' command to open the OpenSSH and 'Apache Full' applications. The OpenSSH application will open the default SSH port 22/tcp and the 'Apache Full' service will open the default HTTP and HTTPS ports - 80/tcp and 443/tcp.
sudo ufw allow OpenSSH
sudo ufw allow 'Apache Full'
Now run the following command to start and enable the UFW firewall. When prompted, input y to confirm and press ENTER to proceed.
sudo ufw enable
An output 'Firewall is active and enabled on system startup' confirms that the UFW is enabled and will be run automatically upon the system bootup. And the UFW should be running after the command is executed.
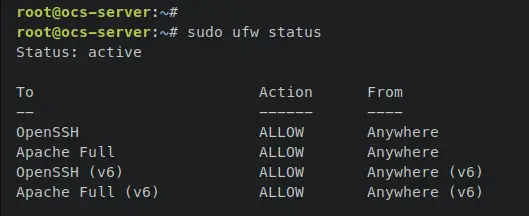
Enter the following command to verify the status of the UFW firewall. An output 'Status: Active' confirms that the UFW is running, you will also see both the 'OpenSSH' and 'Apache Full' applications added and available on the UFW firewall.
sudo ufw status
At this point, you have now finished the installation and basic configurations of package dependencies for the OCS Inventory Server installation. Move to the next section to start the OCS Inventory Server installation.
Installing OCS Inventory Server
OCS Inventory Server can be installed on different operating systems such as Linux, Unix, and Windows. It's available in different packages and provides official repositories for different Linux distributions including Ubuntu, Debian, and CentOS.
For this example, you will install OCS Inventory Server manually from the source and configure it with the MariaDB database server. You will also install the ocsreports that will be used as the graphical application and provides a web administration dashboard for the OCS Inventory Server application.
Move your working directory to '/var/www' and download the OCS Inventory Server source code via the 'git clone' command below. The source code should be available in the 'OCSInventory-Server' directory.
cd /var/www/
git clone https://github.com/OCSInventory-NG/OCSInventory-Server.git
Move to the 'OCSInventory-Server' directory and download the 'ocsreports' application via the 'git clone' command below. The 'ocsreports' is a PHP web application that will be used as the web console or web administration dashboard of the OCS Inventory Server, and this will be stored in the directory 'ocsreports'.
cd OCSInventory-Server/
git clone https://github.com/OCSInventory-NG/OCSInventory-ocsreports.git ocsreports
Move to the 'ocsreports' directory and run the 'composer install' command to install PHP dependencies for the ocsreports web application.
cd ocsreports/
sudo -u www-data composer install
Next, go to the OCS Inventory Server installation root directory '/var/www/OCSInventory-Server/' and open the bash script 'setup.sh' using the following nano editor command. The 'setup.sh' script will be used for installing the OCS Inventory Server.
cd /var/www/OCSInventory-Server/
nano setup.sh
Change the database parameters with your database details which includes the database name, username, and password.
DB_SERVER_HOST="localhost"
DB_SERVER_PORT="3306"
DB_SERVER_USER="ocs"
DB_SERVER_PWD="ocsP4ssw0rd"
Save and close the file when you're done.
Now execute the 'setup.sh' script to start the OCS Inventory Server installation. During the installation, you will be asked for some OCS server configurations.
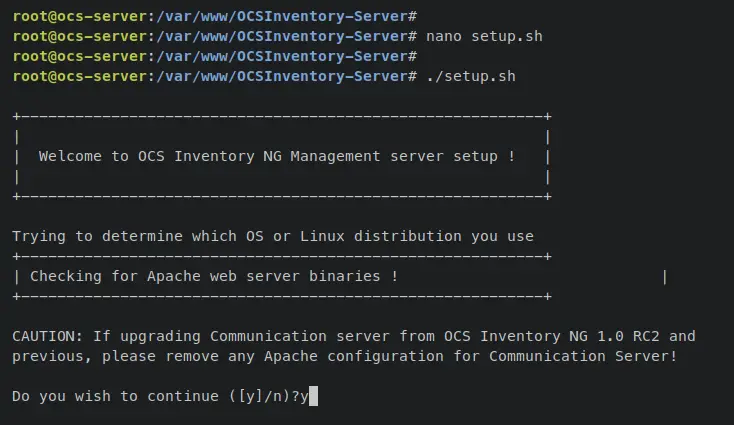
./setup.sh
First, the 'setup.sh' script will check and verify dependencies for the OCS inventory Server installation. If the server configuration met with OCS server requirements, you should receive the welcome message from the installer script.
Input y to continue.
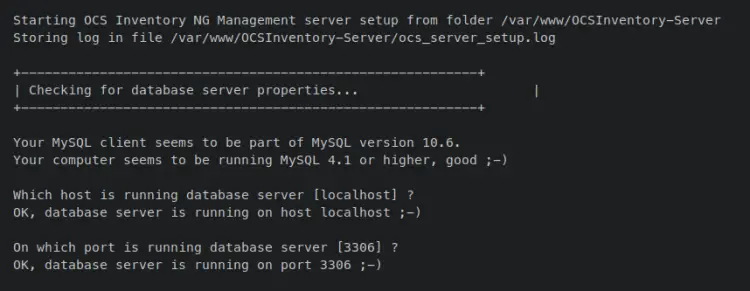
Now the installer script will verify the database details that will be used by OCS Inventory Server. Press ENTER to use the default value for the database host and port.
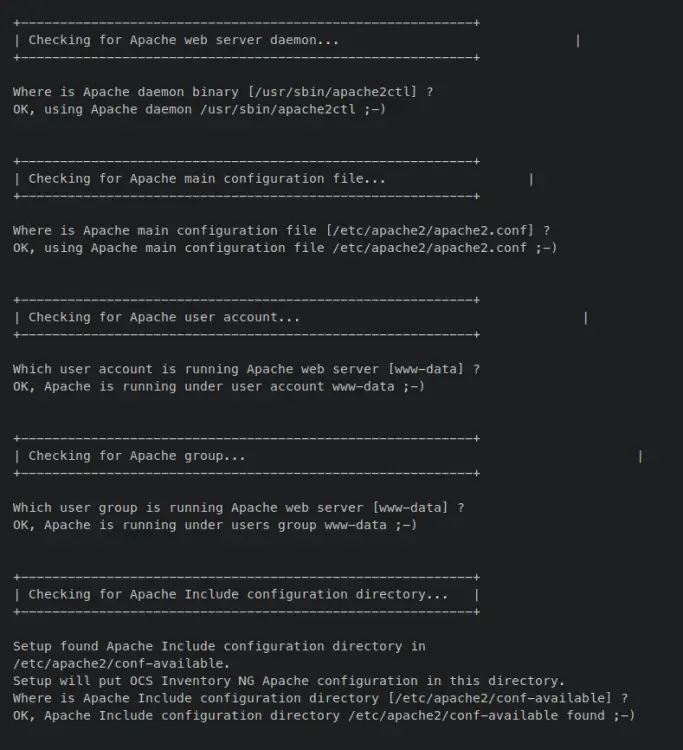
Next, you will be asked about the Apache2 web server configurations. This includes such as the location of the 'apachectl' binary file, the default Apache configuration 'apache.conf', the default user and group that runs the Apache2 service, and the default path that is used by Apache2 to store additional config files.
Press ENTER to use the default settings for the Apache2 web server.
Now you will be asked about the binary file of 'perl'. Leave it as default and press ENTER to continue.
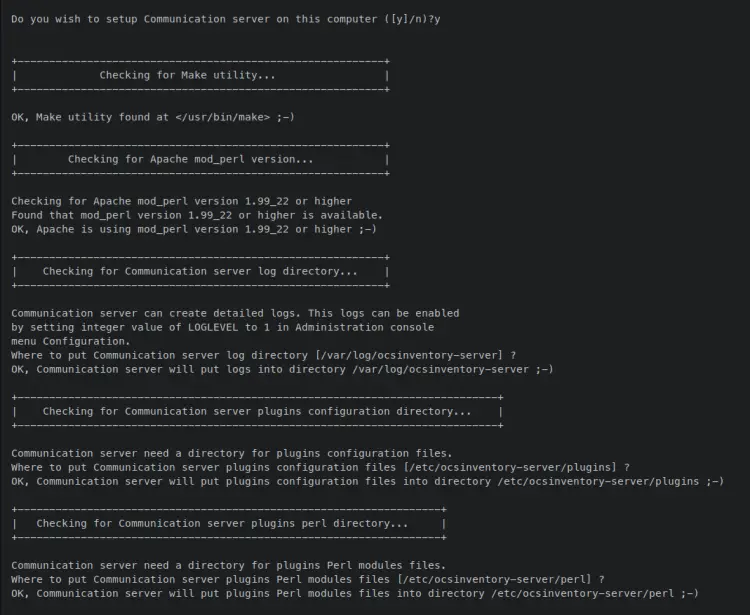
When asked to set up the 'Communication server' on the current machine, input y to confirm. Now the installer script will check some dependencies for installing the 'Communication server'.
Also, you will be asked about some settings that will be used by the 'Communication server'. Press ENTER to use the default settings.
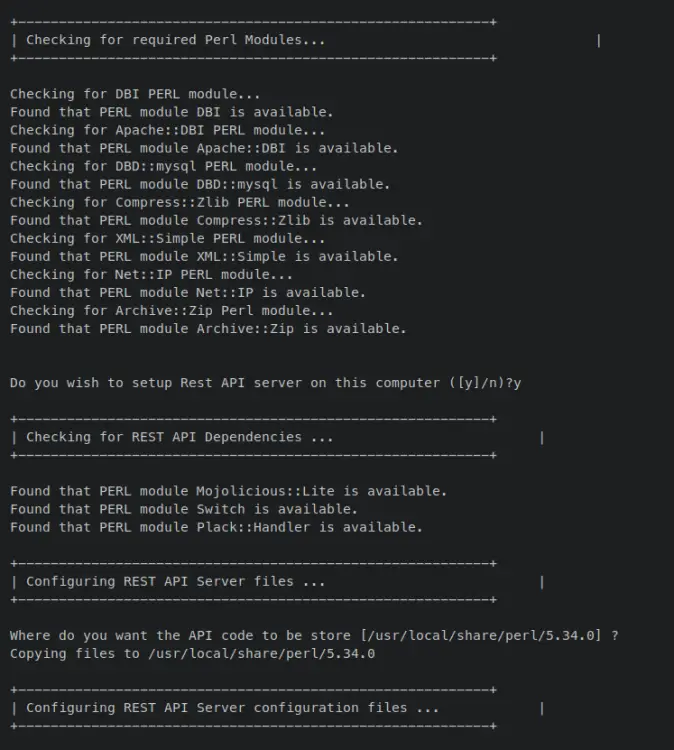
Next, the installer script 'setup.sh' will ensure that the required Perl modules are available on your system. An output 'Found that PERL module ... is available' confirms that module is available.
Then, you will be asked to set up the REST API of the OCS Inventory Server. Input y to confirm and press ENTER for the rest settings.
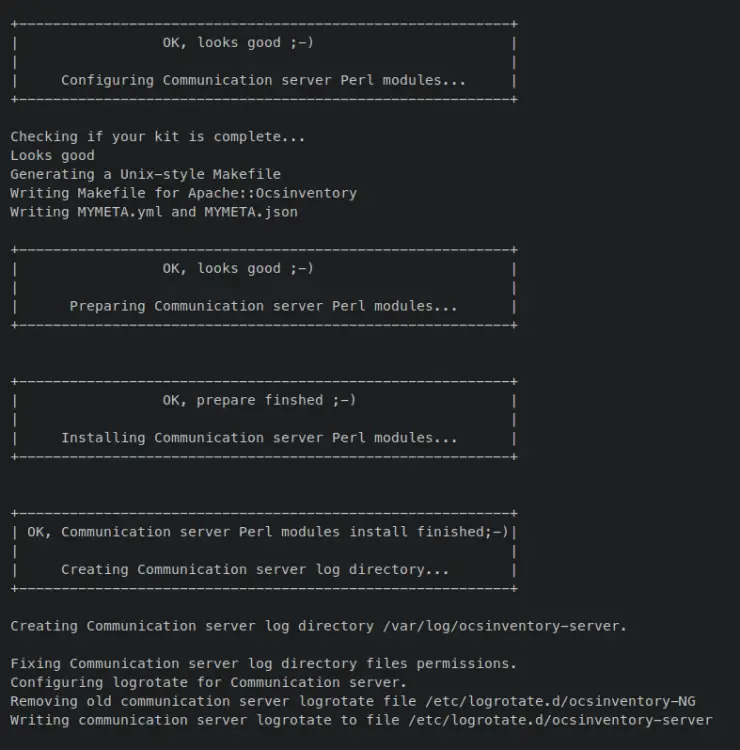
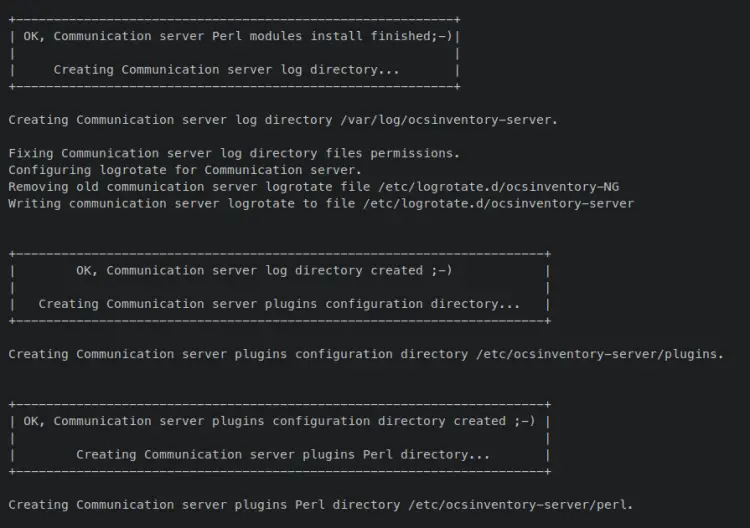
With this, the installation of the 'Communication server' or OCS Inventory Server will start. Below are some screenshots of the OCS Inventory Server installation.
Installation and configuration of 'Communication server' Perl modules.
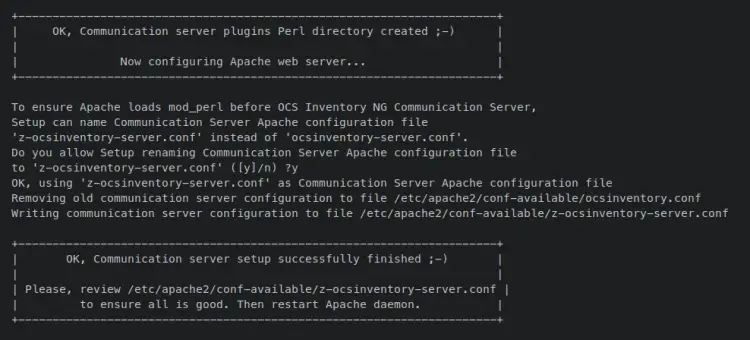
Setting up configuration directories for 'Communication server'.
The 'Communication server' installation is finished. Also, when asked to rename the default Apache2 config file for OCS Inventory Server, input y to confirm and press ENTER to proceed.
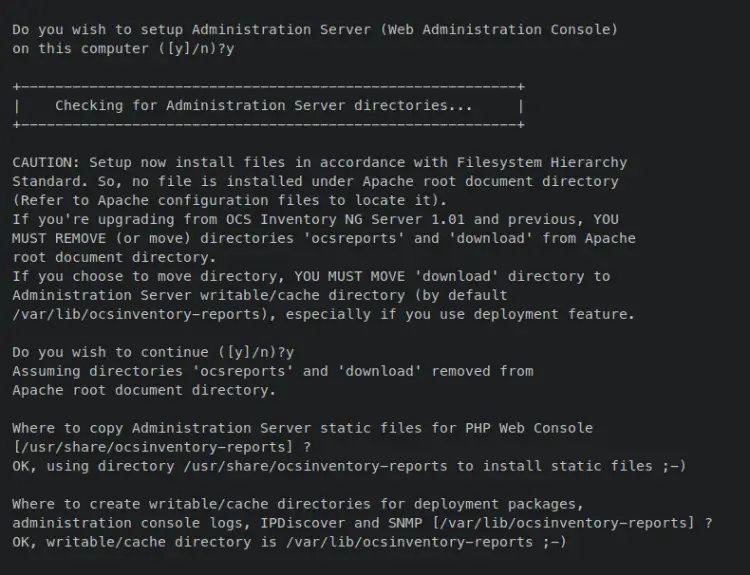
Next, you will be asked to set up and install the 'ocsreports' web administration dashboard. Input y to confirm.
Then, the installer will be asked about the 'ocsreports' source, which is downloaded and PHP dependencies are installed via Composer. Input y again to confirm the installation and press ENTER for the rest of the configurations to use the default settings.
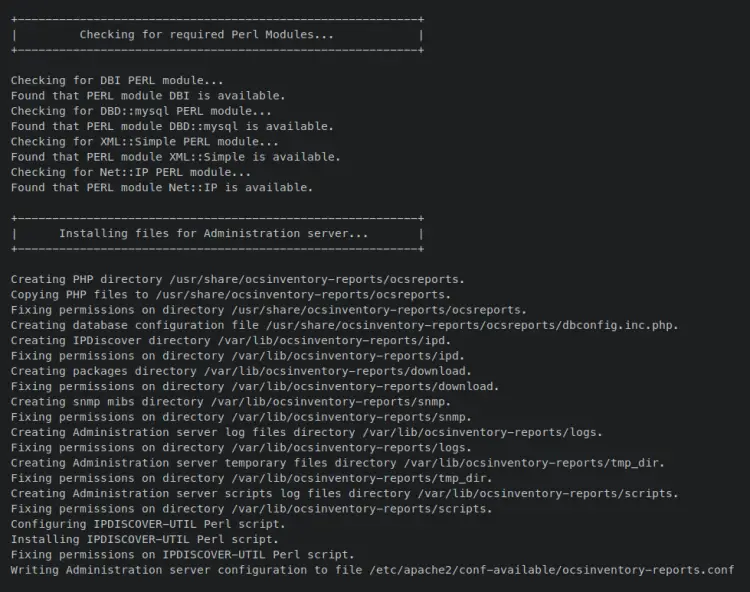
The ocsreports installation will now start.
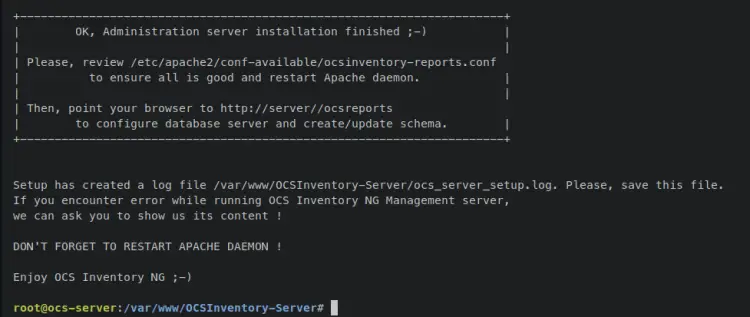
Once finished, you should have the message such as 'OK, Administration server installation finished' printed to your terminal.
With this, the installation of the 'Communication server' or OCS Inventory Server and the 'Administration server' or ocsreports is finished.
At this point, the basic installation and configuration of the OCS Inventory Server are finished, also some default configuration files and directories are generated. In the next step, you will activate the additional Apache2 config files that are used by OCS Inventory Server and ocsreports.
Applying Apache2 Configurations for OCS Inventory Server
After installing the OCS Inventory Server and ocsreports, you will now apply generated Apache2 configurations for the OCS installation. Additional Apache2 configurations generated by the OCS 'setup.sh' script to the directory '/etc/apache2/conf-available/'.
Now you will activate Apache2 configurations that will be used for the OCS Inventory Server by creating a symlink of the config file to the target directory '/etc/apache2/conf-enabled/'.
Enter the following command to enable Apache2 configuration files for OCS Inventory Server.
The file 'ocsinventory-reports.conf' is used to run the ocsreports web application, the 'z-ocsinventory-server.conf' file is used by the OCS inventory Server, and the file 'zz-ocsinventory-restapi.conf' is used by the OCS Server REST API.
sudo ln -s /etc/apache2/conf-available/ocsinventory-reports.conf /etc/apache2/conf-enabled/ocsinventory-reports.conf
sudo ln -s /etc/apache2/conf-available/z-ocsinventory-server.conf /etc/apache2/conf-enabled/z-ocsinventory-server.conf
sudo ln -s /etc/apache2/conf-available/zz-ocsinventory-restapi.conf /etc/apache2/conf-enabled/zz-ocsinventory-restapi.conf
Now enter the following command to ensure that the 'www-data' user and group can write to the ocsreports data directory '/var/lib/ocsinventory-reports'. Then, verify Apache2 configurations via the 'apachectl' command below.
sudo chown -R www-data:www-data /var/lib/ocsinventory-reports
sudo apachectl configtest
An output 'Syntax OK' confirm that you have correct and proper Apache2 configuration files.
Enter the following systemctl command utility to restart the Apache2 service and apply the changes. With this, the OCS Inventory Server should now be accessible via the server IP address.
sudo systemctl restart apache2
Installing OCS Inventory Server and OCS Reports
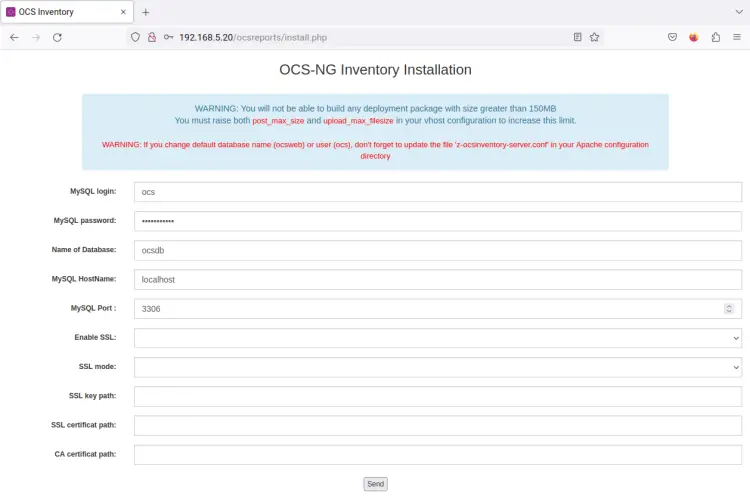
Open your web browser and visit the server IP address followed by the path of the 'ocsreports' web administration dashboard path (i.e: http://192.168.5.20/ocsreports/install.php).
Input database details for your OCS Inventory Server installation and click 'Send' to confirm.
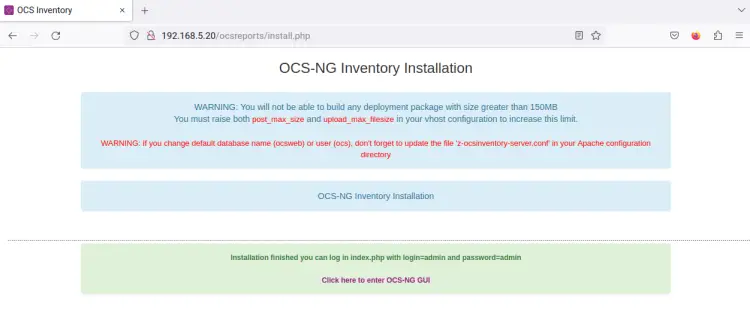
Once the installation is finished, you should receive a page like this - At the bottom page, you should get a message such as 'Installation finished..'. You also get the link to the ocsreports web administration dashboard.
Click the link to get the ocsreports login page.
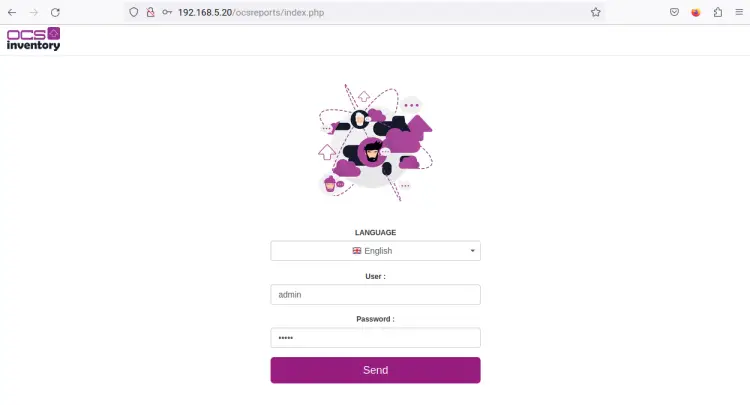
On the OCS login page, input the default administration user and password 'admin'. Then, click 'Send' to continue.
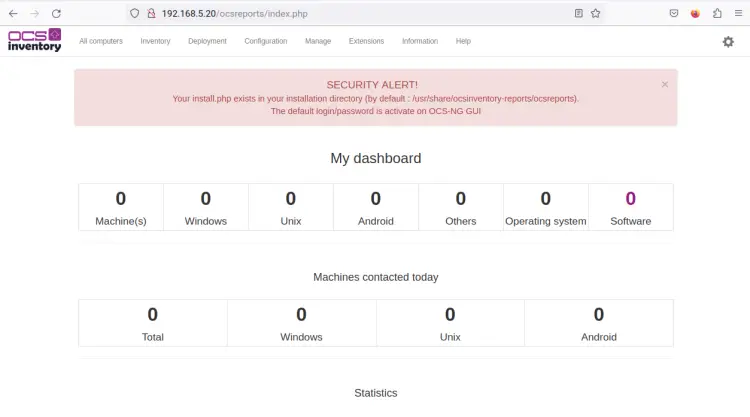
When successful, you should get the ocsreports administration dashboard, which is graphical management for OCS Inventory Server.
At the top of the ocsreports dashboard, you should see the 'SECURITY ALERT' message. This instruct you to remove the installer script '/usr/share/ocsinventory-reports/ocsreports/install.php' and change the default admin user and password.
Back to the OCS Inventory Server terminal and run the below command to remove the installer script 'install.php'.
rm -f /usr/share/ocsinventory-reports/ocsreports/install.php
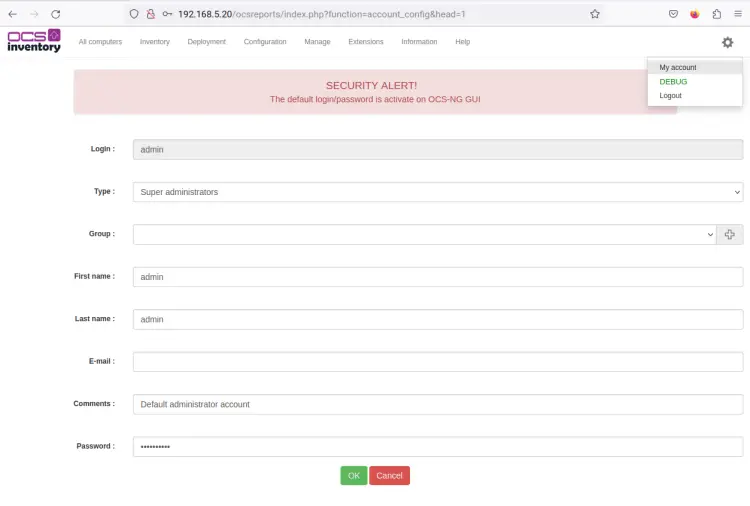
Next, back to the ocsreports dashboard and click on the setting menu on the top right, then select the 'My account' menu.
Change the default admin user, email, and password. Then click 'OK' to confirm.
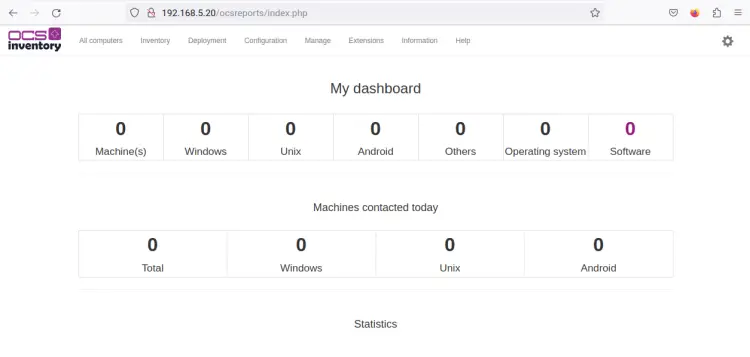
With the installer script 'install.php' removed and the default admin user and password changed, the 'SECURITY ALERT' message will be gone from the ocsreports web administration dashboard.
Conclusion
In this guide, you installed and configured OCS Inventory Server on an Ubuntu 22.04 server. You have manually installed the OCS Invebntory Server from source code and configured the LAMP Stack (Apache2, MariaDB, and PHP) used to run the OCS Invebntory Server and ocsreports web application.
In addition to that, you have also installed the ocsreports as the web console and administration dashboard for the OCS Inventory Server. You have finished installing the OCS reports web application with the LAMP Stack.
With this in mind, you can now easily your devices via OCS Agent, which can be installed on multiple operating systems such as Linux Distributions, Windows, macOS, and BSDs. You can also secure your OCS Inventory Server by implementing the secure HTTPS on the Apache web server. To learn more, visit the OCS Inventory Server's official documentation.

