How to Install NEOS CMS on Ubuntu 18.04 LTS
This tutorial exists for these OS versions
- Ubuntu 24.04 (Noble Numbat)
- Ubuntu 22.04 (Jammy Jellyfish)
- Ubuntu 20.04 (Focal Fossa)
- Ubuntu 18.04 (Bionic Beaver)
On this page
Neos is a modern free and open source content management system that can be used to build and manage websites easily. It is based on its own PHP framework that allows you to build a perfectly customized experience. Neos CMS is not only a CMS but a content application platform and customize as per your enterprise needs. Neos allows you to edit content on your own right in the browser.
In this tutorial, we will explain how to install Neos on Ubuntu 18.04 server.
Requirements
- A server running Ubuntu 18.04.
- A root password is set up to your server.
Getting Started
Before starting, you will need to update your system with the latest version. You can do this by running the following command:
apt-get update -y
apt-get upgrade -y
Once your server is updated, restart your server to apply the changes.
Install LAMP Server
First, you will need to install Apache web server, MariaDB database server, PHP and other required packages to your system. You can install all of them by running the following command:
apt-get install apache2 mariadb-server php7.2 libapache2-mod-php7.2 php7.2-common php7.2-mysql php7.2-gmp php7.2-curl php7.2-intl php7.2-mbstring php7.2-xmlrpc php7.2-gd php7.2-bcmath php7.2-xml php7.2-cli php7.2-zip curl unzip git -y
Once all the packages are installed, start Apache and MariaDB service and enable them to start on boot with the following command:
systemctl start apache2
systemctl start mariadb
systemctl enable apache2
systemctl enable mariadb
Next, you will need to change php.ini file as shown below:
nano /etc/php/7.2/apache2/php.ini
Change the following lines:
short_open_tag = On
memory_limit = 256M
upload_max_filesize = 150M
max_execution_time = 360
date.timezone = Asia/Kolkata
Save and close the file, when you are finished.
Configure MariaDB Database
By default, MariaDB is not secured, so you will need to secure it first. You can secure it by running the following command:
mysql_secure_installation
Answer all the questions as shown below:
    Enter current password for root (enter for none):
    Set root password? [Y/n]: N
    Remove anonymous users? [Y/n]: Y
    Disallow root login remotely? [Y/n]: Y
    Remove test database and access to it? [Y/n]:  Y
    Reload privilege tables now? [Y/n]:  Y
Once the MariaDB is secured, log in to MariaDB shell with the following command:
mysql -u root -p
Enter your root password when prompt. Then, create a database and user for Neos using the following command:
MariaDB [(none)]> CREATE DATABASE neosdb;
MariaDB [(none)]> CREATE USER 'neos'@'localhost' IDENTIFIED BY 'mypassword';
replace the word 'mypassword' with a secure password of your choice in the above command and the next command, use the same password both times. Next, grant all the privileges to Neos database with the following command:
MariaDB [(none)]> GRANT ALL PRIVILEGES ON neosdb.* TO 'neos'@'localhost' IDENTIFIED BY 'mypassword' WITH GRANT OPTION;
Next, change the character set of your database to utf8 with the following command:
MariaDB [(none)]> ALTER DATABASE neosdb charset=utf8;
Next, flush the privileges and exit from the MariaDB shell with the following command:
MariaDB [(none)]> FLUSH PRIVILEGES;
MariaDB [(none)]> EXIT;
Next, you will need to make some changes in MariaDB default config file. You can do this with the following command:
nano /etc/myql/mariadb.conf.d/50-server.cnf
Add the following lines:
innodb_file_format = Barracuda
innodb_large_prefix = 1
innodb_file_per_table = 1
innodb_default_row_format = dynamic
Save and close the file. Then, restart MariaDB service with the following command:
systemctl restart mariadb
You can check the status of MariaDB server with the following command:
systemctl status mariadb
You should see the following output:
? mariadb.service - MariaDB 10.1.38 database server
   Loaded: loaded (/lib/systemd/system/mariadb.service; enabled; vendor preset: enabled)
   Active: active (running) since Tue 2019-04-16 07:31:40 UTC; 7h ago
     Docs: man:mysqld(8)
           https://mariadb.com/kb/en/library/systemd/
  Process: 1239 ExecStartPost=/bin/sh -c systemctl unset-environment _WSREP_START_POSITION (code=exited, status=0/SUCCESS)
  Process: 1235 ExecStartPost=/etc/mysql/debian-start (code=exited, status=0/SUCCESS)
  Process: 937 ExecStartPre=/bin/sh -c [ ! -e /usr/bin/galera_recovery ] && VAR= ||   VAR=`/usr/bin/galera_recovery`; [ $? -eq 0 ]   && systemc
  Process: 927 ExecStartPre=/bin/sh -c systemctl unset-environment _WSREP_START_POSITION (code=exited, status=0/SUCCESS)
  Process: 844 ExecStartPre=/usr/bin/install -m 755 -o mysql -g root -d /var/run/mysqld (code=exited, status=0/SUCCESS)
 Main PID: 1092 (mysqld)
   Status: "Taking your SQL requests now..."
    Tasks: 46 (limit: 1113)
   CGroup: /system.slice/mariadb.service
           ??1092 /usr/sbin/mysqld

Apr 16 07:31:19 ubuntu1804 systemd[1]: Starting MariaDB 10.1.38 database server...
Apr 16 07:31:32 ubuntu1804 mysqld[1092]: 2019-04-16  7:31:32 140002947079296 [Note] /usr/sbin/mysqld (mysqld 10.1.38-MariaDB-0ubuntu0.18.04.1)
Apr 16 07:31:40 ubuntu1804 systemd[1]: Started MariaDB 10.1.38 database server.
Apr 16 07:31:40 ubuntu1804 /etc/mysql/debian-start[1240]: Upgrading MySQL tables if necessary.
Apr 16 07:31:41 ubuntu1804 /etc/mysql/debian-start[1244]: /usr/bin/mysql_upgrade: the '--basedir' option is always ignored
Apr 16 07:31:41 ubuntu1804 /etc/mysql/debian-start[1244]: Looking for 'mysql' as: /usr/bin/mysql
Apr 16 07:31:41 ubuntu1804 /etc/mysql/debian-start[1244]: Looking for 'mysqlcheck' as: /usr/bin/mysqlcheck
Apr 16 07:31:41 ubuntu1804 /etc/mysql/debian-start[1244]: This installation of MySQL is already upgraded to 10.1.38-MariaDB, use --force if you
Apr 16 07:31:41 ubuntu1804 /etc/mysql/debian-start[1294]: Checking for insecure root accounts.
Apr 16 07:31:41 ubuntu1804 /etc/mysql/debian-start[1304]: Triggering myisam-recover for all MyISAM tables and aria-recover for all Aria tables
Once you have finished, you can proceed to the next step.
Install Neos CMS
Before installing Neos, you will need to install Composer to your system. You can install it by running the following command:
curl -sS https://getcomposer.org/installer | php
sudo mv composer.phar /usr/local/bin/composer
Next, change the directory to Apache web root and install Neos CMS with the following command:
cd /var/www/html/
composer create-project --no-dev neos/neos-base-distribution neoscms
Next, change the permission of neoscms with the following command:
chown -R www-data:www-data /var/www/html/neoscms/
chmod -R 755 /var/www/html/neoscms/
Once you have finished, you can proceed to the next step.
Configure Apache for NeosCMS
Next, you will need to create an Apache virtual host file for Neos. You can do it with the following command:
nano /etc/apache2/sites-available/neoscms.conf
Add the following lines:
<VirtualHost *:80>
     ServerAdmin [email protected]
     DocumentRoot /var/www/html/neoscms/Web
     ServerName example.com
     <Directory /var/www/html/neoscms/Web/>
          Options FollowSymlinks
          AllowOverride All
          Require all granted
     </Directory>

     ErrorLog ${APACHE_LOG_DIR}/neos_error.log
     CustomLog ${APACHE_LOG_DIR}/neos_access.log combined

     <Directory /var/www/html/neoscms/Web/>
            RewriteEngine on
            RewriteBase /
            RewriteCond %{REQUEST_FILENAME} !-f
            RewriteRule ^(.*) index.php [PT,L]
    </Directory>
</VirtualHost>
Save and close the file, when you are finished. Then, enable neos virtual host and Apache rewrite module with the following command:
a2ensite neoscms.conf
a2enmod rewrite
Finally, restart Apache service to apply all the changes with the following command:
systemctl restart apache2
You can check the status of Apache with the following command:
systemctl status apache2
You should see the following output:
? apache2.service - The Apache HTTP Server
   Loaded: loaded (/lib/systemd/system/apache2.service; enabled; vendor preset: enabled)
  Drop-In: /lib/systemd/system/apache2.service.d
           ??apache2-systemd.conf
   Active: active (running) since Tue 2019-04-16 14:57:32 UTC; 3s ago
  Process: 2358 ExecStart=/usr/sbin/apachectl start (code=exited, status=0/SUCCESS)
 Main PID: 2372 (apache2)
    Tasks: 6 (limit: 1113)
   CGroup: /system.slice/apache2.service
           ??2372 /usr/sbin/apache2 -k start
           ??2375 /usr/sbin/apache2 -k start
           ??2377 /usr/sbin/apache2 -k start
           ??2378 /usr/sbin/apache2 -k start
           ??2381 /usr/sbin/apache2 -k start
           ??2382 /usr/sbin/apache2 -k start

Apr 16 14:57:31 ubuntu1804 systemd[1]: Starting The Apache HTTP Server...
Apr 16 14:57:32 ubuntu1804 apachectl[2358]: AH00558: apache2: Could not reliably determine the server's fully qualified domain name, using 192.
Apr 16 14:57:32 ubuntu1804 systemd[1]: Started The Apache HTTP Server.
Once you have finished, you can proceed to the next step.
Access Neos Web Interface
Now, open your web browser and type the URL http://example.com/setup. You will be redirected to the following page:
Next, enter the setup password from /var/www/html/neoscms/Data/SetupPassword.txt file and click on the Login button. You should see the following page:
Make sure all the required packages are installed. Then, click on the Next button. You should see the following page:
Now, provide your database name, database username and password. Then, click on the Next button. You should see the following page:
Now, provide your admin account details and click on the Next button. You should see the following page:
Now, click on the Skip button. Once the installation has been completed successfully, you should see the following page:
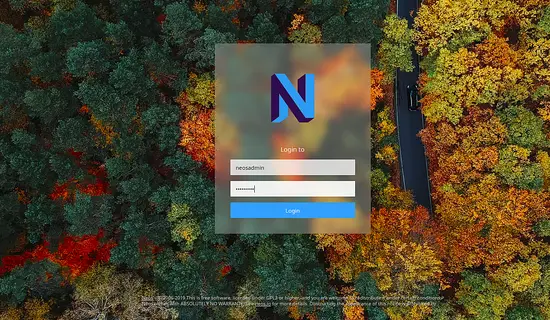
Now, click on the Go to the backend button. You will be redirected to the Neos login page:
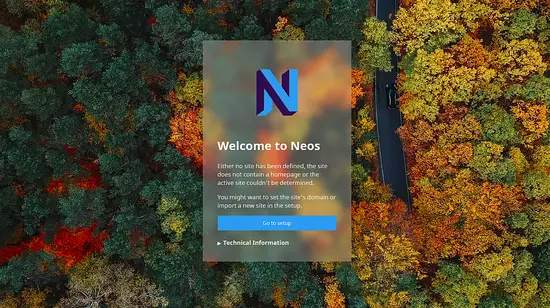
Now, provide your admin username and password. Then, click on the Login button. You should see the following page:
Conclusion
Congratulations! you have successfully installed Neos CMS on Ubuntu 18.04 server. You can now easily host your own website or blog using Neos. Feel free to ask me if you have any questions.


