How to Install Jellyfin Media Server on Debian 12
This tutorial exists for these OS versions
- Debian 12 (Bookworm)
- Debian 11 (Bullseye)
- Debian 10 (Buster)
On this page
Jellyfin is free software for building a media server. It lets you collect, manage, and stream your media files from multiple devices or clients. Jellyfin is a free and self-hosted application that can be installed on your server, so you can create your own media server in your local environment, such as at home, and then allow multiple clients and devices to access all your media files.
Jellyfin is an alternative media file server to proprietary like Emby and Plex. It allows you to manage media files from any device and anywhere.
This guide will show you how to install the Jellyfin media server on Debian 12. You will install Jellyfin via a pre-built binary package and secure it with UFW (Uncomplicated Firewall), SSL/TLS certificates from Letsencrypt, and the Apache2 reverse proxy.
Prerequisites
To begin the process, ensure you have the following:
- A Debian 12 server with 2 or 4 GB of memory.
- A non-root user with administrator privileges.
- A domain name pointed to the server IP address.
Adding Jellyfin Repository
The Jellyfin media server can be installed in many ways, manually or via a pre-built package that is available for most Linux distributions. In this first step, you will add the Jellyfin repository to your Debian server.
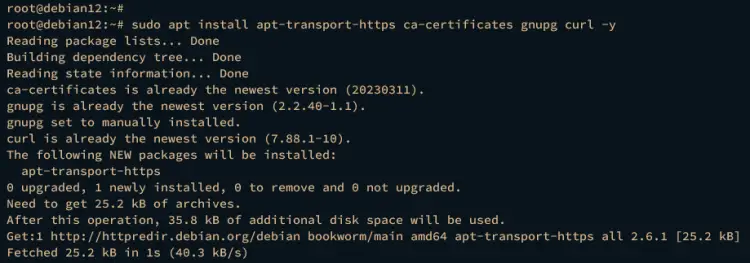
First, run the following apt command to install dependencies to your Debian machine.
sudo apt install apt-transport-https ca-certificates gnupg curl -y
Once dependencies are installed, execute the following command to add the GPG key of the jellyfin repository, which will be stored at /etc/apt/keyrings/jellyfin.gpg.
sudo mkdir -p /etc/apt/keyrings
curl -fsSL https://repo.jellyfin.org/jellyfin_team.gpg.key | sudo gpg --dearmor -o /etc/apt/keyrings/jellyfin.gpg
Now execute the command below to add the jellyfin repository to your Debian server. After executing the command, the repository file /etc/apt/sources.list.d/jellyfin.sources will be created.
cat <<EOF | sudo tee /etc/apt/sources.list.d/jellyfin.sources
Types: deb
URIs: https://repo.jellyfin.org/$( awk -F'=' '/^ID=/{ print $NF }' /etc/os-release )
Suites: $( awk -F'=' '/^VERSION_CODENAME=/{ print $NF }' /etc/os-release )
Components: main
Architectures: $( dpkg --print-architecture )
Signed-By: /etc/apt/keyrings/jellyfin.gpg
EOF
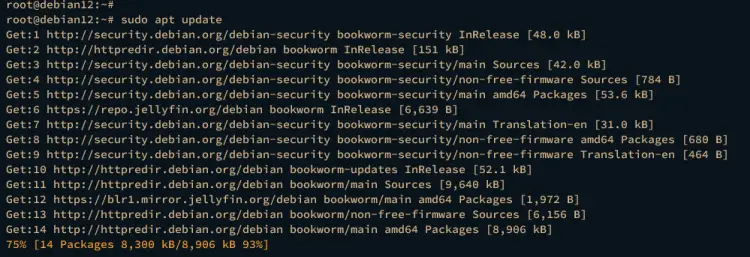
Lastly, update and refresh your Debian package index using the apt update command below.
sudo apt update
You should see the jellyfin repository added to the system repository list.
Installing and Managing Jellyfin
With the jellyfin repository added, you're ready to install the jellyfin media server. Complete these steps to install jellyfin and learn how to manage the jellyfin service via systemctl.
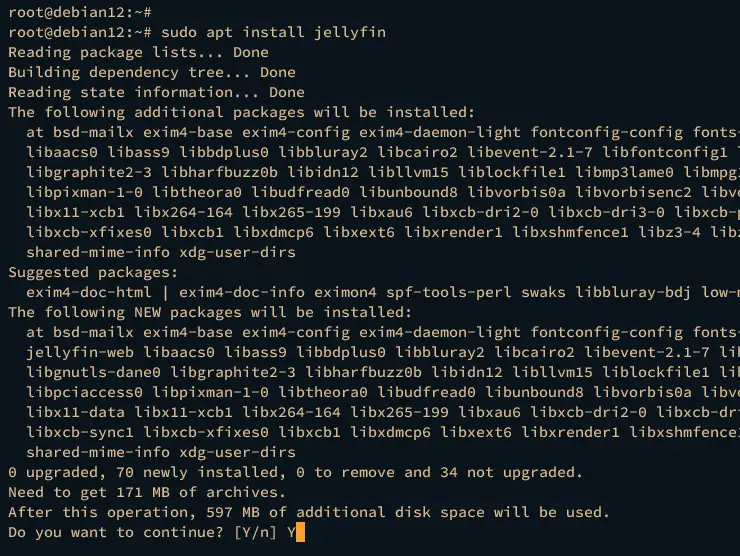
Execute the apt install command below to install the jellyfin media server. Type y for the confirmation and press ENTER to proceed.
sudo apt install jellyfin
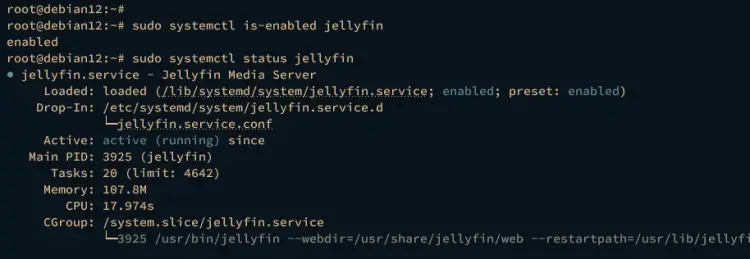
After installation, ensure the Jellyfin service is running and enabled using the command below.
sudo systemctl is-enabled jellyfin
sudo systemctl status jellyfin
If running, you should see the output active (running). When enabled, the output you should get is enabled. This means the Jellyfin will start automatically upon the system boot.
By default, Jellyfin is running in localhost with port 8096. Execute the ss command below to verify the ports list on your Debian system.
ss -tulpn
You can expect to see port 8096 is used by the Jellyfin media server.
Lastly, run the following systemctl command to start, stop, or restart the Jellyfin service.
sudo systemctl start jellyfin
sudo systemctl stop jellyfin
sudo systemctl restart jellyfin
Security Settings with UFW
In the following section, you will secure your Jellyfin media server via UFW. You will install UFW and and then open HTTP and HTTPS protocols for client access. You must open HTTP and HTTPS protocols because you will be using Apache2 as a reverse proxy.
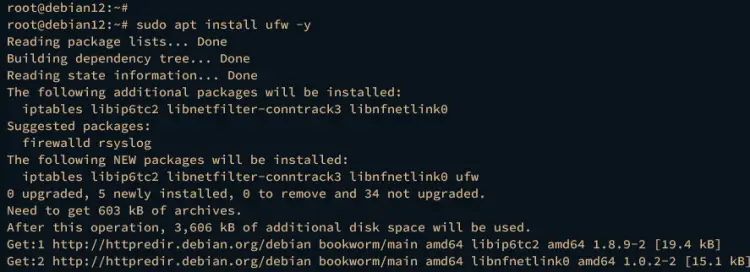
First, install UFW via the apt install command below.
sudo apt install ufw -y
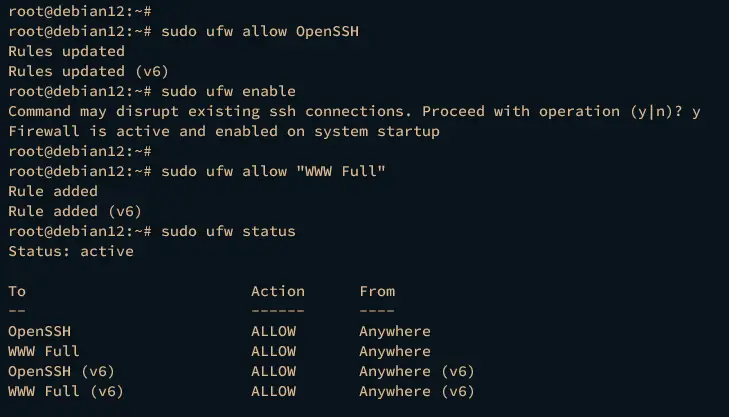
Once UFW installed, run the ufw command below to add the OpenSSH service, then start and enable UFW.
sudo ufw allow OpenSSH
sudo ufw enable
Type y when prompted and UFW should be running and enabled.
Now run the command below to add the WWW Full profile and verify the UFW status. The WWW Full profile will open both HTTP and HTTPS protocols on your Debian system.
sudo ufw allow "WWW Full"
sudo ufw status
The output should indicate that UFW is active with enabled OpenSSH and WWW Full profiles.
Installing and Configuring Apache2 as Reverse Proxy
In this guide, you will run the Jellyfin media server within Apache2 as a reverse proxy. You'll also secure your installation with SSL/TLS certificates generated via Certbot and Letsencrypt.
Now, complete the following tasks: install Apache2 and Certbot, generate SSL/TLS certificates, and create the Apache2 virtual host configuration for the Jellyfin media server.
Installing Apache2 and Certbot
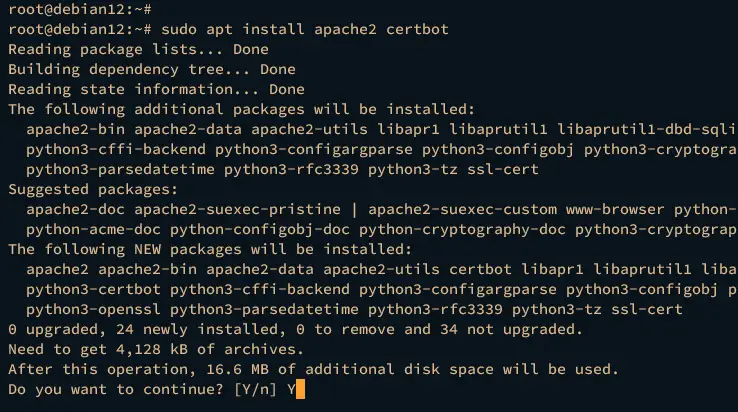
First, run the following command to install the Apache2 web server and Certbot. Type y for the confirmation and press ENTER.
sudo apt install apache2 certbot
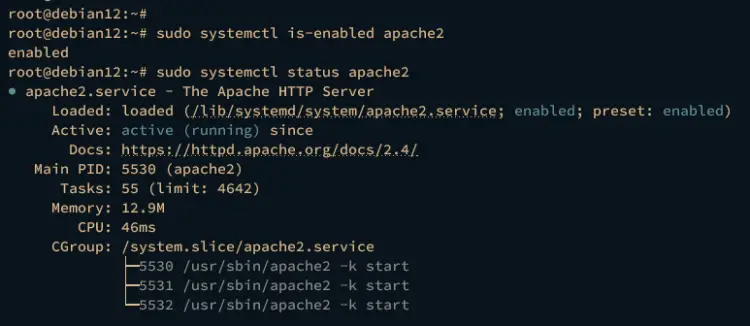
After installation is finished, the apache2 service should be running and enabled by default. Verify it using the systemctl command below.
sudo systemctl is-enabled apache2
sudo systemctl status apache2
The output enabled indicates that the apache2 service will start automatically at boot. And the output active (running) indicates the status of the service is running.
Generating SSL/TLS Certificates with Certbot
Before generating SSL/TLS certificates, enable some Apache2 modules via the a2enmod command and restart the Apache2 service.
sudo a2enmod proxy proxy_http ssl proxy_wstunnel remoteip http2 headers
sudo systemctl restart apache2
Now run the following command to create a new directory /var/www/html/jellyfin/public_html and change the ownership to the www-data user and group. This directory will be used as a temporary web-root directory for generating SSL/TLS certificates.
sudo mkdir -p /var/www/html/jellyfin/public_html
sudo chown -R www-data:www-data /var/www/html/jellyfin/public_html
Next, run the certbot command below to generate new SSL/TLS certificates. Ensure to change the email address and domain name before executing the command.
sudo certbot certonly --agree-tos --email [email protected] --no-eff-email --webroot -w /var/www/html/jellyfin/public_html -d media.howtoforge.local
After the process, your SSL/TLS certificates will be available in /etc/letsencrypt/live/domain.com directory. The file fullchain.pem is the public key and the privkey.pem is the private key.
Configuring Apache2 as a Reverse Proxy
Create a new virtual host configuration /etc/apache2/sites-available/jellyfin.conf using the following nano editor command.
sudo nano /etc/apache2/sites-available/jellyfin.conf
Insert the configuration below and be sure to change the domain name, the path of SSL/TLS certificates, and the server IP address with your information. With this, you will set up Apache2 as a reverse proxy for the jellyfin media server that is running on port 8096.
<VirtualHost *:80>
    ServerName media.howtoforge.local

    # Comment to prevent HTTP to HTTPS redirect
    Redirect permanent / https://media.howtoforge.local/

    ErrorLog /var/log/apache2/media.howtoforge.local-error.log
    CustomLog /var/log/apache2/media.howtoforge.local-access.log combined
</VirtualHost>

# If you are not using an SSL certificate, replace the 'redirect'
# line above with all lines below starting with 'Proxy'
<IfModule mod_ssl.c>
<VirtualHost *:443>
    ServerName media.howtoforge.local
    # This folder exists just for certbot(You may have to create it, chown and chmod it to give apache permission to read it)
    DocumentRoot /var/www/html/jellyfin/public_html

    ProxyPreserveHost On

    # Letsencrypt's certbot will place a file in this folder when updating/verifying certs
    # This line will tell Apache to not to use the proxy for this folder.
    ProxyPass "/.well-known/" "!"

    # Tell Jellyfin to forward that requests came from TLS connections
    RequestHeader set X-Forwarded-Proto "https"
    RequestHeader set X-Forwarded-Port "443"

    ProxyPass "/socket" "ws://192.168.10.15:8096/socket"
    ProxyPassReverse "/socket" "ws://192.168.10.15:8096/socket"

    ProxyPass "/" "http://192.168.10.15:8096/"
    ProxyPassReverse "/" "http://192.168.10.15:8096/"

    SSLEngine on
    SSLCertificateFile /etc/letsencrypt/live/media.howtoforge.local/fullchain.pem
    SSLCertificateKeyFile /etc/letsencrypt/live/media.howtoforge.local/privkey.pem
    Protocols h2 http/1.1

    # Enable only strong encryption ciphers and prefer versions with Forward Secrecy
    SSLCipherSuite HIGH:RC4-SHA:AES128-SHA:!aNULL:!MD5
    SSLHonorCipherOrder on

    # Disable insecure SSL and TLS versions
    SSLProtocol all -SSLv2 -SSLv3 -TLSv1 -TLSv1.1

    ErrorLog /var/log/apache2/media.howtoforge.local-error.log
    CustomLog /var/log/apache2/media.howtoforge.local-access.log combined
</VirtualHost>
</IfModule>
Save the file and exit the editor when finished.
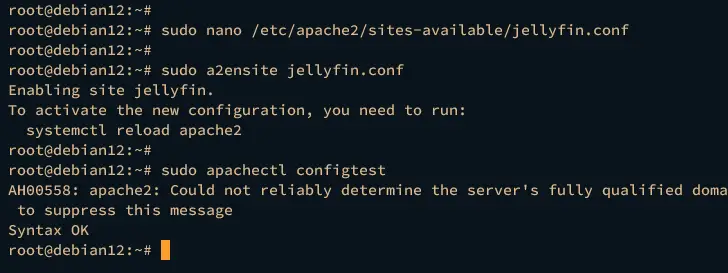
Next, run the a2ensite command below to activate the virtual host jellyfin.conf, then verify your Apache2 syntax.
sudo a2ensite jellyfin.conf
sudo apachectl configtest
If you've proper Apache2 syntax, you should get an output Syntax OK.
Now restart the apache2 service using the below command to apply the changes. Your jellyfin installation should be running and secured under the Apache2 reverse proxy.
sudo systemctl restart apache2
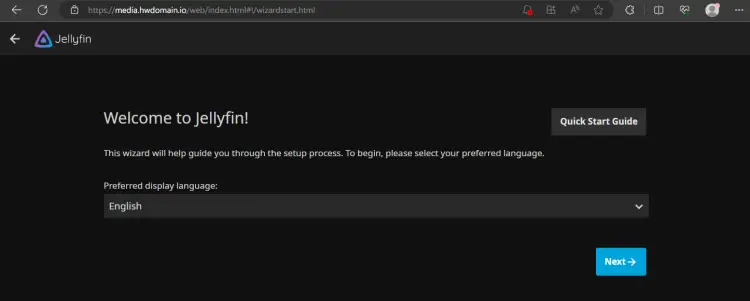
Lunch your web browser and visit the domain name of your Jellyfin installation, such as https://media.howtoforge.local/. If the configuration is successful, you should get the Jellyfin installation wizard like this:
Jellyfin Media Server Installation
In the following step, you'll complete the Jellyfin media server configuration via the installation wizard.
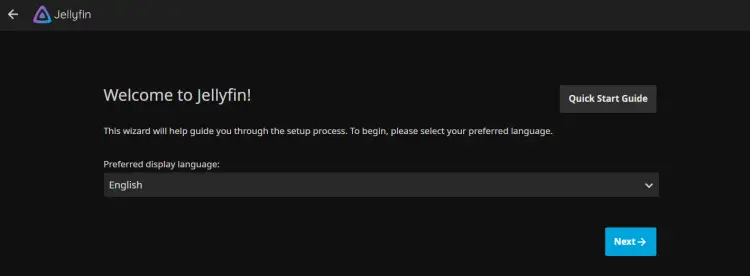
First, select the default language for your Jellyfin installation and click Next.
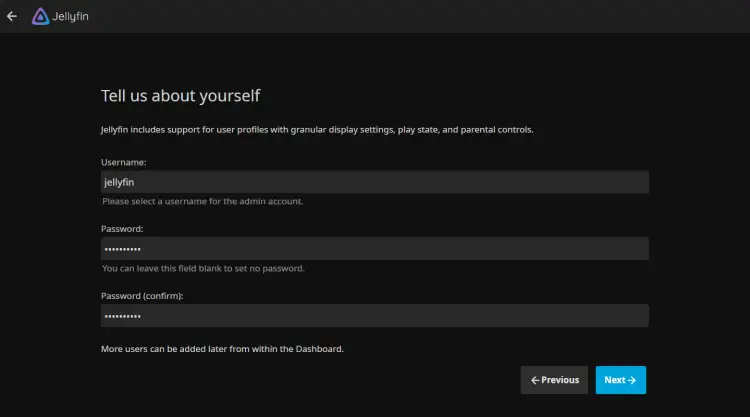
Now, create a new admin user for your Jellyfin installation. Input your username and password, then click Next.
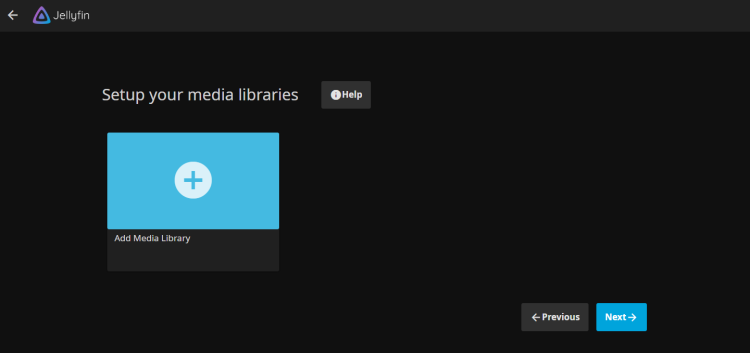
For the media libraries, you can configure them later. Click Next to continue.
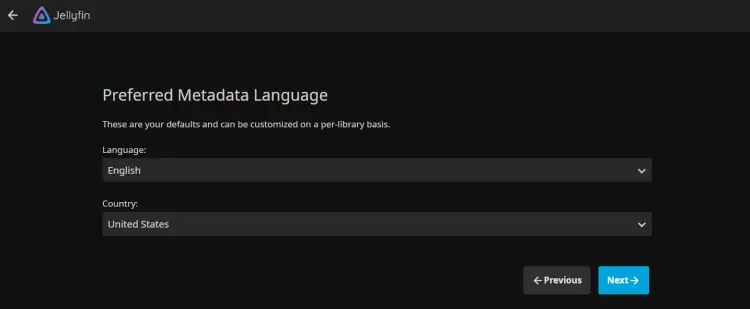
Select your preferred Metadata language for your libraries and click Next.
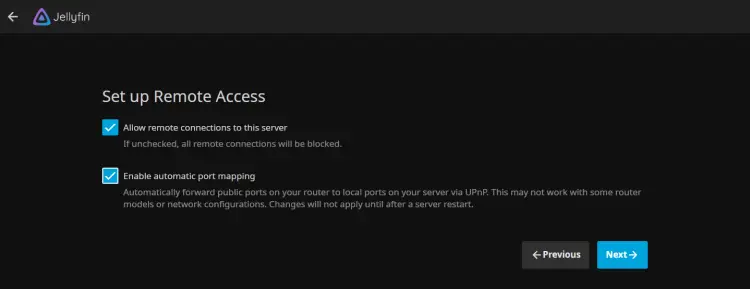
Check the option Allow remote connections to enable remote access to your jellyfin media server. Also, you can enable port mapping by checking the option. Then, click Next.
If your configuration is successful, you should get the message You're Done!. Click Finish to complete the jellyfin installation.
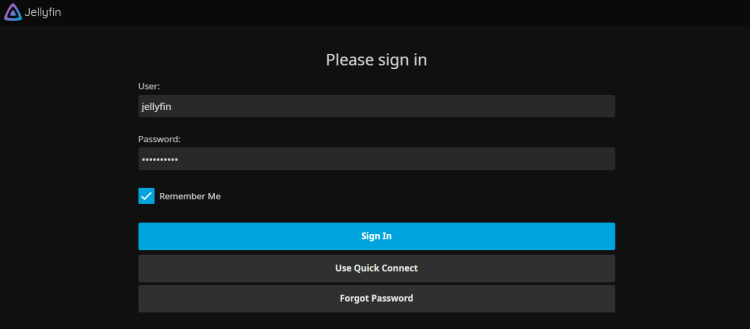
Now, you should be redirected to the Jellyfin login page. Input your admin user and password for Jellyfin, then click Sign In.
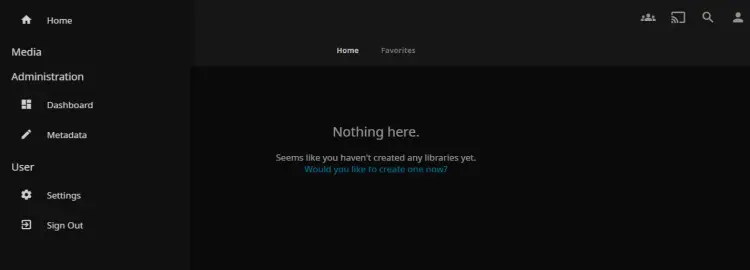
If everything goes well, you should get the Jellyfin administration dashboard like this:
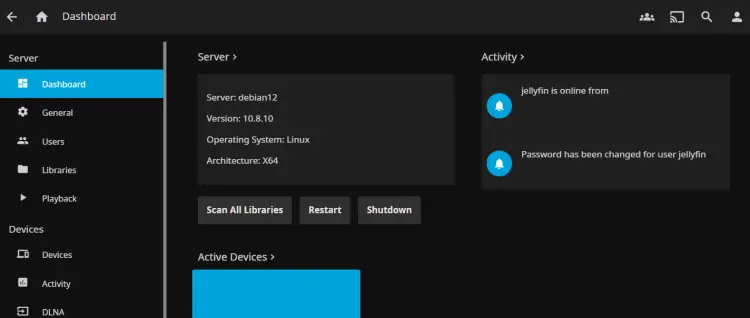
Lastly, click on the Dashboard menu in the Administration section. You should see detailed information about your Jellyfin media server installation:
Conclusion
As a wrap-up of this guide, you have finished the installation of the Jellyfin media server on Debian 12 with Apache2 reverse proxy and SSL/TLS from Letsencrypt. You've also secured your jellyfin server with UFW and completed the basic configuration of the Jellyfin media server. You can create a new media library and upload your media files to Jellyfin.

