How to Install CRI-O Container Runtime on Ubuntu 22.04
CRI-O is a lightweight container runtime alternative to Docker for Kubernetes. It's an implementation of Kubernetes CRI (Container Runtime Interface) and compliance with OCI runtime (Open Container initiative). CRI-O allows Kubernetes to execute containers directly without any additional tools or adjustments to the code.
CRI-O supports multiple image formats, including Docker image format. Also provides functionality for managing container images such as managing image layer, overlay filesystems, managing container process lifecycle, monitoring and logging for containers, and also provides resource isolation.
This tutorial will guide you through the installation of the CRI-O Container Runtime on the Ubuntu 22.04 server. This also includes how to set up the CNI plugin with CRI-O and the basic usage of "cri-tools" for managing Pods and containers.
Prerequisite
Before starting, you must have the following requirements:
- An Ubuntu 22.04 server - This guide uses the Ubuntu Server with hostname "server-ubuntu" and the server IP address "192.168.5.10".
- A non-root user with root/administrator privileges.
Installing CRI-O Container Runtime
CRI-O can be installed in different ways, installing via APT command or building and installing CRI-O from the source. in this example, you will install the CRI-O Container Runtime through the third-party repository.
Before you start the installation, run the following command to set up the environment variable "$OS" and "$CRIO_VERSION". For this example, we will install the CRI-O v1.24.0 for Ubuntu 22.04.
export OS=xUbuntu_22.04
export CRIO_VERSION=1.24
Now run the following command to add the CRI-O repository for Ubuntu 22.04 server.
echo "deb https://download.opensuse.org/repositories/devel:/kubic:/libcontainers:/stable/$OS/ /"|sudo tee /etc/apt/sources.list.d/devel:kubic:libcontainers:stable.list
echo "deb http://download.opensuse.org/repositories/devel:/kubic:/libcontainers:/stable:/cri-o:/$CRIO_VERSION/$OS/ /"|sudo tee /etc/apt/sources.list.d/devel:kubic:libcontainers:stable:cri-o:$CRIO_VERSION.list
Add the GPG key for the CRI-O repository using the below command.
curl -L https://download.opensuse.org/repositories/devel:kubic:libcontainers:stable:cri-o:$CRIO_VERSION/$OS/Release.key | sudo apt-key add -
curl -L https://download.opensuse.org/repositories/devel:/kubic:/libcontainers:/stable/$OS/Release.key | sudo apt-key add -
Now update your Ubuntu repository and refresh the package index. You should see the CRI-O repository is added to your package index list.
sudo apt update
After that, check the CRI-O package version using the below command. As you can see, you will install the latest version of the CRI-O package v1.24.
sudo apt info cri-o
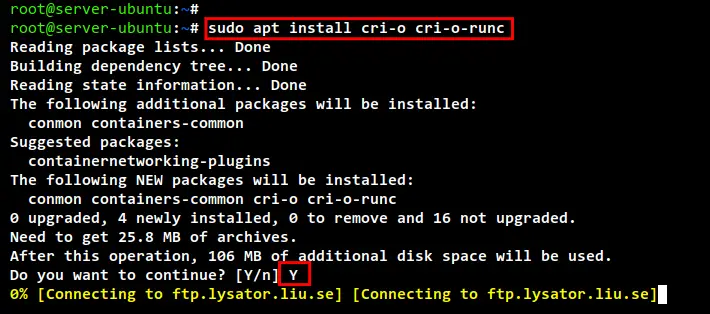
Now install the CRI-O container runtime using the apt command below. Input Y to confirm the installation and press ENTER to continue, and the installation will begin.
sudo apt install cri-o cri-o-runc
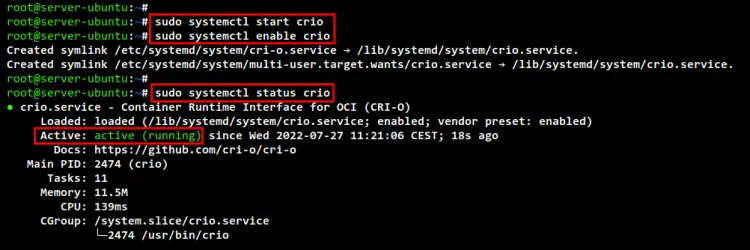
After installation is finished, start the CRI-O service and enable it using the "systemctl" command below.
sudo systemctl start crio
sudo systemctl enable crio
Lastly, check and verify the CRI-O service using the below command. You should see the CRI-O service is enabled and will automatically run at system boot. And the current status of the CRI-O service is running.
sudo systemctl status crio
Installing CNI (Container Network Interface) Plugin
The CNI (Container Network Interface) is required for the CRI-O container runtime. The CNI plugin allows you to set up networking on the container and Pods. You will install the CNI plugin from the official ubuntu repository and set it up with the CRI-O container runtime.
The package "containernetworking-plugins" is mostly available on Linux distribution. To install it, run the apt command below, and the installation will begin.
sudo apt install containernetworking-plugins
After installation is finished, edit the CRI-O configuration file "/etc/crio/crio.conf" using the following command.
sudo nano /etc/crio/crio.conf
On the "[crio.network]" section, uncomment the "network_dir" and "plugin_dirs" option. Also, be sure to add the CNI plugin directory "/usr/lib/cni/" to the "plugin_dirs" option.
# The crio.network table containers settings pertaining to the management of
# CNI plugins.
[crio.network]

# The default CNI network name to be selected. If not set or "", then
# CRI-O will pick-up the first one found in network_dir.
# cni_default_network = ""

# Path to the directory where CNI configuration files are located.
network_dir = "/etc/cni/net.d/"

# Paths to directories where CNI plugin binaries are located.
plugin_dirs = [
        "/opt/cni/bin/",
        "/usr/lib/cni/",
]
When you are finished, save and close the file.
Next, remove the default bridge CNI confgiuration "/etc/cni/net.d/100-crio-bridge.conf". Then, download the new bridge CNI configuration to "/etc/cni/net.d/11-crio-ipv4-bridge.conf".
The new bridge CNI configuration will enable only IPv4 for Pods and containers.
rm -f /etc/cni/net.d/100-crio-bridge.conf
sudo curl -fsSLo /etc/cni/net.d/11-crio-ipv4-bridge.conf https://raw.githubusercontent.com/cri-o/cri-o/main/contrib/cni/11-crio-ipv4-bridge.conf
Now restart the CRI-O service to apply new changes to the CNI plugin settings.
sudo systemctl restart crio
Lastly, check and verify again the CRI-O service using the below command. You should see CRI-O service is running with the new bridge CNI configuration.
sudo systemctl status crio
Installing CRI-Tools Package
You have finished the installation of the CRI-O container runtime and now it's running with the correct CNI plugin. Now you will install the "cri-tools" package which includes the command-line utility "crictl" that can be used to interact with the CRI-O container runtime.
The "cri-tools" can be used with multiple container runtimes such as containerd, dockershim, CRI-O, and cri-dockerd.
Run the apt command below to install the "cri-tools" package. The installation will automatically begin.
sudo apt install cri-tools
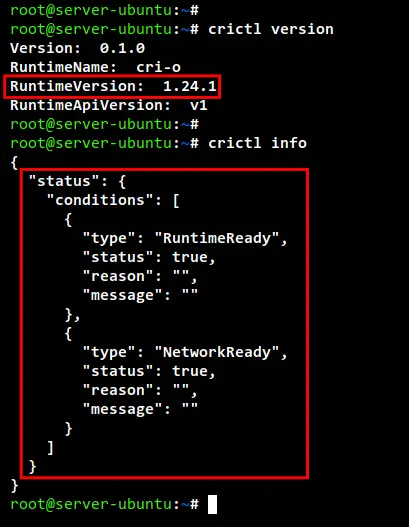
After the installation is finished, run the "crictl" command below to check the current runtime version. you will see the current container runtime you are using is a CRI-O v1.24.
crictl version
Next, run the following "crictl" command below to check the status of the current Container Runtime and the CNI Network Plugin. You should see the CRI-O Container Runtime is "RuntimeReady" and the CNI Plugin is "NetworkReady".
crictl info
The crictl command provides an auto-completion for your shell, which can be generated manually. Run the following crictl command below to generate the command-completion for the Bash shell to the "/etc/bash_completion.d/crictl". Then, reload your current Bash session by sourcing the ~/.bashrc config file.
crictl completion > /etc/bash_completion.d/crictl
source ~/.bashrc
Now run the "crictl" command and press TAB to see all available command completion.
crictl TAB
Creating Pod and Container using crictl
Now that cri-tools is installed on your system, it's time for creating a Pod sandbox and container using the "crictl" command. In this example, we will create a Pod for the Nginx container.
Create a new directory "~/demo" using the below command.
mkdir ~/demo/
Now run the below command to create a new JSON configuration file and define the Pod sandbox for the container.
cat <<EOF | tee ~/demo/sandbox_nginx.json
{
    "metadata": {
        "name": "nginx-sandbox",
        "namespace": "default",
        "attempt": 1,
        "uid": "hdishd83djaidwnduwk28bcsb"
    },
    "linux": {
    },
    "log_directory": "/tmp"
}
EOF
Run the Pod sandbox using the following "crictl" command below. And you should see the random string of your Pod.
sudo crictl runp ~/demo/sandbox_nginx.json
Check and verify running Pods using the below command. You should see the Pod sandbox "nginx-sandbox" with the Pod id "7b0618800e251" in the state "Ready".
sudo crictl pods
To check the details of Pod, run the "crictl" command below, and be sure to change the Pod id. In this example, the "nginx_sandbox" pod has an IP address "10.85.0.3".
sudo crictl inspectp --output table 7b0618800e251
Now that the Pod sandbox is ready, it's time to create the Nginx container. But first, you will download the Nginx image.
Run the following crictl command below to download the Nginx image. Then, check and verify the list of available images.
sudo crictl pull nginx
sudo crictl images
Now run the following command to create a new JSON file for defining the Nginx container.
cat <<EOF | tee ~/demo/container_nginx.json
{
  "metadata": {
      "name": "nginx"
    },
  "image":{
      "image": "nginx"
    },
  "log_path":"nginx.0.log",
  "linux": {
  }
}
EOF
Create a new container to the Pod sandbox "7b0618800e251" using the crictl command below. You should see the random string of your new Nginx container id.
sudo crictl create 7b0618800e251 ~/demo/container_nginx.json ~/demo/sandbox_nginx.json
Start the Nginx container using the below command, and be sure to change the container id.
sudo crictl start 1100498979ee5d3a9cbdb7b8b8f18529a01298f2bb57f7fcd01f54dd5a0f8746
After that, check and verify the running container using the below command. You should see the Nginx container is "Running" inside the Pod "7b0618800e251".
sudo crictl ps
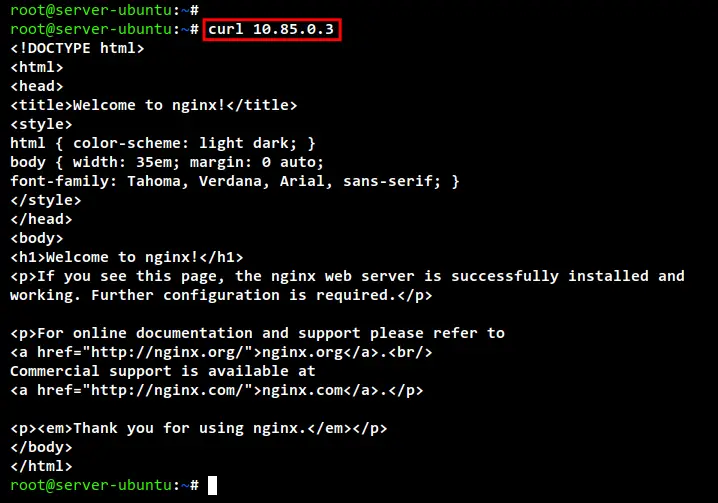
Lastly, you can access the Nginx container via the IP address of the Pod sandbox "nginx_sandbox". Run the curl command to the "nginx_sandbox" IP address "10.85.0.3", and you will see the default index.html page of your Nginx container.
curl 10.85.0.3
Conclusion
You have now finished the installation and configuration of the CRI-O Container Runtime with CNI Plugin on an Ubuntu 22.04 server. You can now use it as the container runtime for the Kubernetes cluster. You have also learned the basic usage of the "crictl" command for creating Pods and containers using the CRI-O Container Runtime.


