How to Install ApostropheCMS on Ubuntu 18.04 LTS
ApostropheCMS is a free and open source content management system that can be used to build both simple and complex content-driven websites. It is simple, in-context CMS built on top of Node.js and MongoDB. ApostropheCMS is customizable, so you can edit your content on the web easily. It is used around the world by companies of all sizes to build and manage mission critical websites and applications. It allows you to create relationships between documents, such as blog posts and their authors.
Features
- Import content from CSV or Excel files.
- Restrict page editing for a page or many pages to particular people and groups of people.
- Easily rolling back to old versions of any page or document.
- Provides powerful back-end search based on MongoDB text search.
- Content tagging and convenient tag management.
In this tutorial, we will learn how to install Apostrophe CMS on Ubuntu 18.04 LTS server.
Requirements
- A server running Ubuntu 18.04.
- A static IP address is configured on your system
- A root password is setup on your system.
Getting Started
Before starting, you will need to update your system with the latest version. You can do this by running the following command:
apt-get update -y
apt-get upgrade -y
Once your system is updated, restart the system to apply the changes.
Next, you will need to install some required packages to your system. You can install all of them by running the following command:
apt-get install git curl wget unzip -y
Once all the packages are installed, you can proceed to the next step.
Install Node.js and Ruby
ApostropheCMS is built on Node.js. So, you will need to install Node.js to your system. By default, the latest version of Node.js is not available in the Ubuntu 18.04 default repository. So, you will need to add Node.js repository to your system. You can add it by running the following command:
curl -sL https://deb.nodesource.com/setup_8.x | bash -
Next, install Node.js with the following command:
apt-get install nodejs -y
Next, you will need to install Yarn to your system. By default, Yarn is not available in the Ubuntu 18.04 default repository. So, you will need to add the Yarn repository to your system.
First, download and add the GPG key with the following command:
curl -sS https://dl.yarnpkg.com/debian/pubkey.gpg | apt-key add -
Next, add Yarn repository to your system with the following command:
echo "deb https://dl.yarnpkg.com/debian/ stable main" | tee /etc/apt/sources.list.d/yarn.list
Next, install yarn and some required packages by running the following command:
apt-get install yarn zlib1g-dev build-essential libpq-dev libssl-dev libreadline-dev libyaml-dev libsqlite3-dev sqlite3 libxml2-dev libxslt1-dev libcurl4-openssl-dev software-properties-common libffi-dev -y
Next, you will need to download and setup Ruby profile to your system. You can do this with the following command:
git clone https://github.com/rbenv/rbenv.git ~/.rbenv
echo 'export PATH="$HOME/.rbenv/bin:$PATH"' >> ~/.bashrc
echo 'eval "$(rbenv init -)"' >> ~/.bashrc
exec $SHELL
git clone https://github.com/rbenv/ruby-build.git ~/.rbenv/plugins/ruby-build
echo 'export PATH="$HOME/.rbenv/plugins/ruby-build/bin:$PATH"' >> ~/.bashrc
exec $SHELL
Next, install Ruby with the following command:
rbenv install 2.5.3
rbenv global 2.5.3
Next, verify the Ruby version with the following command:
ruby -v
You should see the following output:
ruby 2.5.3p105 (2018-10-18 revision 65156) [x86_64-linux]
Install ApostropheCMS
Before installing ApostropheCMS, you will need to install MongoDB to your system. You can install it with the following command:
apt-get install mongodb -y
npm install mongodb --save
The npm SaveError and enoent warnings can be ignored. Next, you can check the status of MongoDB using the following command:
systemctl status mongodb
You should see the following output:
? mongodb.service - An object/document-oriented database
   Loaded: loaded (/lib/systemd/system/mongodb.service; enabled; vendor preset: enabled)
   Active: active (running) since Thu 2019-01-24 15:20:29 UTC; 3min 39s ago
     Docs: man:mongod(1)
 Main PID: 3702 (mongod)
    Tasks: 23 (limit: 1870)
   CGroup: /system.slice/mongodb.service
           ??3702 /usr/bin/mongod --unixSocketPrefix=/run/mongodb --config /etc/mongodb.conf

Jan 24 15:20:29 ubuntu1804 systemd[1]: Started An object/document-oriented database.
Now, run the following command to install ApostropheCMS to your system:
npm install imagemagick
npm install apostrophe-cli -g
The npm SaveError and enoent warnings can be ignored. You should see a similar output:
/usr/bin/apostrophe -> /usr/lib/node_modules/apostrophe-cli/bin/apostrophe
/usr/bin/apos -> /usr/lib/node_modules/apostrophe-cli/bin/apostrophe
+ [email protected]
added 68 packages from 67 contributors in 14.19s
Next, create your project with the following command:
apostrophe create-project apostrophecms
You should see the following output:
Apostrophe  create-project  Grabbing the boilerplate from Github [1/2]
Cloning into 'apostrophecms'...

 Apostrophe  create-project  Setting up your project shortname [2/2]
Next, change the directory to the apostrophecms with the following command:
cd apostrophecms
Next, install all the required dependencies with the following command:
npm install
Next, setup admin user and password with the following command:
node app.js apostrophe-users:add admin admin
And enter the password for the admin user when the command asks for it. Now, start the Apos*tropheCMS with the following command:
node app.js
ApostropheCMS is now installed and listening on port 3000.
Access ApostropheCMS
Now, open your web browser and type the URL http://your-server-ip:3000. You will be redirected to the following page:
Now, click on the Login button. You will be redirected to the following page:
Now, provide your admin username (admin) and password. then, click on the Log In button. You should see the ApostropheCMS dashboard in the following page:
Congratulations! you have successfully installed ApostropheCMS to your server. You can now easily create your website, write your content and published it instantly using ApostropheCMS.
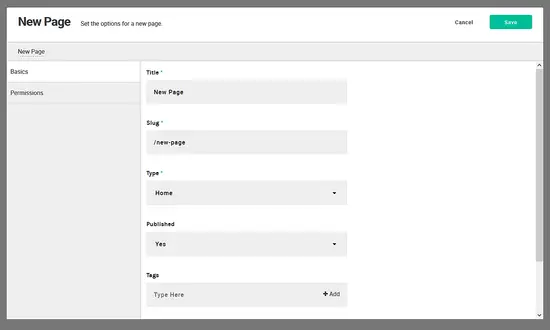
E.g. start adding a page by clicking on the page menu in the lower left corner of the page.
Feel free to comments me if you have any questions.


