How to Install AbanteCart with Nginx and SSL on Debian 11
Abantecart is a free, open-source and feature-rich e-commerce application. It is written in PHP and is powered by the latest technologies like HTML5, Bootstrap, MVC and more. It can create multiple online stores using a single installation with support for digital and physical products, integration with multiple payment gateways and currencies, multiple languages, coupons, store credits and a customer dashboard. You can run an email marketing campaign through it or create banners to increase user engagement. Moreover, it is SEO optimized with support for friendly URLs, integrates with multiple analytics platforms and supports plugins.
In this tutorial, you will learn how to install Abantecart on a Debian 11 based server.
Prerequisites
-
A server running Debian 11.
-
A non-root user with sudo privileges.
-
Everything is updated.
$ sudo apt update && sudo apt upgrade
-
Few packages that your system needs.
$ sudo apt install wget curl nano ufw software-properties-common dirmngr apt-transport-https gnupg2 ca-certificates lsb-release unzip debian-archive-keyring -y
Some of these packages may already be installed on your system.
Step 1 - Configure Firewall
The first step is to configure the firewall. Debian comes with ufw (Uncomplicated Firewall).
Check if the firewall is running.
$ sudo ufw status
You should get the following output.
Status: inactive
Allow SSH port so that the firewall doesn't break the current connection on enabling it.
$ sudo ufw allow OpenSSH
Allow HTTP and HTTPS ports as well.
$ sudo ufw allow 80/tcp
$ sudo ufw allow 443/tcp
Enable the Firewall
$ sudo ufw enable
Command may disrupt existing ssh connections. Proceed with operation (y|n)? y
Firewall is active and enabled on system startup
Check the status of the firewall again.
$ sudo ufw status
You should see a similar output.
Status: active

To                         Action      From
--                         ------      ----
OpenSSH                    ALLOW       Anywhere
80/tcp                     ALLOW       Anywhere
443/tcp                    ALLOW       Anywhere
OpenSSH (v6)               ALLOW       Anywhere (v6)
80/tcp (v6)                ALLOW       Anywhere (v6)
443/tcp (v6)               ALLOW       Anywhere (v6)
Step 2 - Install PHP
Abantecart supports PHP 8.0. To install it, we will use Ondrej's PHP repository. Run the following command to add the repository.
$ echo "deb https://packages.sury.org/php/ $(lsb_release -sc) main" | sudo tee /etc/apt/sources.list.d/sury-php.list
Add the GPG key associated with the repository.
$ wget -qO - https://packages.sury.org/php/apt.gpg | sudo apt-key add -
Update the Debian repositories.
$ sudo apt update
Install PHP 8.0 and the required extensions.
$ sudo apt install php8.0-cli php8.0-fpm php8.0-mysql php8.0-gd php8.0-common php8.0-curl php8.0-xml php8.0-mbstring
Step 3 - Install MySQL
To install the MySQL server, the first step is to add the GPG key for the package
There is a bug in Debian where you need to run the GPG command separately to set up the .gpg directory.
$ sudo gpg
Press Ctrl + C to exit the above command. Import the GPG key and save it in the /usr/share/keyrings directory.
$ sudo gpg --no-default-keyring --keyring /usr/share/keyrings/mysql8.0-archive-keyring.gpg --keyserver hkp://keyserver.ubuntu.com:80 --brecv-keys 3A79BD29
Add the official MySQL repository.
$ echo "deb [arch=amd64 signed-by=/usr/share/keyrings/mysql8.0-archive-keyring.gpg] http://repo.mysql.com/apt/debian/ `lsb_release -cs` mysql-8.0" \
    | sudo tee /etc/apt/sources.list.d/mysql-8.list
Update the Debian repositories.
$ sudo apt update
Install MySQL.
$ sudo apt install mysql-server
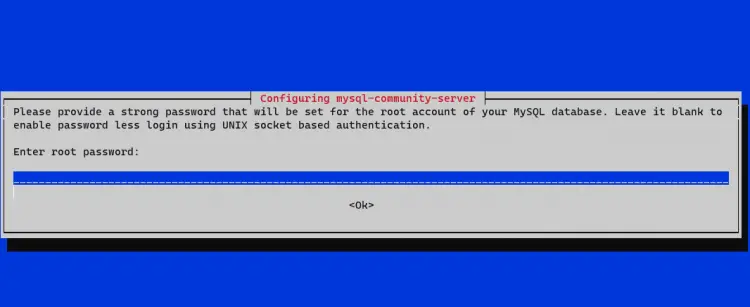
You will be greeted with a configuration screen asking you to set up a root password. Choose a strong password.
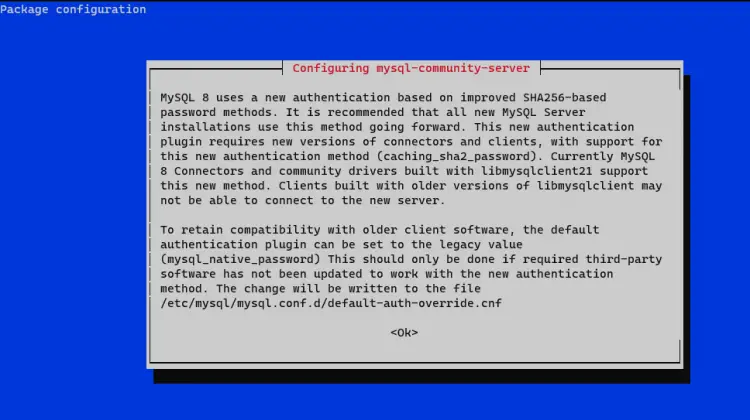
You will be asked to confirm the password. Next, you will be presented with a screen describing the new authentication system. Select OK to proceed.
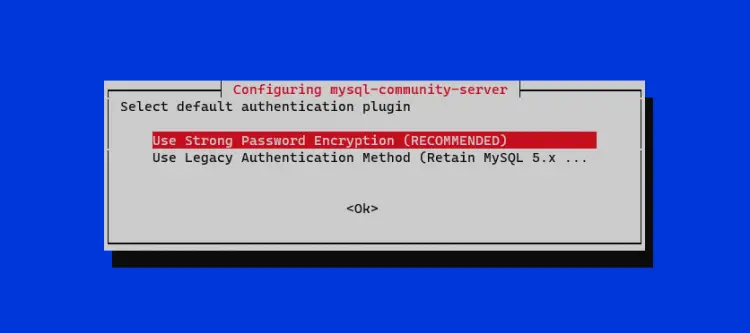
Finally, you will be asked to select the authentication method. Choose the Strong Password Encryption and select Ok to finish the setup.
Step 4 - Install Nginx
Debian ships with an older version of Nginx. You need to download the official Nginx repository to install the latest version.
Import the official Nginx signing key.
$ curl https://nginx.org/keys/nginx_signing.key | gpg --dearmor \
	 | sudo tee /usr/share/keyrings/nginx-archive-keyring.gpg >/dev/null
Add the repository for Nginx's stable version.
$ echo "deb [signed-by=/usr/share/keyrings/nginx-archive-keyring.gpg arch=amd64] \
    http://nginx.org/packages/debian `lsb_release -cs` nginx" \
    | sudo tee /etc/apt/sources.list.d/nginx.list
Update the Debian repositories.
$ sudo apt update
Install Nginx.
$ sudo apt install nginx
Verify the installation. Make sure you use sudo every time you run the Nginx command on Debian. Otherwise, it won't work.
$ sudo nginx -v
nginx version: nginx/1.20.2
Enable the Nginx service.
$ sudo systemctl enable nginx
Step 5 - Configure MySQL for AbanteCart
Secure MySQL installation.
$ sudo mysql_secure_installation
For the first step, you will be asked for your root password. Next, you will be asked if you want to set up the Validate Password Plugin, which you can use to test the strength of your MySQL password. Choose Y to proceed. You will be asked to choose the password validation level in the next step. Choose 2 which is the strongest level and will require your password to be at least eight characters long and include a mix of uppercase, lowercase, numeric and special characters.
Securing the MySQL server deployment.

Enter password for user root:

VALIDATE PASSWORD COMPONENT can be used to test passwords
and improve security. It checks the strength of password
and allows the users to set only those passwords which are
secure enough. Would you like to setup VALIDATE PASSWORD component?

Press y|Y for Yes, any other key for No: Y

There are three levels of password validation policy:

LOW    Length >= 8
MEDIUM Length >= 8, numeric, mixed case, and special characters
STRONG Length >= 8, numeric, mixed case, special characters and dictionary                  file

Please enter 0 = LOW, 1 = MEDIUM and 2 = STRONG: 2
In the next step, you will be asked whether or not to change the root password. Press N to continue.
Using existing password for root.
Estimated strength of the password: 100
Change the password for root ? ((Press y|Y for Yes, any other key for No) : N
Press Y and then ENTER key for all the following prompts to remove anonymous users and the test database, disable root logins and load the newly set rules.
...
Remove anonymous users? (Press y|Y for Yes, any other key for No) : Y
Success.
...
Disallow root login remotely? (Press y|Y for Yes, any other key for No) : Y
Success.
...
Remove test database and access to it? (Press y|Y for Yes, any other key for No) : Y
 - Dropping test database...
Success.
 - Removing privileges on test database...
Success.
Reloading the privilege tables will ensure that all changes
made so far will take effect immediately.
...
Reload privilege tables now? (Press y|Y for Yes, any other key for No) : Y
Success.
All done!
Enter the MySQL shell. Enter your root password to continue.
$ mysql -u root -p
Create abcart user. Make sure the password meets the requirements set before.
mysql> CREATE USER 'abcart'@'localhost' IDENTIFIED BY 'Your_password2';
Create abantecart database.
mysql> CREATE DATABASE abantecart;
Grant the user privileges on the abantecart database.
mysql> GRANT ALL PRIVILEGES ON abantecart.* TO 'abcart'@'localhost';
Exit the Shell.
mysql> exit
Step 6 - Install AbanteCart
Download the latest version of AbanteCart from Github.
$ wget https://github.com/abantecart/abantecart-src/archive/master.zip
Extract the file.
$ unzip master.zip
Create the public web root directory for Abantecart.
$ sudo mkdir /var/www/html/abantecart -p
Copy the extracted abantecart-src-master/public_html directory to the webroot directory. Note the forward-slash (/) at the end of the following command.
$ sudo cp -r abantecart-src-master/public_html /var/www/html/abantecart/
Set proper permissions to the webroot directory.
$ sudo chown -R nginx:nginx /var/www/html/abantecart
For now, the basic installation is finished. Next, we need to set up SSL and Nginx before finishing the installation.
Step 7 - Install SSL
To install an SSL certificate using Let's Encrypt, we need to install the Certbot tool.
We will use the Snapd package installer for that. Since most Debian servers don't ship with it, install Snap.
$ sudo apt install snapd
Ensure that your version of Snapd is up to date.
$ sudo snap install core && sudo snap refresh core
Install Certbot.
$ sudo snap install --classic certbot
Use the following command to ensure that the Certbot command can be run by creating a symbolic link to the /usr/bin directory.
$ sudo ln -s /snap/bin/certbot /usr/bin/certbot
Verify the installation.
$ certbot --version
certbot 1.22.0
Generate the SSL certificate.
$ sudo certbot certonly --standalone --agree-tos --no-eff-email --staple-ocsp --preferred-challenges http -m [email protected] -d abantecart.example.com
The above command will download a certificate to the /etc/letsencrypt/live/abantecart.example.com directory on your server.
Generate a Diffie-Hellman group certificate.
$ sudo openssl dhparam -out /etc/ssl/certs/dhparam.pem 2048
Create a challenge webroot directory for Let's Encrypt auto-renewal.
$ sudo mkdir -p /var/lib/letsencrypt
Create a Cron Job to renew the SSL. It will run every day to check the certificate and renew if needed. For that, first, create the file /etc/cron.daily/certbot-renew and open it for editing.
$ sudo nano /etc/cron.daily/certbot-renew
Paste the following code.
#!/bin/sh
certbot renew --cert-name abantecart.example.com --webroot -w /var/lib/letsencrypt/ --post-hook "systemctl reload nginx"
Save the file by pressing Ctrl + X and entering Y when prompted.
Change the permissions on the task file to make it executable.
$ sudo chmod +x /etc/cron.daily/certbot-renew
Step 8 - Configure Nginx and PHP
Configure PHP-FPM
Open the file /etc/php/8.0/fpm/pool.d/www.conf.
$ sudo nano /etc/php/8.0/fpm/pool.d/www.conf
We need to set the Unix user/group of PHP processes to nginx. Find the user=www-data and group=www-data lines in the file and change them to nginx.
...
; Unix user/group of processes
; Note: The user is mandatory. If the group is not set, the default user's group
;       will be used.
user = nginx
group = nginx
...
Also, find the lines listen.owner=www-data and listen.group=www-data in the file and change them to nginx.
listen.owner = nginx
listen.group = nginx
Save the file by pressing Ctrl + X and entering Y when prompted.
The next step is to disable PHP opcache extension.
Open the file /etc/php/8.0/fpm/conf.d/10-opcache.ini for editing.
$ sudo nano /etc/php/8.0/fpm/conf.d/10-opcache.ini
Paste the following line at the end.
opcache.enable=0
Save the file by pressing Ctrl + X and entering Y when prompted.
Restart the PHP-fpm process.
$ sudo systemctl restart php8.0-fpm
Configure Nginx
Create and open the file /etc/nginx/conf.d/abantecart.conf for editing.
$ sudo nano /etc/nginx/conf.d/abantecart.conf
Paste the following code in it.
server {
    listen       443 ssl http2;
    listen       [::]:443 ssl http2;
    server_name  abantecart.example.com;

    access_log  /var/log/nginx/abantecart.access.log;
    error_log   /var/log/nginx/abantecart.error.log;

    # SSL
    ssl_certificate      /etc/letsencrypt/live/abantecart.example.com/fullchain.pem;
    ssl_certificate_key  /etc/letsencrypt/live/abantecart.example.com/privkey.pem;
    ssl_trusted_certificate /etc/letsencrypt/live/abantecart.example.com/chain.pem;
    ssl_session_timeout  5m;
    ssl_session_cache shared:MozSSL:10m;
    ssl_session_tickets off;
    ssl_protocols TLSv1.2 TLSv1.3;
    ssl_prefer_server_ciphers on;
    ssl_ciphers ECDHE-ECDSA-AES128-GCM-SHA256:ECDHE-RSA-AES128-GCM-SHA256:ECDHE-ECDSA-AES256-GCM-SHA384:ECDHE-RSA-AES256-GCM-SHA384:ECDHE-ECDSA-CHACHA20-POLY1305:ECDHE-RSA-CHACHA20-POLY1305:DHE-RSA-AES128-GCM-SHA256:DHE-RSA-AES256-GCM-SHA384;
    ssl_ecdh_curve X25519:prime256v1:secp384r1:secp521r1;
    ssl_stapling on;
    ssl_stapling_verify on;
    ssl_dhparam /etc/ssl/certs/dhparam.pem;
    resolver 8.8.8.8;

    root /var/www/html/abantecart;
    index index.php;

    location / {
        try_files $uri $uri/ /index.php?$args;
    }

    # Pass PHP Scripts To FastCGI Server
    location ~ \.php$ {
        fastcgi_split_path_info ^(.+\.php)(.*)$;
        fastcgi_pass unix:/run/php/php8.0-fpm.sock; # Depends On The PHP Version
        fastcgi_index index.php;
        fastcgi_param SCRIPT_FILENAME $document_root$fastcgi_script_name;
        fastcgi_param PATH_INFO $fastcgi_path_info;
        include fastcgi_params;
        try_files $uri =404;
    }

    location = /favicon.ico {
        log_not_found off;
        access_log off;
    }

    location = /robots.txt {
        allow all;
        log_not_found off;
        access_log off;
    }

    # Make sure files with the following extensions do not get loaded by nginx because nginx would
    # display the source code, and these files can contain PASSWORDS!
    location ~* \.(engine|inc|info|install|make|module|profile|test|po|sh|.*sql|theme|tpl(\.php)?|xtmpl)$|^(\..*|Entries.*|Repository|Root|Tag|Template)$|\.php_ {
        deny all;
    }

    # Deny all attempts to access hidden files such as .htaccess, .htpasswd, .DS_Store (Mac).
    location ~ /\. {
        deny all;
        access_log off;
        log_not_found off;
    }

    ### Retina images handler. Check cookie and looking for file with @2x at the end of name
    location ~* ^(.*)\.(jpg|jpeg|png|gif|webp)$ {
        set $hidpi_uri $1@2x.$2;
        if ($http_cookie !~ 'HTTP_IS_RETINA=1') {
          break;
        }
        try_files $hidpi_uri $uri =404;
    }

    location ~*  \.(jpg|jpeg|png|gif|css|js|ico|webp)$ {
        expires max;
        log_not_found off;
    }

    location ~ /(system/logs|resources/download) {
      deny all;
      return 403;
    }

    location /admin/ {
        location ~ .*\.(php)?$ {
          deny all;
          return 403;
        }
    }

    #rewrite for images for retina-displays
    location ~ / {
        if (!-e $request_filename){
            rewrite ^/(.*)\?*$ /index.php?_route_=$1 last;
        }
    }
}
# enforce HTTPS
server {
    listen       80;
    listen       [::]:80;
    server_name  abantecart.example.com;
    return 301   https://$host$request_uri;
}
Save the file by pressing Ctrl + X and entering Y when prompted once finished.
Open the file /etc/nginx/nginx.conf for editing.
$ sudo nano /etc/nginx/nginx.conf
Add the following line before the line include /etc/nginx/conf.d/*.conf;.
server_names_hash_bucket_size 64;
Save the file by pressing Ctrl + X and entering Y when prompted.
Verify the Nginx configuration file syntax.
$ sudo nginx -t
nginx: the configuration file /etc/nginx/nginx.conf syntax is ok
nginx: configuration file /etc/nginx/nginx.conf test is successful
Start the Nginx service to enable the new configuration.
$ sudo systemctl start nginx
Step 9 - Finish Installation
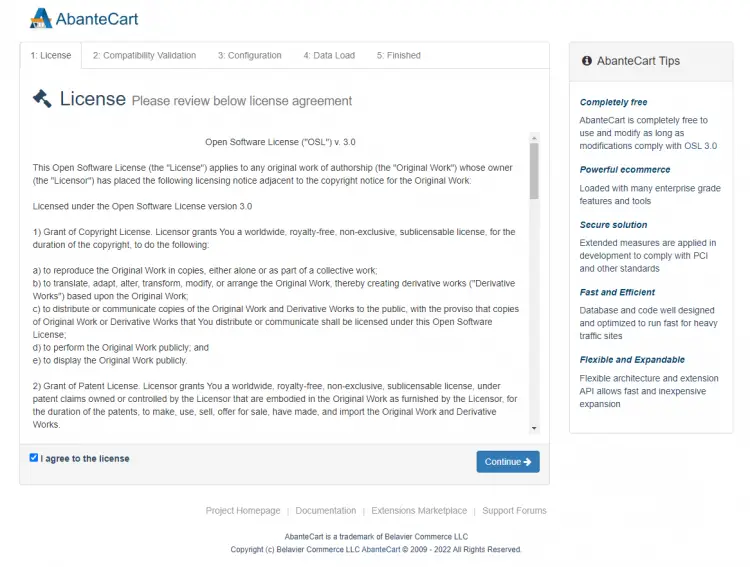
Launch https://abantecart.example.com in your browser, and you will be presented with the following screen.
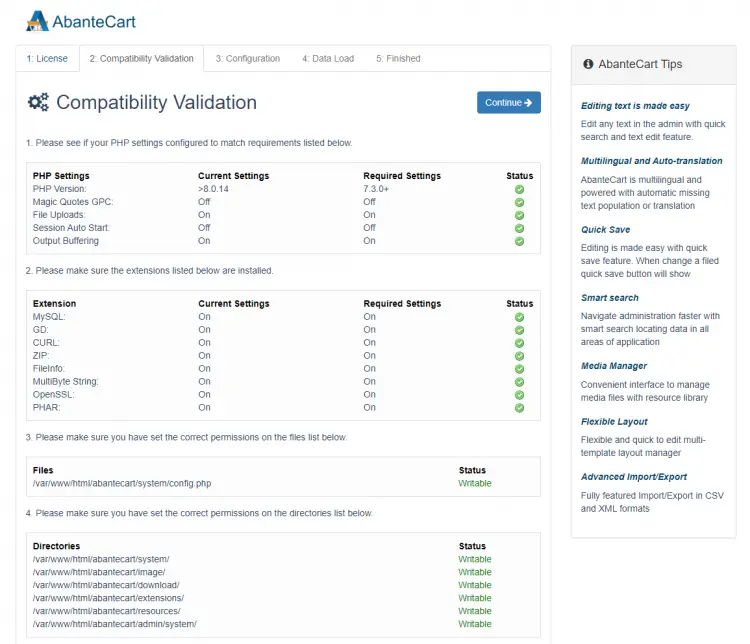
Check the box to agree with the license and press Continue to proceed. Next, the installer will check if all the requirements are being met or not.
If everything is okay, press Continue to proceed to the next page.
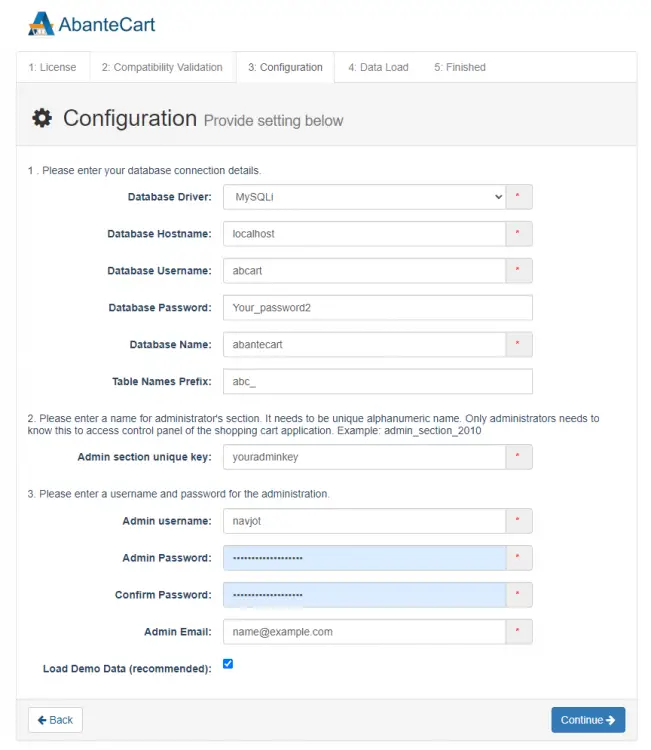
You will be asked to fill in the database credentials. Here you can create an administrator account and a security key to access the control panel. If you want demo data, keep the box checked otherwise, leave it unchecked if you want to start from scratch.
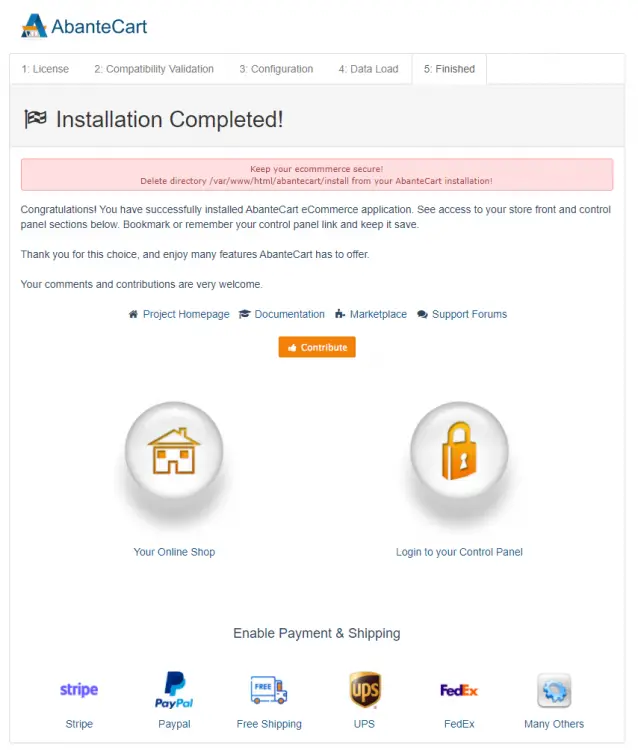
Press Continue to proceed when finished. The installer will then proceed with setting up everything and, once finished, will present you with the following screen.
Bookmark the link to your control panel because you will need it. Run the following command to delete the installer files because they are not needed and pose a security risk.
$ sudo rm -rf /var/www/html/abantecart/install
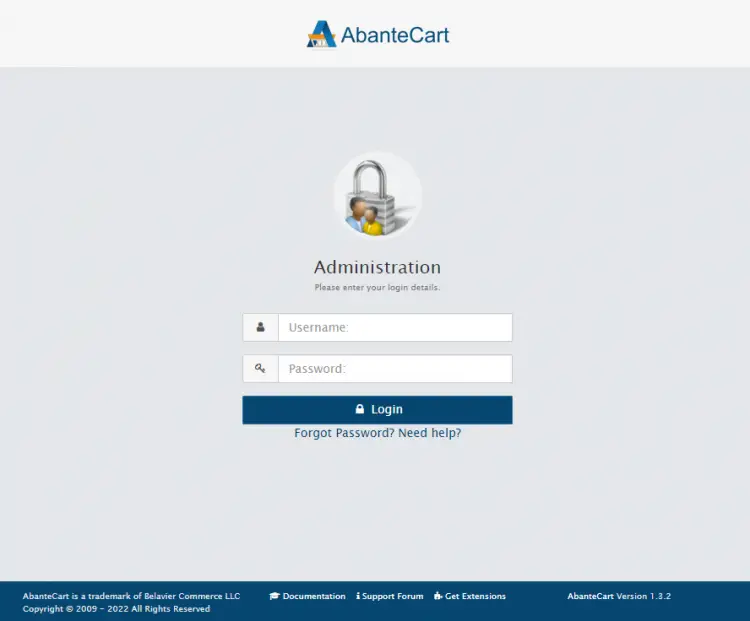
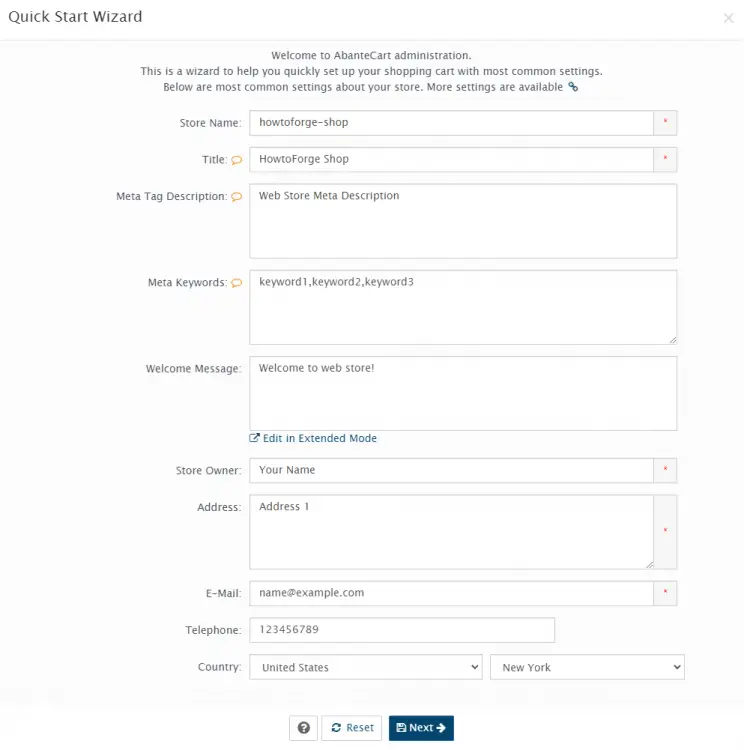
Log in to the Control panel, and you will be asked to finish setting up your shop.
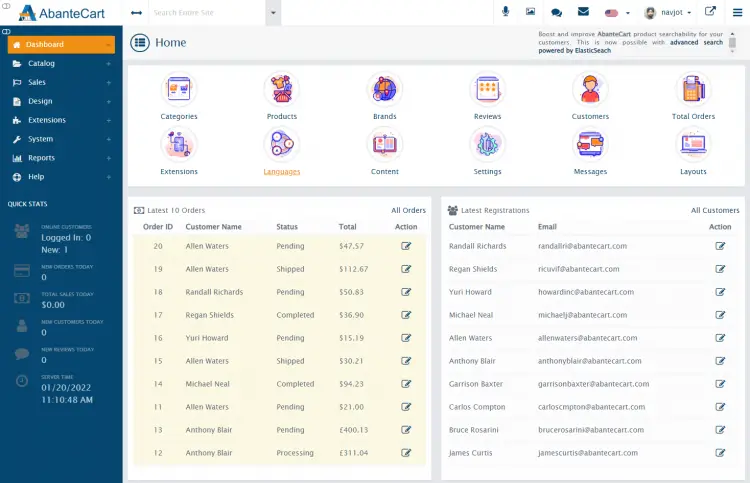
You can either close the quick wizard and configure it from the Control panel shown below or continue with the wizard to set up basic settings.
Conclusion
This concludes our tutorial on setting up AbanteCart on a Debian 11 based server. If you have any questions, post them in the comments below.

