How to create and use a CodeCommit GIT Repository on AWS
CodeCommit hosts Git-based repositories and is a fully managed service by AWS. Teams can use it to collaborate on code in a secure and highly scalable way. It helps us to eliminate the need of having our own self-hosted Source Code Management (SCM) system and manage it on our own.
Files in CodeCommit are encrypted at rest and in transit. It is a highly available fully managed AWS service that eliminates the need of having a self-hosted SCM system. CodeCommit supports all Git commands.
Pre-requisites
- AWS Account (Create if you don’t have one).
- IAM User with AWSCodeCommitPowerUser or equivalent policy attached to it(Learn to create an IAM user on AWS)
What will we do?
- Login to AWS.
- Create a CodeCommit repository.
- Generate Git HTTPs credentials for the IAM user.
- Perform basic operations on the repository.
- Delete the repository.
Login to AWS
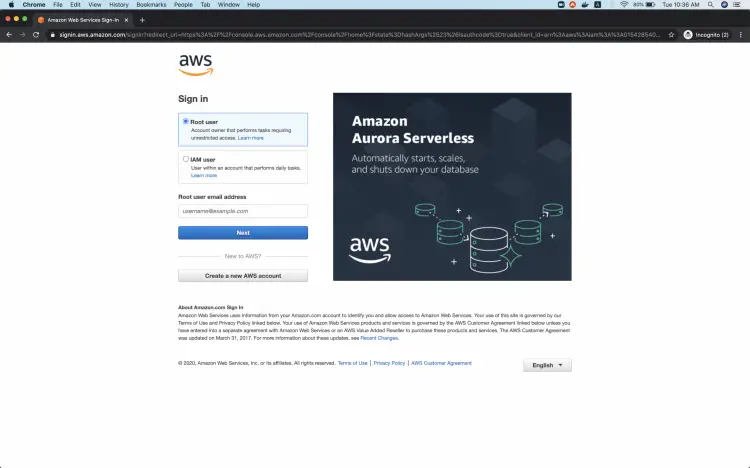
Click here to go to AWS Login Page.
When we hit the above link, we will see a web page as follows where we are required to log in using our login details.
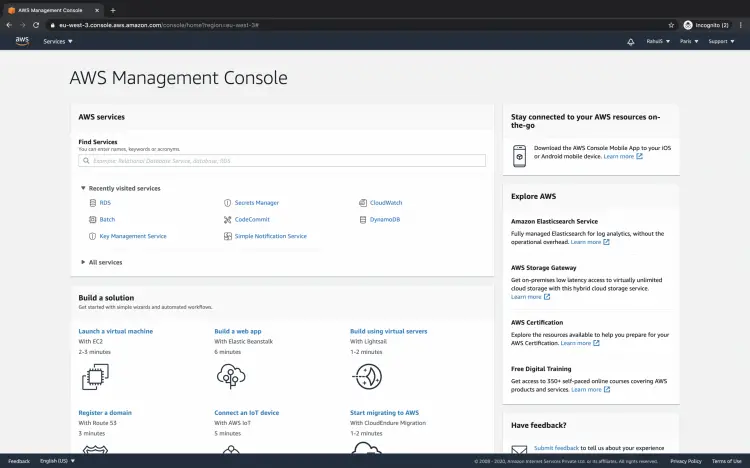
Here is the main AWS management console you see when you login successfully to your account.
Create a CodeCommit repository
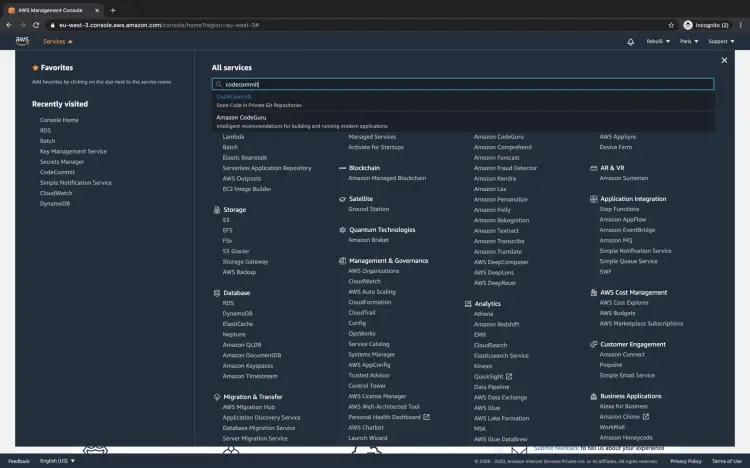
Click on services at the top left of the screen and search for CodeCommit in the search box, click on the CodeCommit result that you get.
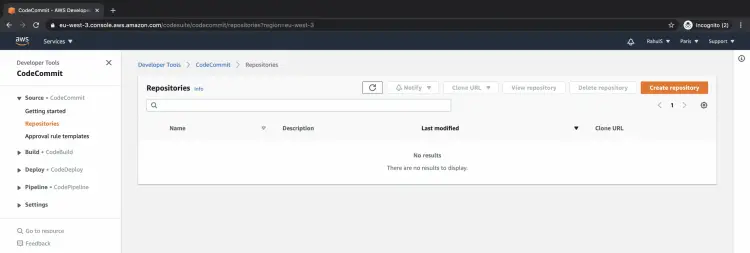
You will see the main dashboard of CodeCommit. Since I have not created any repository in the Paris region there are no results in the dashboard. Click on the "Create repository" button to create your first CodeCommit repository on AWS.
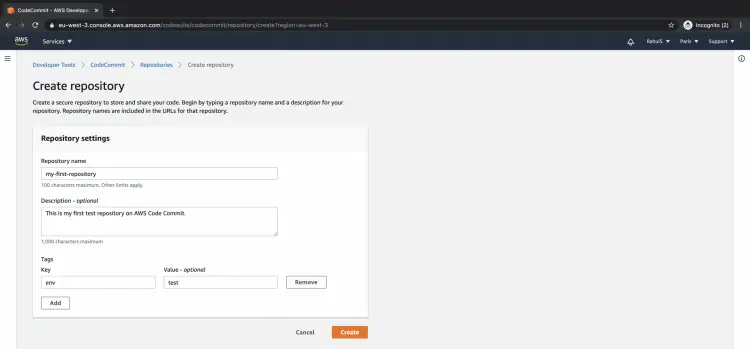
Give a name to the repository to be created and add a description to it which is optional. You may also add tags as I have added. Click on the "Create" button.
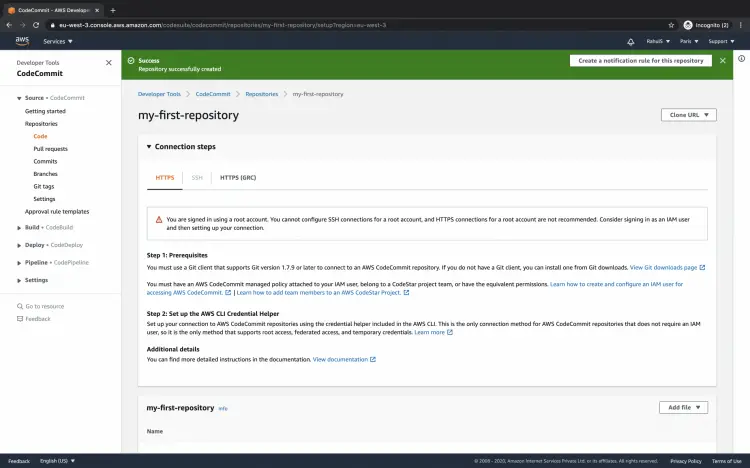
You will see that your repository has been created successfully. On the same screen, you will get steps to connect to the repository.
When you click on the "Clone URL" button at the top right, you will see 3 different options to clone the repository on your local system.
We will see the steps to clone the repository using the "Clone HTTPS" option.
Generate Git HTTPs credentials for the IAM user
To clone the repository using the HTTPs option, you need to have an IAM user. This particular IAM User must at least have an AWSCodeCommitPowerUser policy attached to it or equivalent permission to it.
If you do not have an IAM user, click here to create it and come back to continue.
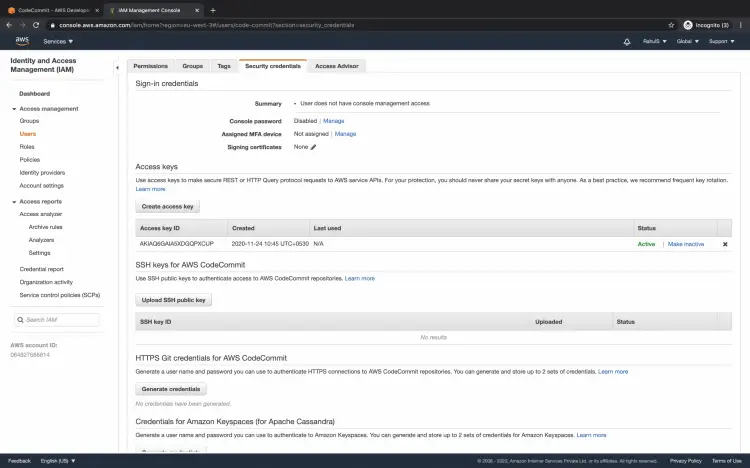
Once you have a user with the required permissions go to IAM -- > Users -- > <click on the user you have> --> Security credentials.
Here, click on "Generate credentials" under "HTTPS Git credentials for AWS CodeCommit".
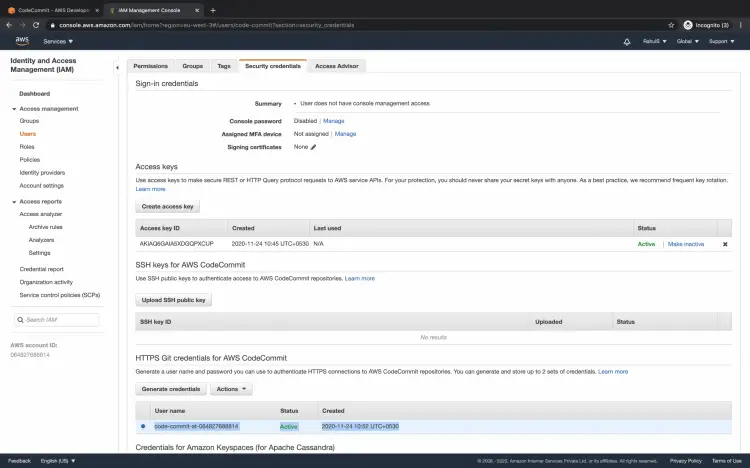
You'll get a username and its secret key. Save the credentials you get as you will need them in the next steps.
Perform basic operations on the repository
Once you have Git HTTPs credentials, you can use them to authenticate operations on the repository.
On your machine execute the following commands to clone the repository you created
ls -lt
git clone https://git-codecommit.eu-west-3.amazonaws.com/v1/repos/my-first-repository
When you execute the above command you will be asked to enter your username and password. Enter the username and password that we created in the previous step.
ls -lt
Change your working directory to the repository you cloned.
cd my-first-repository/
ls -lt
ls -la
Now let's create a file and try to push it to the repository.
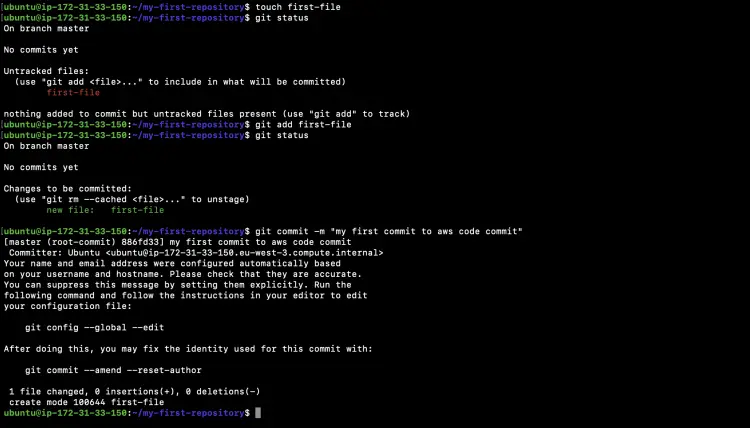
touch first-file
Check the state of the working directory and the staging area.
git status
Add the change in the working directory to the staging area.
git add first-file
Again, check the state of the working directory and the staging area. Now You will see that the file has moved from "Untracked files" to "Changes to be committed".
git status
You are ready to commit your changes but the commit message won't have the identity you want for your commit message.
git commit -m "my first commit to aws CodeCommit"
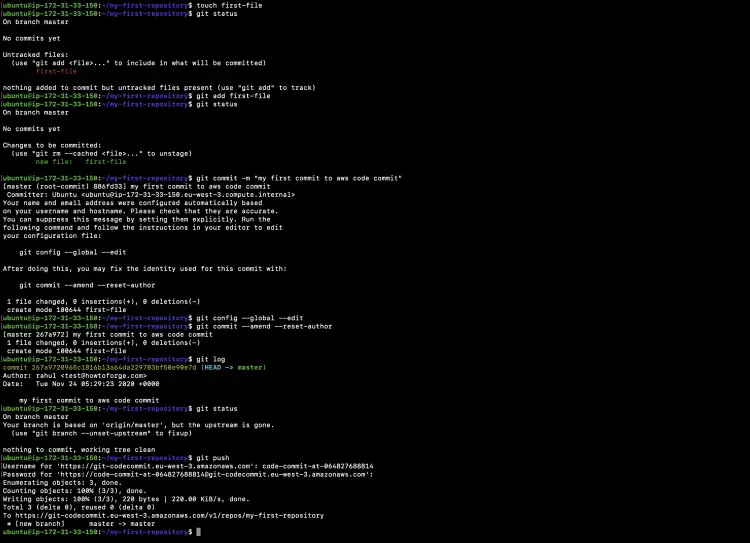
Execute the following command to add your identity.
git config --global --edit
Now, fix the identity using the following command.
git commit --amend --reset-author
Check the Git logs and see what identity has been appended to your commit message.
git log
Now again check the status before you push your changes.
git status
You are completely ready to push your changes to CodeCommit. Push your changes using the following command.
git push
You will see the following screen to fix your identity after you execute the "git commit --amend --reset-author" command.
Use the following screenshot for your reference to the above commands we saw.
When you come back to the AWS console in your repository, you will see that the file you pushed from your local machine is now available under your repository. This means that you have successfully added a new file from your local machine to your CodeCommit repository.
Delete the repository
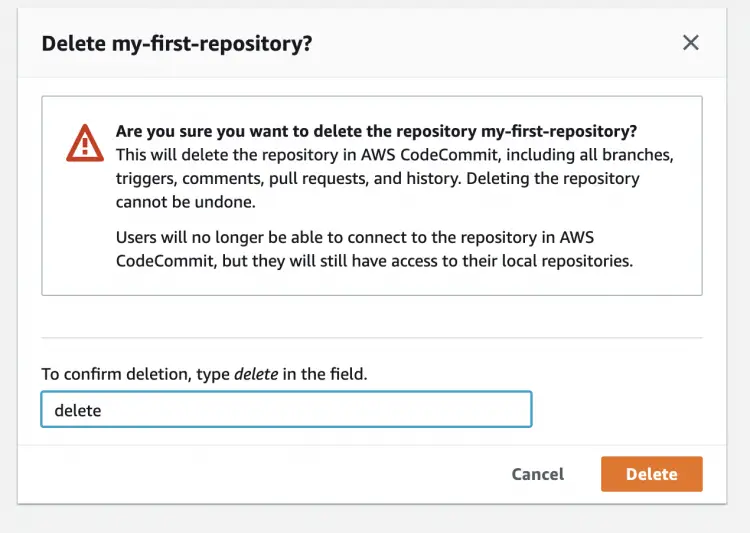
Now, when you no longer need your repository you can delete it. To delete the repository click on the repository and then on the "Delete repository" button.
Confirm the deletion action which will permanently delete your repository from CodeCommit. Once you delete your repository you cannot retrieve it back. Be careful when you handle repositories in your organization or repositories which contain your important data.
Conclusion
In this article, we saw the steps to create and delete a CodeCommit repository. We also learned to create Git HTTPs credentials for the IAM user to be used to access the repository along with our first commit to the repository.

