How To Add Two-Factor Authentication To Openvpn AS With The WiKID Strong Authentication Server
It's been a while since our last tutorial on how to add two-factor authentication to OpenVPN using the WiKID Strong Authentication System. The people at OpenVPN have been very active lately and it seems like a good time to take a look at what they've done. It's still dead simple to configure, but it is mostly done via the new slick web interface.
I downloaded the CentOS Version of OpenVPN Access Server and dropped the RPM onto a WiKID server I built with our Enterprise ISO.
# rpm -ivh openvpn-as-1.3.4-CentOS5.i386.rpm
You are prompted to configure the server with this command:
/usr/local/openvpn_as/bin/ovpn-init
Which runs you through a number of options:
Once you provide a few initial configuration settings,
OpenVPN Access Server can be configured by accessing
its Admin Web UI using your Web browser.

Please specify the network interface and IP address to be
used by the Admin Web UI:
(1) all interfaces: 0.0.0.0
(2) eth0: 10.100.0.125
Please enter the option number from the list above (1-2).
> Press Enter for default [2]:
Enter the default for all the options, or change them if you know what you are doing.
Configuring The Server Via The Admin Web Interface
Proceed to the web interface at the interface and port you specified. Login in with root or whatever credentials you supplied above.
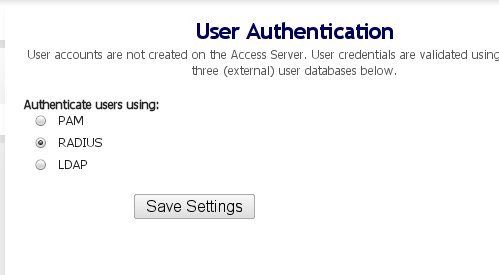
Once you login, click on the Authentication --> General link and choose Radius for authentication:
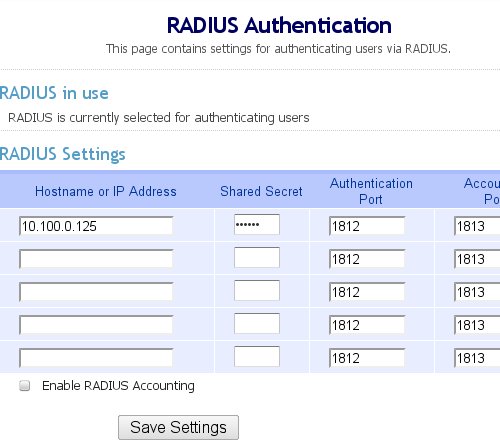
Once you specify that Radius is to be used, click on the Radius link to enter the details. Since this is running on the same server, we use the same IP address. Note though that we are not using the localhost IP as the WiKID server radius listener is using that.
That's it for the OpenVPN server.


