Xen Cluster Management With Ganeti On Debian Etch
Version 1.0
Author: Falko Timme
Ganeti is a cluster virtualization management system based on Xen. In this tutorial I will explain how to create one virtual Xen machine (called an instance) on a cluster of two physical nodes, and how to manage and failover this instance between the two physical nodes.
This document comes without warranty of any kind! I do not issue any guarantee that this will work for you!
[Update 01/21/2010] I got a message from the Ganeti development team:
"[...] In recent months we noticed the unfortunate fact that people try to follow your instructions to the letter and end up installing old or very old versions of Ganeti. Could you please update both tutorials with notes saying that they aren't updated for more recent Ganeti versions and ask people to look at the up-to-date documentation on http://docs.ganeti.org/ganeti/?"
This tutorial is based on an old version of Ganeti. Please refer to the up-to-date documentation on http://docs.ganeti.org/ganeti/.
1 Preliminary Note
Ganeti is still in an early stage. Right now, it can be installed on Debian Etch nodes, and you can create virtual machines with it that use Debian Etch as well. Other Linux distributions should theoretically work, too, but there's no documentation yet.
In this tutorial I will use the physical nodes node1.example.com and node2.example.com:
- node1.example.com: IP address 192.168.0.100; will be the master of the cluster.
- node2.example.com: IP address 192.168.0.101; will be the primary node of the virtual machine (aka instance).
Both have a 50GB hard drive of which I use 10GB for the / partition, 1GB for swap, and leave the rest unpartitioned so that it can be used by Ganeti (the minimum is 20GB!). Of course, you can change the partitioning to your liking, but remember about the minimum unused space.
The cluster I'm going to create will be named cluster1.example.com, and it will also have the IP address 192.168.0.100.
The Xen virtual machine (called an instance in Ganeti speak) will be named inst1.example.com with the IP address 192.168.0.105. inst1.example.com will be mirrored between the two physical nodes using DRBD - you can see this as a kind of network RAID1.
As you see, node1.example.com will be the cluster master, i.e. the machine from which you can control and manage the cluster, and node2.example.com will be the primary node of inst1.example.com, i.e. inst1.example.com will run on node2.example.com (with all changes on inst1.example.com mirrored back to node1.example.com with DRBD) until your fail it over to node1.example.com (if you want to take down node2.example.com for maintenance, for example). This is an active-passive configuration.
I think it's good practice to split up the roles between the two nodes, so that you don't lose the cluster master and the primary node at once should one node go down.
In my tests I was using two systems with 204MB RAM each for node1 and node2. This is pretty low, and you should use considerably more RAM, especially on production systems. For my tests it was ok, though. Because of the low RAM, I restricted my Xen dom0s (node1 and node2) to use 64MB RAM. The Ganeti installation guide says that 512MB are reasonable - I think 256MB should work, too. Anyway, your system must have more RAM than what you specify for dom0 so that enough RAM is left over for the virtual machine(s).
One last thing to note is that all hostnames mentioned here should be resolvable to all hosts, which means that they must either exist in DNS, or you must put all hostnames in all /etc/hosts files on all hosts (which is what I will do here).
Ok, let's start...
2 Installing A Base Debian System On The Physical Nodes
Set up a minimal Debian Etch systems on both node1 and node2:
node1/node2:
Insert your Debian Etch Netinstall CD into your system and boot from it. Press ENTER to boot:
The installation starts, and first you have to choose your language:
Then select your location:
Choose a keyboard layout:
The installer checks the installation CD, your hardware, and configures the network with DHCP if there is a DHCP server in the network:
Enter the hostname. For node1.example.com, enter node1, for node2.example.com, enter node2:
Enter your domain name. In this example, this is example.com:
Now we have to partition the hard drive. As stated in chapter 1, I want a 10GB / partition, a 1GB swap partition, and leave the rest unpartitioned. Select Manual as the partitioning method:
Select the hard drive:
Select Yes when you are asked Create new empty partition table on this device?:
Select the free space on the hard drive:
Choose Create a new partition:
Enter 10 GB as the partition size (or whatever size you want the / partition to have):
Choose Primary as the partition type:
Select Beginning:
Make sure that you set the Bootable flag to on, then select Done setting up the partition:
The / partition is now set up. Now let's create the swap partition. Select the free space again:
Pick Create a new partition again:
Enter 1 GB as the size of the partition (or whatever size you want the swap partition to have):
Choose Primary:
Select Beginning:
Then move to the Use as: row and press ENTER:
Select swap area:
Afterwards, choose Done setting up the partition:
Afterwards, select Finish partitioning and write changes to disk (make sure that you have at least 20 GB of unpartitioned disk space):
Select Yes when you're asked Write changes to disks?:
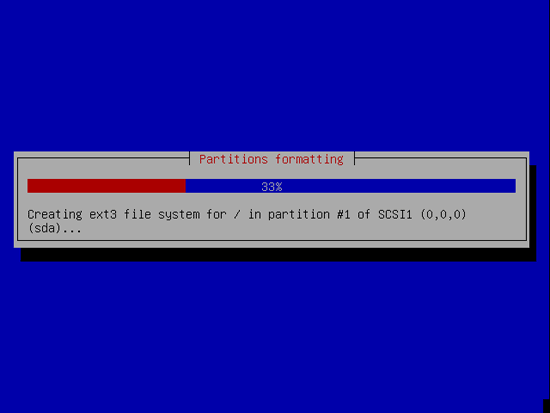
Afterwards, your new partitions are being created and formatted:


