Setting Up A Debian Packages Proxy With apt-cacher
There are many ways to install a Debian Linux but the most common is certainly to use the net-install 160MB CDROM. You can download it from http://www.debian.org/CD/netinst/. Booting up your PC from this CD, you will be capable of setting-up a basic Linux system; downloading updates, extra softwares and language support directly from the Internet. But using this method of installation on more than one PC in your LAN results in a massive waste of your precious bandwidth.
Therefore, maybe you should consider using a cloning utility like “Sysimager”. But, as it is most likely that every computer will be slightly different one from another one, you should consider setting up a Debian Package Proxy as a long term solution.
To complete this task, you could either set up a local Debian repository. It means that every possible package should first be downloaded and then made available to your LAN. It also means that you will store nearly 10GB of .deb files – some of them you will probably never need.
Using a non dedicated proxy like Squid with a very large cache, all the packages downloaded from the Internet will be stored temporally into the hard disk and then made available to all the computers running behind your proxy. With this solution, only the .deb files you really need will be downloaded – no bandwidth and no space is wasted! Only the first installation will be "Internet slow", the next one will be done at LAN speed. But if you have to install your distribution some time later, all the package you had stored into the Squid cache will probably have been replaced by other objects while you were surfing on the Net: you will need to download every package again.
A dedicated Debian packages proxy will ensure you that the package you required to install your Linux distribution one day will always be available to other installations. During the first installation, the .deb files you really need will be download from the closest repository and stored on a hard disk. The next installations, every package that should have been downloaded from the Internet will be make available from the LAN proxy – saving a lot of time!
Installing "apt-cacher"
Installing apt-cacher on a local server named "DebianServer" is "Debian" easy! As root, just type in a terminal the following command:
apt-get install apt-cacher
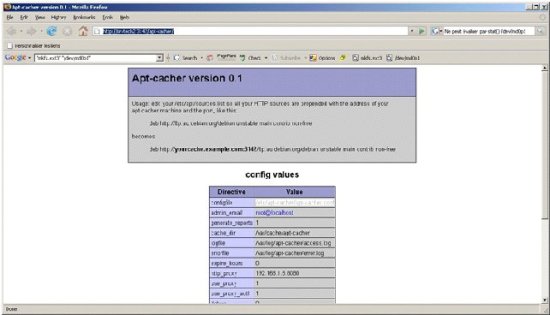
Once installed, you can run your favorite web browser to go to the URL http://DebianServer:3142/apt-cacher/ and check that every is running fine.
Configuring apt-cacher
The default settings for the program are stored in the file /etc/default/apt-cacher. There are very few parameters that you will need to customize.
First of all, you need to set AUTOSTART to 1 so apt-get starts the daemon at boot time! The cache_dir parameter is used to set the location of the local cache. This can become quite large, make sure it is somewhere with plenty of space!
apt-cacher can clean up its cache directory every 24 hours. To enable this behavior, you set the clean_cache directive to 1. Cleaning the cache can take some time to run (generally in the order of a few minutes) and it removes all package files that are not mentioned in any existing "Packages" list. This has the effect of deleting packages that have been superseded by an updated "Packages" list. apt-cacher can use different methods to decide whether package lists need to be updated:
- Method A: by looking at the age of the cached files,
- Method B: by getting HTTP header from server and comparing that with cached data.
The latter is more reliable and avoids desynchronisation of data and index files but it needs to connect to a mirror every time somebody requests the files (basically it runs an apt-get update command). Set the expire_hours parameter to the value fo the maximum age (in hours) for method A or to 0 for method B.
If your network is located behind a proxy requiring authentication, you will need to edit the four parameters as listed below.
http_proxy="delegate proxy IP":"delegate proxy port"
use_proxy=1
http_proxy_auth="proxy user name":"proxy user password"
use_proxy_auth=1
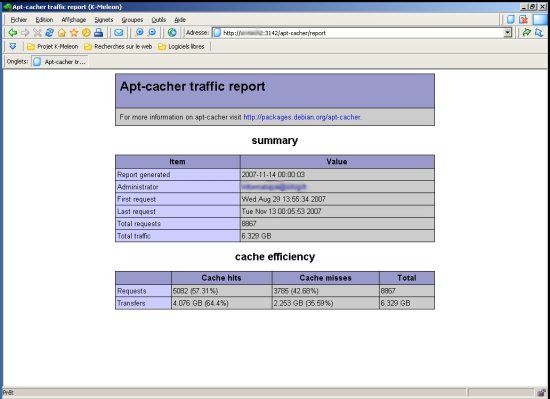
Finally, apt-cacher can generate usage reports every 24 hours if you set this directive to 1. You can view the reports in a web browser by pointing to the URL http://DebianServer/apt-cacher/report.
As you can see, "apt-cacher" saved me downloading 4GB!
Generating reports is very fast even with many thousands of log lines, so you can safely turn this on without creating much additional system load by setting the generate_reports parameter to 1.
Once you have done all the fine tuning, remember to restart apt-cacher by typing the command:
/etc/init.d/apt-cacher restart


