On this page
Data Recovery From Accidentally Deleted Files or Crashed Drives in Ubuntu
Version 1.0
Author: Srijan Kishore
This tutorial will help you to recover data from accidentally deleted data from Linux-file systems. This is a very drastic mistake by any user/admin which costs for huge penalties. This script will be a boon for newbies/expert for data management. I will be using TestDisk for data-recovery. Here I have simplified the task with the help of a script.
1. Background
TestDisk is a powerful free data recovery software. Suppose you have a ext3/ext4 drive which got crashed/deleted with rm -rf or shift+delete like commands, with the help of TestDisk you can recover the data/file.TestDisk can be used to
- Fix partition table
- Undelete files from FAT, exFAT, NTFS and ext2/ext3/ext4 partitions
Beside these functions TesdDisk have several functionality for the data maintenance/management
2. Requirement
I am using Ubuntu12.04 LTS on which I will be installing the TestDisk & implement the data recovery script on a crashed drive. This script works fine with the Ubuntu OS. Even if it happens that any of the harddisk gets deleted just connect the harddisk with the ubuntu machine & run the script to recover the data.3. Script
#!/bin/bash
#######################################################################################################
#######################################################################################################
#######################################################################################################
######                                                                                          #######
######                                                                                          #######
######                 This script will help you to recover the accidentally                    #######
######                     deleted data from crashed linux file systems                         #######
######                          Script created by (Srijan Kishore)                              #######
######                                                                                          #######
######                                                                                          #######
#######################################################################################################
#######################################################################################################
#######################################################################################################

# User Check

if [ "$USER" = 'root' ]
    then
        gdialog --title "User Check" --msgbox "User is root, you can execute the script successfully." 200 150
        echo "User is root, you can execute the script successfully"
    else
        gdialog --title "User Check" --msgbox "User is not Root. Please run the script as root user." 200 150
        echo "User is not Root. Please run the script as root user."
        exit 1
fi

# Check your operating system

cat /etc/debian_version >> /dev/null
if [ "$?" = 0 ]
    then
        echo "You are using ubuntu/debian"
        gdialog --title "Your Operating System" --msgbox "You are using ubuntu/debian"
    else
        gdialog --title "Your Operating System" --msgbox "You are not using debian/ubuntu.You can download the TestDisk from this link http://www.cgsecurity.org/wiki/TestDisk_Download"

    echo "You are not using debian/ubuntu. You can download the TestDisk from this link http://www.cgsecurity.org/wiki/TestDisk_Download"

fi


# Installing Testdisk
testdisk /version >> /dev/null
if [ "$?" = 0 ]
then
    echo "Testdisk already installed"
else
    echo "Installing Testdisk"
    apt-get update
    apt-get upgrade
        apt-get --force-yes -y install testdisk

                    gdialog --title "Success" --msgbox "Testdisk installed successfully" 100 50

 fi

# Set backup directory
mkdir -p /root/result/lostfiles


#Run the recovery program


photorec /d /root/result/lostfiles

# Filters files

user=`ps aux | grep gnome-session | grep -v grep | head -1 | cut -d " " -f1`
mkdir "/home/$user/recovered_output"

mkdir "/home/$user/recovered_output/Debians"
mkdir "/home/$user/recovered_output/rpms"
mkdir "/home/$user/recovered_output/conf_files"
mkdir "/home/$user/recovered_output/exe"
mkdir "/home/$user/recovered_output/binaries"
mkdir "/home/$user/recovered_output/Docs"
mkdir "/home/$user/recovered_output/Pdfs"
mkdir "/home/$user/recovered_output/Mbox"
mkdir "/home/$user/recovered_output/Images"
mkdir "/home/$user/recovered_output/Videos"
mkdir "/home/$user/recovered_output/Sound"
mkdir "/home/$user/recovered_output/ISO"
mkdir "/home/$user/recovered_output/Excel"
mkdir "/home/$user/recovered_output/Presentation"
mkdir "/home/$user/recovered_output/Web_Files"
mkdir "/home/$user/recovered_output/Archives"
mkdir "/home/$user/recovered_output/Others"

#Sorting the Recovered data


find /root/result/ -name "*.doc"    -type f  -exec mv {} "/home/$user/recovered_output/Docs/" \;
find /root/result/ -name "*.docx"   -type f  -exec mv {} "/home/$user/recovered_output/Docs/" \;
find /root/result/ -name "*.odt"    -type f  -exec mv {} "/home/$user/recovered_output/Docs/" \;
find /root/result/ -name "*.pdf"    -type f  -exec mv {} "/home/$user/recovered_output/Pdfs/" \;
find /root/result/ -name "*.mbox"   -type f  -exec mv {} "/home/$user/recovered_output/Mbox/"  \;
find /root/result/ -name "*.png"    -type f  -exec mv {} "/home/$user/recovered_output/Images/" \;
find /root/result/ -name "*.jpg"    -type f  -exec mv {} "/home/$user/recovered_output/Images/" \;
find /root/result/ -name "*.jpeg"   -type f  -exec mv {} "/home/$user/recovered_output/Images/" \;
find /root/result/ -name "*.gif"    -type f  -exec mv {} "/home/$user/recovered_output/Images/" \;
find /root/result/ -name "*.avi"    -type f  -exec mv {} "/home/$user/recovered_output/Videos/" \;
find /root/result/ -name "*.mpeg"   -type f  -exec mv {} "/home/$user/recovered_output/Videos/" \;
find /root/result/ -name "*.mp4"    -type f  -exec mv {} "/home/$user/recovered_output/Videos/" \;
find /root/result/ -name "*.mkv"    -type f  -exec mv {} "/home/$user/recovered_output/Videos/" \;
find /root/result/ -name "*.webm"   -type f  -exec mv {} "/home/$user/recovered_output/Videos/" \;
find /root/result/ -name "*.wmv"    -type f  -exec mv {} "/home/$user/recovered_output/Videos/" \;
find /root/result/ -name "*.flv"    -type f  -exec mv {} "/home/$user/recovered_output/Videos/" \;
find /root/result/ -name "*.mp3"    -type f  -exec mv {} "/home/$user/recovered_output/Sound/" \;
find /root/result/ -name "*.wav"    -type f  -exec mv {} "/home/$user/recovered_output/Sound/" \;
find /root/result/ -name "*.deb"    -type f  -exec mv {} "/home/$user/recovered_output/Debians/" \;
find /root/result/ -name "*.bin"    -type f  -exec mv {} "/home/$user/recovered_output/binaries/" \;
find /root/result/ -name "*.exe"    -type f  -exec mv {} "/home/$user/recovered_output/exe/" \;
find /root/result/ -name "*.rpm"    -type f  -exec mv {} "/home/$user/recovered_output/rpms/" \;
find /root/result/ -name "*.conf"    -type f  -exec mv {} "/home/$user/recovered_output/conf_files" \;
find /root/result/ -name "*.iso"    -type f  -exec mv {} "/home/$user/recovered_output/ISO/" \;
find /root/result/ -name "*.xls"    -type f  -exec mv {} "/home/$user/recovered_output/Excel/" \;
find /root/result/ -name "*.xlsx"   -type f  -exec mv {} "/home/$user/recovered_output/Excel/" \;
find /root/result/ -name "*.csv"    -type f  -exec mv {} "/home/$user/recovered_output/Excel/" \;
find /root/result/ -name "*.ods"    -type f  -exec mv {} "/home/$user/recovered_output/Excel/" \;
find /root/result/ -name "*.ppt"    -type f  -exec mv {} "/home/$user/recovered_output/Presentation/" \;
find /root/result/ -name "*.pptx"   -type f  -exec mv {} "/home/$user/recovered_output/Presentation/" \;
find /root/result/ -name "*.odp"    -type f  -exec mv {} "/home/$user/recovered_output/Presentation/" \;
find /root/result/ -name "*.html"   -type f  -exec mv {} "/home/$user/recovered_output/Web_Files/" \;
find /root/result/ -name "*.htm"    -type f  -exec mv {} "/home/$user/recovered_output/Web_Files/" \;
find /root/result/ -name "*.jsp"    -type f  -exec mv {} "/home/$user/recovered_output/Web_Files/" \;
find /root/result/ -name "*.xml"    -type f  -exec mv {} "/home/$user/recovered_output/Web_Files/" \;
find /root/result/ -name "*.css"    -type f  -exec mv {} "/home/$user/recovered_output/Web_Files/" \;
find /root/result/ -name "*.js"     -type f  -exec mv {} "/home/$user/recovered_output/Web_Files/" \;
find /root/result/ -name "*.zip"    -type f  -exec mv {} "/home/$user/recovered_output/Archives/" \;
find /root/result/ -name "*.tar"    -type f  -exec mv {} "/home/$user/recovered_output/Archives/" \;
find /root/result/ -name "*.rar"    -type f  -exec mv {} "/home/$user/recovered_output/Archives/" \;
find /root/result/ -name "*.gzip"   -type f  -exec mv {} "/home/$user/recovered_output/Archives/" \;
find /root/result/ -name "*.tar.gz" -type f  -exec mv {} "/home/$user/recovered_output/Archives/" \;
find /root/result/ -name "*.7z"     -type f  -exec mv {} "/home/$user/recovered_output/Archives/" \;
find /root/result/ -name "*.bz"     -type f  -exec mv {} "/home/$user/recovered_output/Archives/" \;
find /root/result/ -name "*.bz2"    -type f  -exec mv {} "/home/$user/recovered_output/Archives" \;
find /root/result/ -name "*.*"      -type f  -exec mv {} "/home/$user/recovered_output/Others/" \;
chown -R $user "/home/$user/recovered_output"
zenity --display :0 --info --width=350 --height=100 --title "Recovery Successful" --text " Data has been recovered successfully in recovered_output folder in your home directory."
nautilus /home/$user/recovered_output &
exit 0
4. Script Execution
Simply copy the above script & paste in file viz. script.sh & give the execute permissions to the script.
chmod +x script.sh
Note: Please run the script with root by using the command
sudo -i #### Put your system login password##########
Run the script & it will guide you further.
sh script.sh
5. Finalization
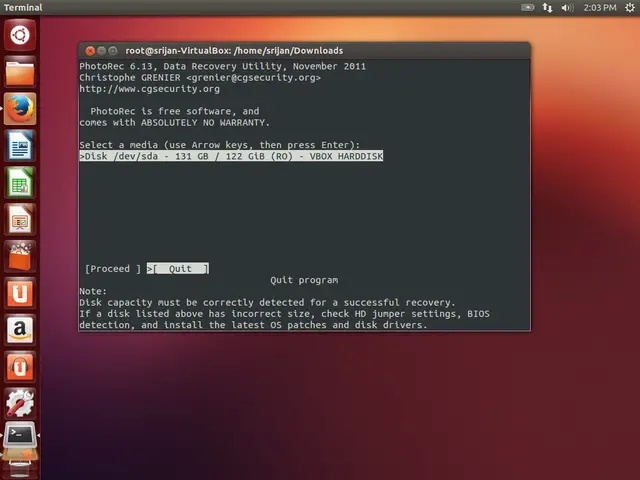
Firstly script will confirm that whether the user running the script is root, then it will check for the TestDisk tool installation. It will redirect you to the drive selection page for the data recovery.
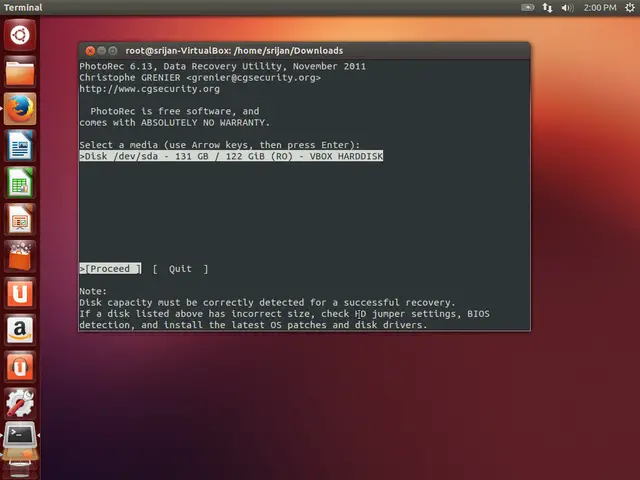
Select the drive which you want to recover.
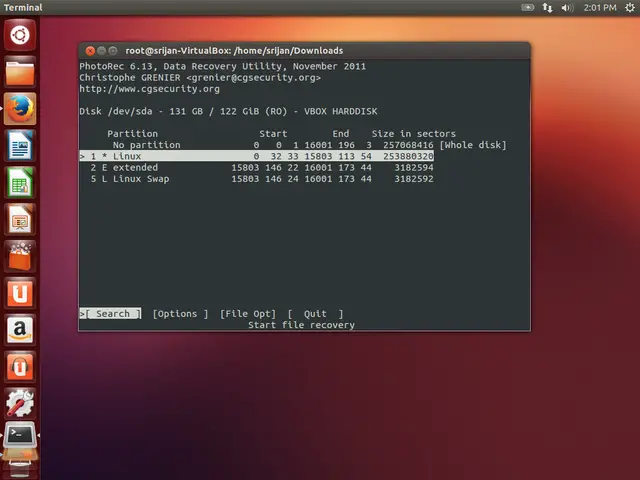
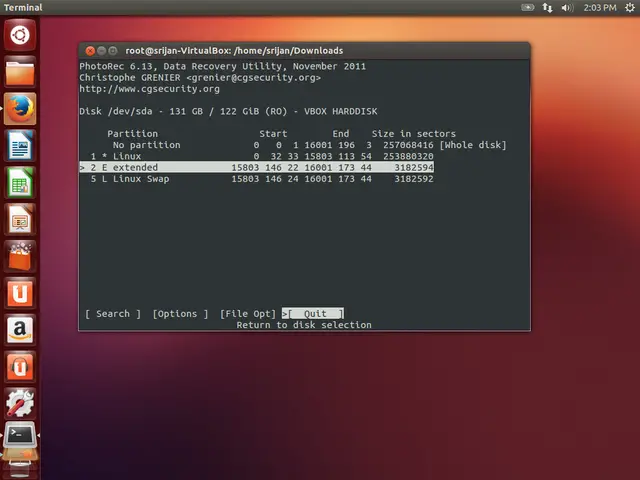
Select its filesystem.
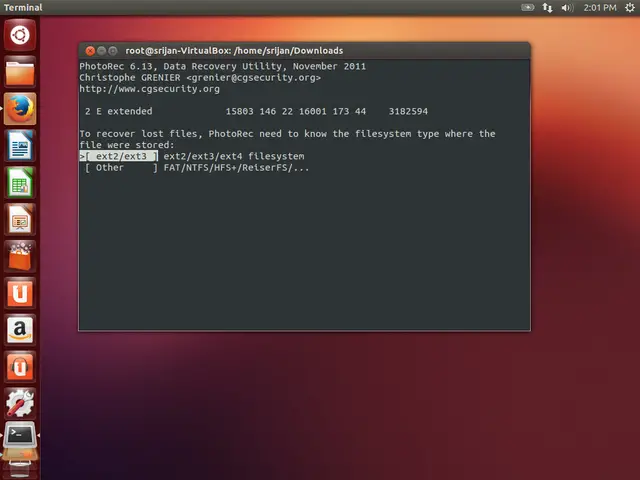
Press enter to continue.
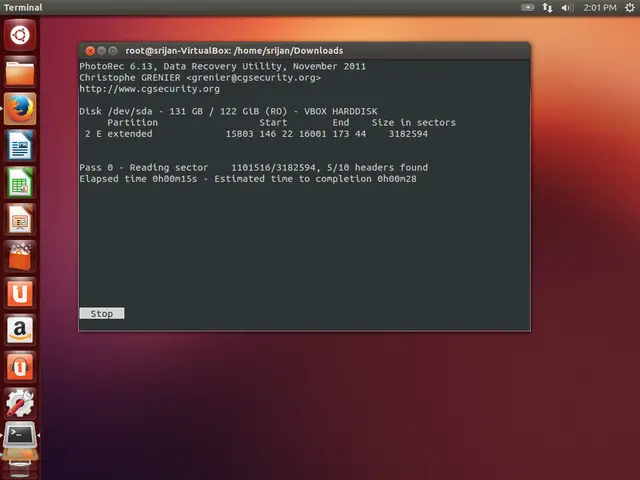
After Completion of recovery it will show the number of files recovered.
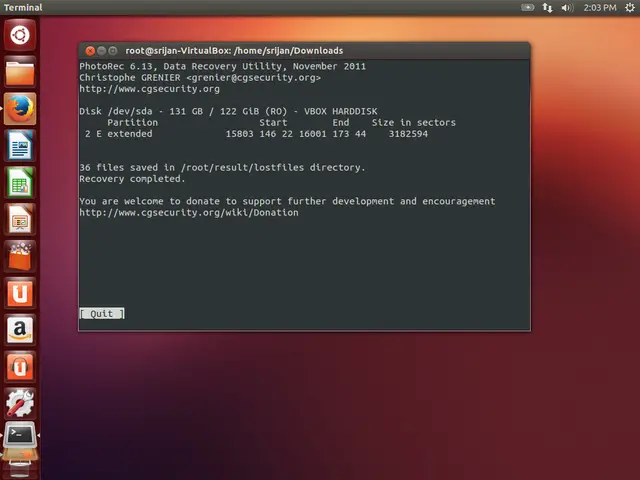
Exit the TestDisk tool as follows.
The script will popup for the success message.
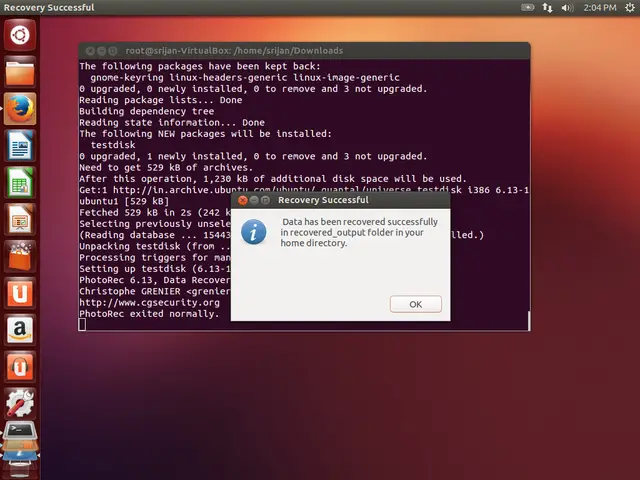
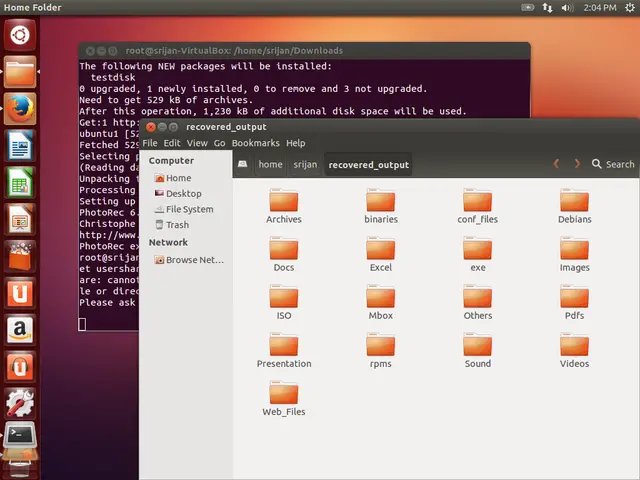
Cheers you have recovered your data.

