Adding Two-Factor Authentication To OpenVPN AS With The WiKID Strong Authentication Server
At WiKID, our goal is to make security easier and less expensive. Pairing WiKID with two-factor authentication and OpenVPN AS is a great cost-effective solution to secure your network for minimal expense.
I downloaded the RPM Version of OpenVPN Access Server and dropped the RPM onto a Centos VM. I had previously configured a WiKID two-factor authentication server using our Enterprise ISO.
The OpenVPN server configures itself on install and directs you to change the password for the openvpn user and directs you to the Openvpn AS web interface.
Configuring the Server via the Admin web interface
Proceed to the web interface at the interface and port you specified. Login in with root or whatever credentials you supplied above.

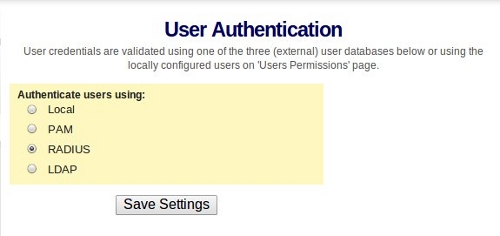
Once you login, click on the Authentication --> General link and choose Radius for authentication:
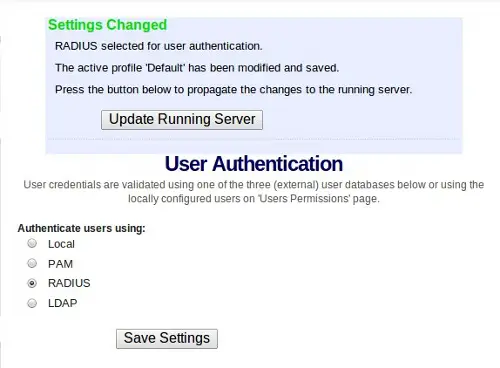
Once you specify that Radius is to be used, click on the Radius link to enter the details. When you submit the information, you will be prompted to updated the running server. Don't bother with that yet.
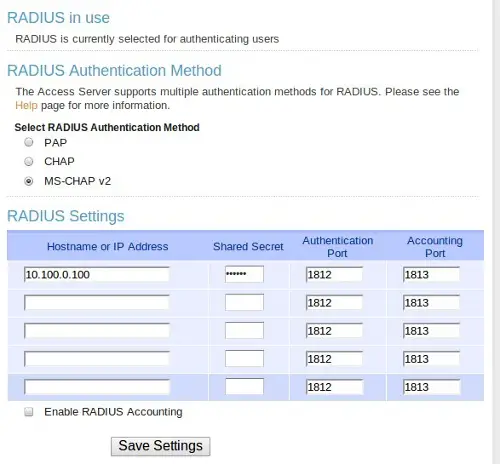
Click on the Radius link under Authentication to add the WiKID server as the two-factor authentication resource. Enter the IP Address of the WiKID server and a shared secret. Please note that there are known attacks against CHAP and MS-Chap V2. Some of these are based on being able to unencrypt the user's password from stolen session data. It's possible that using an one-time passcode lessens the risks, but it probably depends on your session length. Hopefully, OpenVPN will add LEAP soon.
That's it for the OpenVPN server.
Configuring the WiKID Server
For the sake of brevity, we assume you have your WiKID server configured and only need to add the Openvpn AS server as a network client. (For complete installation documentation please see our installation manual .)
On the Network Client tab of the WiKIDAdmin interface, click "Add New network client:". Give it a name, enter the IP address of the OpenVPN server, select Radius as the authentication protocol and choose the WiKID domain.
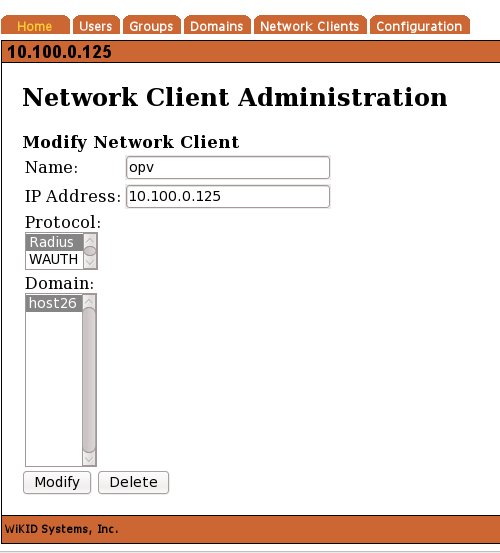
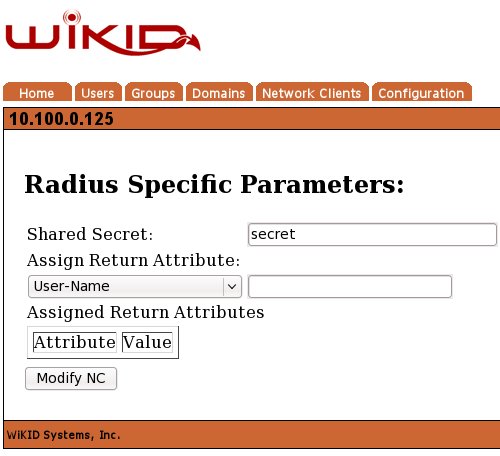
Click Modify and enter the shared secret on the next page. Do not use any Radius Return Attributes. OpenVPN does not support them.
You need to restart the WiKID server to load the new radius configuration:
# wikidctl restart
That's it for the servers!
Configuring the Client
One of the new features that OpenVPN AS has is the automatically created client configuration flies. The user logs into the web interface and downloads the client application (for Windows) and the configuration file.
First start up the WiKID Token and get a one-time passcode from your WiKID server:

Enter your PIN:
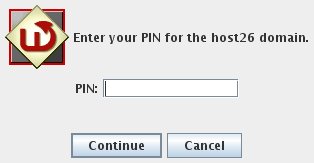
The PIN will be encrypted and sent to the WiKID server. If the account is active, the encryption valid and the PIN is correct, an one-time passcode will be created and returned to the token:

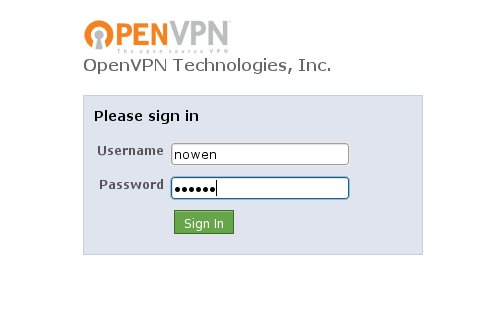
Use this one-time passcode to login to the web interface as a user:
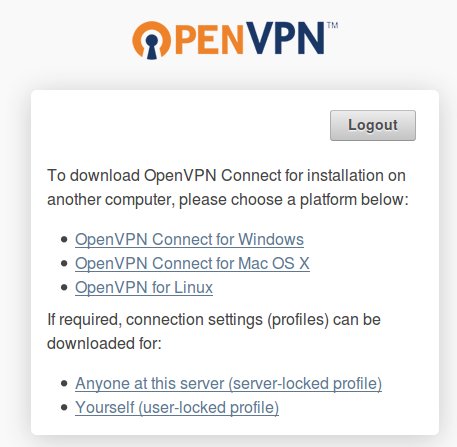
Now you will see the web page for clients:
For linux clients, you should be able to install openvpn via yum or apt-get. Then run the client from the command line, specifying the client config file:
# openvpn --config client.ovpn
And you should now have an internal ip address!
It's great to see a great product like OpenVPN get even better. The new radius management interface is quite nice in it's simplicity. With the recent increase in corporate attacks, password vulnerabilities and malware, it's definitely time to consider adding two-factor authentication to your VPN.
Related
Add two-factor authentication to Google Apps for your domain

