How to secure WebDAV with SSL and Two-Factor Authentication - Page 3
On this page
Setting up clients
Linux
On linux, I used a package called Cadaver, which could not have been easier:
cadaver https://webdav.mydomain.com/webdav/
You will be prompted for your username and password, and then you have commandline access. Type 'help' to see a list of commands.
Windows
Setting up WebDAV on Windows was somewhat confusing as there seem to be a few ways to do it. However, there was only one way that seemed to consistently work. First you must enable basic authentication in the Windows registry. I opened a command prompt and typed regedit. I browsed to
HKEY_LOCAL_MACHINE\SYSTEM\CurrentControlSet\Services \WebClient\Parameters\
And right-clicked on Parameters, Add New, Selected DWORD and created "UseBasicAuth". Set the value to 1 to enable basic authentication. You can change it to 0 to turn it off again. Basic authentication sends the password in the clear so it is disabled, but we are using SSL and one-time passcodes, so it is not an issue here. I was able to add drag-and-drop access by adding the WebDAV address as a Network Place.
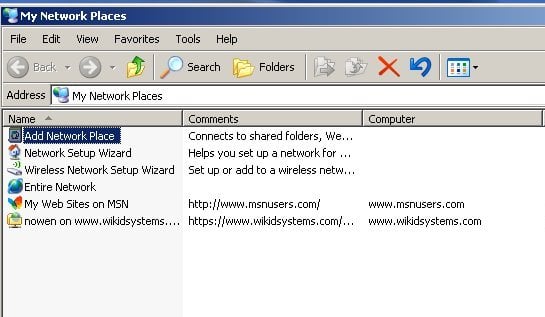
Start by clicking on the My Network Places icon on your desktop - Select Add Network Place:
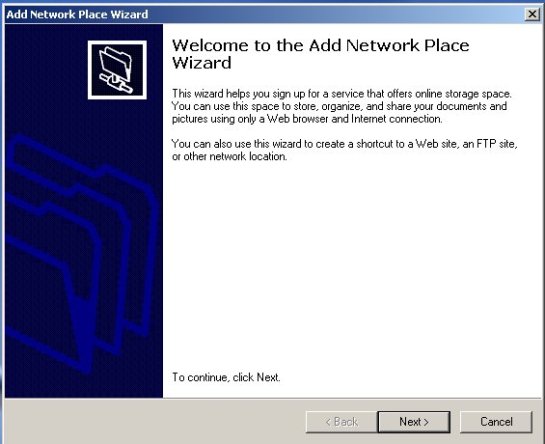
This starts the wizard:
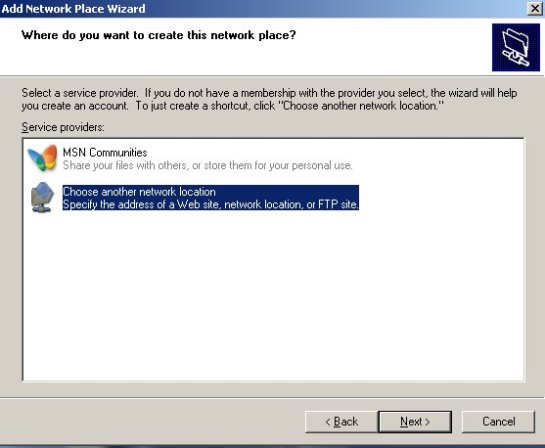
Select the bottom option, "Choose another network location":
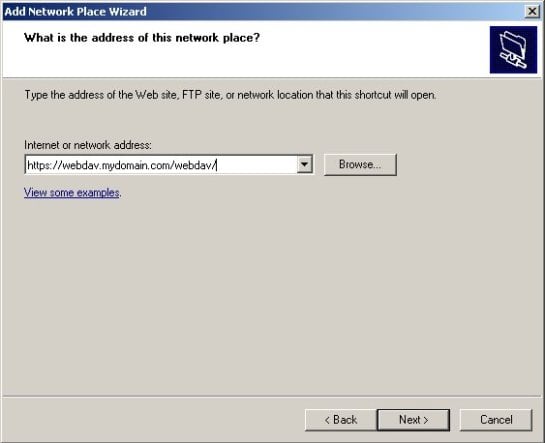
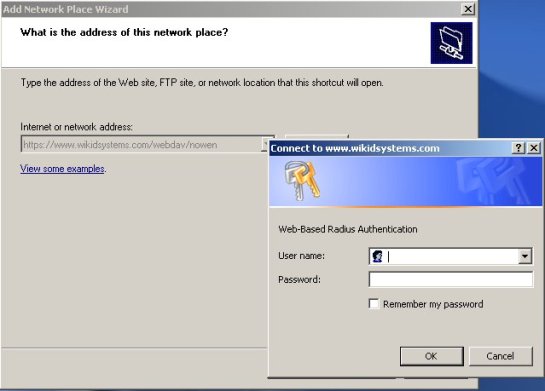
Enter the URL of your WebDAV folder:
When prompted to enter your username and the WiKID one-time passcode:
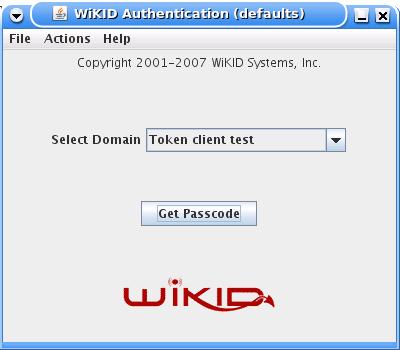
Start the WiKID token and select the Domain associated with the WebDAV resource:
Enter the PIN:
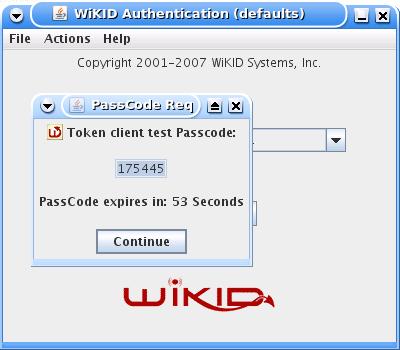
And you will get back the one-time passcode. The OTP is time-bounded, but the time can be set on the WiKID server to whatever you want:
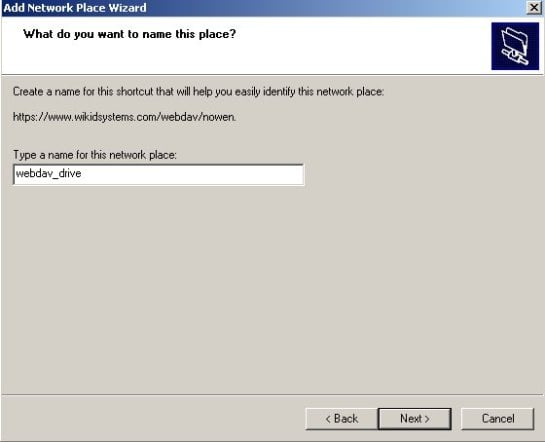
You will be asked to give the location a name:
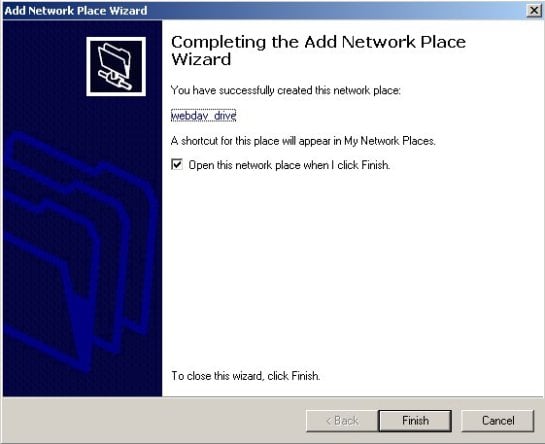
That should be it, click Finish:
The location should open and you should be able to drag and drop a file from Explorer into this location. I was unable to map the WebDAV location to a driver letter. The directory listing entered an infinite loop.
MacIntosh OSX
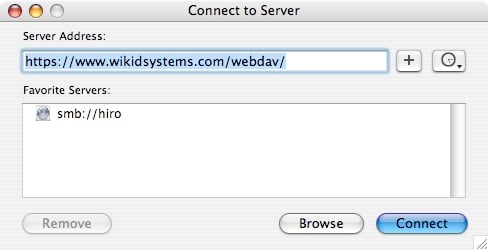
Setting up a WebDAV location on the Mac was a bit easier. Start in the Finder, selecting Go, Connect to Server. A dialog box will open.
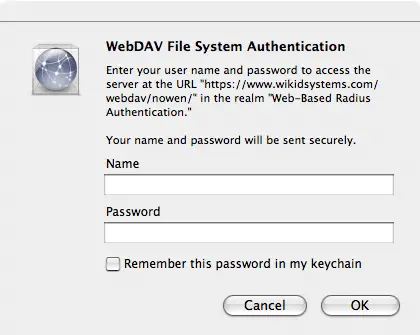
Enter your username and password:
And that is it. You can drag and drop files to this location.
Linux
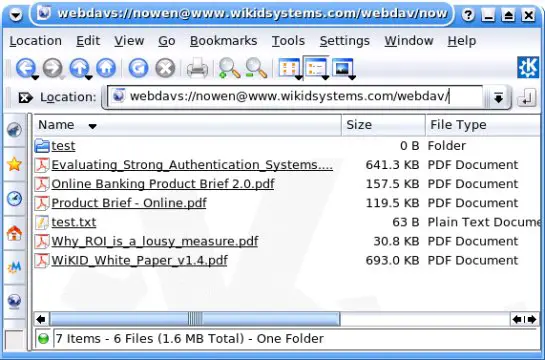
Getting WebDAV to work on Linux is also simple. The trick is to use webdavs as the protocol. In your Konquerer, for example, you can enter: "webdavs://webdav.mydomain.com/webdav/". Additionally, if you would like to not enter the username each time, you can enter "webdavs://[email protected]/webdav/". You can then bookmark that URL:
In Gnome, the process is the same, but the URL would be "davs://[email protected]/webdav/"
Conclusion
Combining WebDAV and Apache provides a great deal of flexibility. With flexibility often comes insecurity. However, by locking down your server, encrypting data in transit with SSL and using two-factor authentication, you can create a system that offers maximum ease of use without sacrificing security. Apache controls access and provides encryption in transit via SSL; Mod_auth_Xradius provides the credential caching and WiKID strongly authenticates the user.
Links of Interest

