How to Install Apache Tomcat 8.5 on CentOS 7.3
Apache Tomcat is an open source Java Servlet implementation developed by the Apache Software Foundation. Beside Java Servlets, Tomcat implements several other Java server technologies including JavaServer Pages (JSP), Java Expression Language, and Java WebSocket. Tomcat provides an HTTP Web Server for Java applications with support for HTTP/2, OpenSSL for JSSE and TLS virtual hosting.
In this tutorial, I will show you how to install and configure Apache Tomcat 8.5 on a CentOS 7 server and how to install and configure Java on a CentOS server which is one of the prerequisites for Tomcat.
Prerequisites
- Server with CentOS 7 - 64bit
- 2 GB or more RAM (Recommended)
- Root Privileges on the server
Step 1 - Install Java (JRE and JDK)
In this step, we will install the Java JRE and JDK from the CentOS repository. We will install Java 1.8.11 on the server with the yum command.
Run this command to install Java JRE and JDK from CentOS repository with yum:
yum -y install java-1.8.0-openjdk.x86_64 java-1.8.0-openjdk-devel.x86_64
It will take some time, wait until the installation finished.
Then you should check the Java version with the command below:
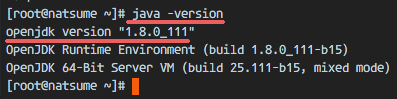
java -version
You should see results similar to the ones below:
openjdk version "1.8.0_111"
OpenJDK Runtime Environment (build 1.8.0_111-b15)
OpenJDK 64-Bit Server VM (build 25.111-b15, mixed mode)
Step 2 - Configure the Java Home Environment
In the first step, we've installed Java. Now we need to configure the JAVA_HOME environment variable on the CentOS server so that Java applications can find the right Java version and Tomcat requires the JAVA_HOME environment to be setup properly, so we need to configure it.
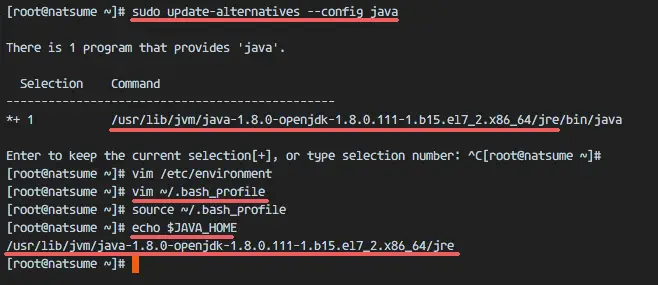
Before we configure the JAVA_HOME environment, we need to know where the Java directory is. Check the Java directory with the command below:
sudo update-alternatives --config java
Java directory = "/usr/lib/jvm/java-1.8.0-openjdk-1.8.0.111-1.b15.el7_2.x86_64/jre"
Then edit the environment file with vim:
vim /etc/environment
Add the JAVA_HOME environment variable by adding the configuration below:
JAVA_HOME="/usr/lib/jvm/java-1.8.0-openjdk-1.8.0.111-1.b15.el7_2.x86_64/jre"
Save the /etc/environment file and exit vim.
Next, edit the .bash_profile file and add the JAVA_HOME variable as well:
vim ~/.bash_profile
At the end of the file, paste the configuration below:
export JAVA_HOME=/usr/lib/jvm/java-1.8.0-openjdk-1.8.0.111-1.b15.el7_2.x86_64/jre
export PATH=$JAVA_HOME/bin:$PATH
Save the file, then reload the bash_profile file.
source ~/.bash_profile
Make sure there is no error, Finally check the JAVA_HOME environment variable:
echo $JAVA_HOME
You will see Java path directory.
Step 3 - Install Apache Tomcat 8.5
In this step, we will install Apache Tomcat under the user tomcat (which we have to create first).
Create a user and group named tomcat:
groupadd tomcat
useradd -s /bin/false -g tomcat -d /opt/tomcat tomcat
Note:
-s /bin/false = disable shell access
-g tomcat = assign new user to the group tomcat
-d /opt/tomcat = define the home directory for the user
Next, go to the /opt directory and download tomcat with the wget command:
cd /opt/
wget http://mirror.wanxp.id/apache/tomcat/tomcat-8/v8.5.6/bin/apache-tomcat-8.5.6.tar.gz
Extract Tomcat and move all the files and directories that are in the 'apache-tomcat-8.5.6' directory to the 'tomcat' directory.
tar -xzvf apache-tomcat-8.5.6.tar.gz
mv apache-tomcat-8.5.6/* tomcat/
Now change the owner of the tomcat directory to the tomcat user and group.
chown -hR tomcat:tomcat tomcat
Step 4 - Test Apache Tomcat
In step 3, we installed and configure tomcat. In this step, we just want to run a short test to make sure there are no errors.
Go to the tomcat/bin directory and run the command 'startup.sh' to test Apache Tomcat:
cd /opt/tomcat/bin/
./startup.sh
Make sure the result is 'Tomcat started'.
Tomcat is using port 8080 now, check the open port on the server with the netstat command.
netstat -plntu
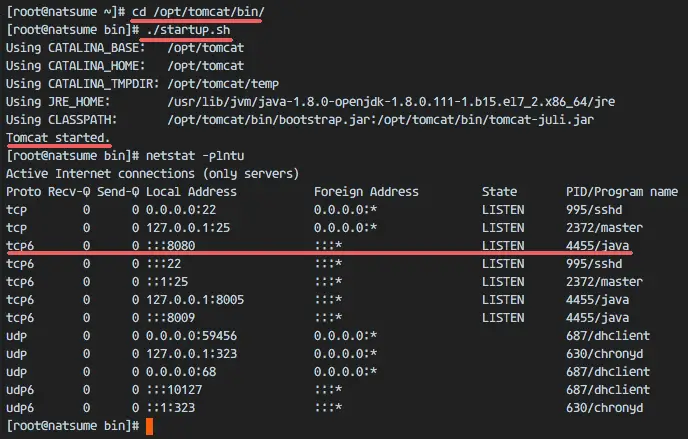
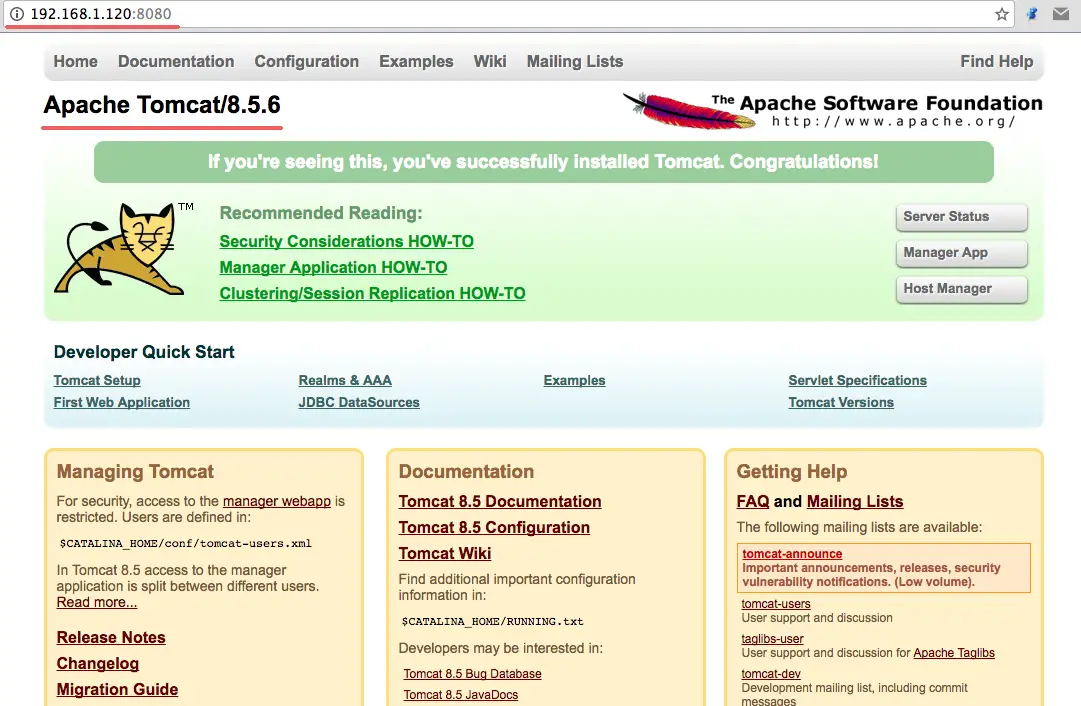
Or visit the server IP address with port 8080 - in my case 192.168.1.120:8080 - with a web browser. You will see the Apache Tomcat default page.

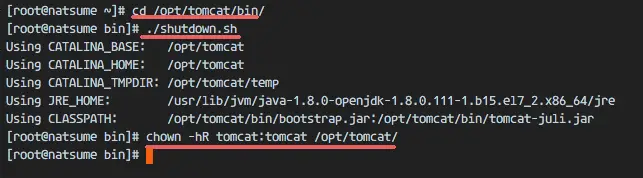
Next, stop Apache Tomcat and because we will run it Tomcat with a systemd service file in the final configuration. Make sure the tomcat directory is owned by the tomcat user and group.
cd /opt/tomcat/bin/
./shutdown.sh
chown -hR tomcat:tomcat /opt/tomcat/
Step 5 - Setup Apache Tomcat Service
In this tutorial, we will run Apache Tomcat as tomcat user with a systemd service file for easy starting and stopping of the service. So the next step is to create a 'tomcat.service' file.
Go to the systemd system directory and create a new file 'tomcat.service'.
cd /etc/systemd/system/
vim tomcat.service
Paste the configuration below:
[Unit]
Description=Apache Tomcat 8 Servlet Container
After=syslog.target network.target

[Service]
User=tomcat
Group=tomcat
Type=forking
Environment=CATALINA_PID=/opt/tomcat/tomcat.pid
Environment=CATALINA_HOME=/opt/tomcat
Environment=CATALINA_BASE=/opt/tomcat
ExecStart=/opt/tomcat/bin/startup.sh
ExecStop=/opt/tomcat/bin/shutdown.sh
Restart=on-failure

[Install]
WantedBy=multi-user.target
Save the file and exit vim.
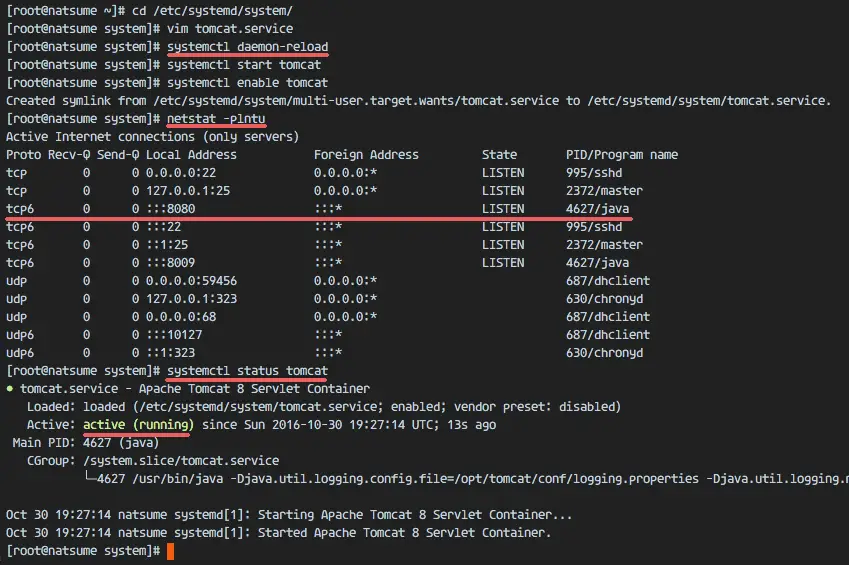
Reload the systemd daemon, then start and add the Apache Tomcat service at boot time.
systemctl daemon-reload
systemctl start tomcat
systemctl enable tomcat
Now check that tomcat is running by checking the open port 8080.
netstat -plntu
And check the tomcat status, make sure the service is active.
systemctl status tomcat
Step 6 - Configure Apache Tomcat Users
In this step, we will configure the users for Apache Tomcat. Tomcat is installed, and it's running by default on port 8080, we can access it with a web browser, but we can not access the site-manager dashboard yet. To enable and configure Tomcat users, edit the file 'tomcat-users.xml'.
Go to the tomcat configuration directory and edit the tomcat-users.xml file with vim.
cd /opt/tomcat/conf/
vim tomcat-users.xml
Create a new line under line 43 and paste configuration below:
<role rolename="manager-gui"/>
<user username="admin" password="password" roles="manager-gui,admin-gui"/>
Save the file and exit vim.
Next, go to the manager directory and edit the context.xml file.
cd /opt/tomcat/webapps/manager/META-INF/
vim context.xml
Comment out line 19 and 20.
<Context antiResourceLocking="false" privileged="true" >
<!--  <Valve className="org.apache.catalina.valves.RemoteAddrValve"
         allow="127\.\d+\.\d+\.\d+|::1|0:0:0:0:0:0:0:1" /> -->
</Context>
Save the file and exit vim.
Go to the host-manager directory and edit the context.xml file again.
cd /opt/tomcat/webapps/host-manager/META-INF/
vim context.xml
Comment out again line 19 and 20.
<Context antiResourceLocking="false" privileged="true" >
<!--  <Valve className="org.apache.catalina.valves.RemoteAddrValve"
         allow="127\.\d+\.\d+\.\d+|::1|0:0:0:0:0:0:0:1" /> -->
</Context>
Save the file and exit, then restart tomcat.
systemctl restart tomcat
Step 7 - Configure Firewalld
In CentOS 7, we have a default firewall tool named firewalld. It replaces the iptables interface and connects to the Netfilter kernel code.
In this step, we will start the firewalld service and open port 8080 so we can access the Apache Tomcat server from the outside of the network.
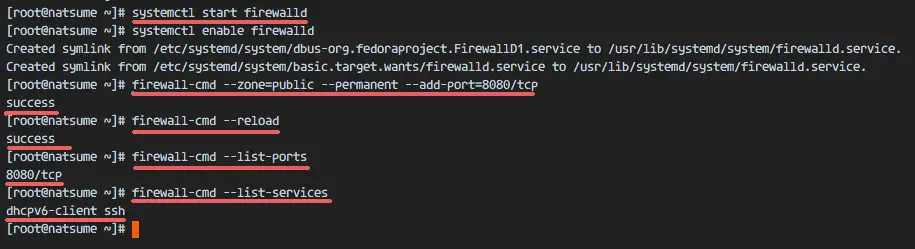
Start the firewalld service and add it to start at boot time with the systemctl command.
systemctl start firewalld
systemctl enable firewalld
Next, add the apache tomcat port 8080 to the firewall with the firewall-cmd command, and reload the firewalld service.
firewall-cmd --zone=public --permanent --add-port=8080/tcp
firewall-cmd --reload
Check that all the services are available in the firewall and check that the Apache Tomcat port 8080 is open.
firewall-cmd --list-ports
firewall-cmd --list-services
Apache Tomcat port 8080 is accessible from outside of the network, and the ssh port is open by default as well.
Step 8 - Testing
Open your web browser and type in your server IP with port 8080. You will see the Apache Tomcat default page.
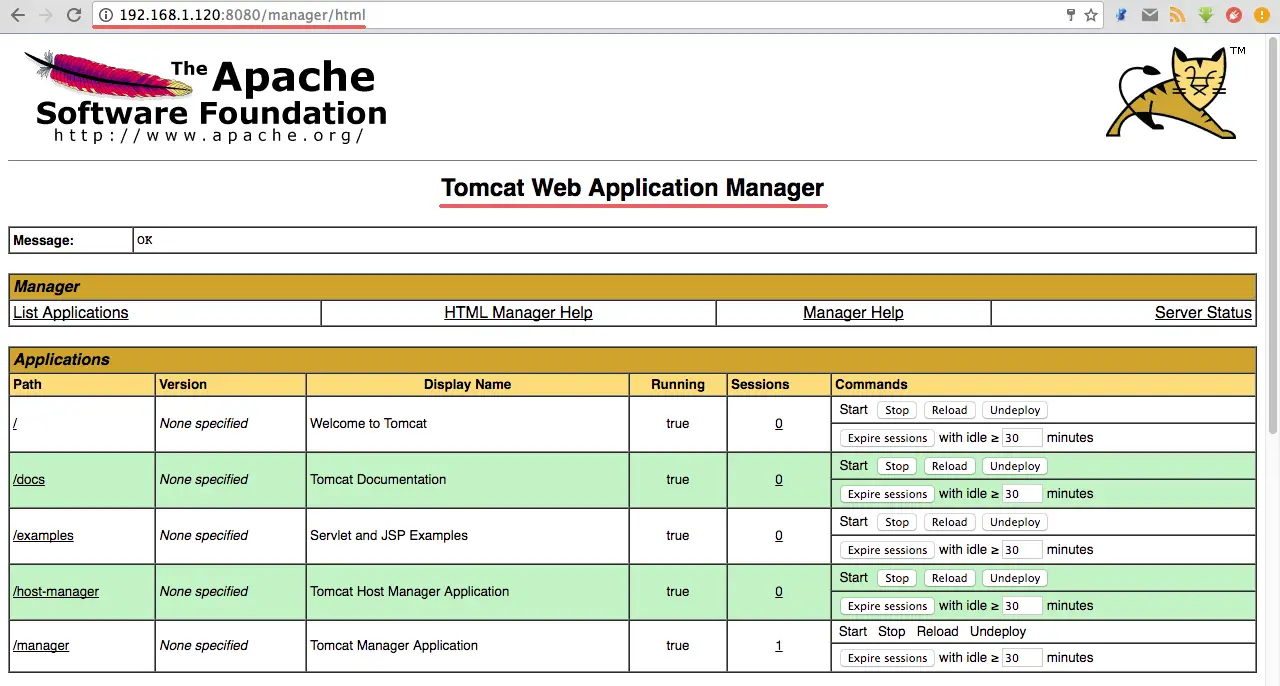
Go to the manager dashboard with URL below:
http://192.168.1.120:8080/manager/html
Type in the admin username 'admin' with password 'mypassword', the configuration that we made on step 5.
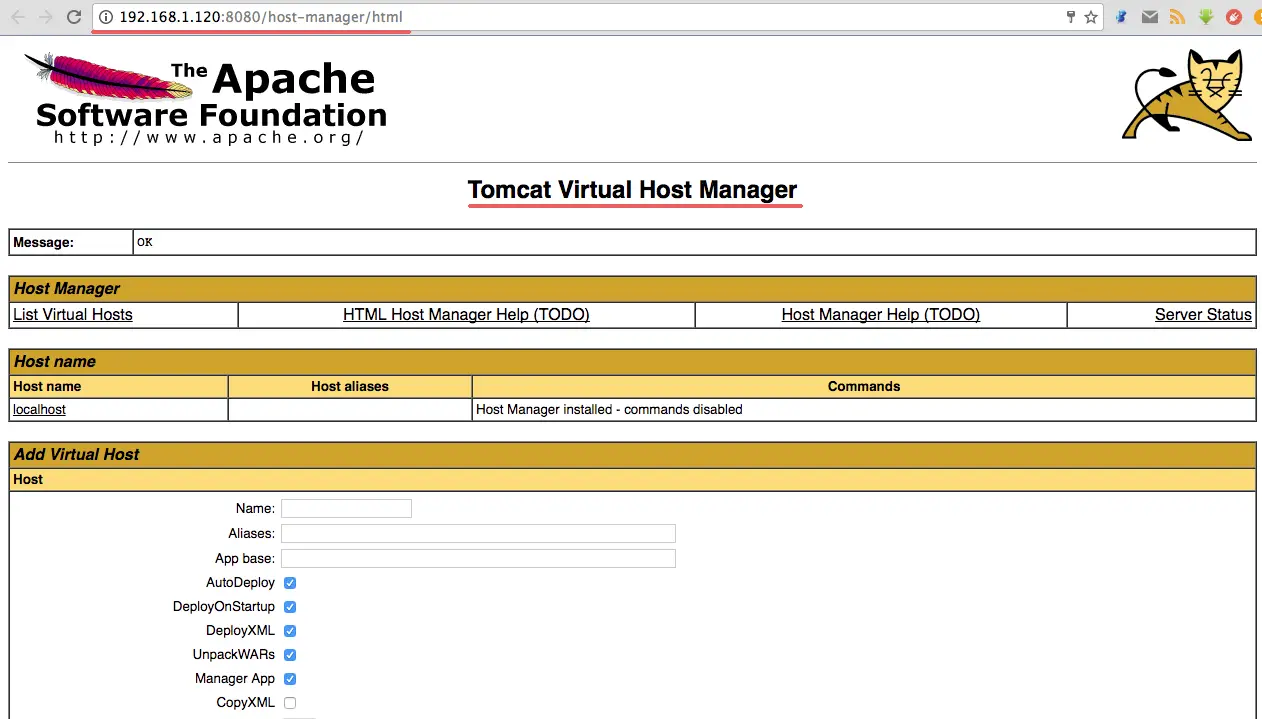
Now go to the host-manager dashboard with URL below:
http://192.168.1.120:8080/host-manager/html
Enter the admin user and password that you set in step 5, you will see the Tomcat Virtual host Manager.
Apache Tomcat 8.5 has been installed on a CentOS 7 Server.

