How to Install Gitlab with PostgreSQL and Nginx on Ubuntu 15.04
On this page
- Prerequisites
- Step 1 - Update the Linux System
- Step 2 - Install Gitlab Dependencies
- Step 3 - Install Ruby and Go
- Step 4 - Create a new Linux user and configure the PostgreSQL database
- Step 5 - Configure the Redis server
- Step 6 - Install GitLab
- Step 7 - Configure the Init Script
- Step 8 - Install and Configure Nginx
- Conclusion
Gitlab is a web-based git repository management application written on Ruby. It is similar to GitHub and includes features like a project wiki and issue tracking system. The Gitlab project was started by Dmitriy Zaporozhets and the software is used by more than 100.000 technology companies including IBM, StackExchange, NASA, Alibaba, Red Hat, etc. Gitlab is one of the best solutions for to build your own git server.
Gitlab is supported by the major Linux distributions such as Ubuntu, Debian, and CentOS. Gitlab provides a .deb package for Debian/Ubuntu and .rpm packages for Rhel and CentOS. The package contains all dependencies including Ruby, Redis, Nginx, Unicorn and PostgreSQL. Gitlab is available in 2 versions, the Community Edition (Gitlab CE) and Enterprise Edition (Gitlab EE). If you want to build your own git server then most likely the free CE edition will offer all features that you need.
In this tutorial, I will guide you step by step trough the installation of Gitlab CE with PostgreSQL as the database system, and Nginx as the web server on Ubuntu 15.04 version. We will use Ruby version 2.x.x, gitlab stable version 8.x.
Prerequisites
- Ubuntu 15.04 - 64bit.
- CPU 2 Cores - recomended from gitlab site.
- 2 GB RAM/Memory - recomended from gitlab site.
- Root privileges.
Step 1 - Update the Linux System
Before we install the Gitlab dependencies, we fetch the latest updates from the ubuntu repository. Log in to the ubuntu server with SSH access, become root user and then update the repositories.
sudo su
apt-get update
Step 2 - Install Gitlab Dependencies
Gitlab has many software dependencies such as a redis-server, git-core, nodejs and postfix to send email notifications. I will install them with a single apt command:
sudo apt-get install -y build-essential zlib1g-dev libyaml-dev libssl-dev libgdbm-dev libreadline-dev libncurses5-dev libffi-dev curl openssh-server redis-server checkinstall libxml2-dev libxslt-dev libcurl4-openssl-dev libicu-dev logrotate python-docutils pkg-config cmake nodejs git-core postfix
Note: During postfix installation, select "internet site" and then press enter to cofirm the hostname.
If all packages are installed, check the git version and make sure git version is 1.7.x or higher.
git --version
git version 2.1.4
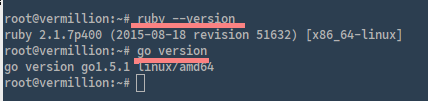
Step 3 - Install Ruby and Go
Gitlab requires a ruby version 2.x or higher. In this tutorial, we will use ruby version 2.7. In this stage, we have to install ruby manually (from source). If you have ruby installed on your system before, remove it with command below:
apt-get remove ruby -y
Next, we will install ruby manually. Create new directory for the ruby source files:
mkdir -p /tmp/ruby && cd /tmp/ruby
Download ruby source with the curl command:
curl -O --progress https://cache.ruby-lang.org/pub/ruby/2.1/ruby-2.1.7.tar.gz
Now verify and extract the ruby.tar.gz, then enter the ruby directory:
echo 'e2e195a4a58133e3ad33b955c829bb536fa3c075  ruby-2.1.7.tar.gz' | shasum -c - && \
tar xzf ruby-2.1.7.tar.gz && \
cd ruby-2.1.7
Compile and install Ruby:
./configure --disable-install-rdoc --prefix=/usr/local
make
make install
As next step, we have to install Go. Since gitlab 8.0, git HTTP request is handled by gitlab-workhorse which is written in Go. To install gitlab-workhorse, we need the go compiler, download and install it.
Create new directory for Go:
mkdir -p /tmp/go && cd /tmp/go
Download Go - we use the 64 bit version:
curl -O --progress https://storage.googleapis.com/golang/go1.5.1.linux-amd64.tar.gz
Verify and extract it to the "/usr/local/" directory:
echo '46eecd290d8803887dec718c691cc243f2175fe0  go1.5.1.linux-amd64.tar.gz' | shasum -c - && \
sudo tar -C /usr/local -xzf go1.5.1.linux-amd64.tar.gz
Now make a symlink for Go in the bin directory:
sudo ln -sf /usr/local/go/bin/{go,godoc,gofmt} /usr/local/bin/
Now we have Ruby and Go installed.
Step 4 - Create a new Linux user and configure the PostgreSQL database
In this step, we will create a new Linux system user called "git" with the home directory "/home/git". Gitlab will run as git user later.
Create new user git with the adduser command:
sudo adduser --disabled-login --gecos 'GitLab' git
Now we configure the database for gitlab. Gitlab supports MySQL and PostgreSQL, in this tutorial we will use the recommended database type PostGreSQL.
Install PostgreSQL with the apt command below:
sudo apt-get install -y postgresql postgresql-client libpq-dev
Once it is done, log in to PostgreSQL and create new role/user called "git" for gitlab:
sudo -u postgres psql -d template1
CREATE USER git CREATEDB;
Then create new database for gitlab called "gitlabhq_production" and grant the database to git user/role:
CREATE DATABASE gitlabhq_production OWNER git;
Now exit for the postgresql shell and test the new role/user with the database that we have created:
\q
sudo -u git -H psql -d gitlabhq_production
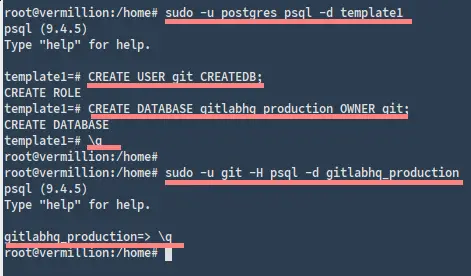
New system user called "git" has been created.
New role/user "git" for psotgreSQL which has been granted to the gitlab database "gitlabhq_production" has been created too.
Step 5 - Configure the Redis server
Before we edit the redis configuration file in the "/etc/redis" directory, we will create a backup copy with the name redis.conf.original.
cd /etc/redis/
cp redis.conf redis.conf.original
Then edit the file "redis.conf" with the vim editor:
vim redis.conf
Go to the line 45 and change the value to 0, because we want Redis to listen on a unix socket only and not a port:
Listen 0
Then go to the end of the file and add a redis socket and the permission for it:
unixsocket /var/run/redis/redis.sock
unixsocketperm 777
Save the file and exit.
Next, create a new directory for the redis socket in the "/var/run" directory and adjust the owner and permissions of the directory:
mkdir -p /var/run/redis
chown redis:redis /var/run/redis
chmod 755 /var/run/redis
Go to redis socket directory and run the command below:
cd /var/run/redis
if [ -d /etc/tmpfiles.d ]; then
  echo 'd  /var/run/redis  0755  redis  redis  10d  -' | sudo tee -a /etc/tmpfiles.d/redis.conf
fi
If all is done, restart the redis server and add the user "git" to group "redis":
sudo service redis-server restart
sudo usermod -aG redis git
Step 6 - Install GitLab
Go to the directory "/home/git" and download gitlab from it's GIT repository:
cd /home/git
sudo -u git -H git clone https://gitlab.com/gitlab-org/gitlab-ce.git -b 8-2-stable gitlab
Note :
sudo -u git -H clone command = we run command "clone" as user "git".
- Configure GitLab
Go to gitlab directory to configure gitlab:
cd /home/git/gitlab
Copy the example of gitlab configuration file gitlab.yml.example to gitlab.yml in the "config" directory:
sudo -u git -H cp config/gitlab.yml.example config/gitlab.yml
In the gitlab directory, change the owner of the sub directories "log and tmp" to the git user:
sudo chown -R git {log,tmp}
Then change the permissions for the other directories so gitlab (the git user) can write to them:
mkdir -p public/uploads/
sudo chmod -R u+rwX,go-w log/
sudo chmod -R u+rwX {tmp,tmp/pids,tmp/sockets,builds,shared/artifacts}
sudo chmod -R 0750 public/uploads
Copy the examples of the unicorn and Rack attack configurations:
sudo -u git -H cp config/unicorn.rb.example config/unicorn.rb
sudo -u git -H cp config/initializers/rack_attack.rb.example config/initializers/rack_attack.rb
Now we have to configure global settings for the git user with git command below:
sudo -u git -H git config --global core.autocrlf input
And we have to configure the redis connection by copying file "resque.yml" into the config directory, then edit it with vim to change the redis configuration, use unix socket as we configured redis to listen on a socket:
sudo -u git -H cp config/resque.yml.example config/resque.yml
- Database Configuration
The next step is to configure the GitLab DB settings, we use postgreSQL for our database. Copy the configuration file and change the permissions:
sudo -u git -H cp config/database.yml.postgresql config/database.yml
sudo -u git -H chmod o-rwx config/database.yml
- Install the Gem's
sudo gem install bundler
sudo -u git -H bundle install --deployment --without development test mysql aws kerberos
Wait until the commands finished.
- Install Gitlab-shell
Gitlab-shell allows SSH access and repository management for Gitlab. We will use the default configuration, so we do not need to edit it. Run command below to install the gitlab-shell:
sudo -u git -H bundle exec rake gitlab:shell:install[v2.6.8] REDIS_URL=unix:/var/run/redis/redis.sock RAILS_ENV=production
REDIS_URL = make sure you use unix socket for redis configuration on production environment.
- Install gitlab-workhorse
Gitlab-workhorse is a small deamon to handle Git HTTP traffic from unicorn, coded in Go. Clone and install it:
cd /home/git
sudo -u git -H git clone https://gitlab.com/gitlab-org/gitlab-workhorse.git
cd gitlab-workhorse
sudo -u git -H git checkout 0.4.2
sudo -u git -H make
- Initialize the database and activate gitlab features
Go to gitlab installation directory and run the command below:
cd /home/git/gitlab
sudo -u git -H bundle exec rake gitlab:setup RAILS_ENV=production
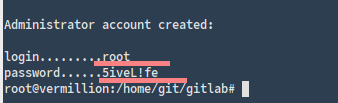
type "yes" to create the tables.

The result will be a gitlab account with username "root" and password "5iveL!fe".
Step 7 - Configure the Init Script
Copy gitlab init script form gitlab installation directory and add gitlab to start at boot time with update-rc.d command:
sudo cp lib/support/init.d/gitlab /etc/init.d/gitlab
sudo update-rc.d gitlab defaults 21
Then copy the gitlab logrotate configuration for log management:
sudo cp lib/support/logrotate/gitlab /etc/logrotate.d/gitlab
And check application status and compile assets:
sudo -u git -H bundle exec rake gitlab:env:info RAILS_ENV=production
sudo -u git -H bundle exec rake assets:precompile RAILS_ENV=production
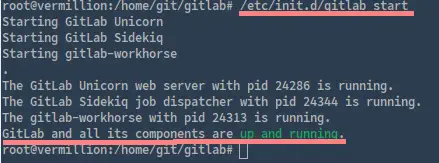
If there is no error, start gitlab with:
/etc/init.d/gitlab start
Step 8 - Install and Configure Nginx
We will use Nginx as the front end web server to handle browser requests. Just install it with this apt command:
apt-get install nginx -y
Copy Nginx virtual host configuration from the gitlab directory and remove default Nginx default virtualhost:
sudo cp lib/support/nginx/gitlab /etc/nginx/sites-available/gitlab
sudo rm /etc/nginx/sites-enabled/default
Edit the config file with vim:
sudo vim /etc/nginx/sites-available/gitlab
Change value of the Listen and ServerName lines in the HTTP section:
Listen *:80; #Port Default

#Listen 0.0.0.0:80; #comment one of this

ServerName my.gitlab.me; #Gitlab FQDN/Domain
Save and exit.
Activate the gitlab virtualhost, start nginx and restart gitlab:
sudo ln -s /etc/nginx/sites-available/gitlab /etc/nginx/sites-enabled/gitlab
service nginx start
/etc/init.d/gitlab restart
Now you can access gitlab with your browser at my.gitlab.me (the hostname you have choosen for your server) and log in with the default username "root" and password "5iveL!fe".
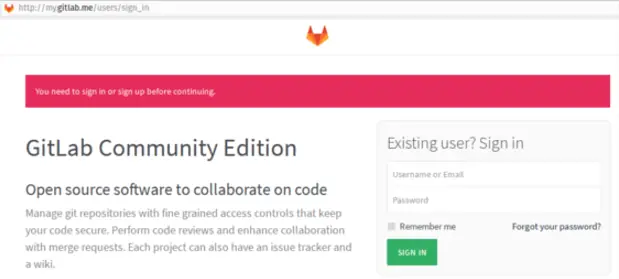
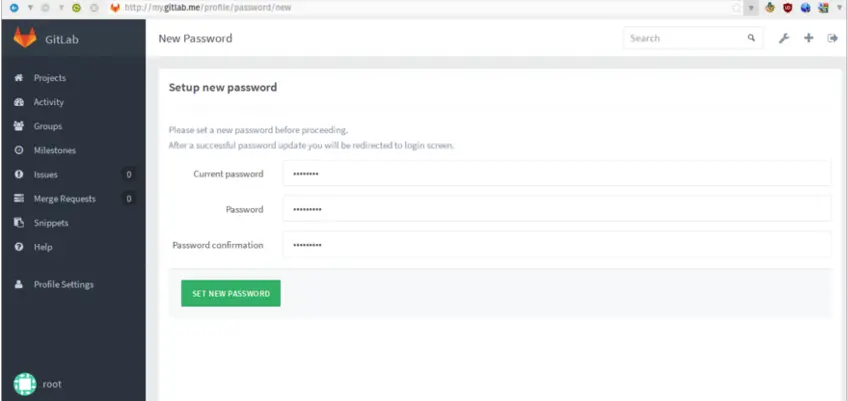
First you should replace the gitlab default password with your password.
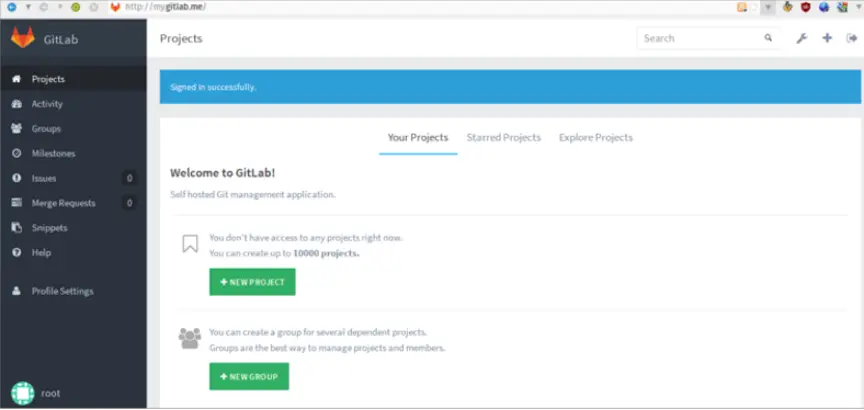
Gitlab 8 with PostgreSQL and Nginx on ubuntu 15.04 is successfully installed now.
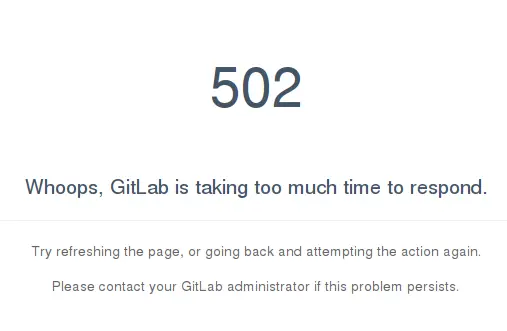
Note :
If you have error, for an example "502 bad gateway", then fix it with by increasing the unicorn time out or upgrade your hardware. Go to gitlab installation directory and edit unicorn.rb file with vim:
sudo -u git -H vim config/unicorn.rb
See more about Gitlab troubleshooting here https://github.com/gitlabhq/gitlab-public-wiki/wiki/Trouble-Shooting-Guide.
Conclusion
Gitlab is an open source git repository management software written in Ruby. It is one of the best solutions to build your own git server. Gitlab is created by Dmitriy Zaporozhets and is available in 2 versions, Gitlab CE (Community Edition) and Gitlab EE (Enterprise Edition). Gitlab is easy to install and configure with a beautifull interface, used by more 100.000 technology companies. It is very powerfull software that helps developers to build applications together with other developers.

