How to collaborate on docs stored on your WebDAV server with ONLYOFFICE
This guide explains how to connect your WebDAV server to ONLYOFFICE and edit and collaborate on documents online.
WebDAV stands for Web-based Distributed Authoring and Versioning and is a set of extensions to the HTTP protocol that allows users to directly edit files on the Apache server so that they do not need to be downloaded/uploaded via FTP. Of course, WebDAV can also be used to upload and download files.
Connecting WebDAV to ONLYOFFICE, a free and open source office suite, significantly extends the file management and collaboration capabilities allowing you to:
- set different permissions to files and folders for users and groups;
- control version history and restore any previous version if needed;
- create and edit text documents, spreadsheets and presentations online;
- collaborate on docs in real-time using two co-editing modes, review and track changes, comment and communicate via chat.
To set up and configure a WebDAV server with Apache on Ubuntu, follow these instructions. To run the latest version of ONLYOFFICE, consult this guide.
Step 1. Once all the components are installed and configured, access your ONLYOFFICE account and switch to the Documents module.
Step 2. ?lick the Add account button on the left side panel under the corresponding caption. The Connecting account window will open.
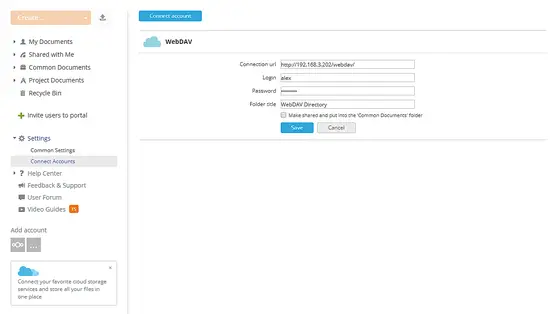
Step 3. Click the Other account button and fill in the form that opens. Enter the Connection URL that looks like as follows:
http://<hostname>/webdav/ or https://<hostname>/webdav/
Specify the Login and Password used for your WebDAV and change the default name of your WebDAV directory if needed.
Finally, click the Save button.
That's all, your WebDAV server is connected to the ONLYOFFICE Documents module. Now you can access the necessary document stored on your WebDAV server, set access rights to it for your team members and start co-editing.


