An introduction to video editing in Openshot 2.0
Openshot is one of the most important and widely-used open source software tools out there. Being very simple to use, powerful enough, and free of charge, this video editor has managed to build a large community of enthusiastic users around it who waited for the release of the second major version of their favorite software with anticipation for years. Now that the release was made available, it is time for us to take a look at the most highlighted new features and capabilities, and to see how we can utilize and incorporate them into our video editing endeavors.
Adding a Project File in OpenShot
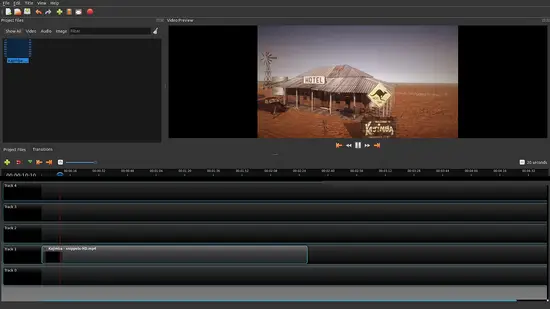
You can add a new file to your project by pressing “Ctrl+F” or through File → Import Files...
The newly added file is placed inside the Project Files box on the upper left, so we can drag it from there and drop it to one of the tracks that lie on the bottom. Placement is done through a snapping function, so you may put the clip exactly where you want, and then preview the clip by pressing “play” on the video player if you want.
Setting Clip Properties
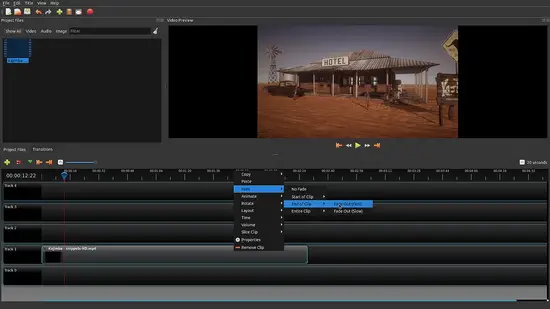
By right-clicking on the clip, you are given an options menu which allows for the implementation of basic fading in/out effects, volume settings, playback speed settings, rotation, copying, etc. These are the most common settings needed for basic video editing, so finding them in this handy menu is comfortable.
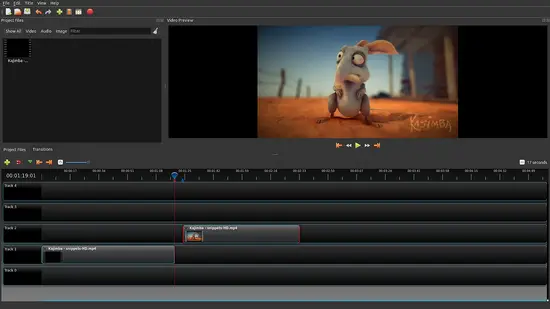
For example, in order to slice the clip which is also a very common practice in basic video editing, you may add markers by pressing the green marker button and then choose the slicing function from the options menu. After slicing it, you can put it into another track line for separate editing.
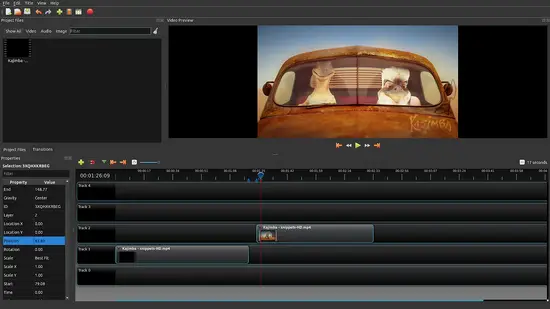
And now we come to the placement precision of Openshot 2.0 that can now be much more accurate compared to the previous versions. If you right-click on the clip and you choose the “Properties” option, a new editor will open up on the left side of the track list, so you may edit the properties of the selected clip. The properties editor is dynamically updated, so if you drag the clip right-left, you will be informed of the corresponding numerical changes. Double-click a property such as the “position” and change the value to match exactly what you want.
Adding Effects and Previewing
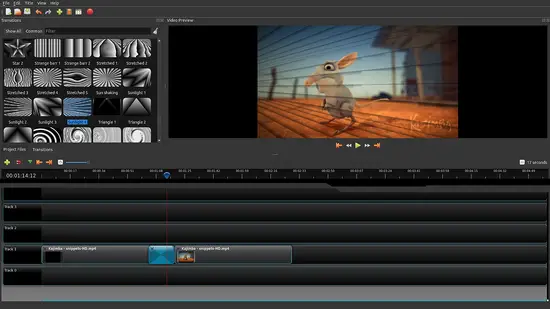
Openshot 2.0 has enriched its transition effects collection, and made it even simpler to add and position them. Click on the “Transitions” tab and drag and drop the effect to position it on the tracks timeline. If you want to change the duration of the effect, you simply extend the effect box by dragging on of its sides. If you want to achieve a reverse effect, you can also choose to do so by right-clicking on the effect box and selecting the particular option. The video previewer will give you the result instantly.
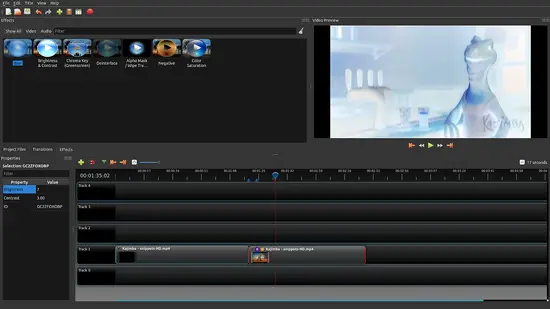
If you want to apply chromatic and brightness effects, you can do so by clicking on the “Effects” tab, and by drag and dropping the selected effect onto the clip. You may set the properties of the effect by right-clicking on the clip, and then selecting the effect icon that was assigned to the clip. Then double click on the property and type the value that you want. The effect is applied clip-wise, in the sense that you cannot change its properties for parts of the selected clip, but only split the clips further.
Splitting Clips
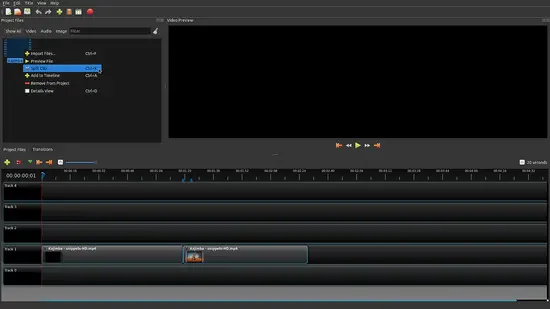
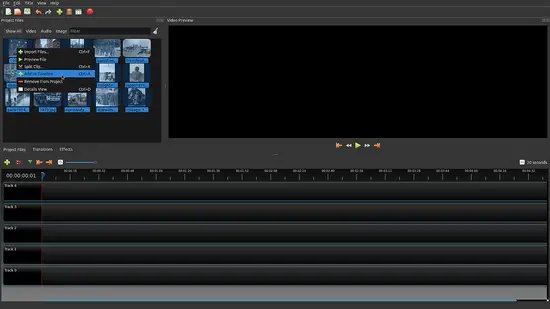
One important thing to note is that Openshop v2 now offers a new splitting clip tool that you may find useful if you need to add several effects in various key parts of the clip. Right-click on the clip that is to be found in the Project Files, and select the “Split Clip” option.
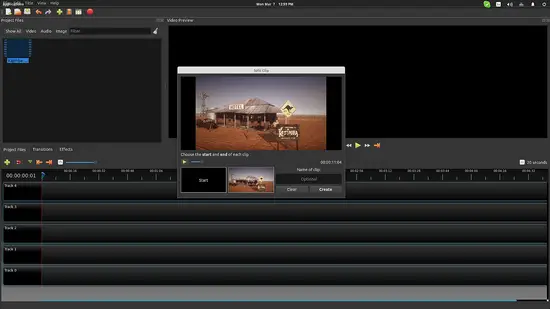
A new window will open up, allowing you to set start and end points and split the clip by naming the parts before importing it to the track line. Note that this new feature is still not quite stable, and you may have to retry a few times because of video freezing randomly. Whatever the case, I hope that it work for you better than it worked for me.
Creating a Pictures Clip
Openshot can quickly and easily create videos of your pictures with added music in the background. Here's how to do it. Add the images/photographs on the project files, select them, and press right-click → Add to Timeline.
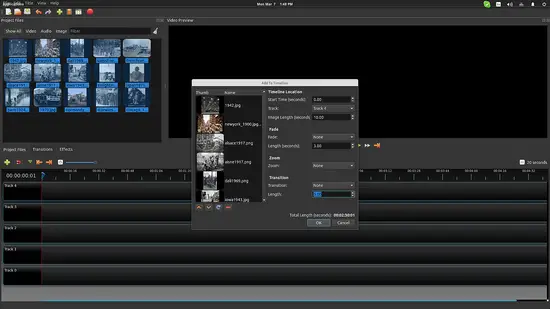
After this, a new dialog will open up allowing the setting of the duration of depiction for each image. You may also rearrange the order of importing through this screen.
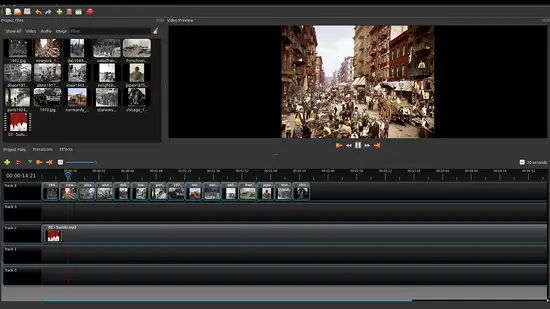
Then you simply add the desired audio file and drag and drop it onto another track line and you're done. Openshot can use any media in this simple way, and in version 2 you can even add GIF files that are automatically read and imported as frames.
Exporting your Project
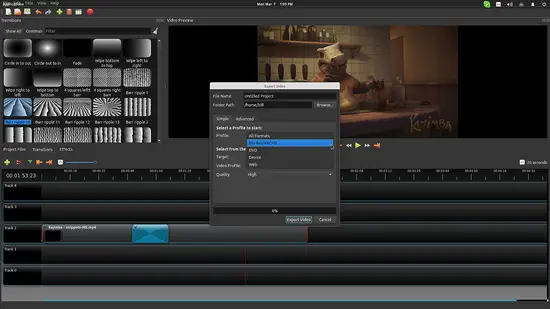
Exporting the resulting project is as simple as hitting “Ctrl+Shift+E” or through File → Export Video. OpenShot 2.0 supports over 100 video formats and codecs, and you can also fiddle with the advanced audio and video quality settings as well (resolution, frame rates, bit rate, etc). There are also ready to use profiles such as DVD, BluRay, Web, found on the “Basic” options tab.
Conclusion
Openshot 2 arrived after a long wait, and it really looks good. On the functionality part, I find it to be much more intuitive and easy to use, more configurable (you can drag and drop the GUI elements to different locations), and more powerful in all aspects. The only thing that it needs now is more debugging. I used version 2.0.6 for this quick guide, and I encountered quite a few stability issues, but those are surely going to be ironed out with time (and work). Have fun editing your videos!

