How to Install RockyLinux 8.4
For the past few months, we've heard the news about the end of the CentOS Linux distribution project. The CentOS 8 will be the last version of the CentOS Linux project, which only gets support until the end of this year 2021. And by this time, we have a few Linux distro as an alternative of CentOS Linux 8 Stable, and among them is "Rocky Linux".
Rocky Linux is an open-source Linux distribution created by the Rocky Linux project, led by Gregory Kurtzer, founder of the CentOS project. It's a fork of CentOS and designed to be 100% binary compatible with RHEL. Rocky Linux provides an enterprise-grade operating system and production-ready Linux distribution.
In this guide, we will show you step-by-step how to install a 64-bit version of Rocky Linux 8.4 as a stand-alone server. Additionally, we will verify the installation by accessing the Rocky Linux server through SSH from another machine.
Prerequisites
- An ISO file Rocky Linux 8.4. The download page provides two versions of ISO, minimal and DVD. We will use Rocky Linux minimal ISO.
- Installation media. For the live machine hardware installation, you will need a USB drive for your media installation. But for the virtual machine (VM) installation such as KVM and VirtualBox, you can just go with the ISO file.
- Disk at least 20GB (for testing purpose). For production, you need larger disk space.
Download and Verify ISO File
First, download the ISO file of Rocky Linux (Minimal or DVD version). Then verify the file you downloaded to make sure it's not corrupt.
1. Download Rocky Linux 8.4 Minimal using the command below.
wget https://download.rockylinux.org/pub/rocky/8.4/isos/x86_64/Rocky-8.4-x86_64-minimal.iso
2. For the Rocky Linux DVD version, download using the following command.
wget https://download.rockylinux.org/pub/rocky/8/isos/x86_64/Rocky-8.4-x86_64-dvd1.iso
3. Once your ISO file is downloaded, run the following command to download the checksum file.
wget https://download.rockylinux.org/pub/rocky/8.4/isos/x86_64/CHECKSUM
After that, you can verify your ISO file using the sha256sum command as below.
sha256sum -c CHECKSUM --ignore-missing Rocky-8.4-x86_64-minimal.iso
Now you will see a similar output as below.
Rocky-8.4-x86_64-minimal.iso: OK
The verification is complete, and the ISO file is not corrupt. Now you can create a USB media bootable using a tool such as UNetbootin or dd command, or if you want to install it as a virtual machine, you're ready to go.
Boot to Installation Media
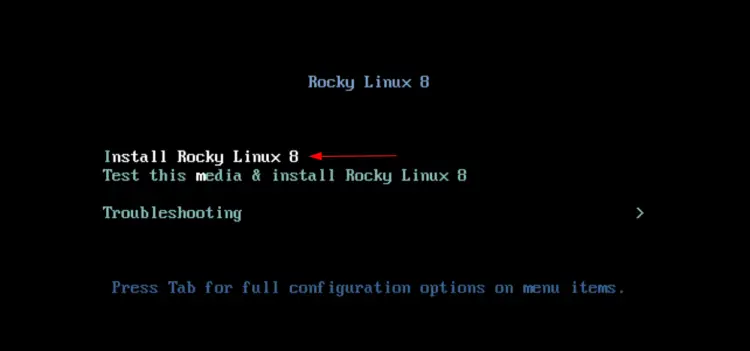
Boot your machine to the ISO file or USB drive installation media. During the booting process, you see a black screen with a list of menus.
1. Select the "Install Rocky Linux 8" menu and press "Enter" to continue.
Now you will see some boot messages and the anaconda installer messages. Once the boot process is complete, you will get the Rocky Linux Welcome Page.
Choose Installation Language
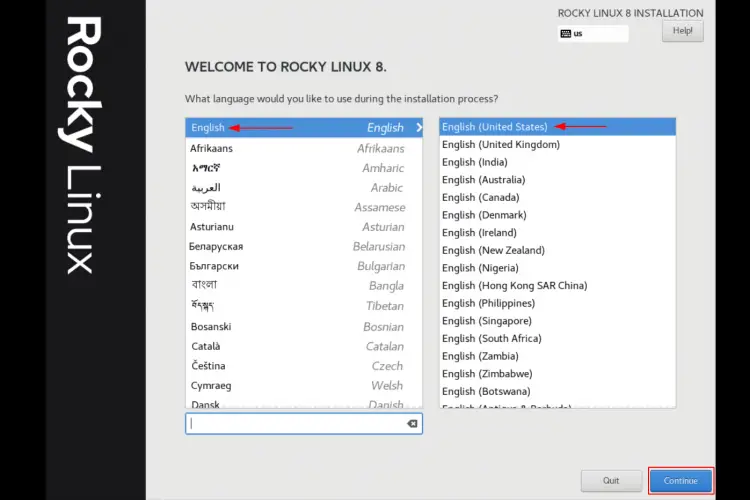
1. On the Rocky Linux welcome page, choose your preferred language for the installation and click "Continue".
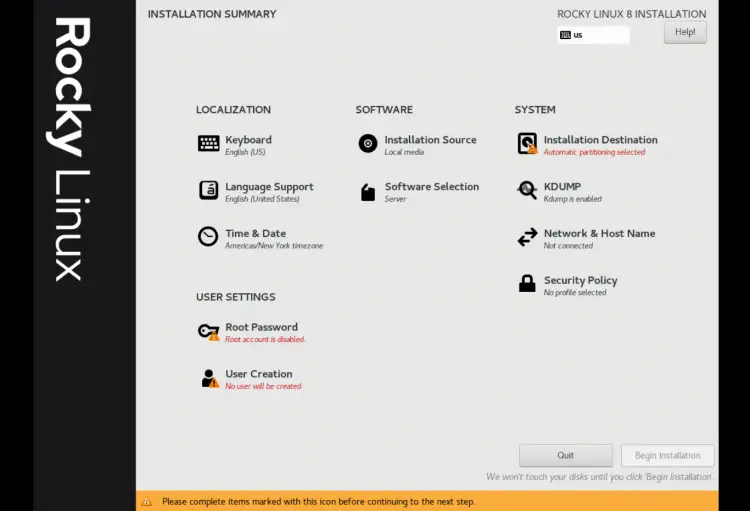
In the next window, you will see the Rocky Linux "Installation Summary" page. Which inform you to complete four different stages for the Rocky Linux installation.
- LOCALIZATION: You will be setting up the keyboard layout, languages, date, and time.
- SOFTWARES: You will be configuring the Rocky Linux installation source and choosing which software packages you want to install.
- SYSTEM: You will be setting up the partition for the Rocky Linux installation destination. And then setting up the hostname and network.
- USER SETTINGS: You will be setting up the new user and the root password.
In the next stage, you will be configuring all of those four stages.
LOCALIZATION
Now you will be focusing on the "LOCALIZATION" stage.
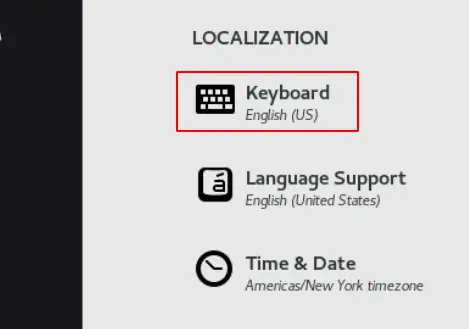
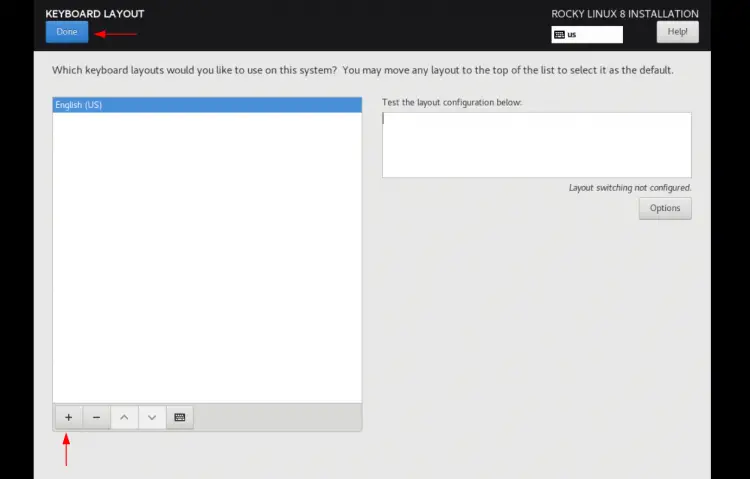
1. Frist, click the "Keyboard" option.
The default keyboard layout configuration is "English (US)". Click the "+" button to add a new keyboard layout as your preferred keyboard, then click on "Done" to continue the installation.
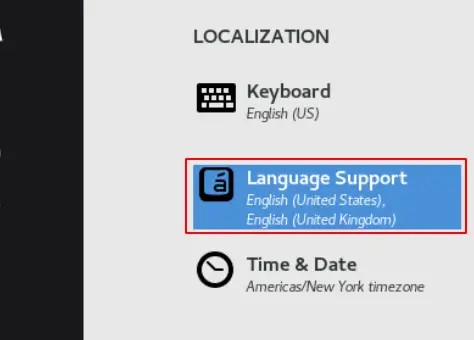
2. Next, click the "Language Support" option to add a new language.
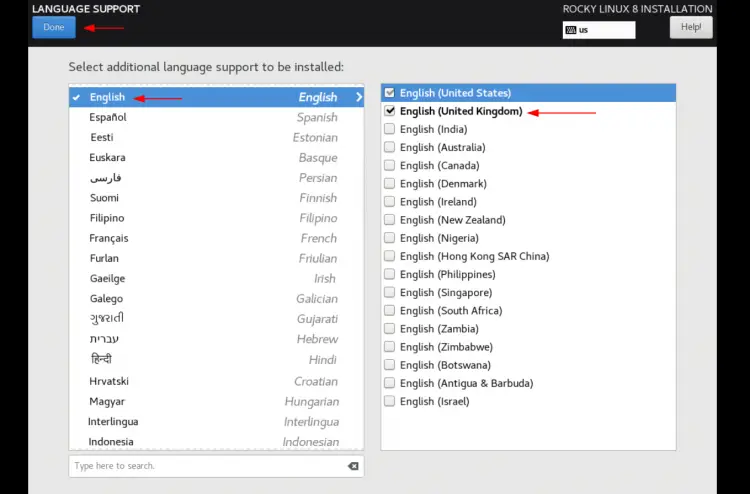
As shown below, there are multiple versions of each language, and the default language configuration is "English - English (United States)".
To add a new language, click the base language you want to use and select the version as your preferred. Additionally, you can install multiple versions of the language by marking each version.
After that, click the button "Done to continue.
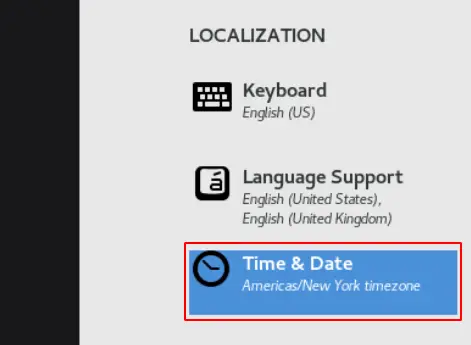
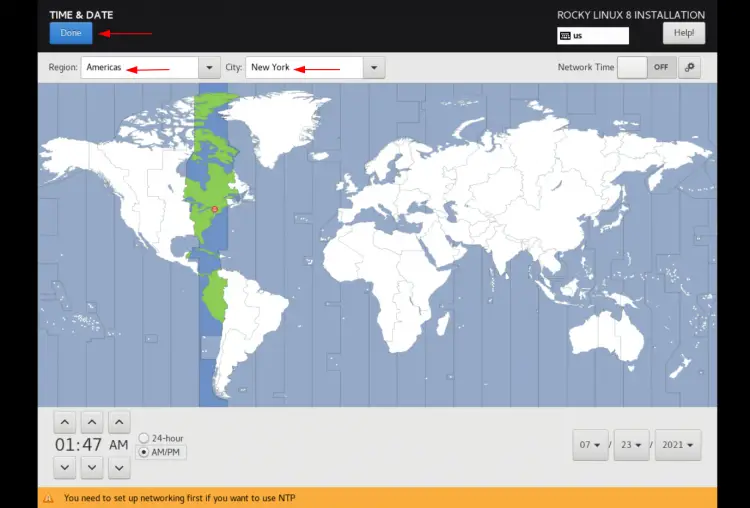
3. Now click the "Time & Date" option.
Click the map to set up the "Region" and "City". After that, you can adjust the time and date with your own at the bottom page. Optionally, you can choose the "Region" and "City" from each box.
Now click the button "Done" to continue and move to the second stage.
SOFTWARE
On the "SOFTWARE" stage, you will be checking the Rocky Linux installation source and choosing the software packages you want to install.
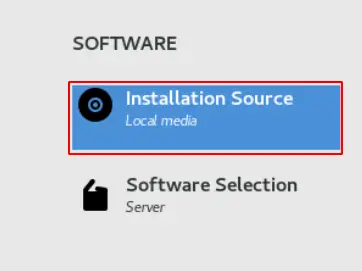
1. Click on the "Installation Source" option.
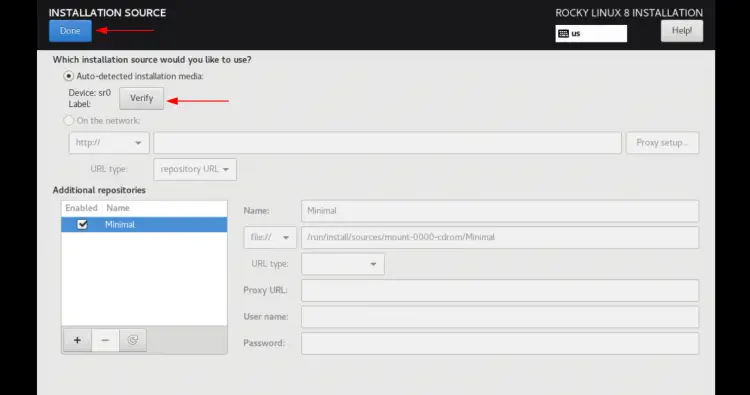
Now the installer will automatically detect the installation source media, click the "Verify" button and make sure the source for the installation is good and not corrupt.
After that, click "Done".
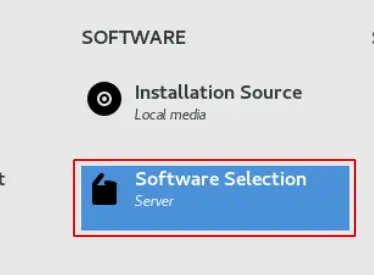
2. Next, click the "Software Selection" option.
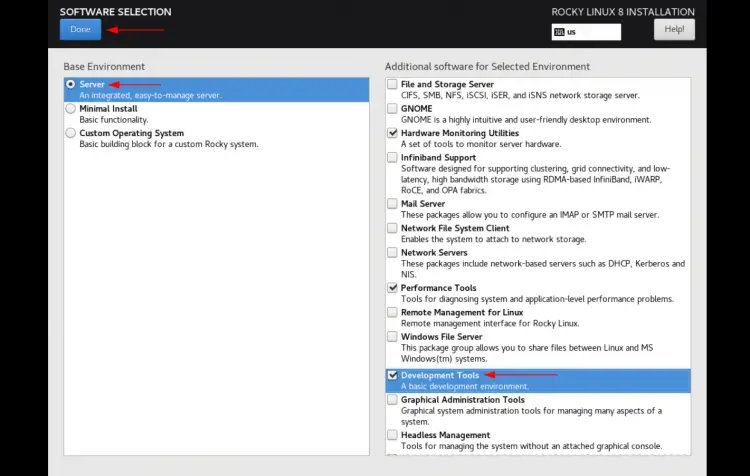
One the "Base Environment" section, select the option "Server" to use the Rocky Linux as a server machine.
On the right side "Additional software for Selected Environment" section, select additional software packages that you want to install.
Then click "Done" to save the configuration.
SYSTEM
At this stage, you will be configuring the partition for the installation destination and setting up the network IP address and hostname.
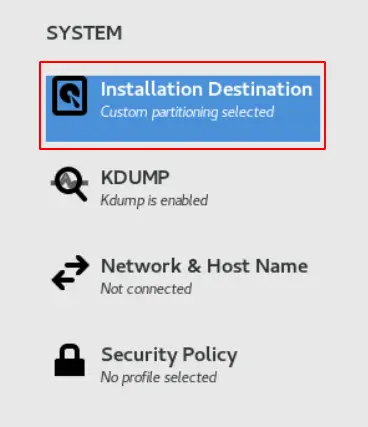
1. Click the "Installation Destination" option.
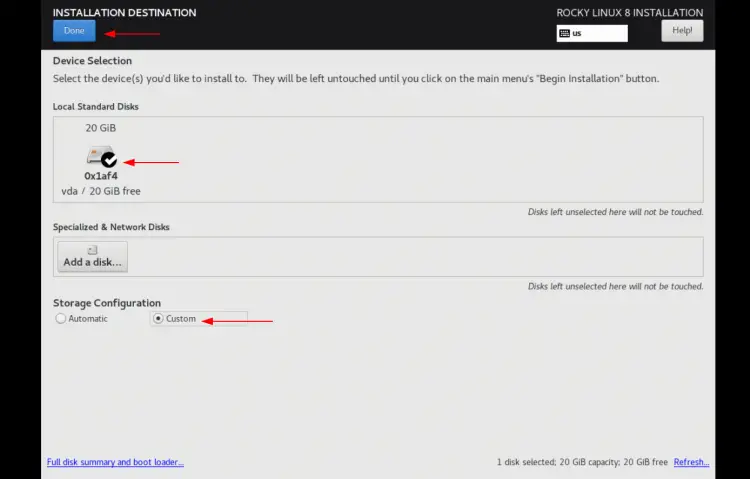
The installer will automatically select the disk for the installation with the "automatic" storage configuration.
Change the default "Storage Configuration" to "Custom" and click "Done".
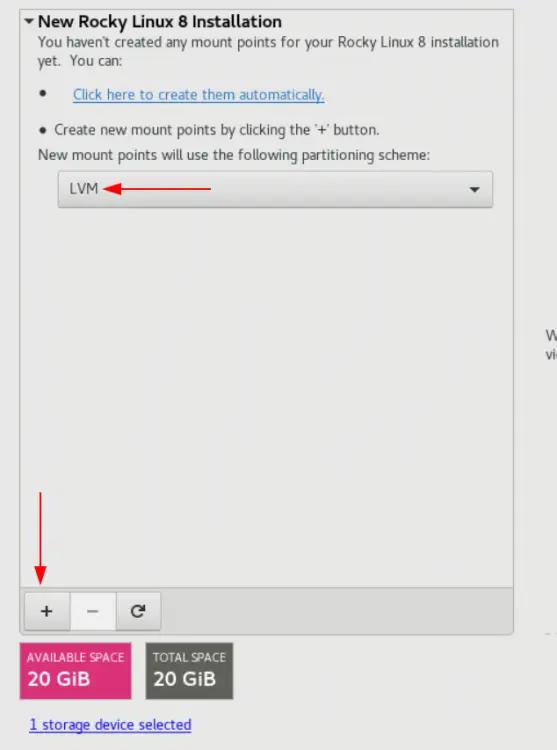
Now you can create the custom partition for the Rocky Linux.
Leave the default partition scheme to LVM and click the "+" button to create new partitions.
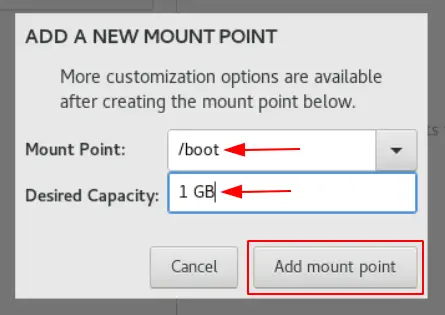
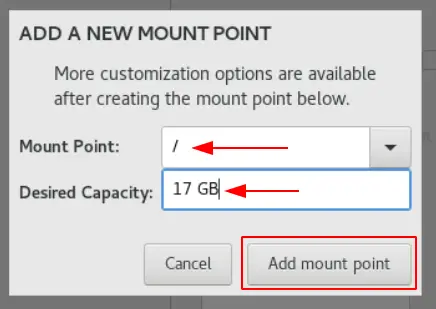
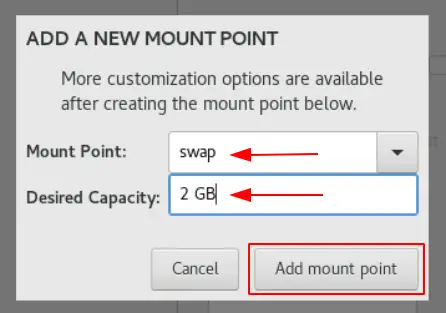
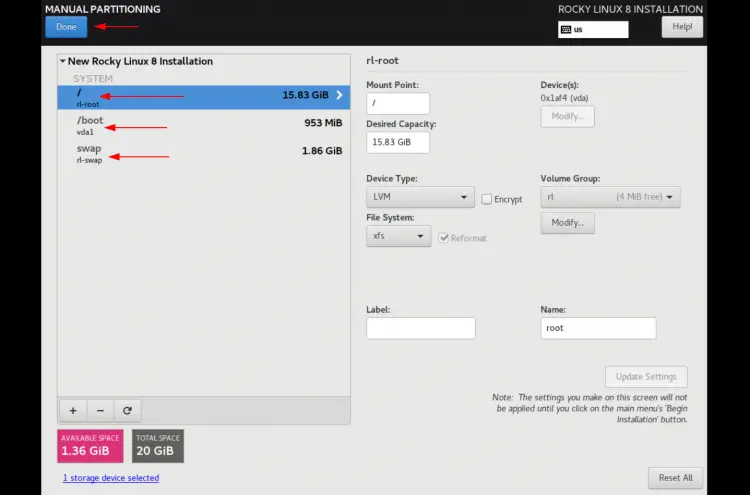
Now create three disk partitions, boot partition, root partition, and swap as following.
Boot partition: Mount Point: /boot - Desired Capacity: 1 GB
Root partition : Mount Point: / - Desired Capacity: 17 GB
Swap partition : Mount point: swap - Desired Capacity: 2 GB
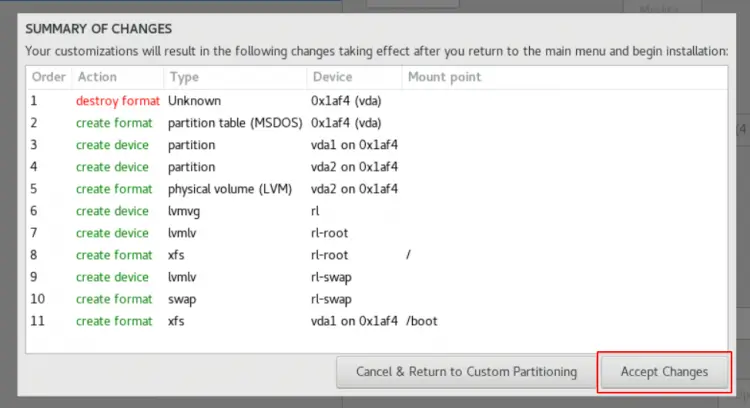
Once you've created all those partitions, click "Done" to save the new partition configuration.
Double-check your configuration and click the "Accept Changes" button to apply.
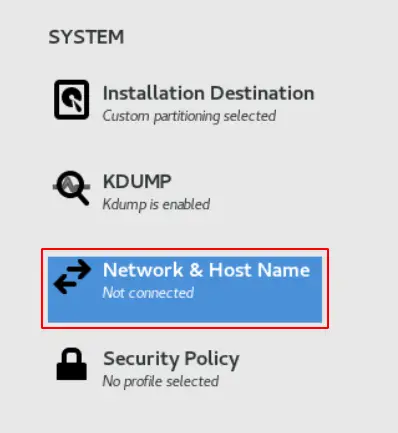
2. Next, click the "Network & Host Name" option.
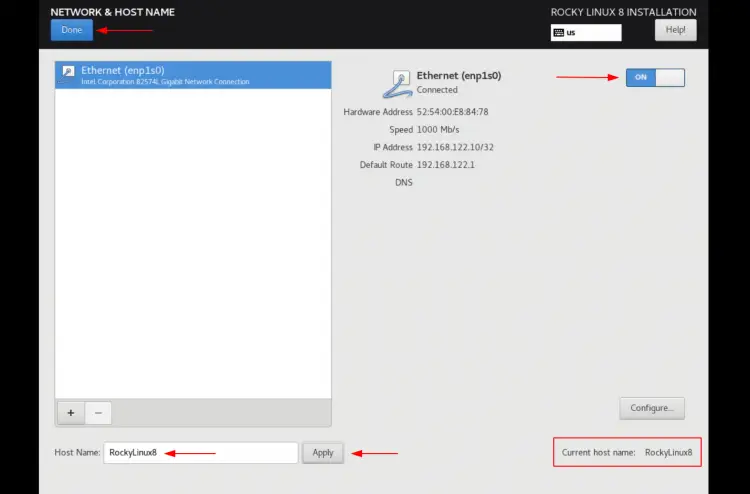
The installer will automatically detect your network device. You need to "turn on" the network interface so you will get an IP address from your DHCP server.
Alternatively, click the "Configure" button to set up the IP address manually, choose the tab "IPv4 Configuration".
After that, type the new name of your Rocky Linux machine on the "Host Name" box and click "Apply".
Now click "Done" to continue to the next stage.
USER SETTINGS
At this stage, you will be setting up the root password and create a non-root user.
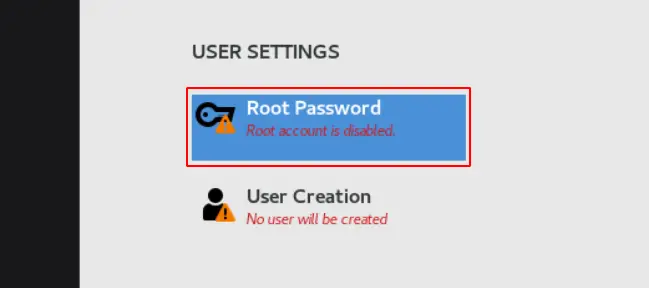
1. Click on the "Root Password" option.
Now type your strong root password and repeat, then click the "Done" button.
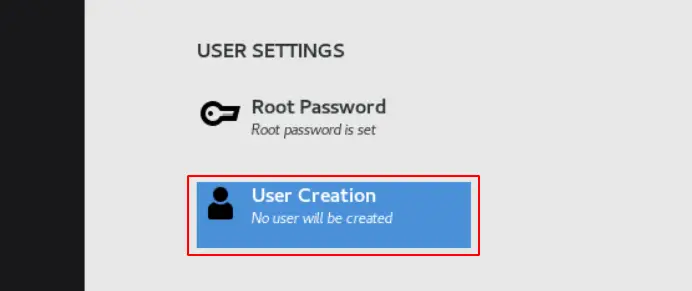
2. After that, click the "User Creation" option to create a new user.
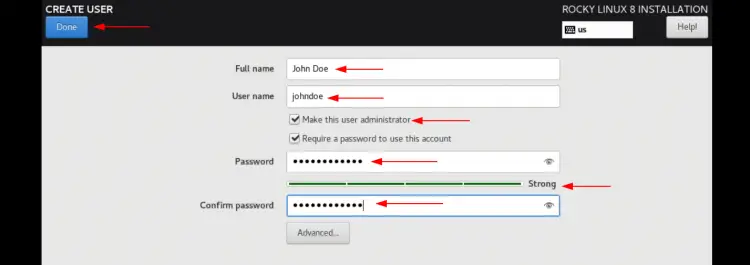
Type details full name, username, and password. Then select the option "Make this user administrator" to allow the user to run the "sudo su" command and get the root privileges.
Now click the "Done" button to complete the configuration.
Rocky Linux Installation Process
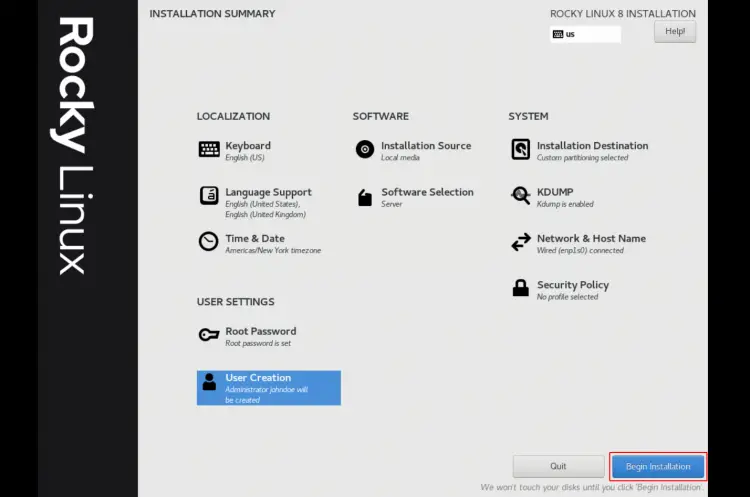
1. Double-check your installation configurations for each stage. After that, click the button "Begin Installation" to start Rocky Linux installation.
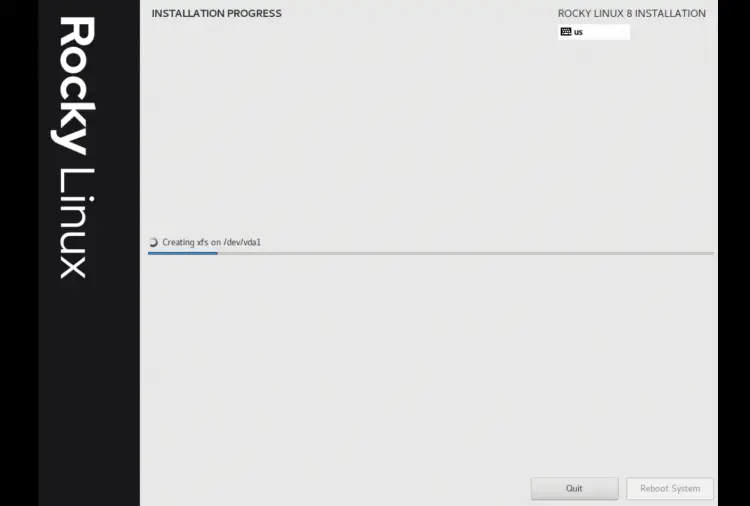
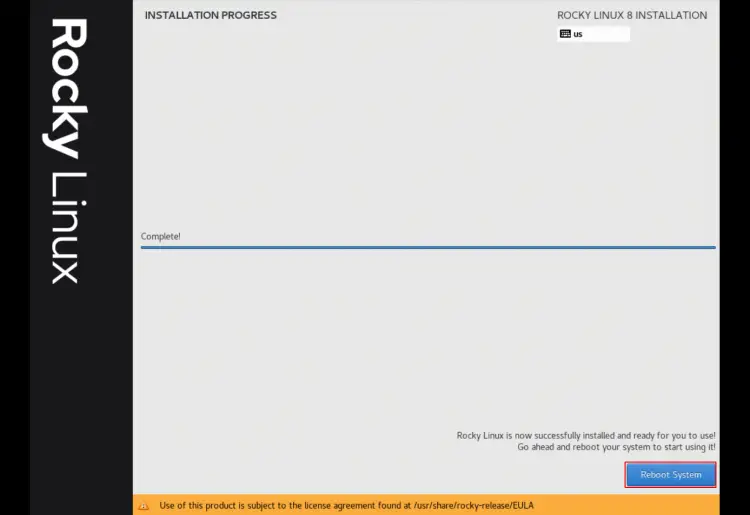
2. Below is the page of the Rocky Linux installation process.
3. once the installation is complete, click the "Reboot System" button to restart the machine.
4. Next, remove the installation media and boot to the default disk.
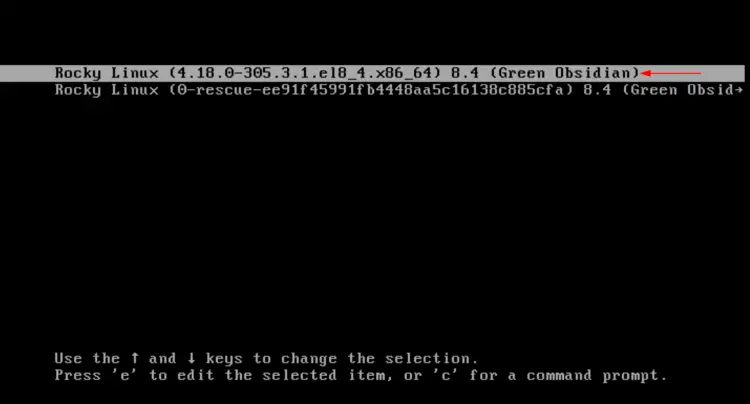
During the booting process, you will see the Rocky Linux grub as below.
Select the Rocky Linux menu on top and press "Enter" to boot to the system.
Verify Rocky Linux Installation
To verify the Rocky Linux installation, you need to log in to the server and check the Rocky Linux version.
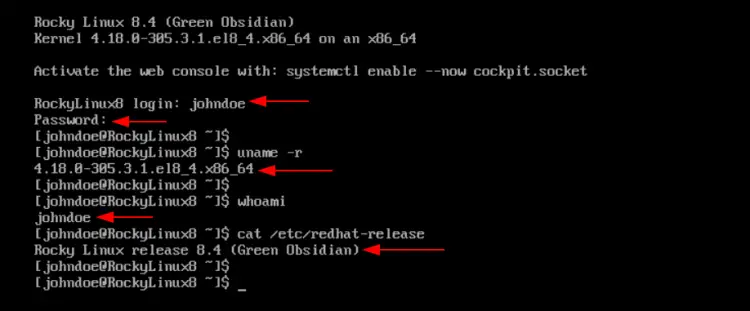
1. On the Rocky Linux login page, type your username and password. Then press "Enter" to log in to the system.
2. Now execute the following command to check the Rocky Linux version, kernel version, and the current user login.
uname -r
whoami
cat /etc/redhat-release
As seen below, you've installed the Rocky Linux 8.4 Green Obsidian.
Verify Sudo Root Privileges
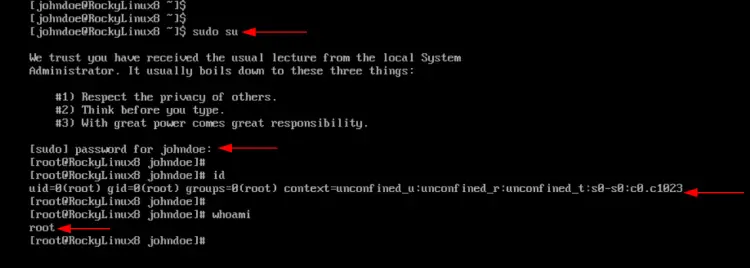
1. To test the root sudo privileges, run the sudo command below.
sudo su
Type the password of your user and press "Enter".
2. Now check the current user using the following command.
id
whoami
Once you get the root privileges, you should get similar output as below.
Verify SSH Service
1. Before checking the SSH service status, check the Rocky Linux server IP address using the following command.
sudo ip a
You will get similar output as below.
As seen on the screenshot, the Rocky Linux server gets an IP address "192.168.122.10". You will be connecting to the server using this server's IP address.
2. Next, verify the SSH service by executing the command below.
sudo systemctl status sshd
As seen below, the SSH service is active and running on default SSH port 22.
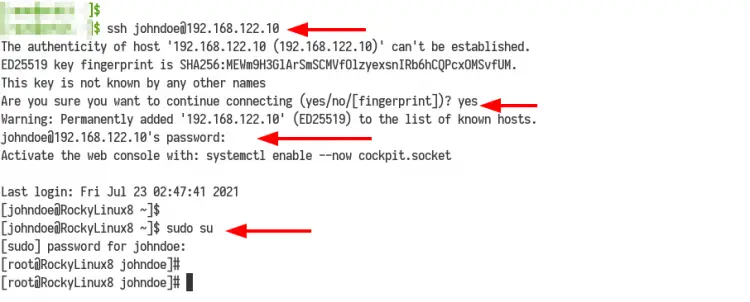
3. Next, access the Rocky Linux server IP address from another machine using the ssh command as below.
ssh [email protected]
Type "yes" to confirm the server fingerprint, then type the password of your user and press "Enter".
Once it's successful, you will get the shell of the Rocky Linux server.
Next, execute the sudo command below and type the password of your user.
sudo su
Once your password is correct, you will get the root privileges.
Conclusion
Congratulations! you have successfully installed the Rocky Linux 8.4. Now you can update and upgrade all packages to the latest version. And after that, you're ready to deploy your application on the Rocky Linux server.

