The Perfect Server - Gentoo 2007.0 - Page 2
On this page
- 3 The Base System
- 3.1 Booting the installation disk
- 3.2 Logging into the installation environment remotely
- 3.3 Setting up the system drive
- 3.4 Preparing the way for Stage 3
- 3.5 Optional: Temporarily installing vim into the Stage3 environment
- 3.6 Entering the chroot Stage3 environment
- 3.7 Install the kernel
- 3.8 Set up filing systems
- 3.9 Start networking on boot.
- 3.10 Install system services
- 3.11 Bootloader
- 3.12 Wrapup and reboot
3 The Base System
3.1 Booting the installation disk
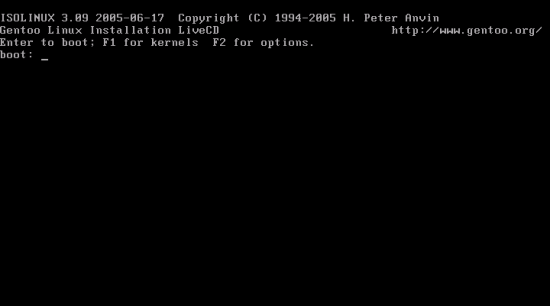
Insert your Gentoo Minimal Install CD into your system and boot from it. You can set some options at the bootloader, but if you just leave it, it will continue and boot Linux by itself.
(It will default to using a framebuffer console, but in the interests of smaller screenshots I changed the option to use VGA by pressing F1 and choosing the gentoo-nofb kernel.)
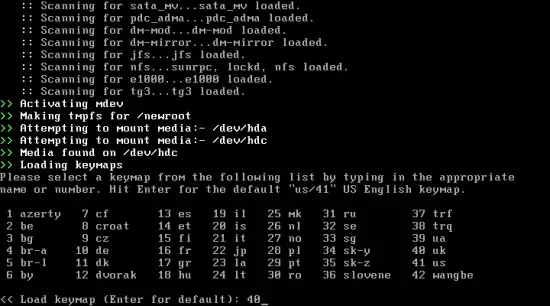
A load of text will scroll up the screen as the kernel boots and the install CD detects your hardware. Then you'll be given a choice of keymap.
If you're using a US keyboard you can just leave it, or press Enter and this prompt will time-out with that choice. I live in Britain, so I want the uk keymap.
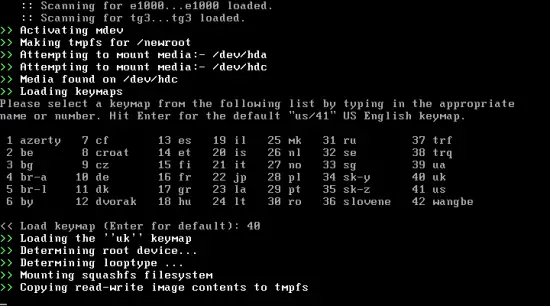
More text scrolls up...
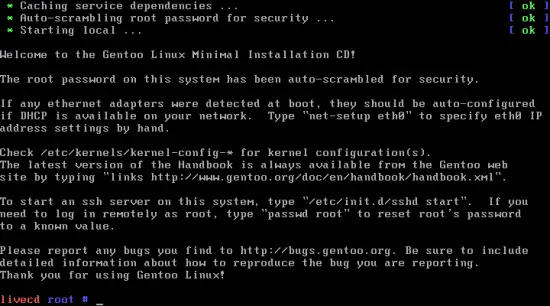
Until you're left at a root prompt.
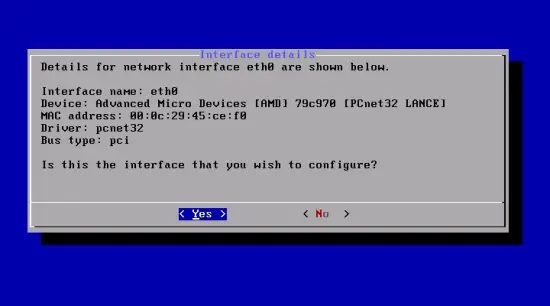
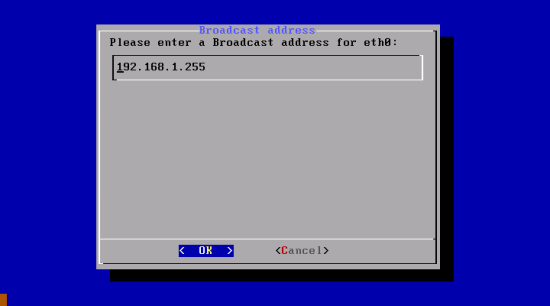
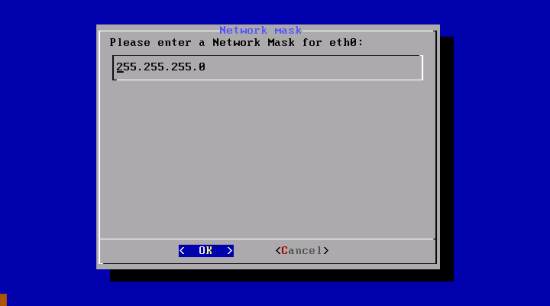
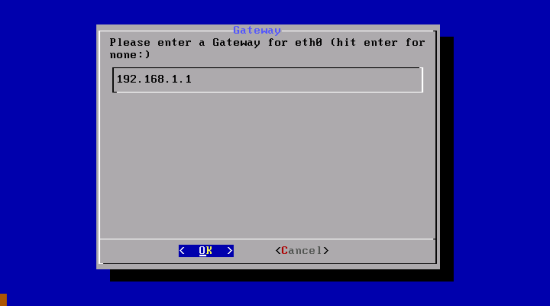
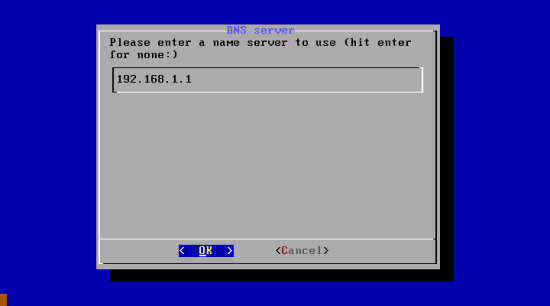
The chances are it found a DHCP server during detection and you're already connected to the internet. However, we want to specify our own IP address right away, so we type,
net-setup eth0
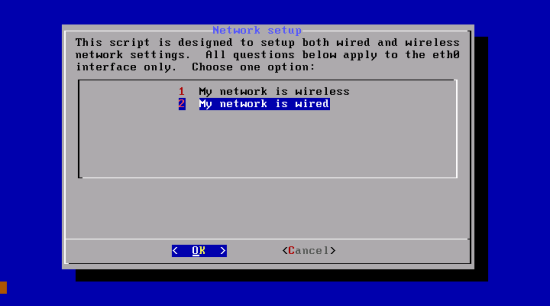
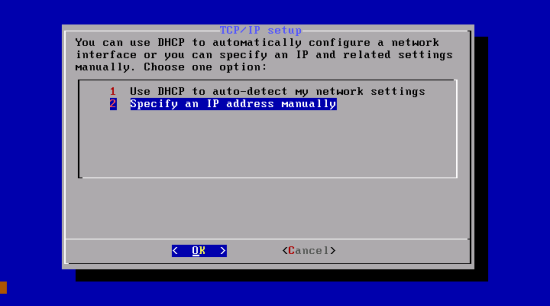
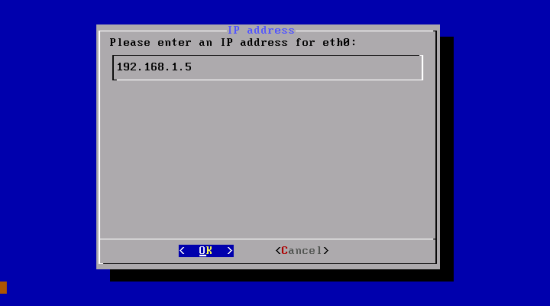
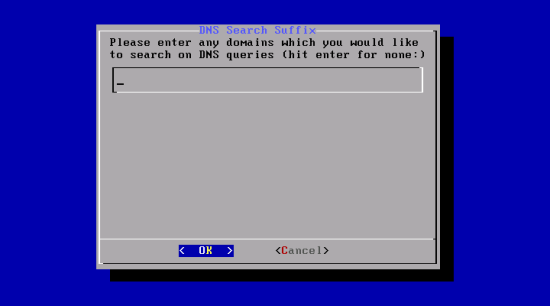
And go through the options as appropriate:
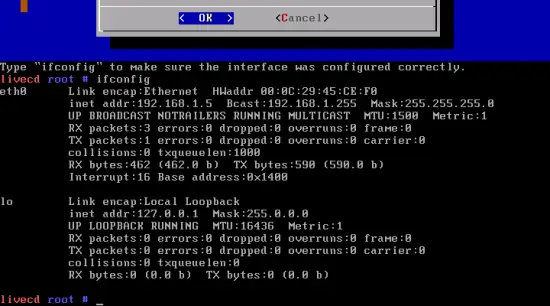
Now you're back at the root prompt, as suggested you may like to just verify that your network came up OK.
ifconfig
And any other commands you want to do to satisfy yourself you have an internet connection. For example (from the Gentoo Handbook):
ping -c 3 www.gentoo.org
Now set your hostname temporarily. We'll be reading this back later to automate some later stages of the installation.
hostname server1.example.com
3.2 Logging into the installation environment remotely
Set the root password. This is only for the installation system, not for the final installed system:
passwd
And start sshd:
/etc/init.d/sshd start
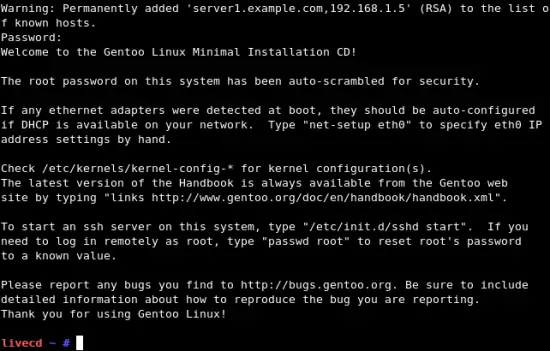
Host keys will be created and the sshd daemon will be started. Now you can log into the installation system from the comfort of your usual terminal program on your own computer. Obviously if you prefer, or have to, you can omit this step and carry on using the console.
ssh [email protected]
Obviously that will only work if server1.example.com resolves on your system.
3.3 Setting up the system drive
This part is likely to be very different on other architectures. Refer to the Gentoo Handbook if you're not on x86 or amd64, or if you want to do anything other than the default layout suggested in the x86 handbook.
To partition the drive, use parted. We're just going to go straight in and set up the suggested Gentoo partition scheme, and parted lets us do that in a way that can be shown concisely in text:
parted /dev/hda
You'll get a (parted) prompt. At this prompt enter the following commands:
mklabel msdos
mkpartfs primary ext2 0 32
mkpartfs primary linux-swap 32 545
mkpart primary 545 -0
set 1 boot on
You should see something like:
Disk /dev/hda: 5906MB
Sector size (logical/physical): 512B/512B
Partition Table: msdos
Number  Start   End     Size    Type     File system  Flags
 1      32.3kB  32.9MB  32.9MB  primary  ext2         boot
 2      32.9MB  545MB   512MB   primary  linux-swap
 3      545MB   5906MB  5361MB  primary
(parted)
Type quit to exit and save changes.
We've already created the ext2 and swap filesystems on partitions 1 and 2, so we just want to create the ext3 filesystem on partition 3.
mke2fs -j /dev/hda3
And let's turn on swap for our installation environment:
swapon /dev/hda2
And mount the filesystem on which we're about to install.
mount /dev/hda3 /mnt/gentoo
mkdir /mnt/gentoo/boot
mount /dev/hda1 /mnt/gentoo/boot
3.4 Preparing the way for Stage 3
Confirm the date and time are correct for your system. If they're not, things can get confusing later.
date
Thu Aug 30 13:58:36 UTC 2007
Which indeed, at the time I did it, was a little wrong, so correct it something like this:
date 083013542007
Now we need to download the Stage 3 Tarball and the Portage snapshot. Rather than mess about with links or lynx let's just use a few commands:
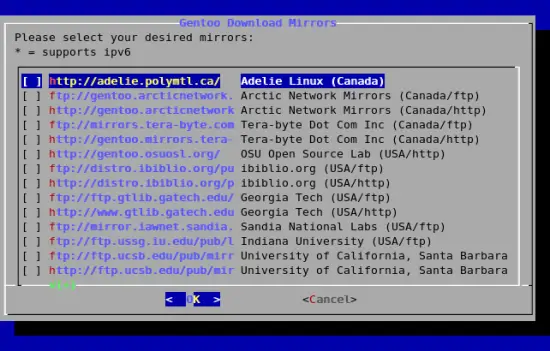
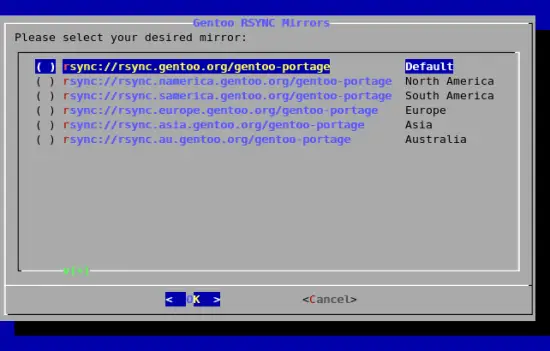
mirrorselect --interactive --output > /tmp/mirror
Select whatever mirrors are appropriate to you and select OK. When you exit, a line will be written to /tmp/mirror with your selections. We just want the first one, so:
source /tmp/mirror
MIRRORS=($GENTOO_MIRRORS)
MIRROR=${MIRRORS[0]}
cd /mnt/gentoo
wget ${MIRROR}releases/x86/current/stages/stage3-$(arch)-2007.0.tar.bz2 \
|| wget ${MIRROR}releases/x86/current/stages/stage3-x86-2007.0.tar.bz2
wget ${MIRROR}snapshots/portage-latest.tar.bz2
There isn't actually a failsafe way of determining the architecture-specific portions of the above stage3 URL, so if you're not on x86, refer to the Gentoo Handbook.
Unpack the stage tarball.
tar --extract --verbose --bzip2 --preserve-permissions --file stage3-*.tar.bz2
Unpack the portage snapshot.
tar --extract --verbose --bzip2 --file portage-latest.tar.bz2 --directory /mnt/gentoo/usr
You can delete those downloads now, if you're short on space.
rm portage* stage*
Now, I'm going to do something almost heretical to the Gentoo community and leave etc/make.conf alone! That's the file where things like the CFLAGS are set up, and where you can set it to be as optimal as you please. I'm not going to touch it. You should at least check it for sanity. If it's insane you might have downloaded the wrong stage file. In particular, on x86, the flag -mtune=i686 is set by default even on the plain x86 stage3 file, which may be inappropriate if you're installing onto old hardware. But by using $(arch) we're hoping to avoid any such problems.
vi /mnt/gentoo/etc/make.conf
We are just going to append some information that we do need. Firstly, the mirrors from which Gentoo's going to download itself. We've already fetched the download mirrors once, so to save choosing them again, we'll take that selection and add a selection for the rsync mirror.
cat /tmp/mirror >> /mnt/gentoo/etc/make.conf
mirrorselect --interactive --rsync --output >> /mnt/gentoo/etc/make.conf
Now we're going to copy some stuff into /mnt/gentoo in order to chroot into it and continue the installation. We're also going to copy in the current networking configuration so the installed system has the same thing. This little script will write the current configuration of eth0 to the newer /etc/conf.d/net format.
#!/bin/bash
cat /etc/resolv.conf > /mnt/gentoo/etc/resolv.conf
echo "HOSTNAME=\"$(hostname -f)\"" > /mnt/gentoo/etc/conf.d/hostname
eth0=$(ifconfig eth0 | grep "inet addr")
ip=$(echo $eth0 | cut -f2 -d' ' | cut -f2 -d:)
broadcast=$(echo $eth0 | cut -f3 -d' ' | cut -f2 -d:)
netmask=$(echo $eth0 | cut -f 4 -d' ' | cut -f2 -d:)
gw=$(route -n | grep -e '^0.0.0.0' | unexpand -a | cut -f3)
nservers=$(grep -e '^nameserver' /etc/resolv.conf | cut -f2 -d' ')
sdomains=$(grep -e '^search' /etc/resolv.conf | cut -f2- -d' ')
echo 'modules=( "ifconfig" )' > /mnt/gentoo/etc/conf.d/net
echo "config_eth0=( \"${ip} netmask ${netmask} broadcast ${broadcast}\" )" >> /mnt/gentoo/etc/conf.d/net
echo "routes_eth0=( \"default via ${gw}\" )" >> /mnt/gentoo/etc/conf.d/net
echo "dns_domain_eth0=\"$(hostname -d)\"" >> /mnt/gentoo/etc/conf.d/net
echo "dns_servers_eth0=\"${nservers}\"" >> /mnt/gentoo/etc/conf.d/net
if [ -n "$sdomains" ] ; then echo "dns_search_eth0=\"${sdomains}\"" ; fi >> /mnt/gentoo/etc/conf.d/net
Afterwards, /mnt/gentoo/etc/conf.d/net should look like this, with the correct values of course.
modules=( "ifconfig" )
config_eth0=( "192.168.1.5 netmask 255.255.255.0 broadcast 192.168.1.255" )
routes_eth0=( "default via 192.168.1.1" )
dns_domain_eth0="example.com"
dns_servers_eth0="192.168.1.1"
Using this format will cause the Gentoo network initialisation script to use the data therein to write out a new /etc/resolv.conf, as well as set up the network itself, so in future there's only the one file to keep correct. (We copied in the install system's /etc/resolv.conf purely for use within the chroot environment until we boot the installed system.)
Having done that we can complete preparations for chroot and go in.
3.5 Optional: Temporarily installing vim into the Stage3 environment
The Gentoo Stage 3 system has no vi. Instead the default practice is to use the included editor nano. If you really would rather have vi, do the following now:
VIM=$(which vim)
VIMDIR=$(dirname ${VIM})
cp --dereference ${VIM} /mnt/gentoo${VIM}
ln --symbolic ${VIM} /mnt/gentoo$(dirname ${VIM})/vi
(The libraries on which it depends are already in place.)
However, further instructions will assume you haven't done this. If you have, you're smart enough to substitute the command you want.
3.6 Entering the chroot Stage3 environment
mount -t proc none /mnt/gentoo/proc
mount -o bind /dev /mnt/gentoo/dev
chroot /mnt/gentoo /bin/bash
env-update
source /etc/profile
export PS1="(chroot) $PS1"
Now we're in the chrooted environment, we're going to update portage to the current state.
emerge --sync
If you're bothered about using the machine's own console you may want to set the keymap in /etc/conf.d/keymaps. Otherwise you might as well leave it.
nano --nowrap /etc/conf.d/keymaps
Now we set our timezone. Check out the contents of /usr/share/zoneinfo to see which timezone to use. (We're not going to alter USE or the default make.profile.) For instance,
cp /usr/share/zoneinfo/Europe/London /etc/localtime
Set the timezone in /etc/conf.d/clock. Just set the TIMEZONE variable to whatever file you copied to /etc/localtime earlier. For instance,
nano --nowrap /etc/conf.d/clock
TIMEZONE="Europe/London"
(Don't forget to uncomment the line.)
You may need to set CLOCK to local. Usually one doesn't, but it's generally needed if you're installing in VMWare and possibly other virtual environments.
3.7 Install the kernel
emerge gentoo-sources
We're just going to do a genkernel install, to install the standard Gentoo kernel. This is partly for simplicity for this howto. If you're comfortable with building your own kernels, do so following the Gentoo Handbook notes in Chapter 7.
emerge genkernel
zcat /proc/config.gz > /usr/share/genkernel/x86/kernel-config-2.6
The second command copies the configuration of the installer disk's kernel to be our current kernel. If we've got this far it's a fair bet this kernel configuration works for us.
Here we can short-cut something and save ourselves a more complicated step later. We want to add quota support to the kernel config. What we'll do here is add it to the config template file that genkernel uses, so we don't lose the change when we upgrade the kernel.
nano --nowrap /usr/share/genkernel/x86/kernel-config-2.6
Search for # CONFIG QUOTA is not set and change it to the following (adding the two subsequent lines):
CONFIG_QUOTA=y
# CONFIG_QFMT_V1 is not set
CONFIG_QFMT_V2=y
Then we can continue:
genkernel all
This may take some time. It's building support for everything. I did say this was going to be a generic Gentoo build.
Note; if you're installing onto a SCSI or SATA disk, it's best at this stage to instead do,
genkernel --menuconfig all
and select the appropriate low-level driver for the SCSI or SATA interface your system drive is connected to, to be compiled into the monolithic kernel rather than as a module. I believe it should work if you don't do this (loading the driver module from the initrd just like the installer disk), but at present it appears not to.
3.8 Set up filing systems
nano --nowrap /etc/fstab
Assuming you're on the same partition scheme as I am, ie: following this guide, replace /dev/BOOT with /dev/hda1; /dev/ROOT with /dev/hda3; and /dev/SWAP with /dev/hda2. The altered file should look like this:
[...]
# <fs>                  <mountpoint>    <type>          <opts>          <dump/pass>
# NOTE: If your BOOT partition is ReiserFS, add the notail option to opts.
/dev/hda1               /boot           ext2            noauto,noatime  1 2
/dev/hda3               /               ext3            noatime         0 1
/dev/hda2               none            swap            sw              0 0
/dev/cdrom              /mnt/cdrom      audo            noauto,ro       0 0
#/dev/fd0               /mnt/floppy     auto            noauto          0 0
[...]
3.9 Start networking on boot.
rc-update add net.eth0 default
rc-update add hostname default
3.10 Install system services
emerge syslog-ng vixie-cron
rc-update add syslog-ng default
rc-update add vixie-cron default
3.11 Bootloader
emerge bootloader
This will install the default bootloader for your architecture. The following assumes you're on x86 or amd64 and that this bootloader is grub. As this is an ultra-generic PC install, we're going to cheat and just write it out. If the rest of this guide fits your system, so should this; otherwise, refer to the Gentoo Handbook, chapter 10.
echo -e "default 0\ntimeout 5\n\ntitle=GentooLinux\nroot (hd0,0)" > /boot/grub/grub.conf
echo "kernel `ls /boot/kernel*` root=/dev/ram0 init=/linuxrc ramdisk=8192 real_root=/dev/hda3 udev" >> /boot/grub/grub.conf
echo "initrd `ls /boot/initramfs*`" >> /boot/grub/grub.conf
grep --invert-match rootfs /proc/mounts > /etc/mtab
grub-install --no-floppy /dev/hda
3.12 Wrapup and reboot
rc-update add sshd default
passwd
And give root a password. That way we get to log in afterwards without having to go to the console. Assuming everything worked.
Get out of the chroot and reboot.
exit
cd
umount /mnt/gentoo/boot /mnt/gentoo/dev /mnt/gentoo/proc /mnt/gentoo
reboot
Of course, you may need to remove the CD from the drive. This will depend on what your boot order is; but you might as well get rid of it; it's no longer needed.

