Installing OpenVZ + Management Of VMs Through ISPConfig 3 (Debian 6.0) - Page 2
On this page
Log Into ISPConfig
Open the URL to the ISPConfig control panel in the webbrowser:
https://192.168.0.105:8080/
(Replace the IP address with the IP of your server.)
The default login details are:
User: admin
Password: admin
As the first step, you should change the password. Go to Tools > Password and Language and enter a new password, then click on save.
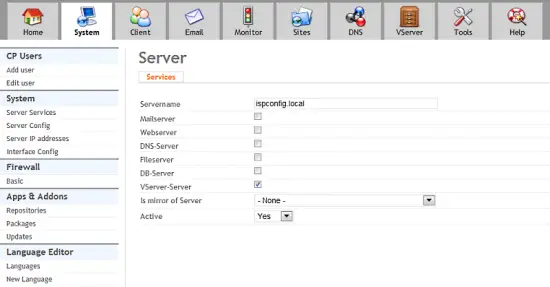
Go to System > Server Services and uncheck all checkboxes except of "Vserver-server" and click on save.
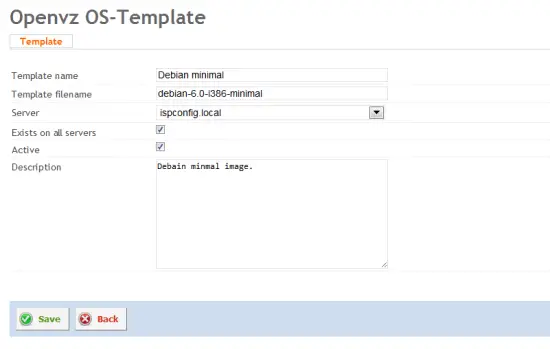
Now open the virtual machine management module by clicking on the "VServer" icon in the upper menu, then click on "OStemplates" in the left menu and on the "Debian minimal" template in the list.
If your server is a 32Bit System, change the template filename to "debian-6.0-i386-minimal" and for a 64Bit System, change the filename to "debian-6.0-amd64-minimal" so that it matches our downloaded openVZ template image filename (but without the tar.gz file ending).
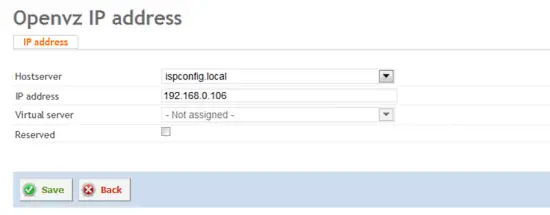
An OpenVZ virtual machine needs a dedicated IP address. So we must have at least 2 IP addresses on this server to run a virtual machine, one IP for the host server itself and a second IP for the virtual machine. Click on "IP addresses" in the left menu and then on the "Add new record" button to add the second IP address.
If you have more than 2 IP addresses, then add them all here by repeating the step above.
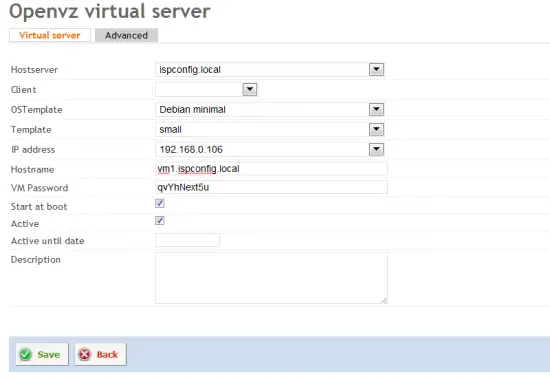
To create the first virtual machine, click on "Virtual servers" in the left menu and then on the "Add new record" button:
Enter the hostname that the virtual machine shall get and click on save. It may take several minutes until the virtual machine is ready.
You should be able to see the newly created virtual machine with the command "vzlist -a" on the shell:
vzlist -a
CTID NPROC STATUS IP_ADDR HOSTNAME
101 7 running 192.168.0.106 vm1.ispconfig.local
Links
- ISPConfig Website: http://www.ispconfig.org
- ISPConfig forum: https://www.howtoforge.com/forums/
- ISPConfig Bugtracker: http://bugtracker.ispconfig.org


