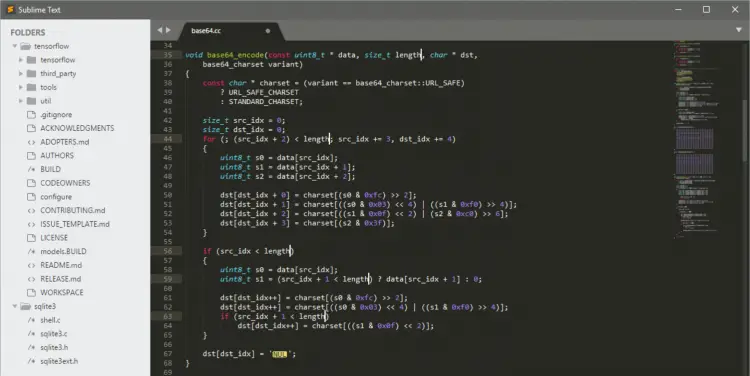
Installation of Sublime text editor on Ubuntu 20.04
Sublime Text is a well-known text editor used to write source code for web development. It is a very fast and powerful tool. Sublime Text offers Linux apt repository, helping users to easily install and update it into their systems. The proprietary source code editor is used with a Python API and supports different languages, extending its functionality with additional features. This editor is freely available to download.
This cross-platform text editor is available for some of the common operating systems like macOS, Windows, and Linux for coding purposes. It is used to write different programming and markup languages with its various features. Users can easily extend its functionality by using plugins. It also supports using custom settings based on user requirements. This editor been termed as the best code editor for a long time and is the developer's first choice. With a large user base, it has been a valuable tool for all Linux users. This tutorial will assist you in installing Sublime Text on an Ubuntu 20.04 machine.
Pre-requisites
- Recommended OS: Ubuntu 20.04 Or Linux Mint 20
- User account: A user account with sudo
This guide presumes that the Linux operating system is indeed installed by users in their system.
Install Sublime Text on Ubuntu
To install sublime text, you have to open the Terminal from Applications in your computer system or open the terminal by pressing Ctrl+Alt+T keys from your keyboard.
Once the terminal window is open, you need to install some keys and packages along with different package repositories provided for Linux. The GPG key can be installed by executing the command appended below:
$ wget -qO - https://download.sublimetext.com/sublimehq-pub.gpg | sudo apt-key add –
Note: Users can also use Snap packages for installing sublime text editor by using the command snap install sublime-text. All snap packages are maintained by the Snap crafters community and can be used to install different software when needed.
You have to enter the password of the user who is currently logged in. By hitting <Enter> key, it will provide the status of the network downloader. The status OK shows that the key has been successfully installed in the system, this way users can proceed further with the installation.
Once, the key is installed you must add the apt repository. An apt repository is a network server/ local directory that comprises of all types of deb packages and metadata files readable by the APT tools.
Note: Though many applications available are already available in Ubuntu repositories, sometimes users need to install software from third-party repository. They can use Apt repository to install all unavailable or third-party software as per their need.
Install the apt repository using the command:
$ echo "deb https://download.sublimetext.com/ apt/stable/" | sudo tee /etc/apt/sources.list.d/sublime-text.list
Once the apt repository is installed, check for the updates in your system. To install the sublime-text editor and for checking the updates use the command:
$ sudo apt-get update
When prompted, type your user password and press Enter to proceed. The system will start to fetch all available updates, and will list them one by one. Completing all the updates will take some time in the system.
Once the available update will be done, you can install sublime text editor using the affixed command:
$ sudo apt-get install sublime-text
Once prompted, type the user's password and press Enter to proceed. The following new package will be installed and can be viewed among the available software in the computer system.
Once Sublime text is installed, launch it from your Applications by typing Sublime-Text in the search bar. It can be viewed in the list of available applications along with its supporting file locations.
This way users can install Sublime Text on their Ubuntu desktop.
Uninstalling the Sublime Text Editor
Users can easily uninstall the sublime text editor using the command line if needed. To uninstall the Sublime text Editor, run the cited command:
$ sudo apt-get remove sublime-text
Provide password for the user, then Hit Enter.
Note: Users can also remove Sublime Text apt by accessing the System Settings -> Software & Updates -> Other Software tab.
Users can successfully uninstall all sublime text files from the system by following the above-mentioned steps.
Users can check out all updates from Sublime Text 2.0 to 3.0 here. This way the free available version can be downloaded by all users and is free to use for some time but for long-term usage, a license is needed to be purchased. Sublime Text 3 accepts the license purchased by all of its users in the year 2013, while for all those who have a license key for Sublime Text 1 or 2, can easily get a purchased upgrade. To know more about the details about packages and purchases, follow the link here.
Conclusion
The latest features that are available in Sublime Text 3.0 have facilitated its users in the best way by providing a better user interface and an improved OS integration for Linux. This way users can successfully install Sublime Text on their Ubuntu machine. The tutorial also provides step by step walkthrough of uninstalling this editor.
To benefit more from Sublime text editor, users can further install the Sublime Text Package Control to customize and make the best use of the editor based on their needs. I hope by following this tutorial you can conveniently install sublime text editor on your Linux OS.


