How to Setup MariaDB Master-Master Replication on Debian 11
On this page
This tutorial will go over how to set up MariaDB Master-Master Replication on Debian 11 Servers. Additionally, we will go over how to synchronize time using Chrony between MariaDB servers.
Prerequisites
To complete this tutorial, you will need the following requirements:
- Two or more Debian 11 Servers. This demonstration used two Debian servers.
- A non-root user with root/administrator privileges.
Setup fqdn and /etc/hosts file
To set up the MariaDB Master-Master between multiple servers, you will need to ensure each system hostname is resolved to the correct IP address. To configure it, you need to set up the fqdn and the /etc/hosts file on each server.
In this demonstration, we will use two Debian servers below:
IP Address      Hostname    FQDN
---------------------------------------------------
192.168.5.10    master1     master1.localdomain.io
192.168.5.11    master2     master2.localdomain.io
To set up the correct fqdn (Fully Qualified Domain Name), run the hostnamectl command below.
Setup fqdn for the "master1" server.
sudo hostnamectl set-hostname master1.localdomain.io
Setup fqdn for the "master2" server.
sudo hostnamectl set-hostname master2.localdomain.io
Next, edit the /etc/hosts file on each server using the following command.
sudo nano /etc/hosts
Add the following configuration to the file.
192.168.5.10    master1.localdomain.io  master1
192.168.5.11    master2.localdomain.io  master2
Save and close the file when you're done.
Lastly, run the "ping" command below to check and verify the fqdn and /etc/hosts file.
Now you should see the hostname "master1" is pointed to the fqdn "master1.localdomain.io" with the IP address "192.168.5.10". And the hostname "master2" will be pointed to the fqdn "master2.localdomain.io" with the IP address "192.168.5.11".
ping master1
ping master2
Synchronuizing Time using Chrony
Time synchronization for the MariaDB Master-Master Replication deployment is crucial. And to synchronize time between servers, you will need to set up Chrony as the NTP client on each MariaDB server.
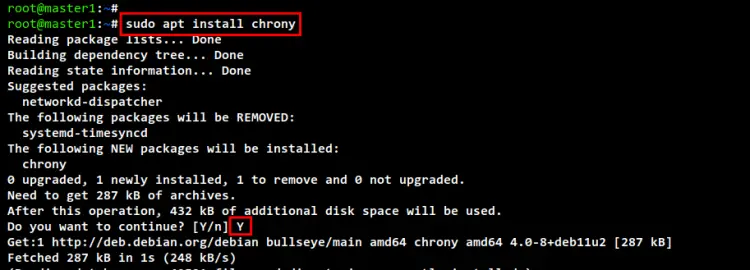
To install the Chrony package, run the following "apt install" command. Input Y to confirm the installation and press ENTER, and the installation will begin.
sudo apt install chrony
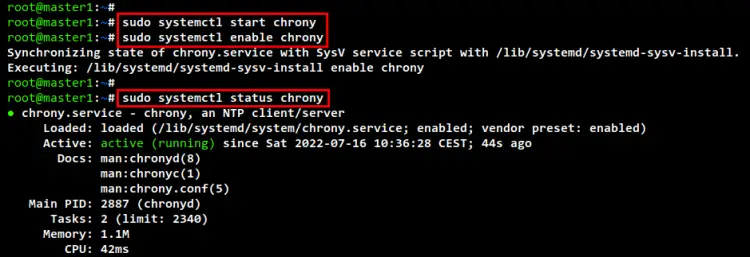
After installation is finished, run the "systemctl" command below to start and enable the Chrony service.
sudo systemctl start chrony
sudo systemctl enable chrony
Now check and verify the Chrony service using the following command. And you should see the Chrony service is running. Also, you will see the Chrony service is "enabled", which means it will automatically be running at system boot.
sudo systemctl status chronyd
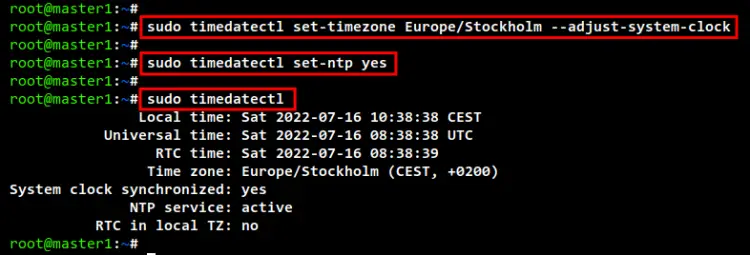
Next, run the "timedatectl" command below to adjust your system time with the specific timezone and enable it to use the NTP service Chrony.
sudo timedatectl set-timezone Europe/Stockholm --adjust-system-clock
sudo timedatectl set-ntp yes
Lastly, run the "timedatectl" command below to check and verify the current settings of your system clock and time. Make sure the time is synchronized between all MariaDB servers.
timedatectl
Installing MariaDB Server
The default Debian repository provides the MariaDB server package. But, for this demonstration, we will install the MariaDB server from the official MariaDB repository.
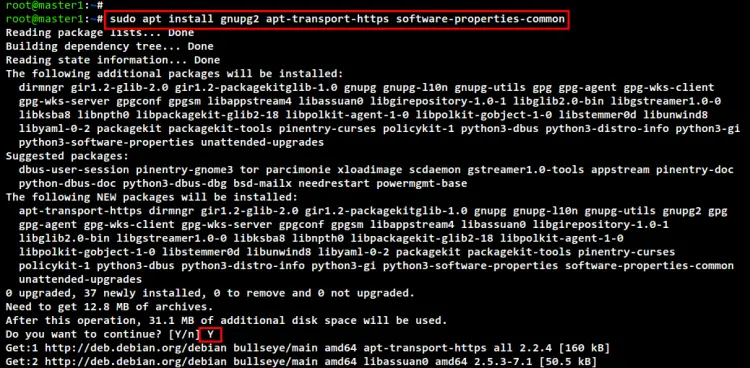
Before installing the MariaDB server, run the "apt install" command below to install some basic package dependencies. Input Y to confirm the installation and press ENTER to continue.
sudo apt install gnupg2 apt-transport-https software-properties-common
Next, run the following command to import the GPG key for the MariaDB repository. The full key fingerprint is "1993 69E5 404B D5FC 7D2F E43B CBCB 082A 1BB9 43DB".
sudo apt-key adv --recv-keys --keyserver hkp://keyserver.ubuntu.com:80 0xF1656F24C74CD1D8
Now run the following command to add the MariaDB repository for the Debian 11 server. Then, update and refresh the package index on your servers.
sudo add-apt-repository 'deb [arch=amd64,arm64,ppc64el] http://sfo1.mirrors.digitalocean.com/mariadb/repo/10.8.3/debian bullseye main'
sudo apt update
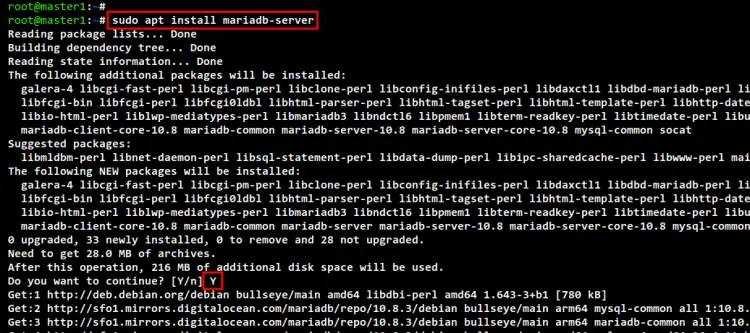
To install the "mariadb-server" package, run the "apt install" command below. Input Y to confirm and press ENTER, and the installation will begin.
sudo apt install mariadb-server
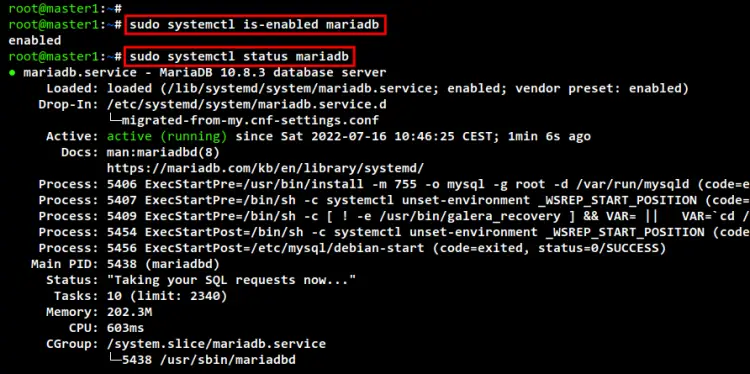
On the Debian system, the MariaDB service will be started and enabled automatically. Run the following "systemctl" command below to check and verify the MariaDB service.
You should see the MariaDB service is "enabled", which means it will be running automatically at system boot. And the current status of the MariaDB service is "running".
sudo systemctl is-enabled mariadb
sudo systemctl status mariadb
Setting Up UFW Firewall
It's recommended to use the firewall between all your MariaDB servers. This will ensure that only allowed IP addresses or networks will be able to access and reach MariaDB service ports. And in this demo, we will use the UFW firewall.
Run the "apt install" command below to install the "ufw" package. Input Y to confirm the installation and press ENTER to continue.
sudo apt install ufw
After installation is finished, run the "ufw" command below to add the "OpenSSH" application profile. Then, run and enable the UFW firewall service.
You will be prompted to confirm and enable the UFW firewall, input "y" and press ENTER. And the UFW firewall is up and running.
sudo ufw allow "OpenSSH"
sudo ufw enable
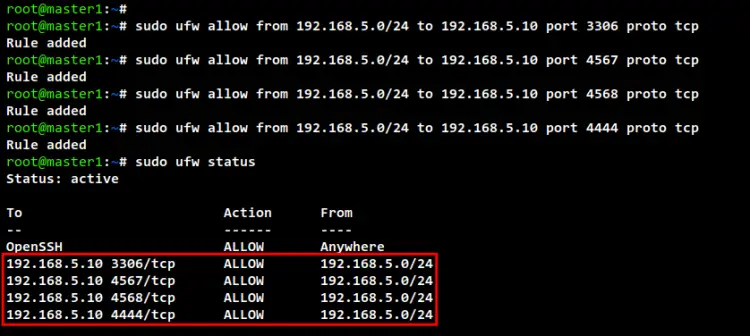
Next, open some ports for the MariaDB Master-Master Replication deployment. Some TCP ports for MariaDB Replication deployment is "3306", "4567", "4568", and "4444".
In this example, only networks "192.168.5.0/24" will be allowed to access MariaDB server TCP ports.
For the "master1" server with IP address "192.168.5.10", run the following "ufw" commands.
sudo ufw allow from 192.168.5.0/24 to 192.168.5.10 port 3306 proto tcp
sudo ufw allow from 192.168.5.0/24 to 192.168.5.10 port 4567 proto tcp
sudo ufw allow from 192.168.5.0/24 to 192.168.5.10 port 4568 proto tcp
sudo ufw allow from 192.168.5.0/24 to 192.168.5.10 port 4444 proto tcp
For the "master2" server with IP address "192.168.5.11", run the following "ufw" commands.
sudo ufw allow from 192.168.5.0/24 to 192.168.5.11 port 3306 proto tcp
sudo ufw allow from 192.168.5.0/24 to 192.168.5.11 port 4567 proto tcp
sudo ufw allow from 192.168.5.0/24 to 192.168.5.11 port 4568 proto tcp
sudo ufw allow from 192.168.5.0/24 to 192.168.5.11 port 4444 proto tcp
Lastly, check and verify the status of the UFW firewall with all enabled rules using the below command. You should see the "OpenSSH" application profile with all MariaDB Replication ports "3306", "4567", "4568", and "4444" available on the UFW firewall.
sudo ufw status
Setting Up master1 MariaDB Server
You have completed the basic configuration of the Debian server for the MariaDB Master-Master Replication deployment. Now, let's begin configuring MariaDB servers.
First, you will be setting up the MariaDB server on the "master1" server. Log in to the "master1" server shell.
Run the "systemctl" command below to stop the MariaDB service. This is needed before you set up the MariaDB server.
sudo systemctl stop mariadb
Now edit the MariaDB server config file "/etc/mysql/mariadb.conf.d/50-server.cnf" using the following command.
sudo nano /etc/mysql/mariadb.conf.d/50-server.cnf
Change the default "listen-address" to the internal IP address. In this example, the "master1" server has an IP address "192.168.5.10". Next, enable the "binary_log" for the MariaDB server, this allows you to set up replication on the MariaDB server. Be sure to place the following configuration under the "[mysqld]" option.
[mysqld]
bind-address = 192.168.5.10

server-id              = 1
report_host            = master1

log_bin                = /var/log/mysql/mariadb-bin
log_bin_index          = /var/log/mysql/mariadb-bin.index

relay_log              = /var/log/mysql/relay-bin
relay_log_index        = /var/log/mysql/relay-bin.index
Save and close the file when you are done.
Next, run the "systemctl" command below to start the MariaDB service and apply new changes. Then, check and verify which IP address the MariaDB is running. You should see the MariaDB service is now running on the internal IP address "192.168.5.10".
sudo systemctl start mariadb
ss -plnt
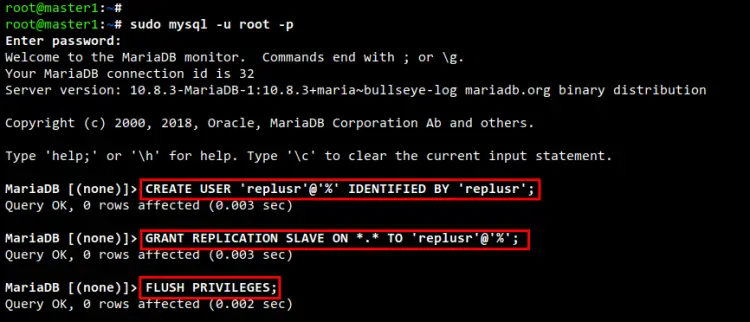
Now you will need to create a new MariaDB user that will be used for replicating data between MariaDB servers. Log in to the MariaDB shell as "root" using the "mysql" command below.
sudo mysql -u root -p
Run the following queries to create a new MariaDB user and password "replusr". Then, grant the correct privileges to the user.
CREATE USER 'replusr'@'%' IDENTIFIED BY 'replusr';
GRANT REPLICATION SLAVE ON *.* TO 'replusr'@'%';
FLUSH PRIVILEGES;
Next, run the following query to check the current binary log and its exact position of it. In this example, the binary log file for the MariaDB server is "mariadb-bin.000001" with the position "773". These outputs will be used in the next stage for setting up the "master2" server.
SHOW MASTER STATUS;
Type "quit" to exit from the MariaDB shell.
Setting Up master2 MariaDB Server
Now move to the "master2" server and start configuring the MariaDB server. The configuration for the MariaDB Master-Master Replication is not particularly different for all MariaDB servers.
Run the following command to stop the MariaDB service.
sudo systemctl stop mariadb
Edit the MariaDB config file "/etc/mysql/mariadb.conf.d/50-server.cnf" using the following command.
sudo nano /etc/mysql/mariadb.conf.d/50-server.cnf
Change the "bind-address" to the local IP address of the "master2" server. Then, enable the binary log on the MariaDB server "master2" to enable the replication. Be sure to add place the following configuration under the "[mysqld]" option.
[mysqld]
bind-address = 192.168.5.11

server-id              = 2
report_host            = master2

log_bin                = /var/log/mysql/mariadb-bin
log_bin_index          = /var/log/mysql/mariadb-bin.index

relay_log              = /var/log/mysql/relay-bin
relay_log_index        = /var/log/mysql/relay-bin.index
Save and close the file when you are done.
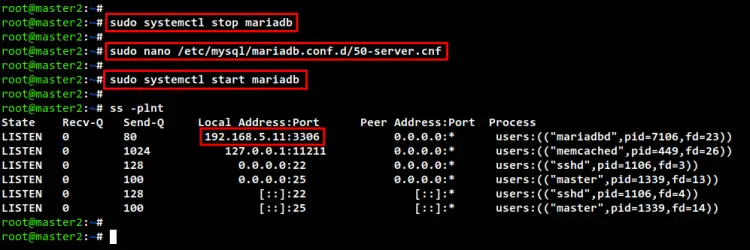
Next, start the MariaDB service to apply new changes. Then, check and verify the current IP address of which the MariaDB server is running. If your configuration is correct, you will see the MariaDB server is not running on the internal IP address of the "master2" server, which is "192.168.5.11".
sudo systemctl start mariadb
ss -plnt
After the MariaDB service is running, run the following command to log in to the MariaDB shell as the "root" user.
sudo mysql -u root -p
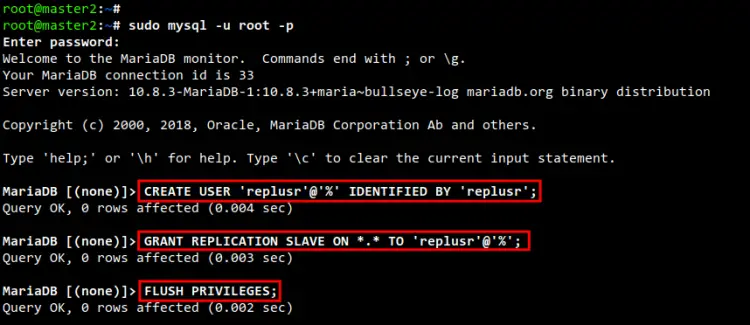
Run the following queries to create a new MariaDB user that will be used for replicating data between all MariaDB servers. This user must be matched with the user that you just created on the "master1" server.
CREATE USER 'replusr'@'%' IDENTIFIED BY 'replusr';
GRANT REPLICATION SLAVE ON *.* TO 'replusr'@'%';
FLUSH PRIVILEGES;
After that, you will need to make changes on the MariaDB "master2" server and define the "Master" node using the detailed configuration of the MariaDB "master1" server.
Run the following queries to stop the slave. Then, add detailed information about the MariaDB "master1" server. In this example, the MariaDB "master1" server uses the hostname "master1", the user and password for data replication is "replusr", and lastly the binlog file is "mariadb-bin.000001" with the position "773".
STOP SLAVE;
CHANGE MASTER TO MASTER_HOST='master1', MASTER_USER='replusr', MASTER_PASSWORD='replusr', MASTER_LOG_FILE='mariadb-bin.000001', MASTER_LOG_POS=773;
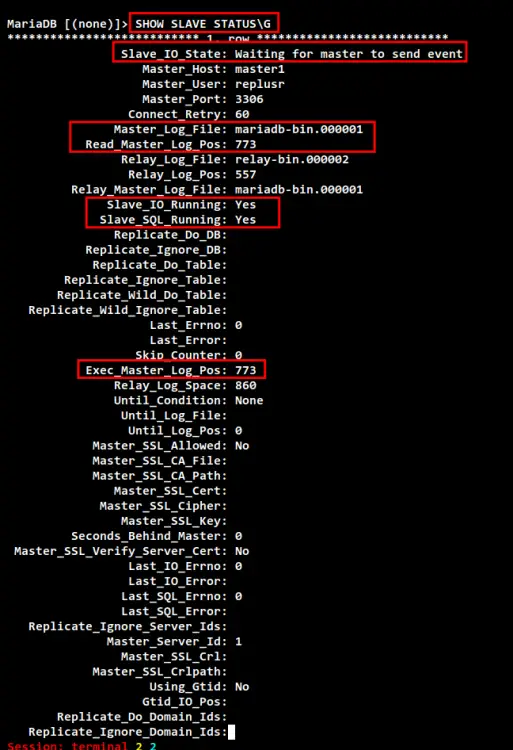
Now start the slave again using the following query. Then, check and verify the slave status on the "master2" server. If you get the output such as "Slave_IO_Running: Yes" and "Slave_SQL_Running: Yes", it means the MariaDB replication is active and running. Also, you can see the binary log file on the "master2" server is "mariadb-bin.000001" with the position "773". which is should be the same as on the "master1" server. Additionally, you can see the MariaDB "Master_Host" value is "master1".
START SLAVE;
SHOW SLAVE STATUS\G
You can also verify the master binary log file and the position on the "master2" server using the following query. And you should get the same output as the binary log file "mariadb-bin.000001" with the position "773" as on the "master1" server.
SHOW MASTER STATUS;
Start Master-Master Replication on master1 MariaDB Server
Because this guide is to set up the MariaDB master-master Replication, then you also need to add and define the "master2" detailed configuration to the "master1" server.
Back to the "master1" server and log in to the MariaDB shell using the "mysql" command below.
sudo mysql -u root -p
Stop the slave using the following command. Then, add detailed information about the "master2" server, which includes the "master2" server hostname, the MariaDB user and password for replication, and the binary log file and position.
STOP SLAVE;
CHANGE MASTER TO MASTER_HOST='master2', MASTER_USER='replusr', MASTER_PASSWORD='replusr', MASTER_LOG_FILE='mariadb-bin.000001', MASTER_LOG_POS=773;
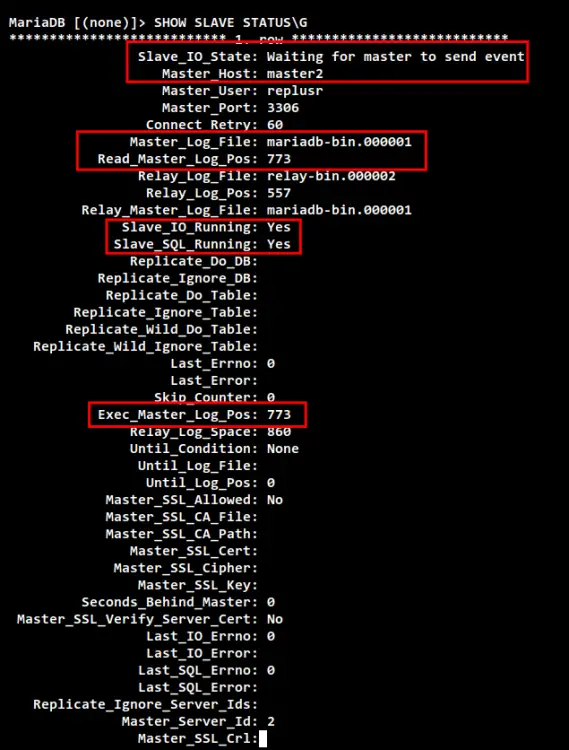
Now start again the slave using the below command. Then, check and verify the slave on the "master1" server. And you should see the output such as "Slave_IO_Running: Yes" and "Slave_SQL_Running: Yes", which means the MariaDB replication is active and running on the "master1" MariaDB server. Also, you can see the "Master_Host" value is the "master2" server.
START SLAVE;
SHOW SLAVE STATUS\G
Testing Database Replication
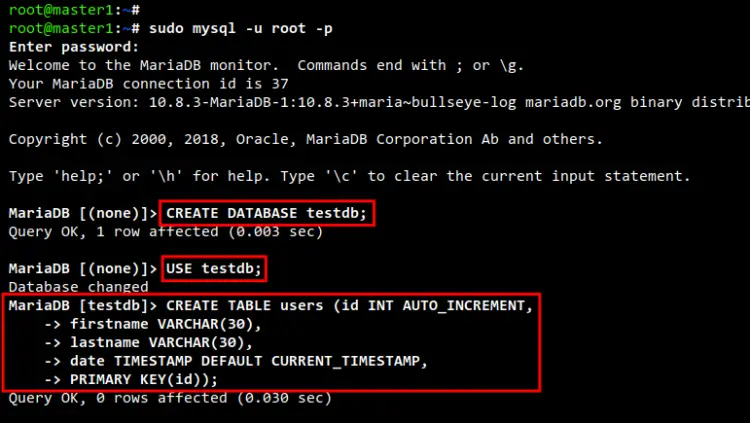
To verify the MariaDB Master-Master Replication, create a new database on the "master1" server and input some data into it. Then, log in to the "master2" and verify the database, and input another data into it.
Move to the "master1" server and log in to the MariaDB shell as the root user using the following command.
sudo mysql -u root -p
Create a new database "testdb" using the following query.
CREATE DATABASE testdb;
USE testdb;
Now create some tables to the database "testdb" using the following query.
CREATE TABLE users (id INT AUTO_INCREMENT,
firstname VARCHAR(30),
lastname VARCHAR(30),
date TIMESTAMP DEFAULT CURRENT_TIMESTAMP,
PRIMARY KEY(id));
After that, insert some data to the "testdb" using the MariaDB query below.
INSERT INTO users(firstname,lastname) VALUES ('Alice','Wonders');
To check your data on the MariaDB server, use the "SELECT" query as below. And you should see the data that you just inserted.
SELECT * FROM users;
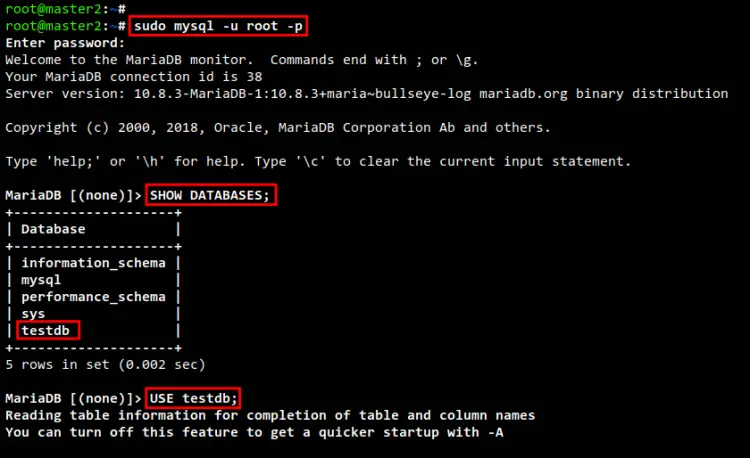
Next, move to the "master2" server and log in to the MariaDB shell using the "mysql" command below.
sudo mysql -u root -p
Check and verify the list of databases on the "master2" server using the following query. And you should get the database "testdb" that you just created.
SHOW DATABASES;
USE testdb;
Next, insert some other data to the database "testdb" from the "master2" server. Then, check and verify the data using the "SELECT" query. And you should get the new data inserted from the "master2" server.
INSERT INTO users(firstname,lastname) VALUES ('Bob','Burgers');
SELECT * FROM users;
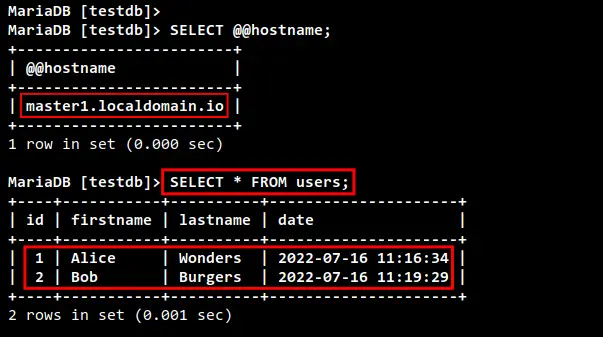
Now move back to the "master1" to check and verify the new data that you just inserted from the "master2" server. Run the following query to check the new data from the "master1" server. And you should see the new data that you just inserted from the "master2" server is replicated to the "master1" server.
select @@hostname;
SELECT * FROM users;
Conclusion
Congratulation! You have now successfully deployed the MariaDB Master-Master Replication on Debian 11 servers. You have also configured time synchronization on MariaDB servers using the Chrony service. Additionally, you have also secured the MariaDB server deployment using the UFW firewall. In the end, you have a MariaDB server with automatic replication between two MariaDB servers, you can write on all of those MariaDB servers and all data will be automatically replicated.

