How to setup Elasticsearch cluster with 3 Nodes on Ubuntu
Elasticsearch is a no-sql database. It is the distributed search and analytics engine, real-time search and analytics for all types of data. Elasticsearch can efficiently store any type of data be it structured or unstructured text, numerical data and index it in a way that supports fast searches. Elasticsearch provides a simple REST API for managing the cluster and indexing/writing and searching the data.
Elasticsearch is built using Java and includes a bundled version of OpenJDK.
To understand Elasticsearch more in detail, refer its official documentation.
In this article, we will focus only on how to set up a cluster of 3 Nodes.
Pre-requisites
- Ubuntu 18.04 LTS
What we will do
- Download Elasticsearch
- Install Java 1.8
- Install and Configure Elasticsearch
- Test the Cluster
Download Elasticsearch
For linux, the current version 7.4.2, as of now, of Elasticsearch can be downloaded using the following command on your linux systems.
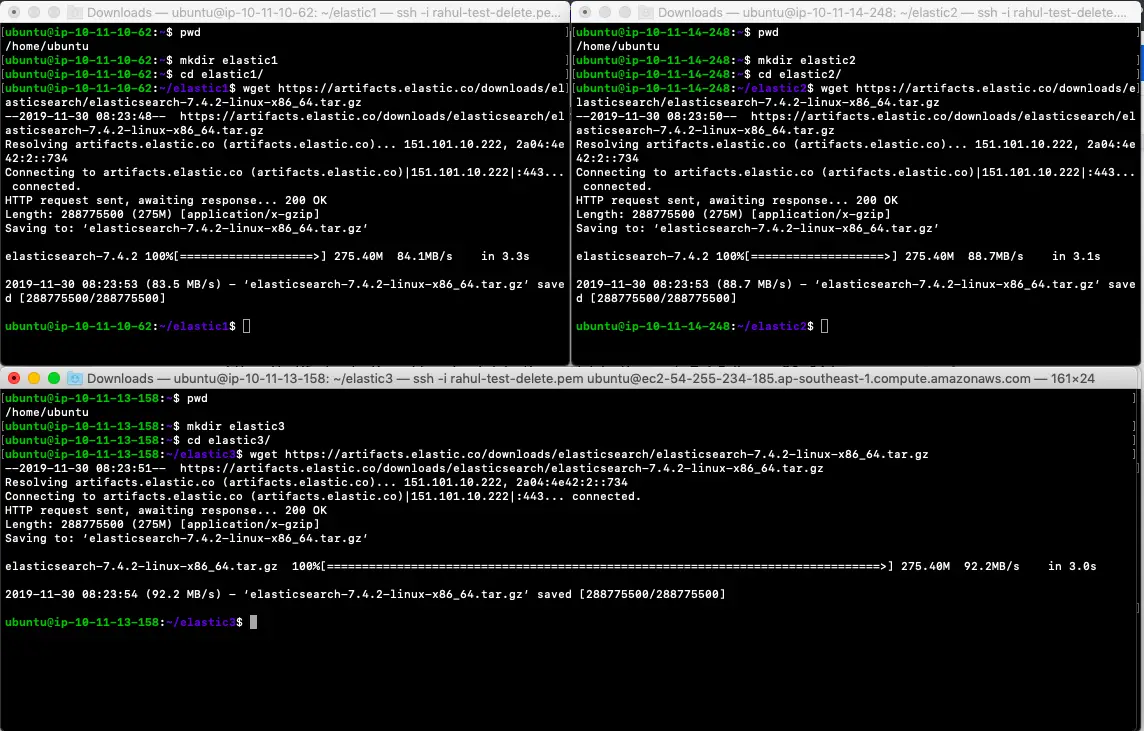
Download On Each Node (Folder name may differ)
mkdir elastic1
cd elastic1/
wget https://artifacts.elastic.co/downloads/elasticsearch/elasticsearch-7.4.2-linux-x86_64.tar.gz
If you are looking for a specific version, you can always browse the archives on Elasticsearch site. It is always good to go with the latest version as it contains all the fixes for the issues in the previous versions.
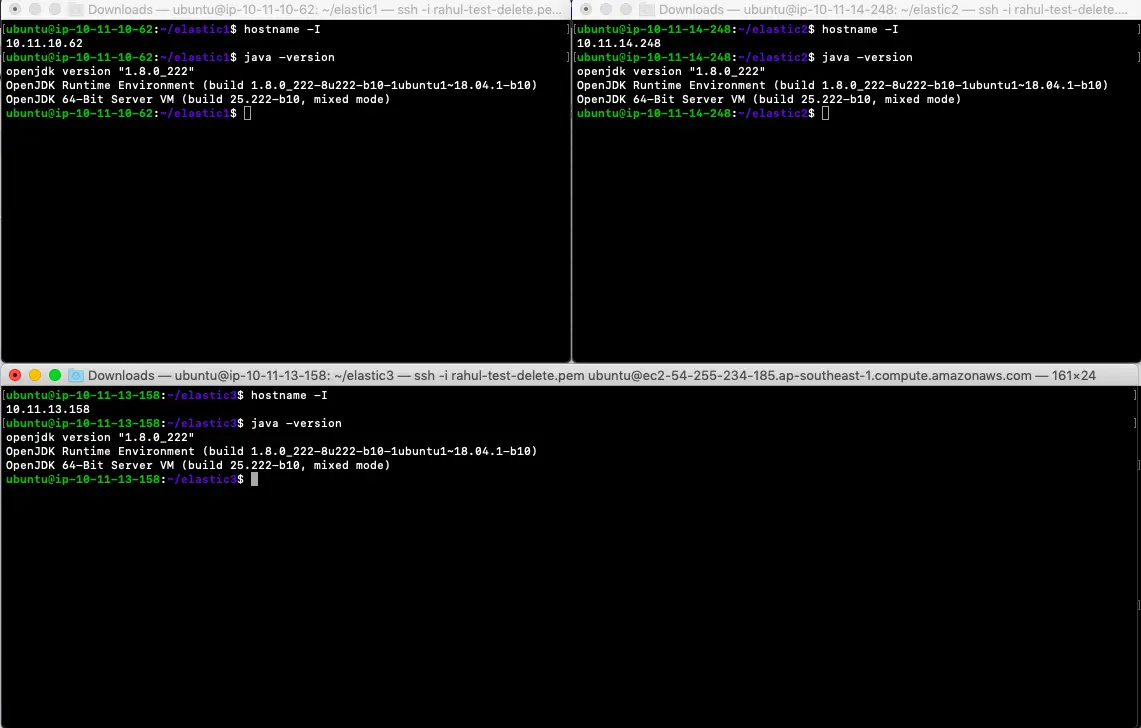
Install Java
Elasticsearch need Java to be available on the system.
To install OpenJDK 8, use the following commands on your Ubuntu 18.04 Server
On Each Node
sudo apt update
sudo apt install openjdk-8-jdk
java --version
Install and Configure Elasticsearch
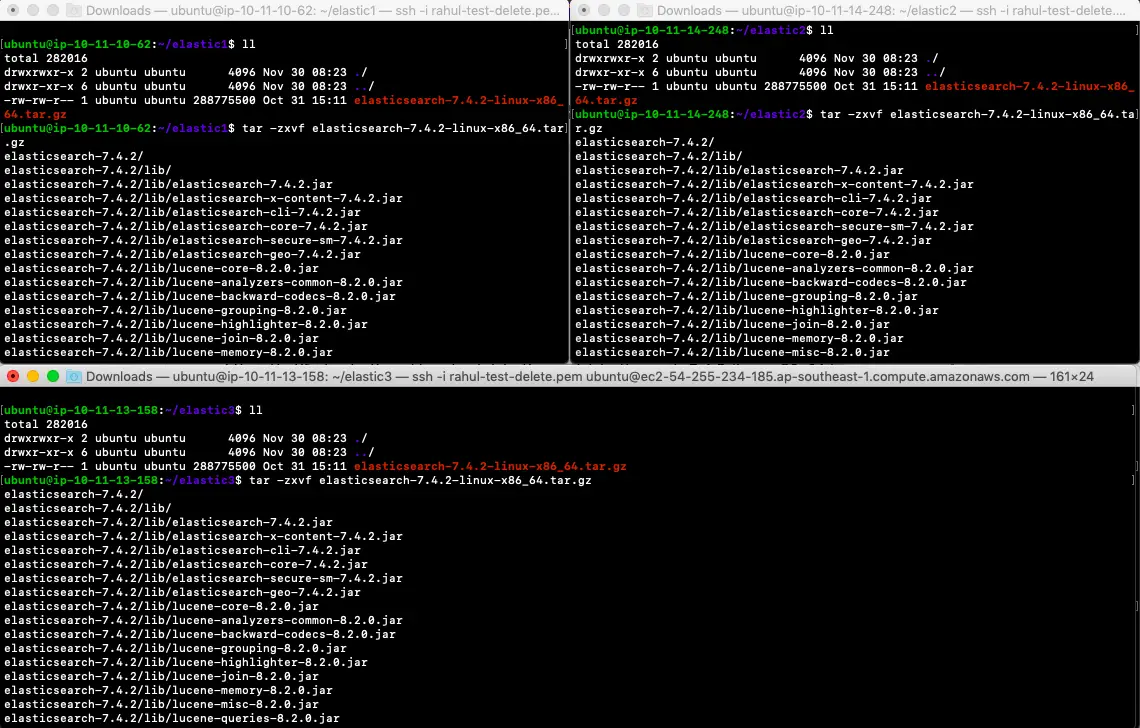
Now, it’s time to install Elasticsearch from the archive.
Extract the package we just downloaded in the previous step using the following command.
Install Elasticsearch On Each Node
tar -zxvf elasticsearch-7.4.2-linux-x86_64.tar.gz
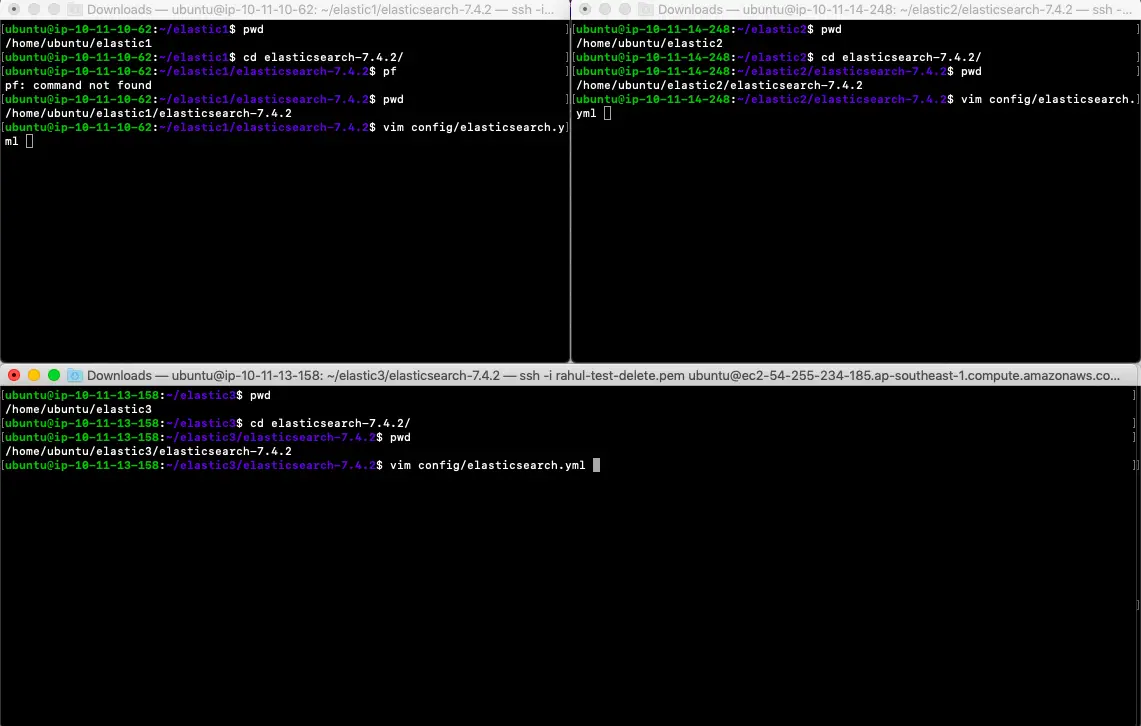
Configure Elasticsearch
Before starting the service, Elasticsearch needs to be configured to work in Cluster mode.
Here we have 3 servers
es-node-1: 10.11.10.62 (Initial master)
es-node-2: 10.11.14.248
es-node-3: 10.11.13.158
Open config/elasticsearch.yml file and add the following in it. (Check for your IPs)
vim config/elasticsearch.yml
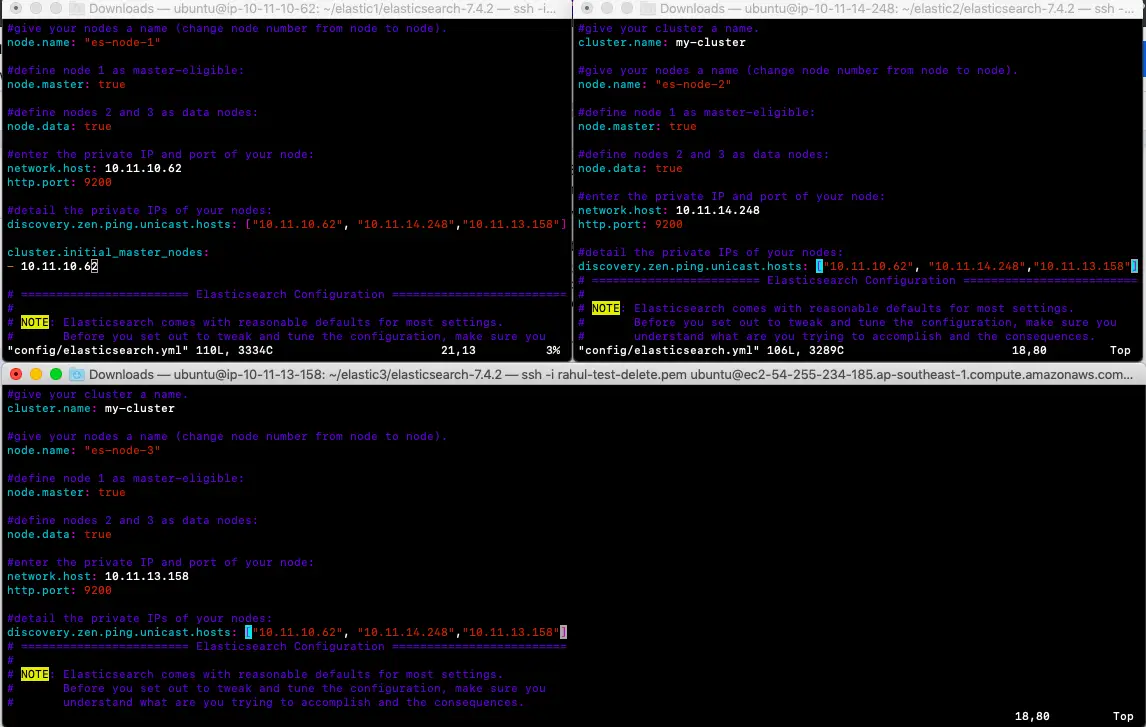
Add On Master es-node-1 in config/elasticsearch.yml
#give your cluster a name.
cluster.name: my-cluster

#give your nodes a name (change node number from node to node).
node.name: "es-node-1"

#define node 1 as master-eligible:
node.master: true

#define nodes 2 and 3 as data nodes:
node.data: true

#enter the private IP and port of your node:
network.host: 10.11.10.62
http.port: 9200

#detail the private IPs of your nodes:
discovery.zen.ping.unicast.hosts: ["10.11.10.62", "10.11.14.248","10.11.13.158"]

cluster.initial_master_nodes:
- 10.11.10.62
Add On es-node-2 in config/elasticsearch.yml (This node does not contain: cluster.initial_master_nodes)
#give your cluster a name.
cluster.name: my-cluster

#give your nodes a name (change node number from node to node).
node.name: "es-node-2"

#define node 1 as master-eligible:
node.master: true

#define nodes 2 and 3 as data nodes:
node.data: true

#enter the private IP and port of your node:
network.host: 10.11.14.248
http.port: 9200

#detail the private IPs of your nodes:
discovery.zen.ping.unicast.hosts: ["10.11.10.62", "10.11.14.248","10.11.13.158"]
Add On es-node-3 in config/elasticsearch.yml (This node does not contain: cluster.initial_master_nodes)
#give your cluster a name.
cluster.name: my-cluster

#give your nodes a name (change node number from node to node).
node.name: "es-node-3"

#define node 1 as master-eligible:
node.master: true

#define nodes 2 and 3 as data nodes:
node.data: true

#enter the private IP and port of your node:
network.host: 10.11.13.158
http.port: 9200

#detail the private IPs of your nodes:
discovery.zen.ping.unicast.hosts: ["10.11.10.62", "10.11.14.248","10.11.13.158"]
Start and Test the Cluster
Start the Cluster
On Each Node (First start Master es-node1)
Use the following command to start Elasticsearch in foreground
bin/elasticsearch
Note:
Elasticsearch uses a mmapfs directory by default to store its indices. The default operating system limits on mmap counts is likely to be too low, which may result in the following out of memory exceptions.
[1]: max virtual memory areas vm.max_map_count [65530] is too low, increase to at least [262144]
On Ubuntu 18.04 we can increase the limits by running the following command as root/sudo:
sudo sysctl -w vm.max_map_count=262144
Add -d to start to start Elasticsearch in background
bin/elasticsearch -d
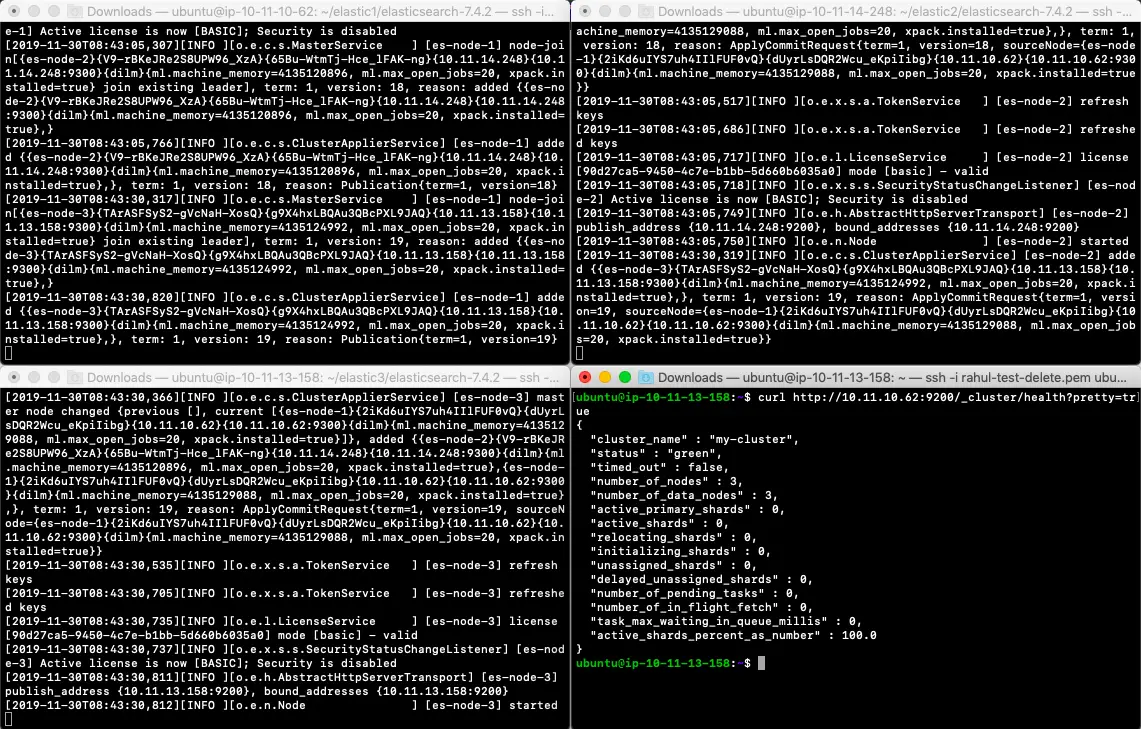
Once the cluster starts, you can see logs as follows on es-node-1. Notice how nodes are added to es-node-1 when they are started.
[2019-11-30T08:43:05,766][INFO ][o.e.c.s.ClusterApplierService] [es-node-1] added {{es-node-2}{V9-rBKeJRe2S8UPW96_XzA}{65Bu-WtmTj-Hce_lFAK-ng}{10.11.14.248}{10.11.14.248:9300}{dilm}{ml.machine_memory=4135120896, ml.max_open_jobs=20, xpack.installed=true},}, term: 1, version: 18, reason: Publication{term=1, version=18}
[2019-11-30T08:43:30,317][INFO ][o.e.c.s.MasterService ] [es-node-1] node-join[{es-node-3}{TArASFSyS2-gVcNaH-XosQ}{g9X4hxLBQAu3QBcPXL9JAQ}{10.11.13.158}{10.11.13.158:9300}{dilm}{ml.machine_memory=4135124992, ml.max_open_jobs=20, xpack.installed=true} join existing leader], term: 1, version: 19, reason: added {{es-node-3}{TArASFSyS2-gVcNaH-XosQ}{g9X4hxLBQAu3QBcPXL9JAQ}{10.11.13.158}{10.11.13.158:9300}{dilm}{ml.machine_memory=4135124992, ml.max_open_jobs=20, xpack.installed=true},}
[2019-11-30T08:43:30,820][INFO ][o.e.c.s.ClusterApplierService] [es-node-1] added {{es-node-3}{TArASFSyS2-gVcNaH-XosQ}{g9X4hxLBQAu3QBcPXL9JAQ}{10.11.13.158}{10.11.13.158:9300}{dilm}{ml.machine_memory=4135124992, ml.max_open_jobs=20, xpack.installed=true},}, term: 1, version: 19, reason: Publication{term=1, version=19
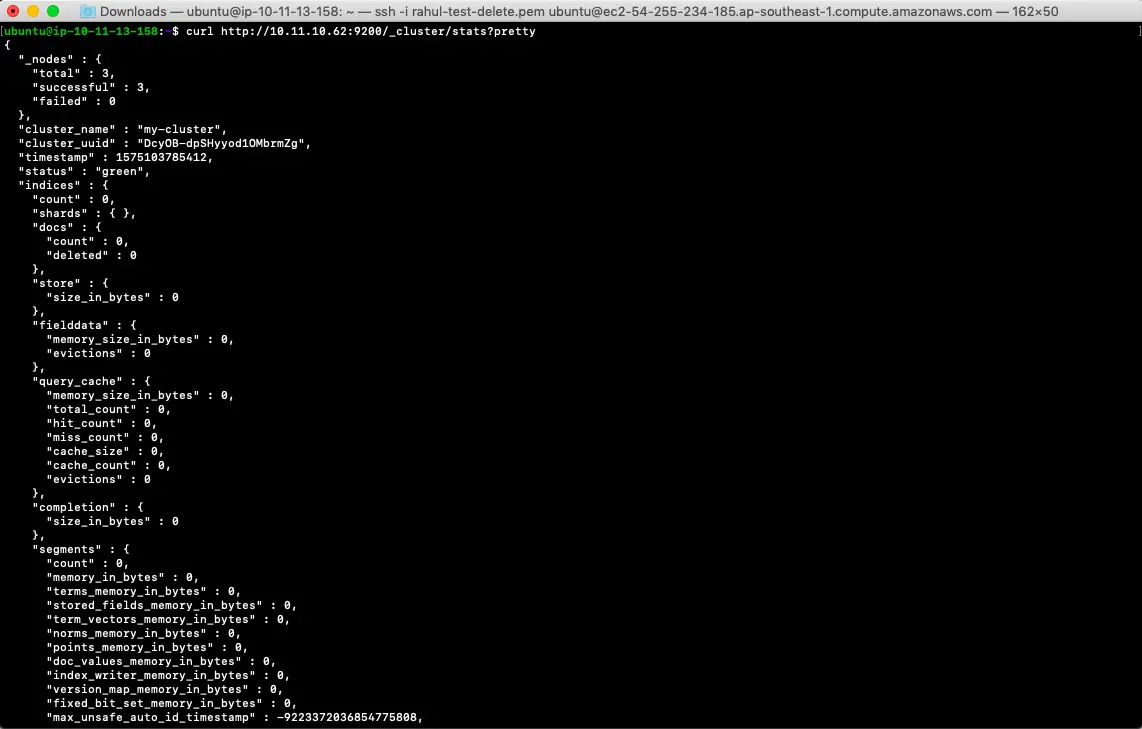
Test the cluster
Open a new terminal from which the cluster is reachable and try the following commands
curl http://10.11.10.62:9200/_cluster/stats?pretty
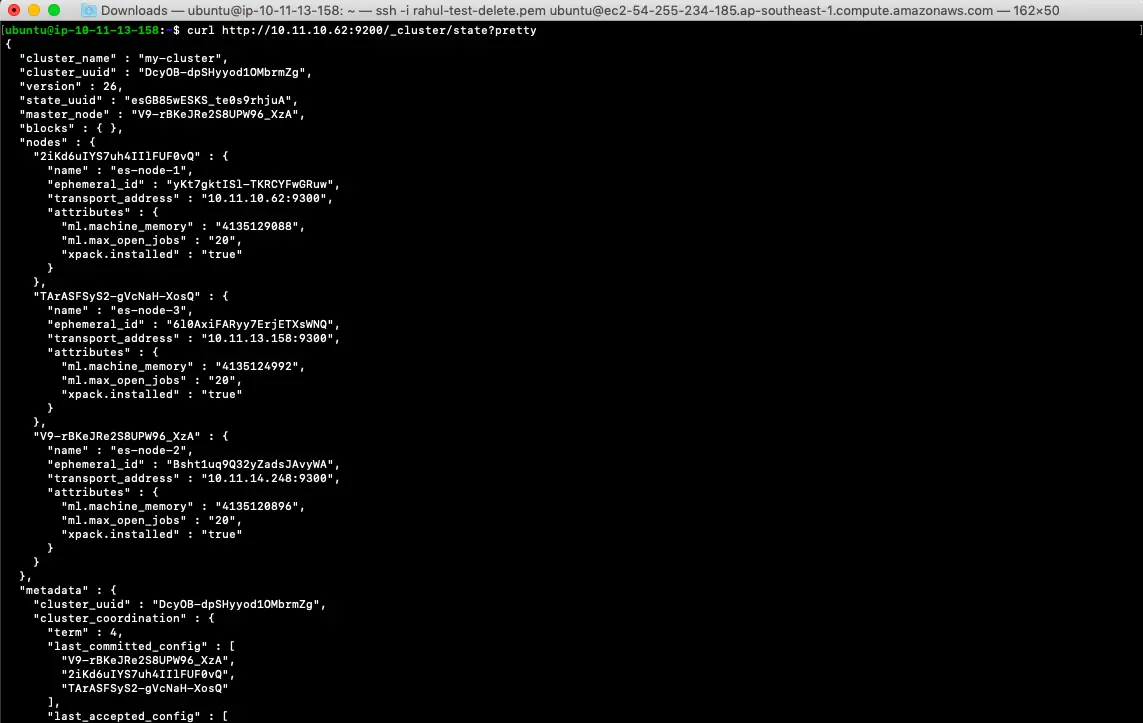
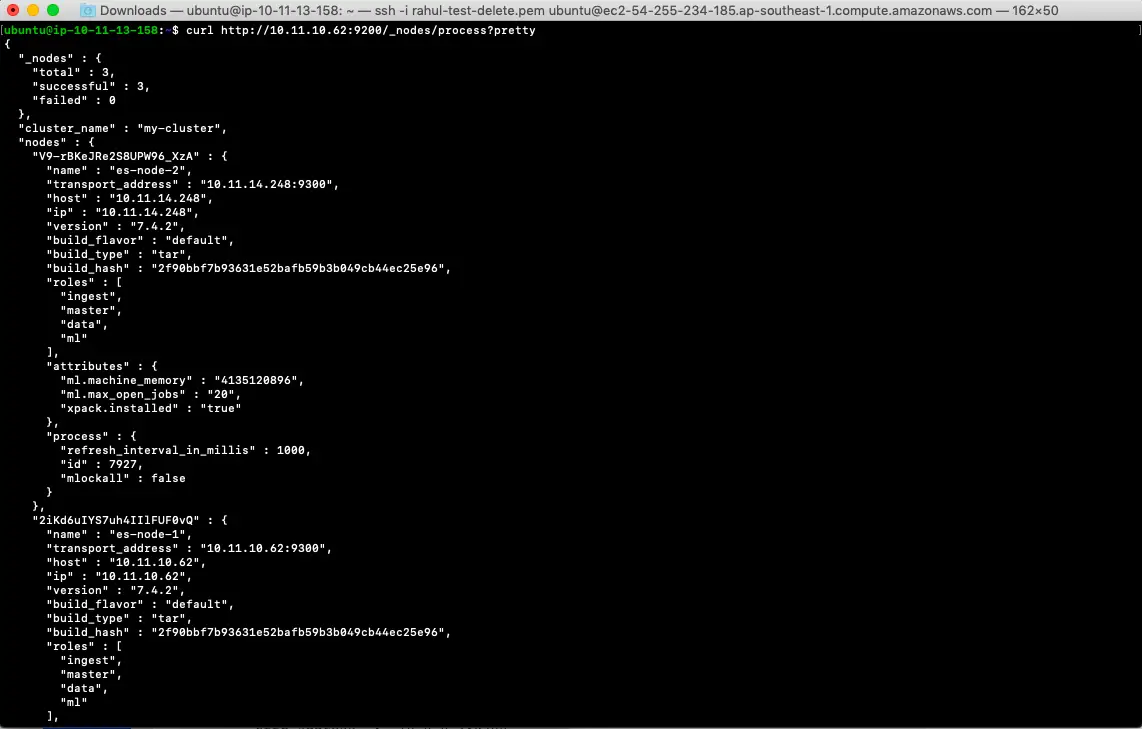
curl http://10.11.10.62:9200/_nodes/process?pretty
curl http://10.11.10.62:9200/_cluster/stats?pretty
Conclusion
In this article, we saw the steps to download the latest version of elasticsearch, install Java 8, configure Elasticsearch, start and test the cluster.

