How to Install RabbitMQ Cluster on Ubuntu 22.04
This tutorial exists for these OS versions
- Ubuntu 22.04 (Jammy Jellyfish)
- Ubuntu 20.04 (Focal Fossa)
On this page
RabbitMQ is a free and open-source message broker. Supporting multiple message protocols, RabbitMQ is the most widely used message broker on the Internet. It supports protocols such as AMQP, STOMP, MQTT, HTTP, and WebSockets, as well as the RabbitMQ Stream.
RabbitMQ is fully compliant with the JMS 1.1 standard and is suitable for a variety of development scenarios, from small to medium to large deployment environments.
As a message broker, RabbitMQ sits between applications and allows them to communicate with each other asynchronously, reliably and conveniently. RabbitMQ provides temporary storage between applications and protects against data loss.
In this tutorial, we will install and set up the RabbitMQ server between multiple Ubuntu 22.04 machines. You'll also learn how to set up an administrator user for RabbitMQ and set up classic queue mirroring via the HA policy.
Prerequisites
To complete this guide, you will need the following requirements:
- Two or more Ubuntu 22.04 servers - This example uses three Ubuntu machines, the 'rabbitmq1, 'rabbitmq2', and 'rabbitmq3'.
- A non-root user with sudo/root administrator privileges.
Preparing Machines
Before you get started, you will update and refresh your system repositories. Then set up the /etc/hosts file on each server so the server will be able to connect via the system hostname.
Update and refresh your Ubuntu package repository via the apt command below.
sudo apt update
Next, edit the '/etc/hosts file via the nano editor command below.
sudo nano /etc/hosts
Add the following configuration and be sure to change each IP address and hostname with your current environment details.
192.168.5.21    rabbitmq1
192.168.5.22    rabbitmq2
192.168.5.23    rabbitmq3
Save the file and exit the editor when you are finished. With all Ubuntu servers prepared, you will then install RabbitMQ and set up the cluster.
Installing RabbitMQ Server
After preparing your Ubuntu machines, you will now be ready to install the RabbitMQ server on all of the target machines. The default Ubuntu 22.04 repository provides the latest and stable version of RabbitMQ that can easily be installed via APT.
Run the apt command below to update and refresh your ubuntu package index.
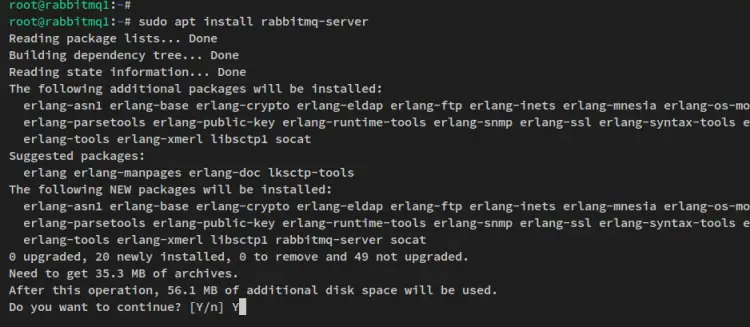
Install RabbitMQ via the following apt command below.
sudo apt install rabbitmq-server
This will prompt you for the confirmation, input y to confirm, and press ENTER to proceed.
After RabbitMQ is installed, run the following systemctl command to verify the RabbitMQ service and ensure that the service is enabled and running.
sudo systemctl is-enabled rabbitmq-server
sudo systemctl status rabbitmq-server
The output - You can see that the RabbitMQ is running and it's enabled. The RabbitMQ will be run automatically upon bootup.
Now that the RabbitMQ server is installed, you will next enable the RabbitMQ plugin 'rabbitmq_management'.
Enabling RabbitMQ Management Plugin
RabbitMQ provides a management plugin that allows you to manage and monitor RabbitMQ nodes and clusters via the web browser. The 'rabbitmq_management' plugin is an HTTP-based API with functionality similar to the command-line tool 'rabbitmqadmin'.
Before start configuring the RabbitMQ cluster, you will enable the 'rabbitmq_management' plugin on your target machines.
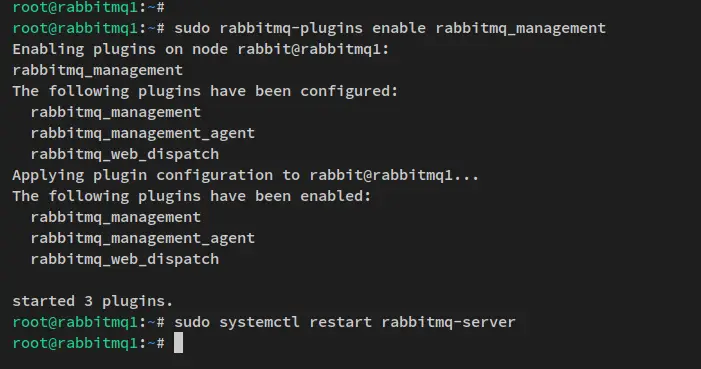
Enable the RabbitMQ plugin 'rabbitmq_management' using the following 'rabbitmq-plugins' command. The following command also will enable the required plugins for 'rabbitmq_management'.
sudo rabbitmq-plugins enable rabbitmq_management
Next, restart the RabbitMQ service to apply new changes and the 'rabbitmq_management' plugin is enabled.
sudo systemctl restart rabbitmq-server
The default 'rabbitmq_management' plugin is now running on the default port '15672'. Run the following ss command to ensure that the rabbitmq_management port '15672' is open.
ss -plnt
The output - The rabbitmq_management port is active and open.
Setting up UFW Firewall
After configured enabled the RabbitMQ Management plugin, you'll then set up the UFW firewall on all systems. The default Ubuntu installation comes with UFW package installed, so you can easily start and enable the UFW firewall process.
Run the following ufw command to add the OpenSSH service and enable the ufw firewall.
sudo ufw allow OpenSSH
sudo ufw enable
When prompted for the confirmation, input y to confirm and press ENTER to proceed. And the ufw firewall should now be running and enabled.
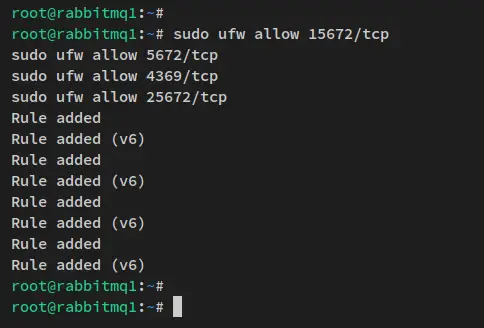
Next, open some TCP ports for the RabbitMQ cluster via the following ufw command. Then, reload the ufw firewall to apply new changes.
sudo ufw allow 15672/tcp
sudo ufw allow 5672/tcp
sudo ufw allow 4369/tcp
sudo ufw allow 25672/tcp
sudo ufw reload
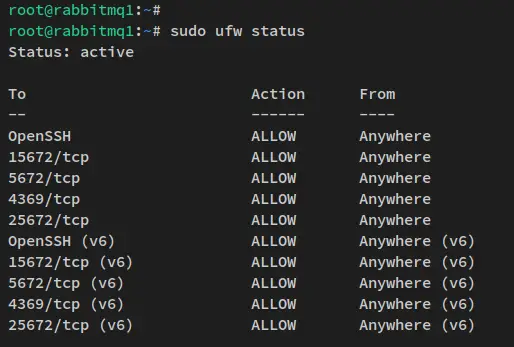
Lastly, run the following ufw command to verify that RabbitMQ ports are added to the ufw firewall.
sudo ufw status
The output - Some ports that will be used for the RabbitMQ cluster added to the ufw firewall.
Setting up RabbitMQ Cluster
After enabling the 'rabbitmq_management' plugin and configuring the ufw firewall, you will now start creating and configuring the RabbitMQ cluster via the 'rabbitmqctl' command.
On every RabbitMQ installation, there is a file '.erlang'cooke' that is available in the '/var/lib/rabbitmq' directory. To set up the cluster, you must ensure that all nodes across the cluster have the same file of '.erlang.cookie'.
For this example, the 'rabbitmq1' will be used as the first initial cluster, so you will need to copy/transfer the file '.erlang.cookie' file to both the 'rabbitmq2' and 'rabbitmq3' servers.
On the 'rabbitmq1' server, run the following command to verify the file '.erlang.cookie' and make sure the file is available.
ls -lah /var/lib/rabbitmq/
Next, copy/transfer the file '.erlang.cookie' to both the 'rabbitmq2' and 'rabbitmq3' servers. This example uses an SCP command to copy the '.erlang.cookie' file to the server '192.168.5.22' and '192.168.5.23'.
scp /var/lib/rabbitmq/.erlang.cookie [email protected]:/var/lib/rabbitmq/
scp /var/lib/rabbitmq/.erlang.cookie [email protected]:/var/lib/rabbitmq/
After the file '.erlang.cookie' is copied/transferred, move the working server session to 'rabbitmq2' and 'rabbitmq3'.
Run the following command on both 'rabbitmq2' and 'rabbitmq3' to restart the RabbitMQ service and apply new changes. Then, stop the RabbitMQ application.
sudo systemctl restart rabbitmq-server
sudo rabbitmqctl stop_app
Below is the output from the 'rabbitmq2' server.
Below is the output from the 'rabbitmq3' server.
After that, add the 'rabbitmq2' and 'rabbitmq3' servers to the RabbitMQ cluster via the following command. Then, start the RabbitMQ application.
sudo rabbitmqctl join_cluster rabbit@rabbitmq1
sudo rabbitmqctl start_app
Below is the output when 'rabbitmq2' joining the RabbitMQ cluster and starts the RabbitMQ application.
Below is the output when 'rabbitmq3' joining the RabbitMQ cluster and starts the RabbitMQ application.
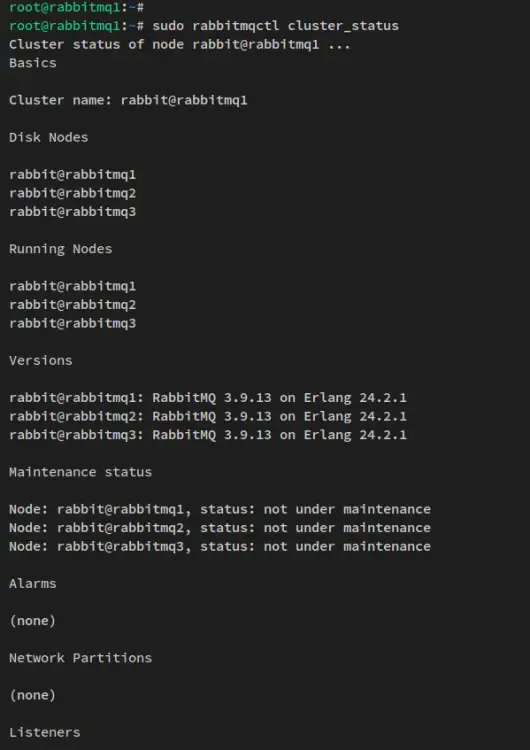
Lastly, move back to the 'rabbitmq1' server and run the following command to verify the status of the RabbitMQ cluster.
sudo rabbitmqctl cluster_status
You'll then see the RabbitMQ cluster is created with three nodes 'rabbitmq1', 'rabbitmq2', and 'rabbitmq3'. You also see the current version of RabbitMQ on each node and the maintenance status of nodes across the cluster.
Setting up RabbitMQ Administrator
With the RabbitMQ cluster created, you'll now create and set up a new administrator user for the RabbitMQ server via the 'rabbitmqctl', the main command line for managing the RabbitMQ server.
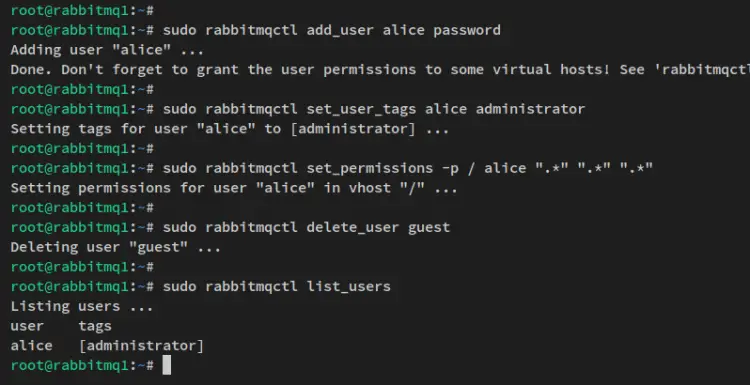
Run the following command to add a new RabbitMQ user. This example will add the user 'alice' to the RbbitMQ. Also, you must change the password with the new one.
sudo rabbitmqctl add_user alice password
Next, the command below makes the new user 'alice' an administrator on the RabbitMQ cluster.
sudo rabbitmqctl set_user_tags alice administrator
Set up the permission for the user 'alice' to all entities inside the RabbitMQ cluster.
sudo rabbitmqctl set_permissions -p / alice ".*" ".*" ".*"
Now run the below command to delete the default user 'guest' from your RabbitMQ installation.
sudo rabbitmqctl delete_user guest
Verify the list of users that are available on RabbitMQ. You'll then see the new user 'alice' are created and can be used as an administrator for the RabbitMQ server.
sudo rabbitmqctl list_users
At this point, you have finished the installation and configuration of the RabbitMQ cluster and configured the administrator for RabbitMQ. Next, you will set up classic queue mirroring via RabbitMQ policies.
Setting up Classic Queue Mirroring
RabbitMQ provides two ways to set up mirroring queues, you can use the classic queues mirroring via the RabbitMQ policy or set up using the quorum queues.
For this example, you will learn how to set up queues mirroring via the RabbitMQ policies.
Run the following command to create a new policy 'ha-all'. This policy allows all queues to be mirrored across nodes on the RabbitMQ cluster.
sudo rabbitmqctl set_policy ha-all ".*" '{"ha-mode":"all"}'
Now if you want to specify the queues to be mirrored across the cluster. This example will create a new policy 'ha-two-' that will mirror any queues with the name 'two.'
sudo rabbitmqctl set_policy ha-two "^two\." '{"ha-mode":"exactly","ha-params":2,"ha-sync-mode":"automatic"}'
Lastly, you can also create a new policy that allows you to set up queues to be mirrored to specific nodes on the RabbitMQ cluster. In this example you will create a new policy 'ha-nodes' that will mirror any queues with the name 'nodes.' to specific nodes 'rabbitmq2' and 'rabbitmq3'.
sudo rabbitmqctl set_policy ha-nodes "^nodes\." '{"ha-mode":"nodes","ha-params":["rabbit@rabbitmq2", "rabbit@rabbitmq3"]}'
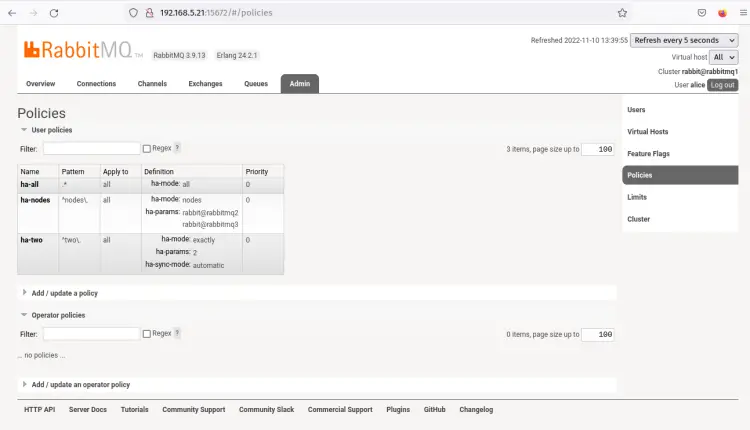
Verify the list of policies on your RabbitMQ cluster via the following command. You'll then see policies 'ha-all', 'ha-two', and 'ha-nodes' are available on the RabbitMQ cluster.
sudo rabbitmqctl list_policies
Accessing RabbitMQ Cluster via Management Plugin
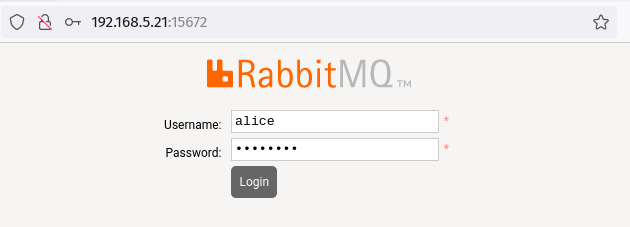
Open your web browser and visit the server IP address followed by the default RabbitMQ port 15672 (i.e: http://192.168.5.21). You will then get the RabbitMQ login page.
Log in with the new user and password you have created and click 'Login'.
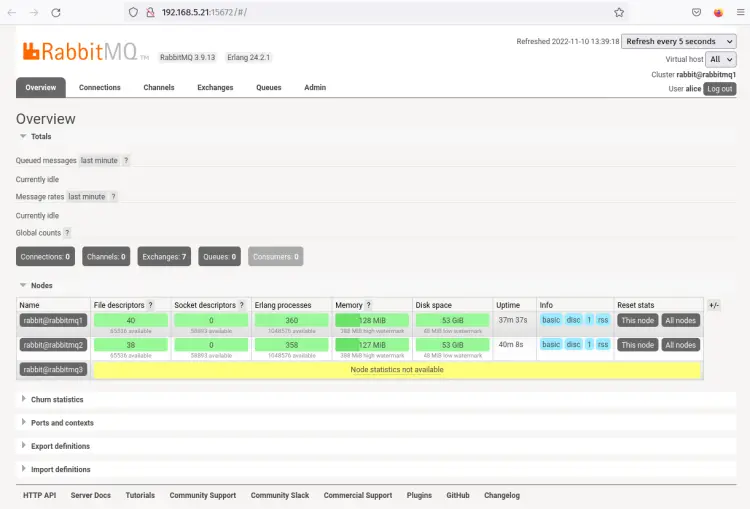
You should now see the RabbitMQ administration dashboard provided by the 'rabbitmq_management' plugin.
Next, click on the 'Admin' tab and click 'Policies' to verify that the RabbitMQ policies that you have created are available.
In the below screenshot, you can see three different policies, the 'ha-all', 'ha-two', and 'ha-nodes'.
Conclusion
Congratulations! You have now installed the RabbitMQ server and configured the RabbitMQ cluster with three Ubuntu 22.04 servers. Also, you have configured the UFW firewall for securing the RabbitMQ deployment, and also configured the administrator user for RabbitMQ, and created a classic queue mirroring on the RabbitMQ cluster via RabbitMQ policies.
With this in place, you can now use RabbitMQ as a message broker for your application and infrastructure. However, you can also bring the RabbitMQ deployment to the next level by setting up such as quorum queues, securing RabbitMQ via TLS, and many more.


