How to Integrate Sudoers with FreeIPA Server
Sudo is an application that allows you to get root or administrator privileges on Linux and Unix operating systems. Sudo is mostly installed by default on Linux distributions, also you can set up user authorization via the /etc/sudoers file and enable unprivileged users to execute specific commands as the root user.
Sudo can be configured in multiple ways. You can set up sudo on a local computer/server or set up a centralized sudo via third-party software. For this example, you will use the FreeIPA server to set up centralized sudo deployment.
FreeIPA is built-in multiple tools that make administrator jobs easier, which includes the sudo integration. You can set up fully sudo access for FreeIPA users, and set up sudo for specific commands, which includes the HBAC (Host-based Access Control) rule and also the Sudo Command Group.
In this tutorial, you will learn how to integrate Sudoers and FreeIPA with two scenarios. You will also learn the basic usage of the 'ipa' command utility for managing user, user group, host group, Sudo Rule, HBAC Rule, and Sudo Command Group. This also covers how to set up and integrate SSSD service with Sudo and FreeIPA on the client machines.
Prerequisites
To complete this tutorial, the FreeIPA server must be installed and fully configured. You can find tutorials for Debian, Ubuntu and Rocky Linux here:
- https://www.howtoforge.com/how-to-add-ubuntu-system-to-freeipa-server/
- https://www.howtoforge.com/how-to-install-freeipa-on-rocky-linux-9/
- https://www.howtoforge.com/how-to-install-freeipa-server-with-docker-on-debian/
You must also have a FreeIPA user and a client machine configured as a FreeIPA client. In addition to that, the non-root user with sudo/root administrator privileges is also needed on both the FreeIPA server and the client.
This example uses two Rocky Linux servers with the following details:
Hostname            IP Address      Used as
--------------------------------------------------
ipa.hwdomain.lan    192.168.5.20    FreeIPA Server
client.hwdomain.lan 192.168.5.75    FreeIPA Client
When these requirements on top are ready, start the integration of Sudoers with FreeIPA.
Allows FreeIPA Users to Fully Execute Sudo
First, you will learn how to integrate Sudoers with the FreeIPA server by creating a specific Sudo Rule that allowed users to execute 'sudo'. In this example, you will set up an existing FreeIPA user called 'rocky' to be able to execute the 'sudo' command on every client machine and get the root privileges.
Below are the steps you must do to achieve integrate Sudoers with FreeIPA Server:
- Verify user and connections
- Enable the Sudo feature on the SSSD service (on the client machine)
- Setting up Sudo Rule
- Verify Sudoers Integration
Now let's get started.
Verify FreeIPA User and Connection
In this section, you will verify and ensure that the FreeIPA user 'rocky' is available on the FreeIPA server and ensure that the user can connect to the client machine 'client.hwdomain.lan'.
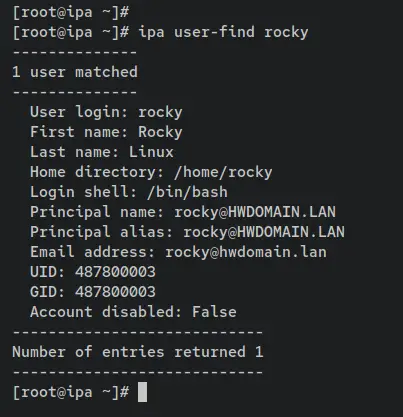
This example uses a FreeIPA user 'rocky', enter the following 'ipa' command to ensure that the user 'rocky' is available on the FreeIPA server.
ipa user-find rocky
An output '1 user matched' confirms that the user 'rocky' is available on the FreeIPA server.
Next, enter the following command to log in to the FreeIPA client machine using the user 'rocky'. This will ensure that the user can connect to FreeIPA client machines. In this example, the server called 'client.hwdomain.lan' is used as the FreeIPA client machine.
ssh [email protected]
Input the password for the user 'rocky'. After logging in to the client machine, enter the following command to identify the current user.
whoami
id
Enter the following 'sudo su' command to gain root access or privileges. After typing your password, you should get an error such as 'rocky is not in the sudoers file. This incident will be reported.'
sudo su
Enable Sudo Feature on SSSD Service
Before setting up Sudoers with FreeIPA, you must enable the feature 'with-sudo' features on the SSSD service on the client machine. In this section, you will enable the SSSD feature 'sudo' via the 'authselect' utility. So be sure to run these commands on the client machine 'client.hwdomain.lan'.
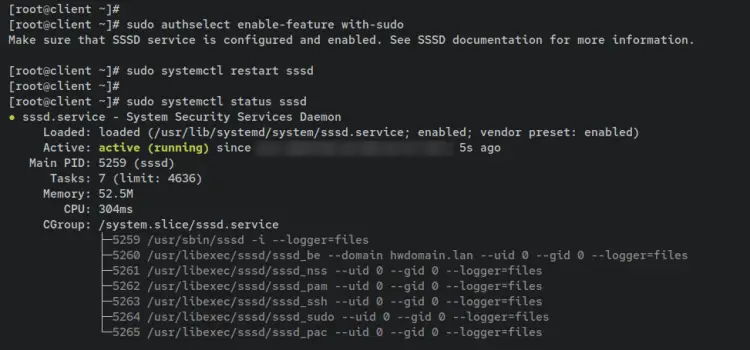
Enter the following command 'authselect' to enable 'sudo' on the SSSD service. You must enable the 'sudo' feature on SSSD so the FreeIPA users can execute the 'sudo' command on the client machine.
sudo authselect enable-feature with-sudo
Next, restart the SSSD service via the following systemctl command utility. Then, verify the SSSD service to ensure that the service is running.
sudo systemctl restart sssd
sudo systemctl status sssd
An output 'active (running)' confirms that the SSSD service is running on the client machine.
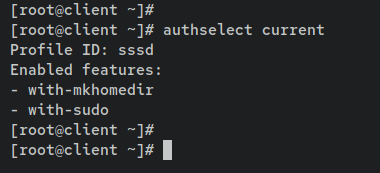
Lastly, enter the following command to show the list of enabled features on the current authentication source. On the FreeIPA client machine, SSSD is enabled by default as an authentication source.
authselect current
Under the 'Enabled features' section, you should see the parameter 'with-sudo'. This confirms that the 'sudo' feature is enabled on the SSSD authentication profile.
Setting up Sudo Rule
Sudo is an application that allows you to execute the command as the root user or you can also get the root user with it. By default, Freeipa supports Sudo and provides a command-line utility for integrating Sudo with the FreeIPA server.
In this section, you will integrate Sudo with FreeIPA by creating a Sudo Rule. You will first set up the user group, then you will set up the Sudo Rule that allows any users within the specific group to access and execute Sudo.
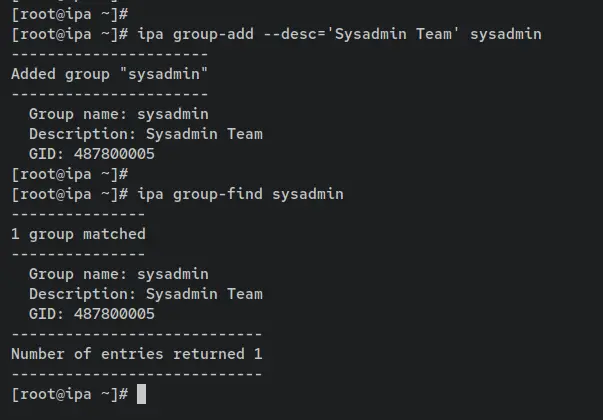
On the FreeIPA server, enter the following command to create a new group called 'sysadmin' on the FreeIPA server. Then, verify the details of the 'sysadmin' group.
ipa group-add --desc='Sysadmin Team' sysadmin
ipa group-find sysadmin
An output 'Added group "sysadmin"' confirms that the new group is created on the FreeIPA server. After the command 'ipa group-find' is executed, you should get an output such as '1 group matched', which means the group 'sysadmin' is added and available.
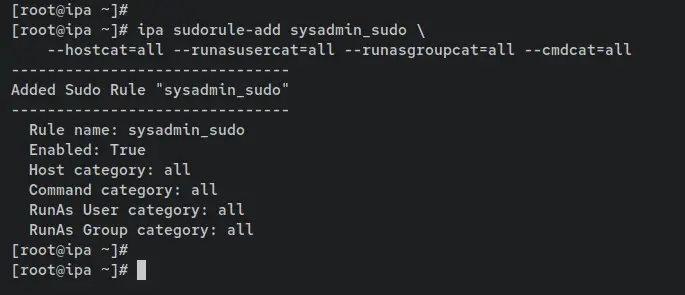
Next, enter the following command to create a new Sudo Rule called 'sysadmin_sudo'. The 'ipa sudorule-add' is a utility that can be used to add the sudo rule to the FreeIPA server. Also, you're creating a new sudo rule with some parameters '--hostcat=all --runasusercat=all --runasgroupcat=all --cmdcat=all' that allows this rule to execute sudo on every client machine, and any user or group that will be part of the 'sysadmin_sudo' rule.
ipa sudorule-add sysadmin_sudo \
    --hostcat=all --runasusercat=all --runasgroupcat=all --cmdcat=all
An output 'Added Sudo Rule "sysadmin_sudo"' confirms that the new sudo rule is created.
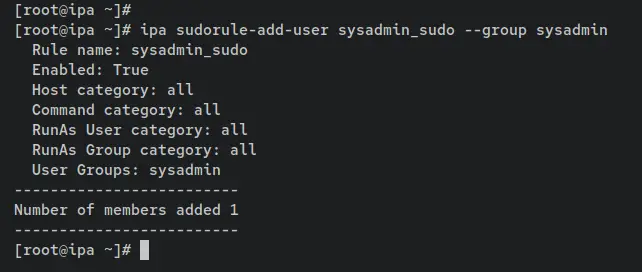
Now enter the following command to add the group 'sysadmin' to the sudo rule 'sysadmin_sudo'. This will allow any FreeIPA users within the 'sysadmin' group to execute the sudo command on every FreeIPA client machine.
ipa sudorule-add-user sysadmin_sudo --group sysadmin
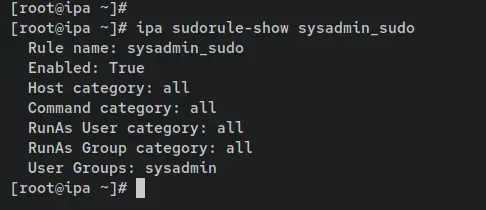
Verify the details of the sudo rule 'sysadmin_sudo' using the following command. On the 'User Grous' section, you should see the 'sysadmin' group added and available on the 'sysadmin_sudo'.
ipa sudorule-show sysadmin_sudo
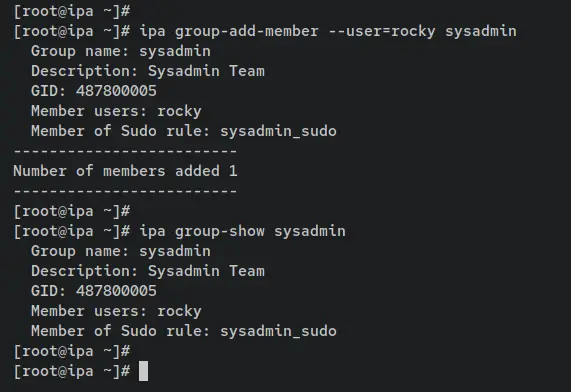
Lastly, enter the following command to add the FreeIPA user 'rocky' to the group 'sysadmin'. Then, verify the details of the 'sysadmin' group to ensure that your user is added.
ipa group-add-member --user=rocky sysadmin
ipa group-show sysadmin
On the details of the 'sysadmin' group, you should see the user 'rocky' added and this group is also part of the sudo rule 'sysadmin_sudo'.
At this point, you have now configured and allowed the user 'rocky' via the group 'sysadmin' and Sudo Rule 'sysadmin_sudo' to execute Sudo on all client machines. In the next step, you will verify the integration of Sudo with the FreeIPA server.
Verify Sudoers Integration with FreeIPA
In this section, you will ensure that the integration of Sudo with FreeIPA is working. This can be achieved by logging in to the client machine as the user 'rocky', then executing the 'sudo' command to get the root privileges.
Enter the following command to connect to the FreeIPA client machine 'client.hwdomain.lan' using the user 'rocky'. When prompted, input the password for the user 'rocky'.
ssh [email protected]
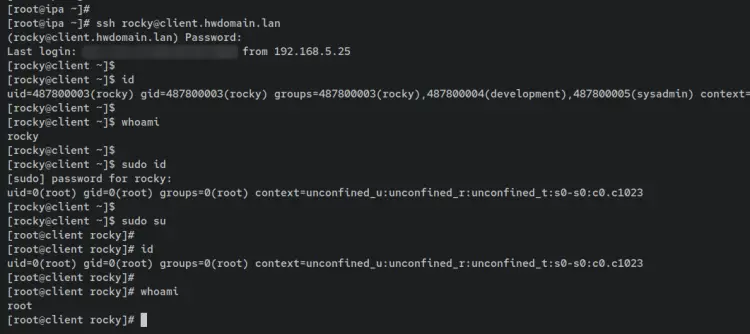
Once logged in to the client machine, execute the following command to identify your current user. You should see that you're logged in as the user 'rocky'.
id
whoami
Now enter the 'sudo' command below to verify the 'sudo' root privileges for the FreeIPA user 'rocky'. When prompted, input the password for the user 'rocky'.
sudo id
sudo su
When the operation is successful, you should see your shell prompt changed to 'root@hostname ...'. This confirms that you're now granted root privileges and logged in as the user root.
Identify your current user using the below command. You should see that you're currently logged in as the user 'root'.
id
whoami
With this in mind, you have now successfully integrated Sudoers with the FreeIPA server. Any user within the 'sysadmin' group now can execute the 'sudo' command and get the root privileges on every client machine.
Allows FreeIPA Users to Execute Sudo for Specific Commands
For this scenario, you will set up a new FreeIPA user that will be able to log in to the client machine and execute Sudo for specific commands.
In this example, you will set up a new user called 'max' that will be able to log in to the client machine 'client.hwdomain.lan' via SSH and execute Sudo but for some commands for managing the LEMP Stack.
To achieve this, you will need to do the following steps:
- Creating FreeIPA User and Group
- Creating Host Group
- Creating HBAC (Host-Based Access Control) Rule
- Creating Sudo Rule
- Creating Sudo Command Group
- Verify the Sudo Integration with FreeIPA
Now let's begin.
Creating FreeIPA User and Group
First, you will need to create and define a specific user and group. In this example, you will create a new user 'max' and the user group 'systemadmin' on the FreeIPA server. You'll also verify the new user 'max' to ensure that the user can access and log in to the client machine 'client.hwdomain.lan'.
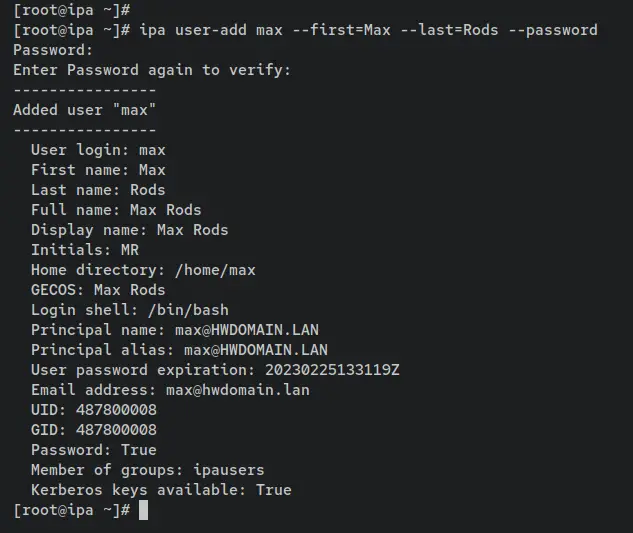
Create a new FreeIPA user called 'max' by entering the 'ipa user-add' command below. Input the password for your new user when prompted and repeat.
ipa user-add max --first=Max --last=Rods --password
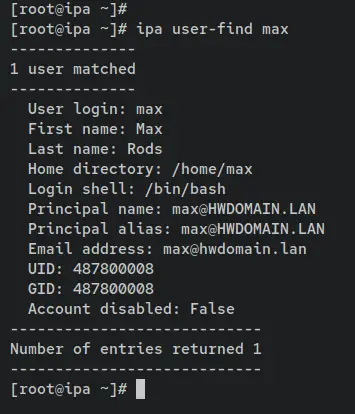
Now verify the details of user 'max' using the following command. You should see the default detailed configuration of the user 'max'.
ipa user-find max
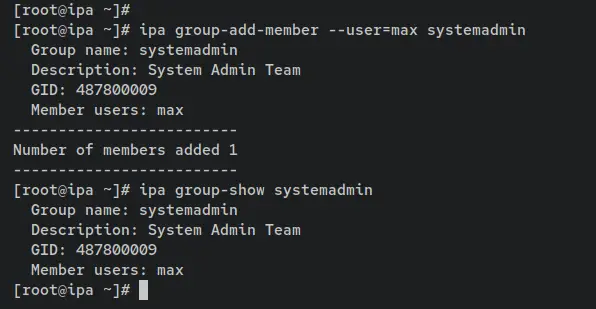
Next, enter the following command to add a new group 'systemadmin'. Then, add the user 'max' to the group 'sysadmin'.
ipa group-add --desc='System Admin Team' systemadmin
ipa group-add-member --user=max systemadmin
Verify the detailed configuration of group 'systemadmin' using the following command. You should see the user 'max' is added and available on the group 'systemdadmin'.
ipa group-show systemadmin
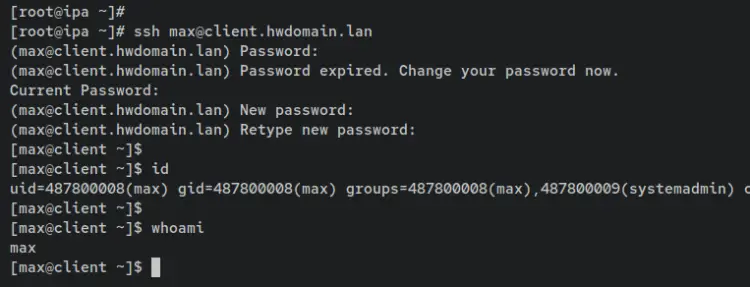
To ensure that the new user can log in to the client machine, enter the following ssh command. In this example, the user 'max' will be logging in to the client machine 'client.hwdomain.lan'.
ssh [email protected]
When prompted, input your password. Then you will also be asked to change the default password. SO input your current password, then input the new password and repeat.
After logging in, identify your current user using the following command.
id
whoami
You should see that you're logged in as the user 'max' to the 'client.hwdomain.lan'.
Creating Host Group
After creating the user and group, you will now create and set up the Host group on FreeIPA. You will create a new host group called 'appserver', and the member of this group will be a 'client.hwdomain.lan'.
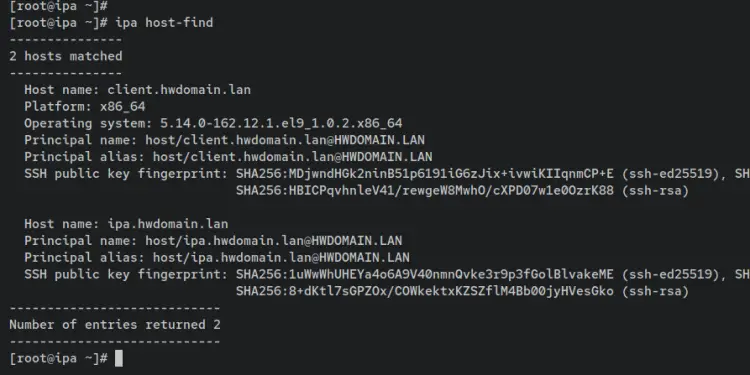
Verify the list of available hosts on the FreeIPA using the following command. This will show you the list of machines that are available on the FreeIPA. In this example, two hosts 'ipa.hwdomain.lan' and 'client.hwdomain.lan' is available on the FreeIPA server.
ipa host-find
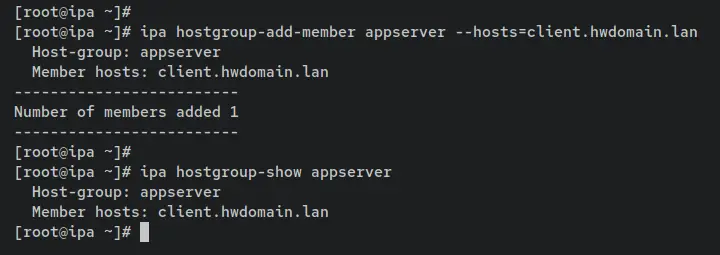
Now create a new host group called 'appserver'. Then, add the host 'client.hwdomain.lan' to the host group 'appserver'.
ipa hostgroup-add appserver
ipa hostgroup-add-member appserver --hosts=client.hwdomain.lan
Verify the detailed host group 'appserver' using the command below. You should see the host 'client.hwdomain.lan' is added and available on the 'appserver' host group.
ipa hostgroup-show appserver
Creating HBAC (Host-Based Access Control) Rule
With the Host Group 'appserver' created, you will now set up the HBAC (Host-based Access Control) Rule on the FreeIPA server. With the HBAC Rule, you can set up and define policies that restrict access to hosts or services based on the user attempting to log in and that user’s groups, the host that they are trying to access (or its Host Groups), and (optionally) the service being accessed.
In this section, you will disable the default HBAC rule, and set up a custom HBAC rule called 'operation_admin' that allows the user 'max' or group 'systemadmin' to admin any hosts within the host group 'appserver' via SSH. Also, this user or group will be able to run the 'sudo' and 'sudo -l' commands.
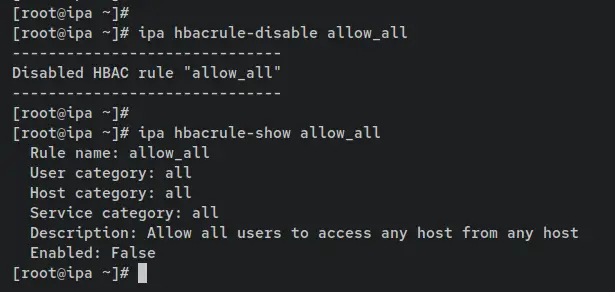
Enter the following command to disable the default HBAC rule 'allow_all'. Then, verify the details of the HBAC rule 'allow_all'.
ipa hbacrule-disable allow_all
ipa hbacrule-show allow_all
An output 'Disabled HBAC rule "allow_all" confirms the rule is disabled. Also, on the 'Enabled' section, you should see the value changed to 'false'.
With the default HBAC rule 'allow_all' disabled, no user will be able to log in to the client machine.
Next, create a new custom HBAC rule called 'operation_admin' using the following 'ipa hbacrule-add' command.
ipa hbacrule-add operation_admin
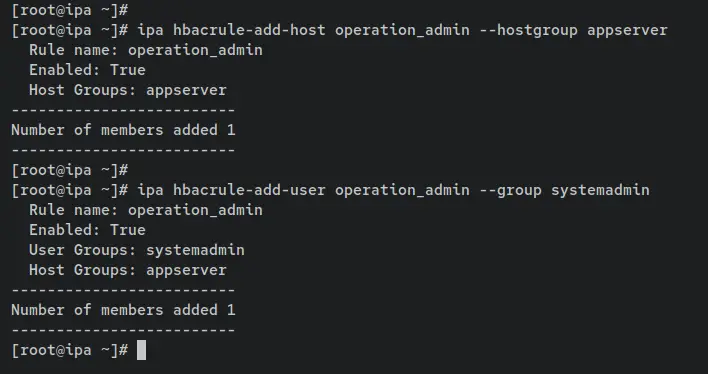
Now add the host group 'appserver' via the command 'ipa hbacrule-add-host' and the user group 'sysadmin' via the command 'ipa hbacrule-add-user' to the HBAC rule 'operation_admin'.
ipa hbacrule-add-host operation_admin --hostgroup appserver
ipa hbacrule-add-user operation_admin --group systemadmin
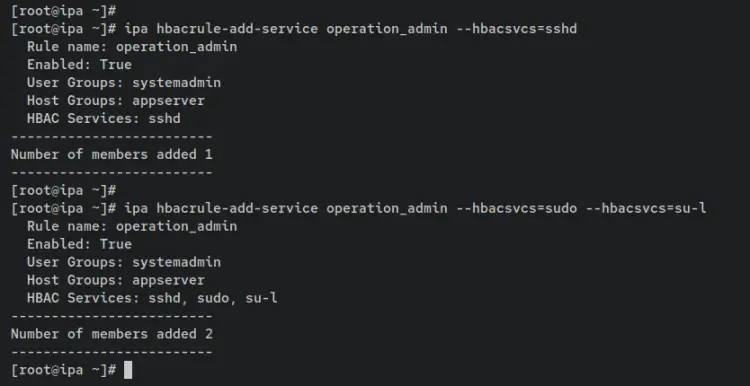
Next, add services such as 'sshd, sudo, and su to the HBAC rule 'operation_admin'. Any hosts or host group within the HBAC rule 'operation_admin' will be affected and allowed to access or run these commands.
ipa hbacrule-add-service operation_admin --hbacsvcs=sshd
ipa hbacrule-add-service operation_admin --hbacsvcs=sudo --hbacsvcs=su-l
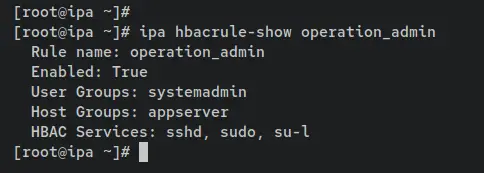
Verify the details of HBAC rule 'operation_admin' using the following command. You should see three services 'sshd', 'sudo', and 'su-l' added and available on the 'operation_admin'.
ipa hbacrule-show operation_admin
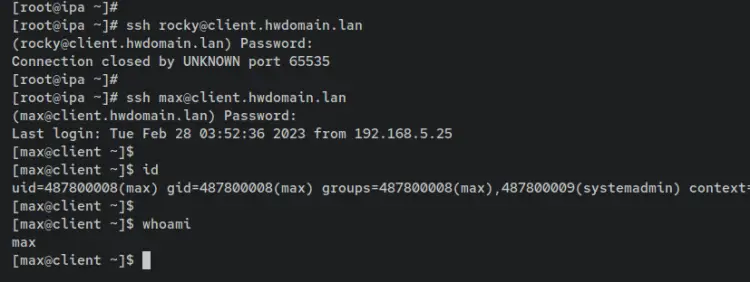
At this point, only users/groups within the rule 'operation_admin' will be able to log in to the client machine. The user 'rocky' cannot log in to the client machine 'client.hwdomain.lan', but the user 'max' can log in to the 'client.hwdomain.lan'. This is because the user 'max' is part of the group 'systemadmin', which is applied to the HBAC rule 'operation_admin'.
Log in as user 'rocky' will be defined by the client machine.
ssh [email protected]
Log in as user 'max' is allowed because it's part of the 'systemadmin' group.
ssh [email protected]
Creating Sudo Rule
In this section, you will create and set up a new Sudo Rule on FreeIPA. Then, you will also assign this Sudo Rule to the specific group 'systemadmin' and the host group 'appserver'.
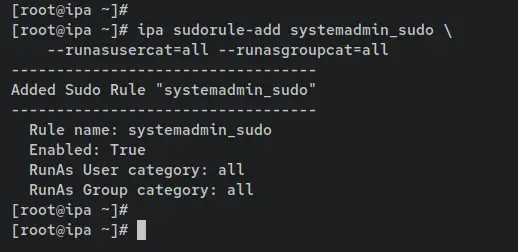
Enter the following command to add a new Sudo Rule called 'systemadmin_sudo'. In this example, you're creating a new sudo rule that will only be applied to the user and group with the parameter '--runasusercat=all --runasgroupcat=all'. With this, not all commands can be run with sudo or as root and this rule can be applied to specific clients or hosts.
ipa sudorule-add systemadmin_sudo \
    --runasusercat=all --runasgroupcat=all
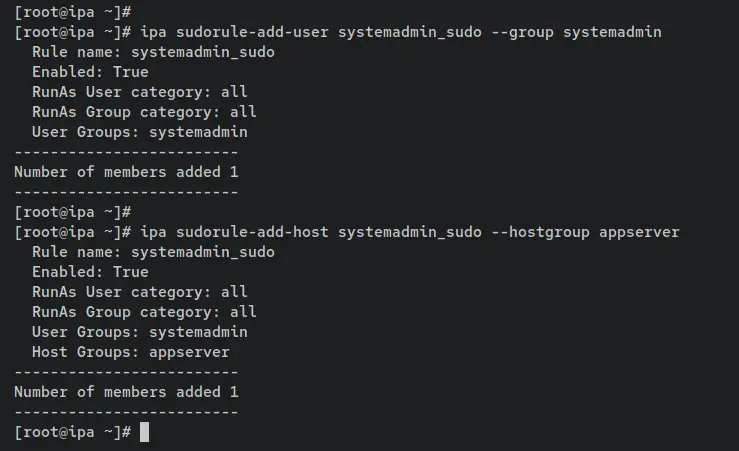
Now enter the command below to add the user group 'systemdadmin' and the host group 'appserver' to the sudo rule 'systemadmin_sudo'. With this, the 'systemadmin_sudo' will only be applied to users within the group 'systemadmin' and the hosts/clients part of the 'appserver'.
ipa sudorule-add-user systemadmin_sudo --group systemadmin
ipa sudorule-add-host systemadmin_sudo --hostgroup appserver
Creating Sudo Command Group
After the Sudo Rule is created, you will now set up and define the Sudo Command Group on FreeIPA. With this, you can bind multiple commands to some specific Sudo Command Group, then you can apply the Sudo Command group to the specific Sudo Rule.
For this example, you will define some commands on FreeIPA that will be used to start and restart the LEMP Stack service. Then, you will create a new Sudo Command group called 'systemadmin_cmds' and add your commands to it. Lastly, you will assign the Sudo Command Group 'systemadmin_cmds' to the Sudo Rule 'systemadmin_sudo'.
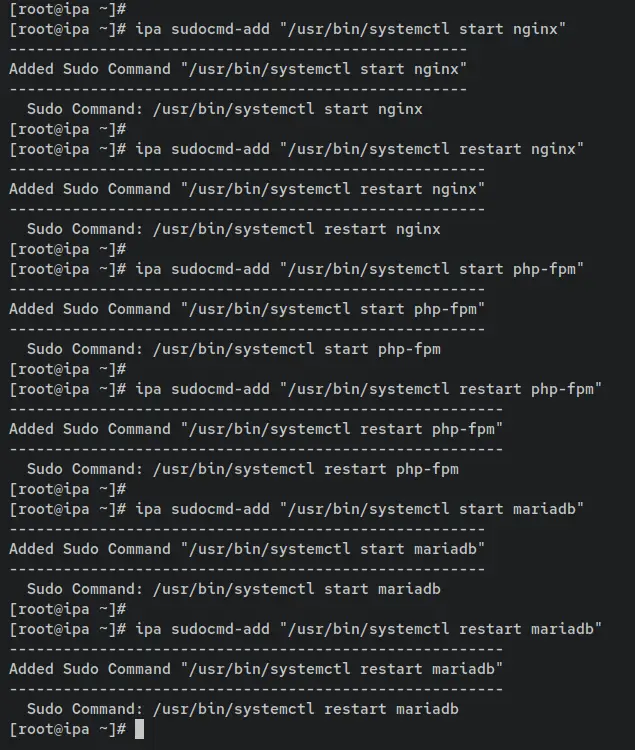
Enter the following command to add new commands to the FreeIPA server. In this example, you will add commands that can be used to manage the LEMP Stack. You can start and restart Nginx, MariaDB, and PHP-FPM services.
ipa sudocmd-add "/usr/bin/systemctl start nginx"
ipa sudocmd-add "/usr/bin/systemctl restart nginx"

ipa sudocmd-add "/usr/bin/systemctl start php-fpm"
ipa sudocmd-add "/usr/bin/systemctl restart php-fpm"

ipa sudocmd-add "/usr/bin/systemctl start mariadb"
ipa sudocmd-add "/usr/bin/systemctl restart mariadb"
Next, add a new sudo command group called 'systemadmin_cmds'. Then, add all commands that are used for managing the LEMP Stack to the sudo command group 'systemadmin_cmds'.
ipa sudocmdgroup-add systemadmin_cmds
ipa sudocmdgroup-add-member systemadmin_cmds \
    --sudocmds "/usr/bin/systemctl start nginx" \
    --sudocmds "/usr/bin/systemctl restart nginx" \
    --sudocmds "/usr/bin/systemctl start php-fpm" \
    --sudocmds "/usr/bin/systemctl restart php-fpm" \
    --sudocmds "/usr/bin/systemctl start mariadb" \
    --sudocmds "/usr/bin/systemctl restart mariadb"
An output 'Added Sudo Command Group "systemdadmin_cmds"' confirms that the new sudo command group is created. Also, an output 'Number of members added 6' confirms that you've added 6 commands to the 'systemdadmin_cmds' sudo command group.
Lastly, enter the following command to add the sudo command group 'systemadmin_cmds' to the sudo rule 'systemadmin_sudo'. With this, users within the sudo rule 'systemadmin_sudo' will be able to execute 6 sudo commands that are available on the 'systemadmin_cmds' sudo command group.
ipa sudorule-add-allow-command systemadmin_sudo --sudocmdgroups systemadmin_cmds
Verify Sudoers Integration with FreeIPA
To verify the Sudo implementation and integration with FreeIPA in this scenario, you will be logging in to the 'client.hwdomain.lan' via the new user 'max'. Then, you will execute some of the commands that will be used to manage the LEMP Stack services.
Log in to the client.hwdomain.lan with the user 'max' using the following ssh command. Input the password when prompted.
ssh [email protected]
After logging in, enter the following command to identify your current user. You will see that you're logged in as the user 'max'.
id
whoami
Next, enter the following command to restart the LEMP Stack services. When prompted, input the password for the user 'max'. The operation should be successful because the user 'max' is allowed to execute these commands as 'sudo'.
sudo /usr/bin/systemctl restart nginx
sudo /usr/bin/systemctl restart php-fpm
sudo /usr/bin/systemctl restart mariadb
Now if you try the 'systemctl stop' command, the operation should be failed and you will have an error such as 'Sorry, user max is now allowed to execute ... as root on the client.hwdomain.lan'.
sudo /usr/bin/systemctl stop nginx
sudo /usr/bin/systemctl stop php-fpm
sudo /usr/bin/systemctl stop mariadb
With this, you have now finished the configuration of Sudoers with the FreeIPA server to allow specific commands to be executed as sudo or as root.
Conclusion
This tutorial taught you how to integrate Sudoers with the FreeIPA server. You have also learned some basic commands of the 'ipa' utility for managing users, groups, host group, sudo rule, HBAC (Host-Based Access Control) rule, and sudo command group. You learned the basic integration of Sudoers with FreeIPA server with two different scenarios: Allow users to execute sudo for all commands and hosts and allow users to run sudo with only specific commands on specific hosts/clients.
In addition to that, you have also learned the basic configuration of the SSSD service and integrated it with Sudo via the FreeIPA server.
With this Sudo implementation, you can implement these two scenarios on your deployment server. To learn more, visit the official documentation of FreeIPA and Sudoer.

